Ready to be frightened??

This post is meant to gross you out. To scare you. To make you never want to make the same mistakes as me. EVER.

So, what’s this post about, exactly??  Well, let me show you……

IMG_3083

What is that disgusting, grody nastiness, you ask?? Why it’s our AIR FILTER. Grossed-out yet? I am. Oh, I really am.

I’d been noticing more dust around the house than normal lately (especially in our bedroom) and realized that we hadn’t changed our air filter…. ooooh, since we moved in. Last February. Our air filter is located in the ceiling of our hallway, It’s a darker area of our home and since it’s up high (and I’m vertically-challenged) I never really thought to look up. So, imagine my horror when I finally checked it out and discovered this…

IMG_3079

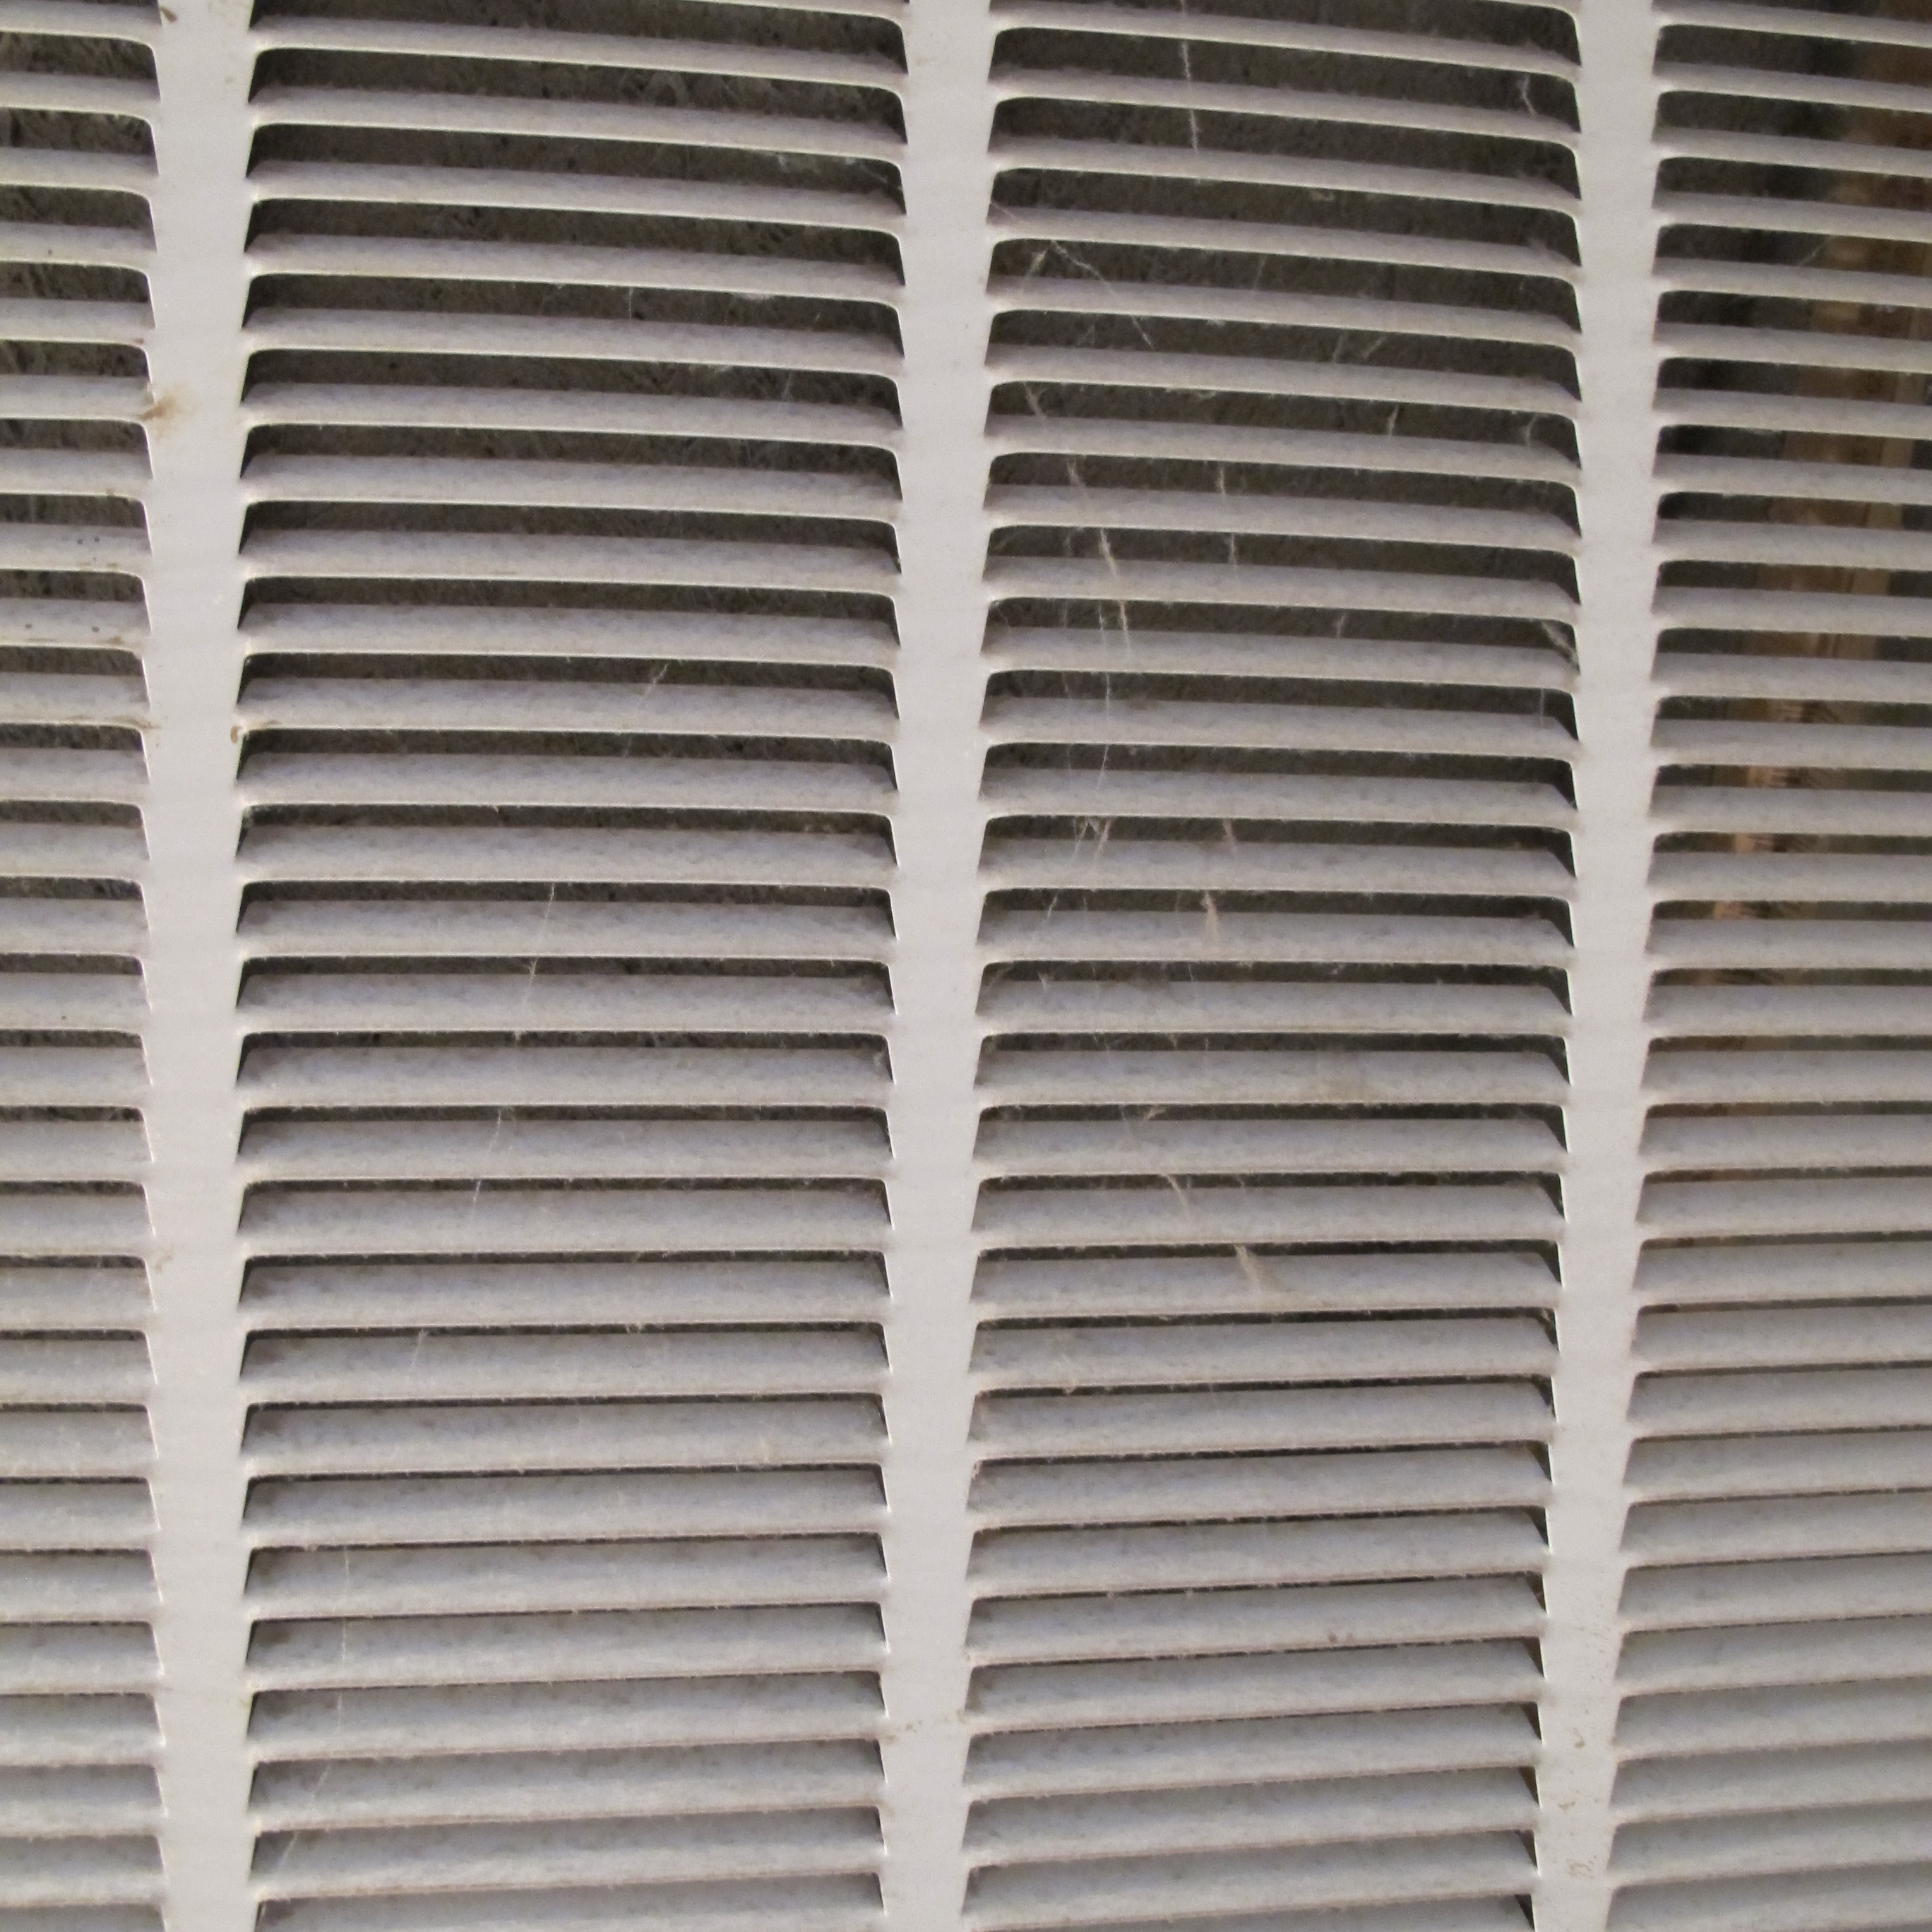
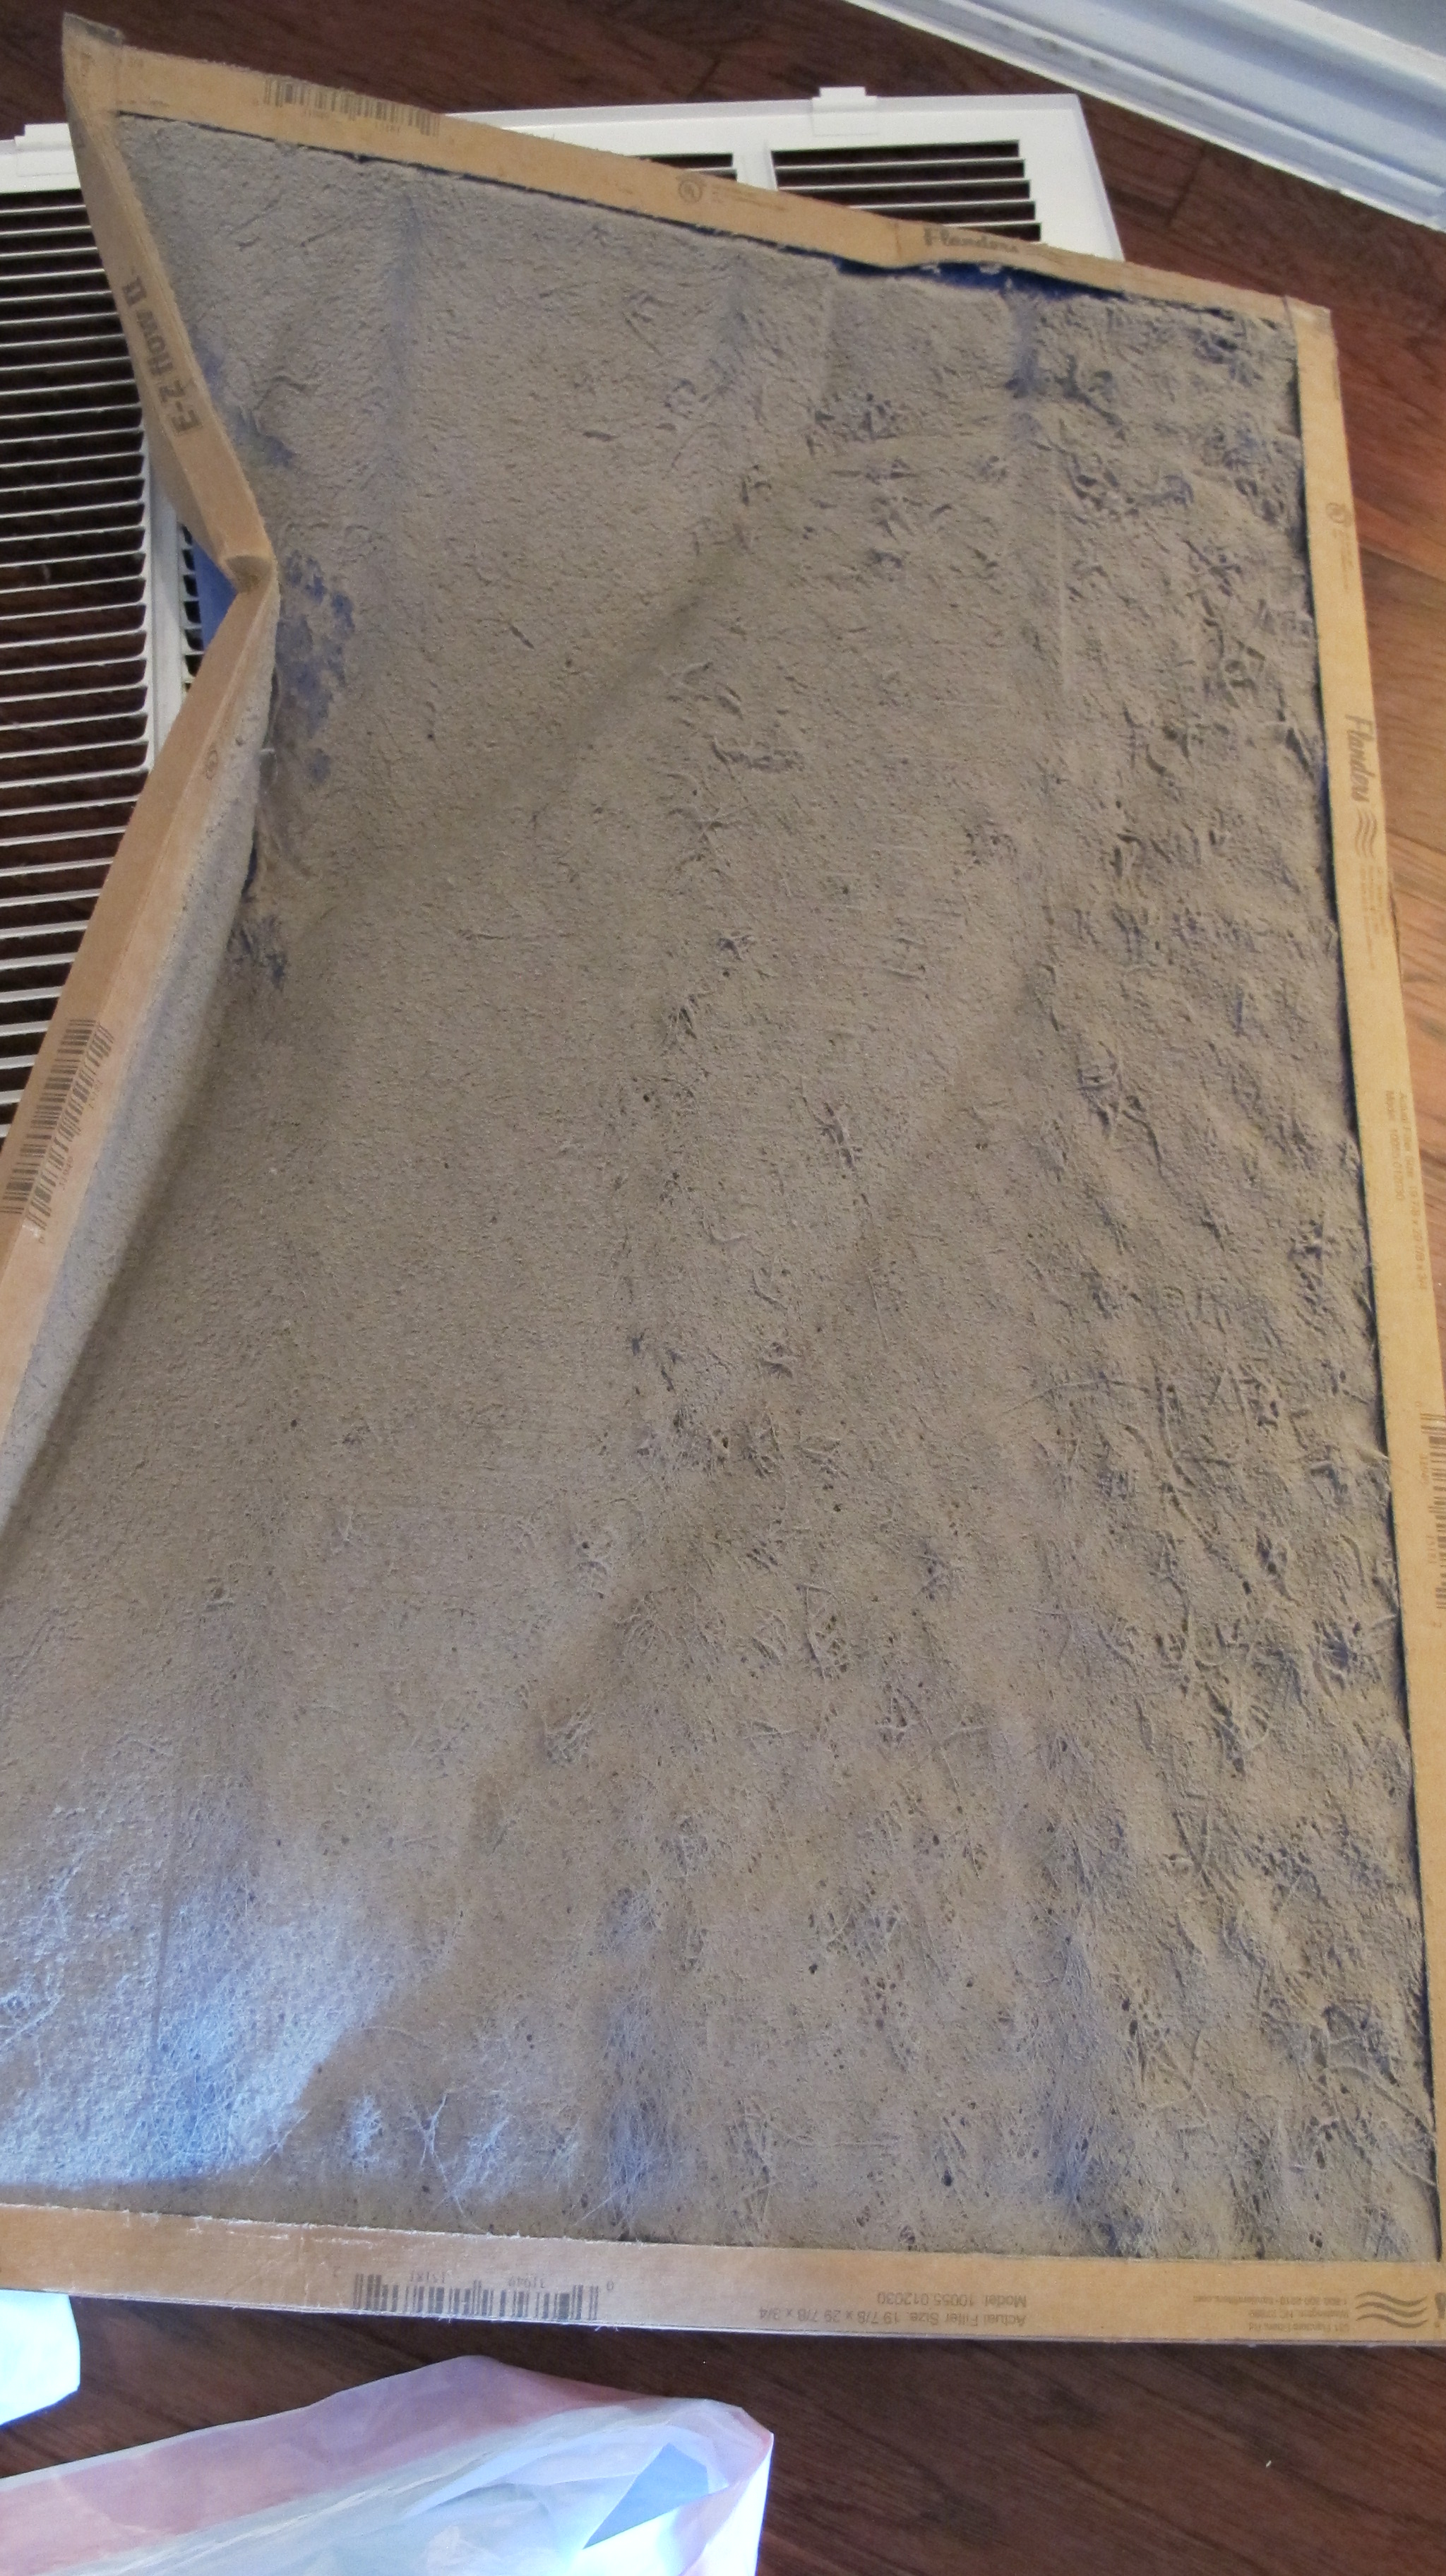
Oh holy crow. How did I let this happen?? Upon further inspection I realized that not only was the filter and vent cover a crusty mess, the builder had installed a BENT filter. I’m not sure if you can see (I couldn’t get the right angle with my camera), but it’s bent so badly that about 1/4 of the vent above it was clearly exposed with NO filtration whatsoever….

IMG_3081

Gross. Just gross. No wonder so much dust had been accumulating. Not to mention our recently increasing allergy symptoms.

I opened the vent to figure out the measurements of the filter (it was 20x30x1). The measurement is usually printed on the side edge of the filter for any newbie vent changers. Then, I immediately headed to Lowe’s and picked up a value pack of these Filtrete filters….

IMG_3110

No more cheapo filters here. I value my lungs. And sinuses. And Swiffer rags.

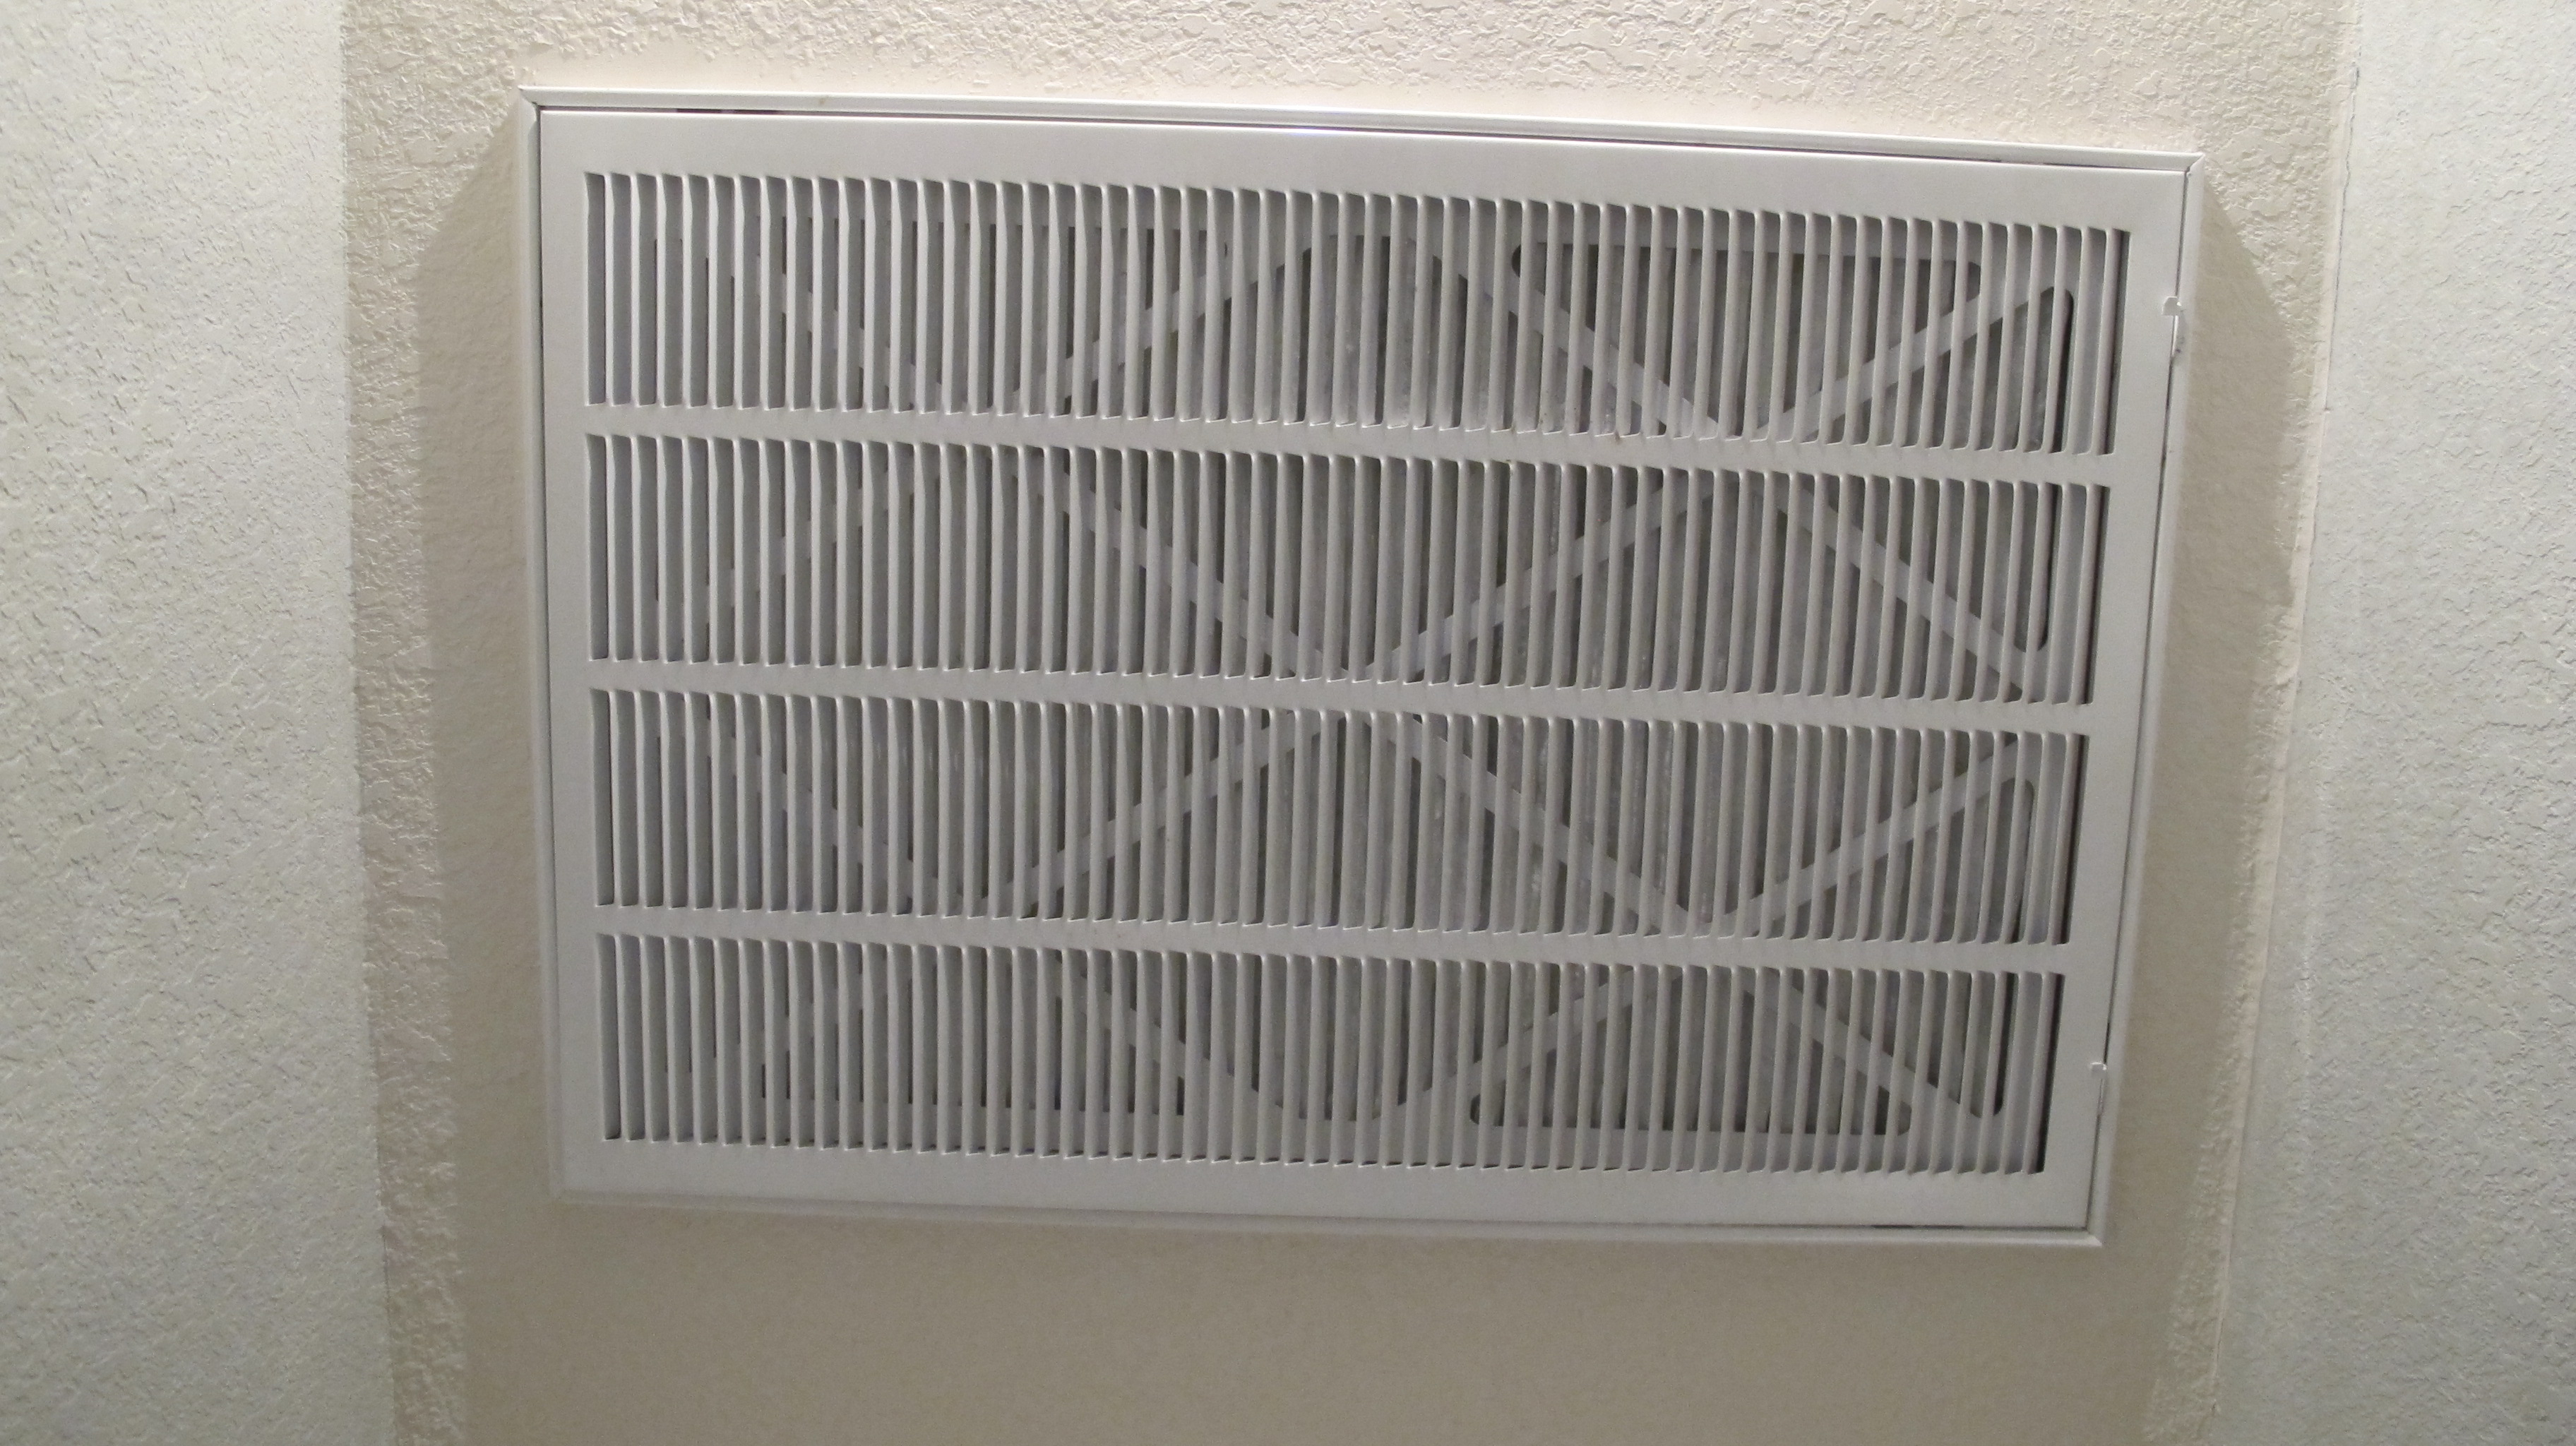
I climbed up our ladder once I got home and removed the vent cover and nasty filter….

IMG_3082

…placed the filter in a large garbage bag, then went to town cleaning the vent cover with my Swiffer duster rags. I used THREE rags to clean that dust-bunny-encrusted thing. It took THREE. And the vent cover isn’t huge. That’s how much dust was on it. Next, I figured out which direction to install the filter which is shown here by this arrow….

IMG_3114

The arrow should point in the direction of air flow. So, in my case it would point up, away from the vent cover. I climbed back on my ladder, popped the filter up into the vent hole and replaced the cover.

IMG_3086

And, scene.

IMG_3115

It was so embarrassingly easy, that I can’t believe I let 11 months go by without replacing our air filter. Needless to say, lesson learned. I’ll be replacing this sucker within the recommended 3-6 month period from now on. If only to save my pride. Of which I have none at the moment (in case you’re wondering).

So, really, I wanted to include this post as a reminder for any procrastinators out there like myself. Change your air filters regularly. And save your gag reflex a workout.

Also, I hope everybody has a terrific New Years!!  Have fun and be safe!  I’ll be enjoying the holiday with family and will be back with my regularly scheduled program on Friday.  And just to make myself accountable… my New Years resolution is to workout at least twice per week (as opposed to twice per month as it’s been lately).  What’s your resolution?

Gifts or Bust

Get it??? Bust??? That’s what this post is about after all. When we were brainstorming about what to give our parents for Christmas, we thought and thought and thought. Then one day, I spotted these at Walmart….

IMG_2828

Burlap canvases for around five bucks a piece. And I asked myself… what do you get the grandparents who have everything??? Why, more pictures of Lucas, of course!!! I thought the burlap canvases would be the perfect backdrops for black silhouette busts of Lucas’s sweet profile.

In preparation for this project, I took advantage of a rare moment of stillness and snapped this shot of Lucas way back in September…

IMG_2829

Then, I procrastinated for three months. I tell ya, I always have good intentions. Every year, I try to plan presents early. It’s the execution part that I seem to have a problem with.  So anyways, when I finally motivated myself to get on it, I pulled the pic up on our computer screen and stared at it for a while as I decided how to proceed. Then, I held the burlap canvas right up to the screen and realized that thanks to our newly upgraded monitor, the pic was the perfect size for the canvas as is. Right there on the monitor. So, I held a piece of computer paper up to the screen and simply traced the outline of Lucas’s head with a pencil.

IMG_2830

Which left this….

IMG_2831

Worked like a charm.  I’ll bet you could do this on just about any monitor, too (as long as it’s big enough).  Just zoom in until you reach your desired size and use the screen as a lightbox of sorts.   I cut out my baby boy’s profile….

IMG_2833

And placed my paper template on my canvas. I used a fine-tipped black sharpie to CAREFULLY trace the outline of Lucas’s head onto the burlap. To be honest, I was sweating bullets during this part. When I lifted my paper after I’d completed my outline, I was pleasantly surprised…..

IMG_2836

YESSSSSSSS!!!! It looked like him and everything!!!! Then I used this multipurpose paint (which specifies that it can be used on fabric)….

IMG_2838

…to fill in the lines. I used a thin painters brush to do the outline. I filled right up to my sharpie line. NOT over it.

IMG_2839

Then, I used a larger brush to fill in the inside. This is when I realized that although burlap seems low maintenance, it’s really quite greedy. With paint anyways. It soaked up a surprising amount. Then, wanted MORE. Burlap, you little diva, you.  Anyhow, here’s how it looked after one coat of paint….

IMG_2840

I let that dry, then applied another. And here’s the finished product….

IMG_2877

After I was done, I waited a few days to be sure I was fresh, and repeated the process again so that both sets of grandparents would have a cute little Lucas profile.   

I have to say, I was pleasantly surprised with how quick this project was. I fully expected it to take longer. I used the same Lucas template for both canvases, which helped save some time. The longest part was simply filling in the lines with paint, which wasn’t bad at all. And in the end, both sets of grandparents seemed to really like them, so I’m calling this project a success!

So anyways, I hope everyone had a very Merry and safe Christmas (or Hanukkah or Festivus or whatever holiday you celebrate)! So, tell me, how’d Santa treat you guys?? Any fun DIY gifts in you’re parts?