Howdy, all! After nine months of house-hunting, we found a super-cool 1970’s house in our dream neighborhood. Check out this post for details. We like to take on projects one step at a time, which coincidentally, is also how I like to blog. This house tour page reflects the status of each room as they are now, and I like to update them project by project in real time as we get ‘er done. But since there have been some blogging gaps as of late, I’d be remiss to not mention that all interim updates that I haven’t blogged about yet have been posted on Instagram, so follow along there if you’re interested in all the in-between updates. That being said, here are our “before” pics as well as the current pics that I’ve taken up to this point. I’ll be adding more current photos as they come to be. So, let’s begin!
Let’s start with the exterior. This is the house on the day that we closed…
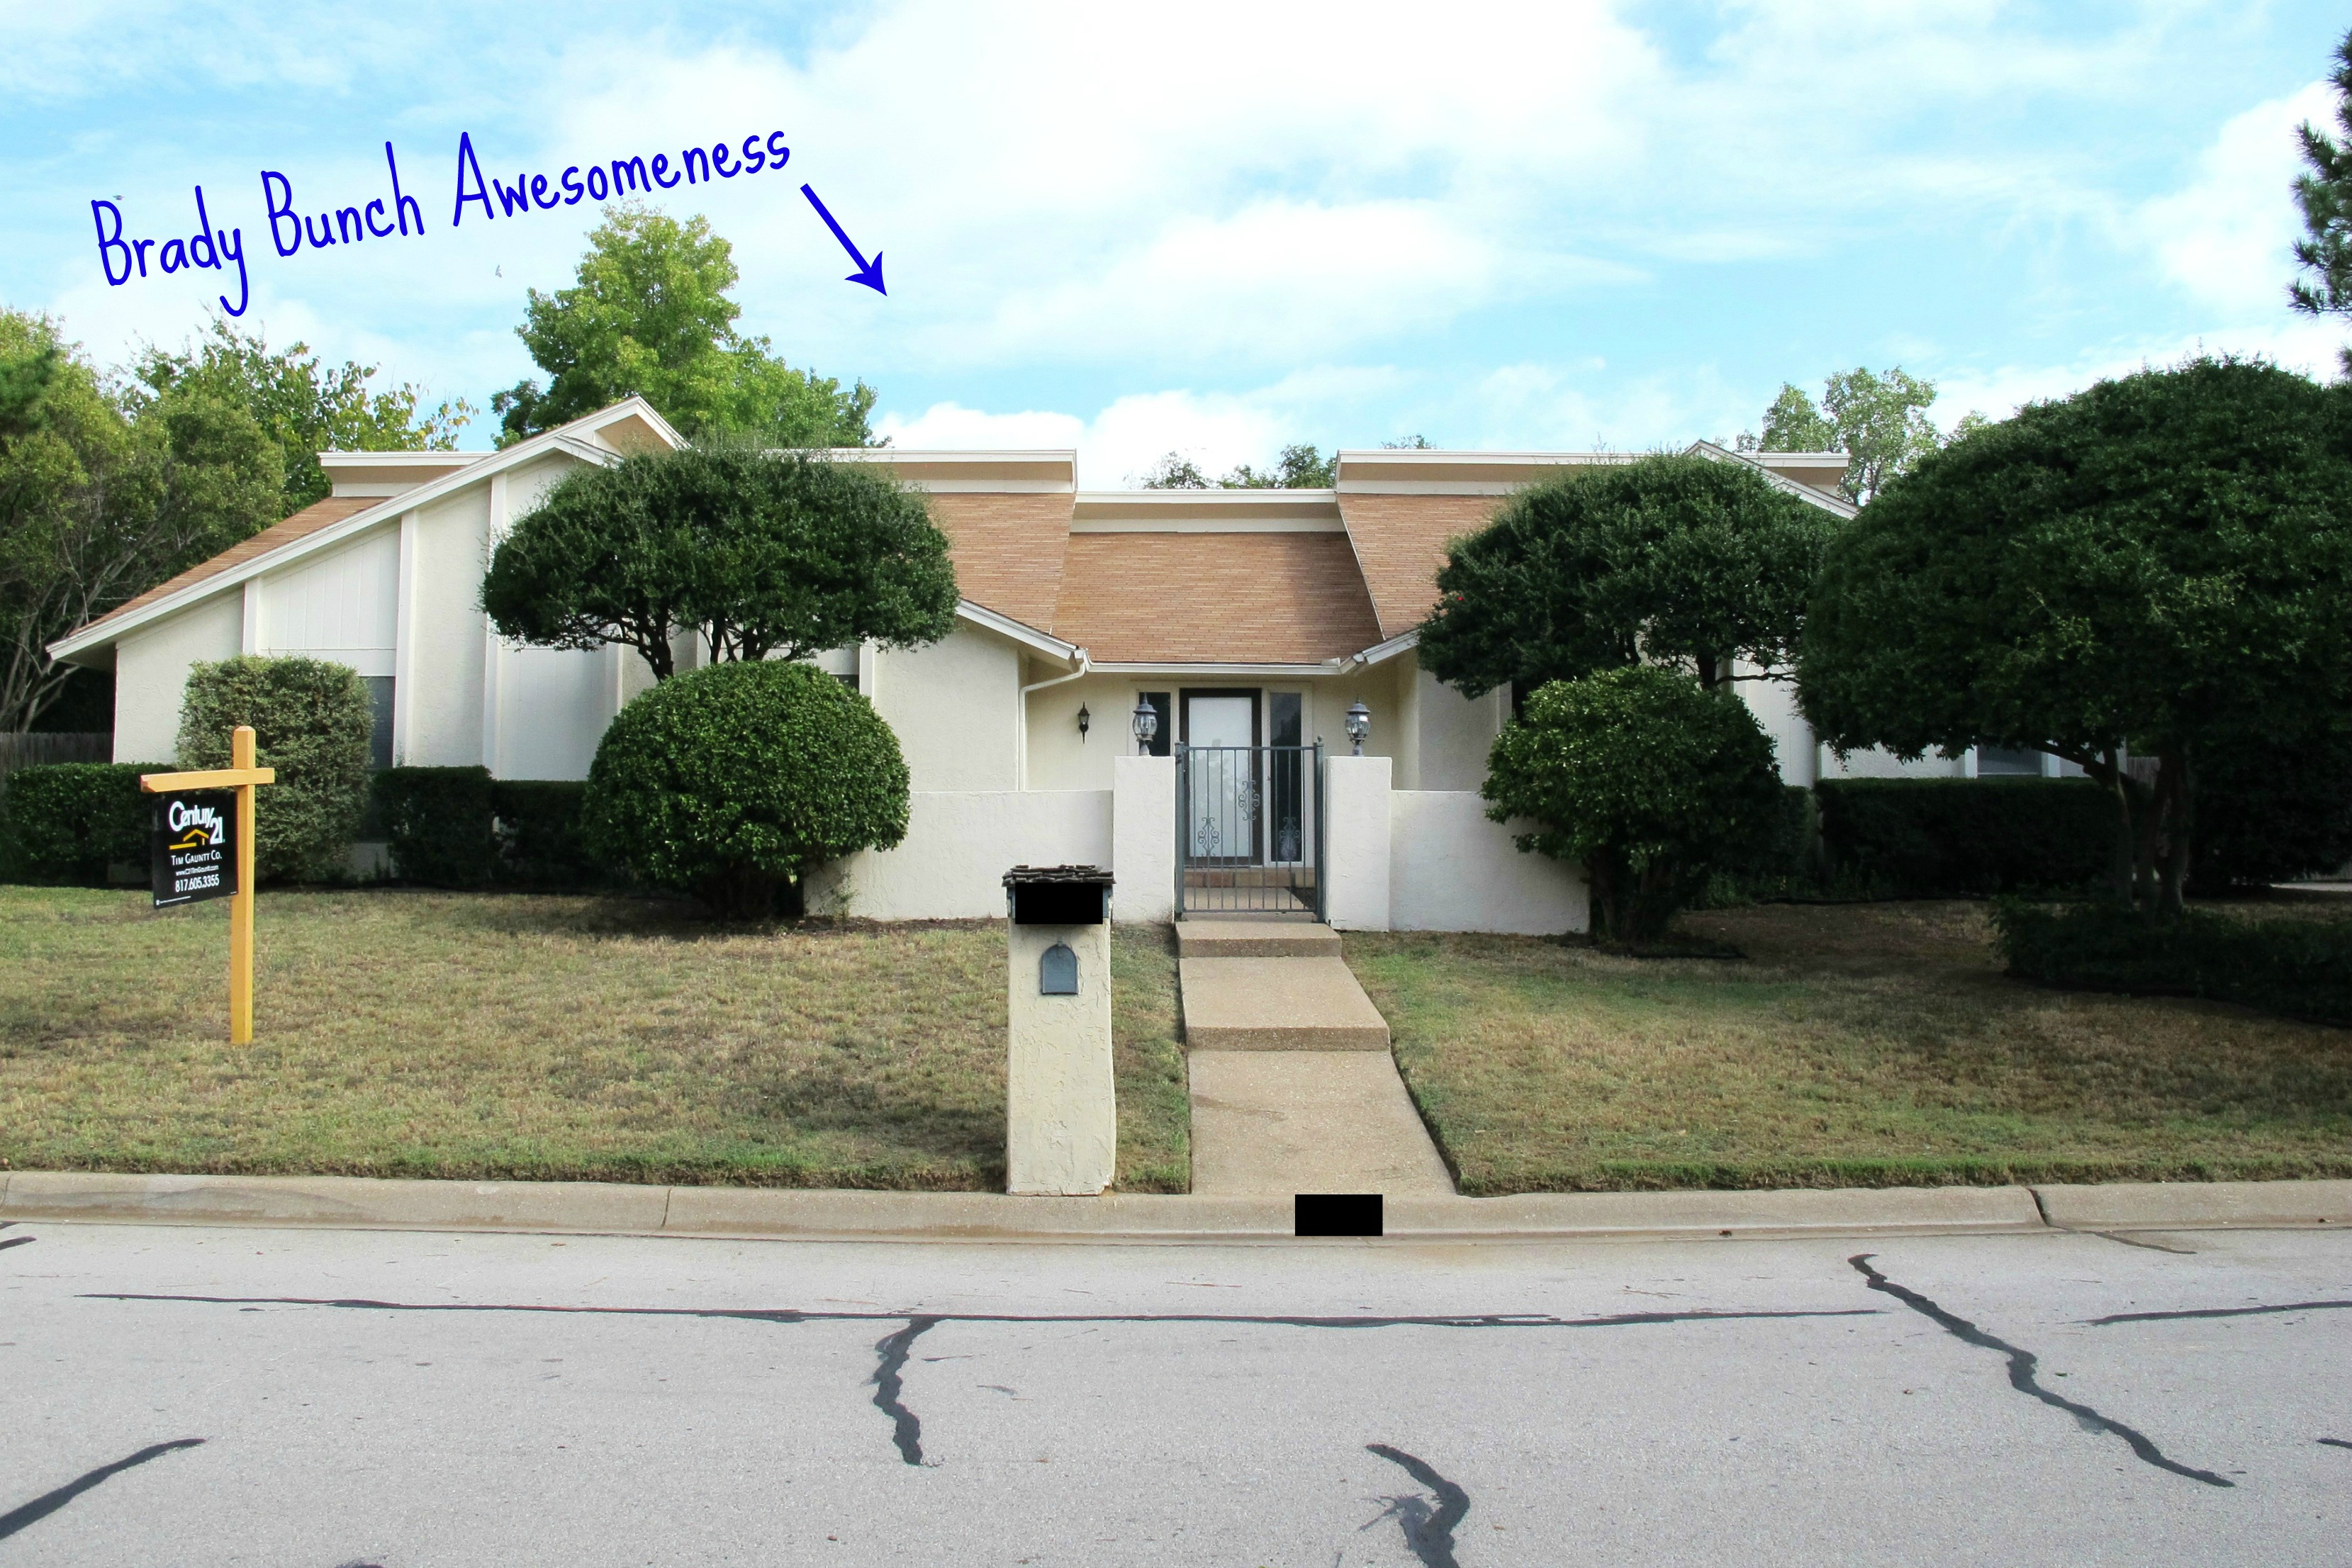
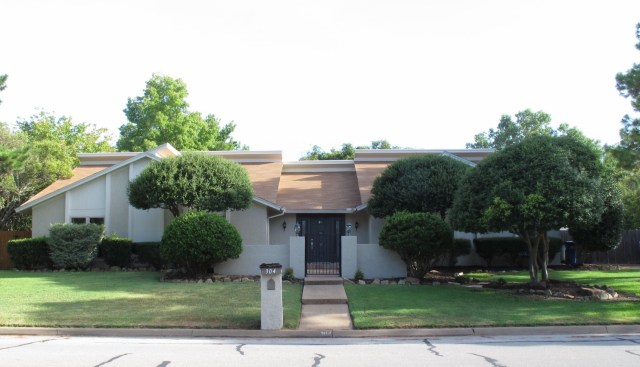
So far, we’ve (Joey’s) done some trimming, Joey also added a rock border to the beds, and we’ve had the house painted. Next, I painted our rusty courtyard gate and had a new front door installed (The process was here and here) which I then painted a charcoal grey. Then, Joey extended the fence on the left-facing side of our property and stained it. I still need to paint the faded post lighting fixtures a crisp black and update the mailbox. We’d also like to add more landscaping improvements, green up the grass, and replace the ugly orange roof with a richer/darker toned roof (#hailstormplease).. OH, IT’LL BE GLORIOUS!! (intenyears)
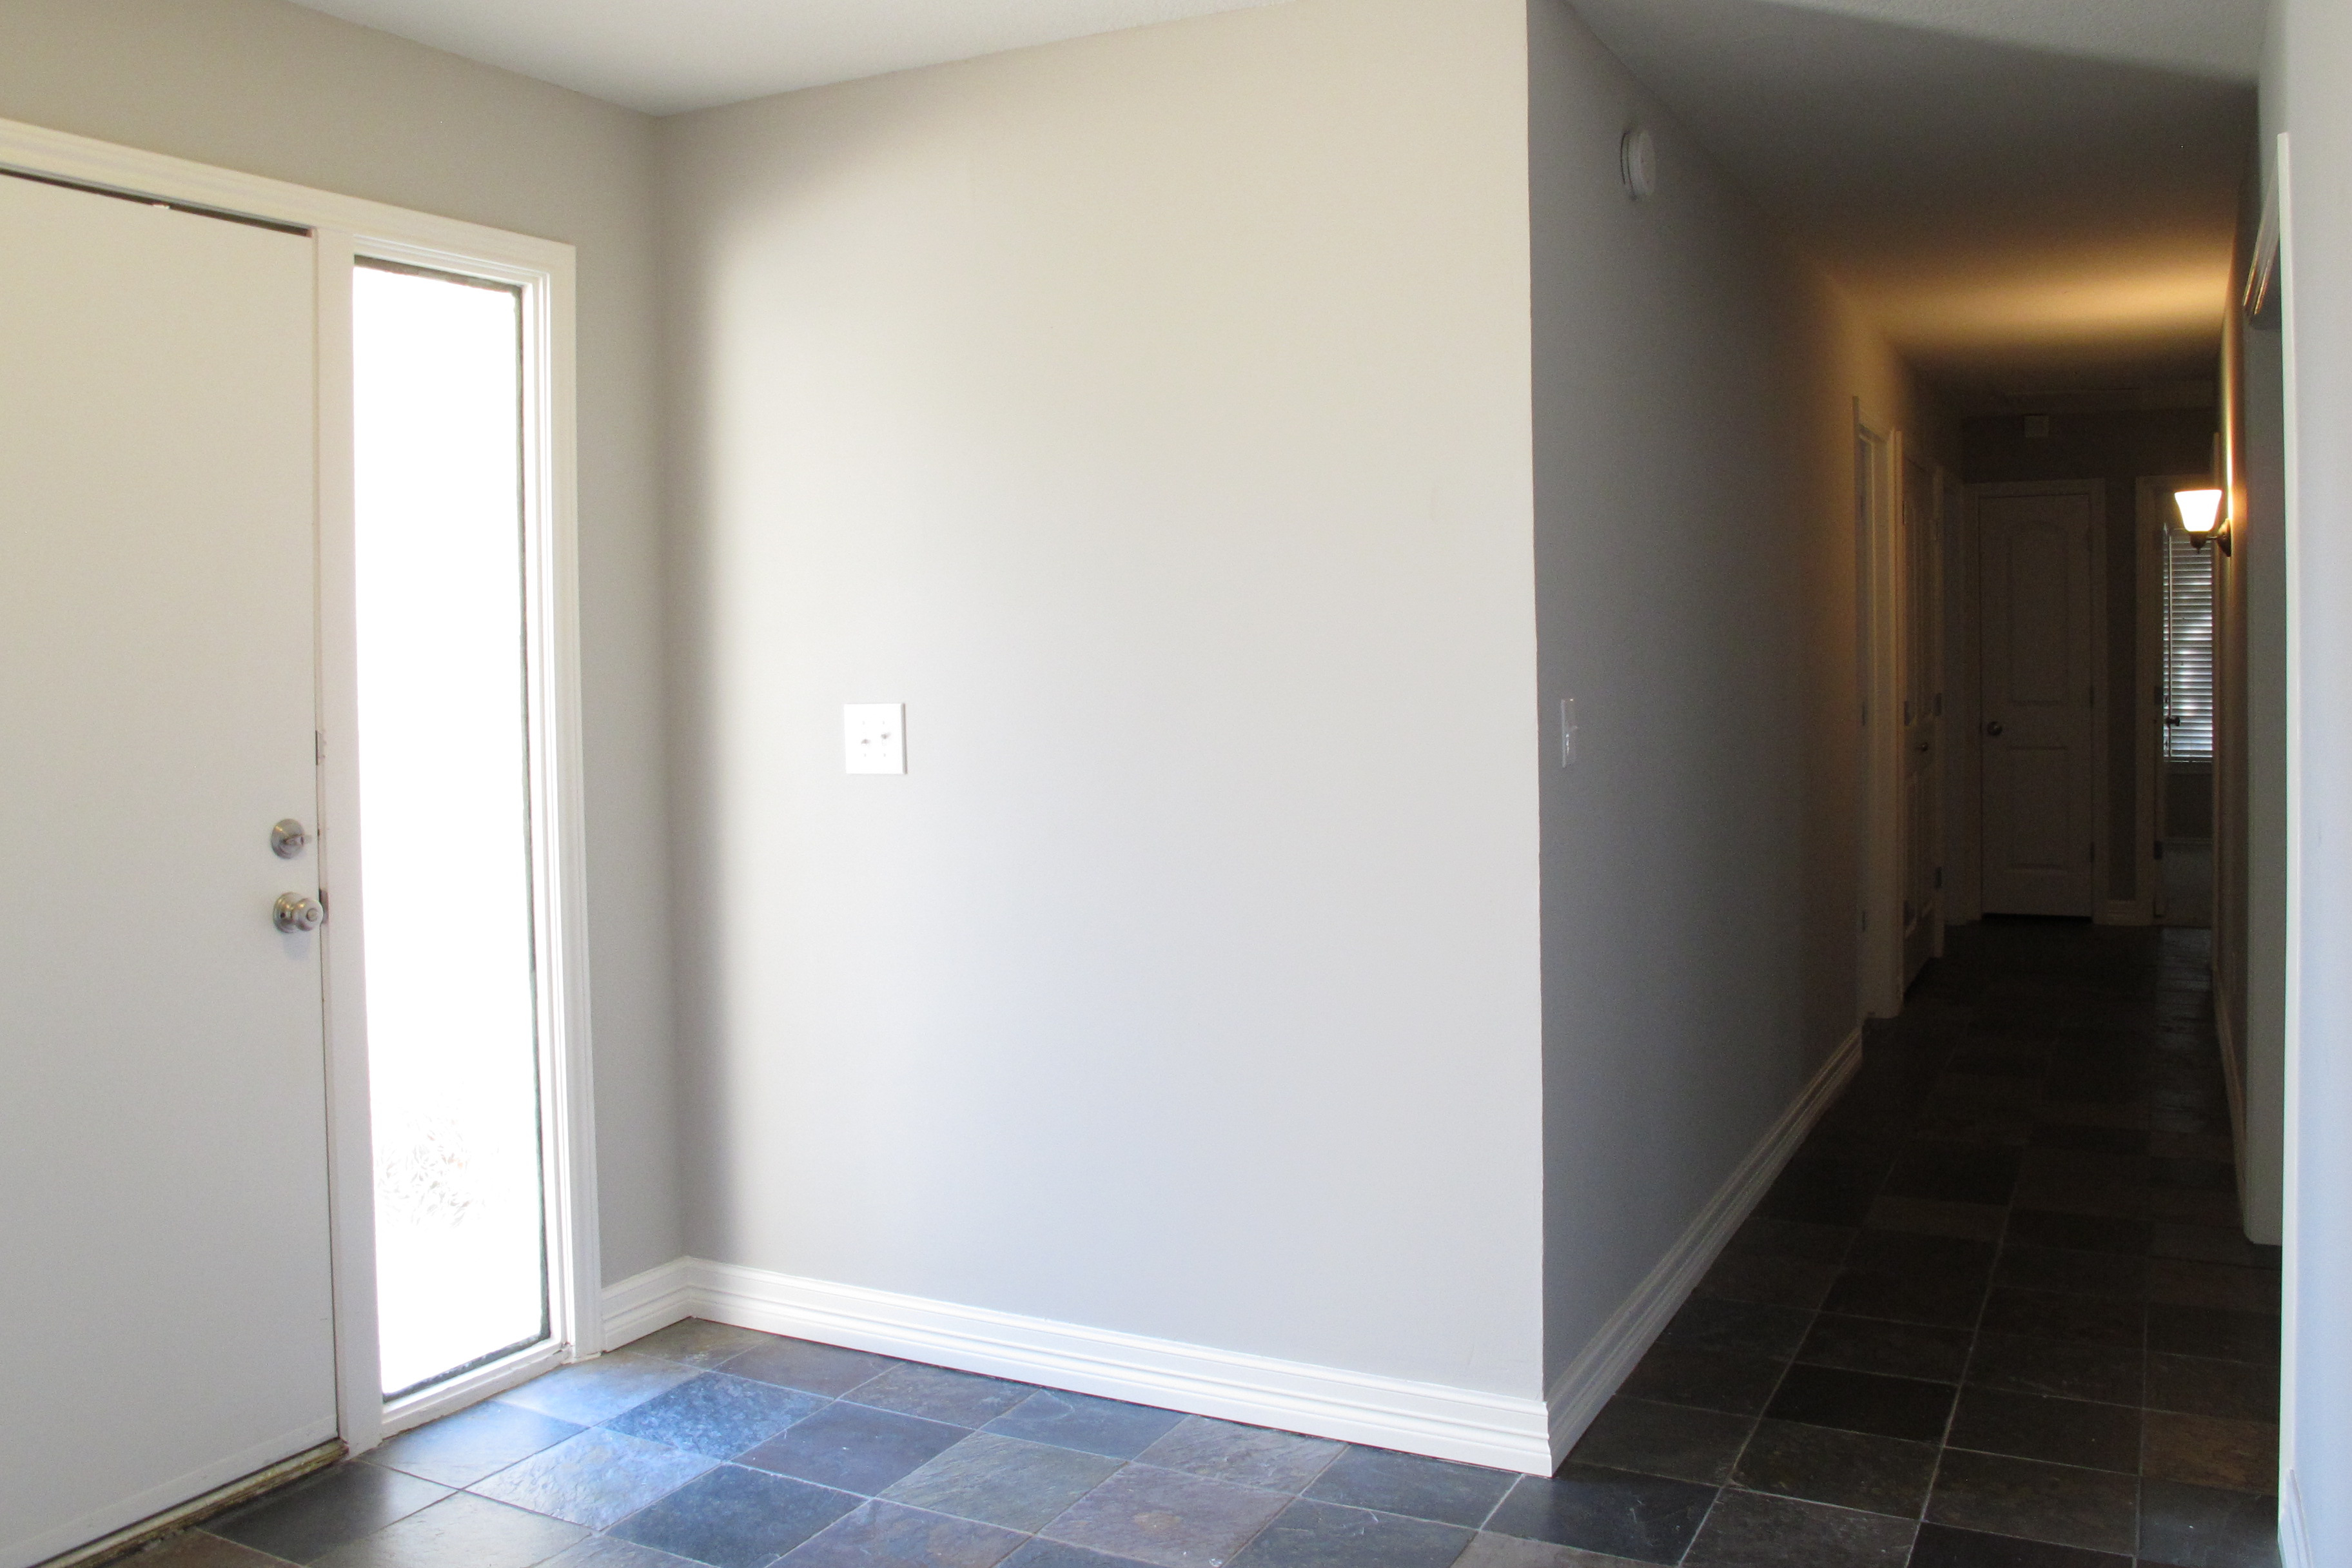
Walking inside, you see THE FOYER:
Here’s the Before:
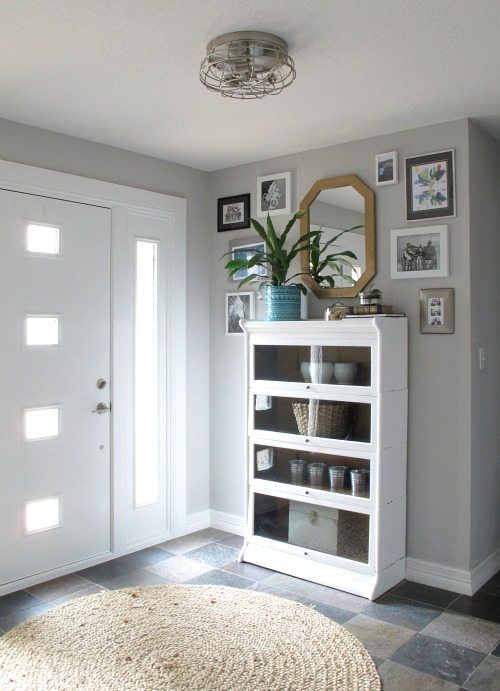
And here’s the foyer currently after we added an awesome antique lawyer’s cabinet, had a new door installed (which I then painted a crisp white), created a gallery wall and added a new lighting fixture…
And the other direction, before…

And current…

Before: Dining space

And here is our dining space now…. So far, we’ve changed out the flooring, and introduced curtains and shelves which instantly updated and warmed up the space. After having a bit of a “re-do” moment, I removed a rug we’d purchased, painted the table, added some quirky eye-chart art, changed out the seat covers of a more neutral look, and added the most amazing fixture EVER (notthatImbiased). Still to come… finding a new rug, and adding a few other touches to finish out the space….

Before: Dining Space, the other direction

And this is the space as it stands now, after I painted the built-ins. …

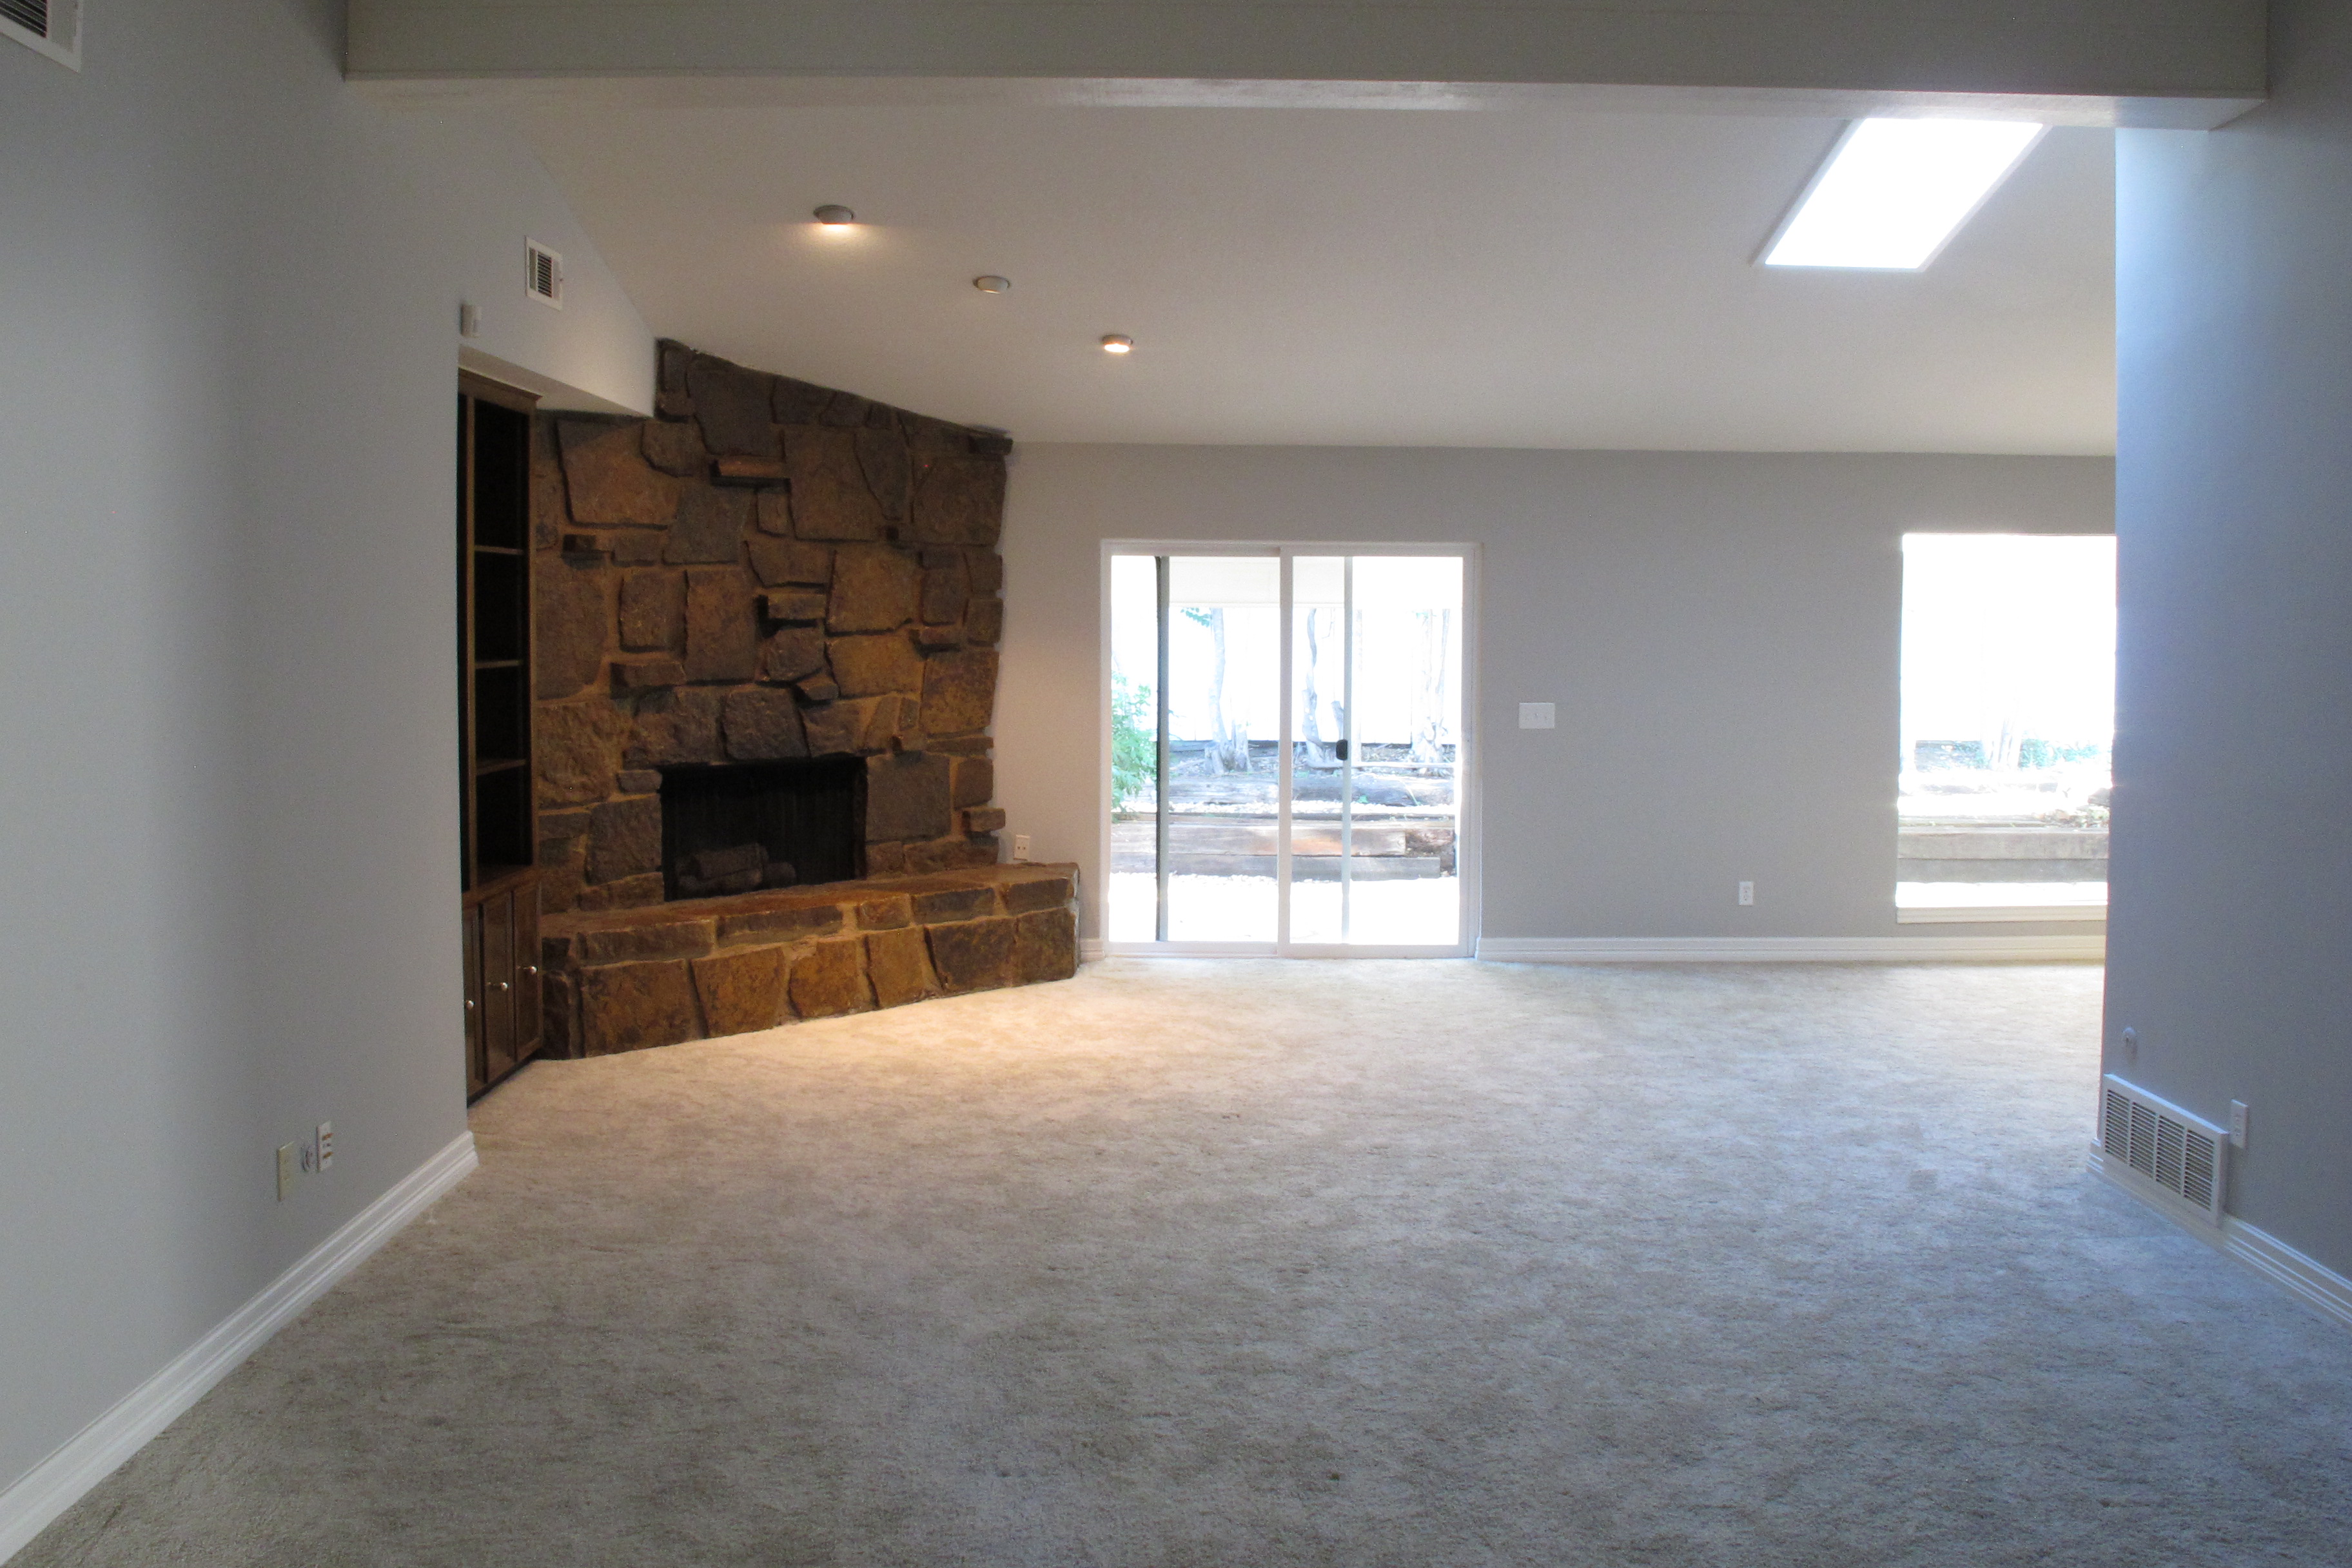
Before: Living space
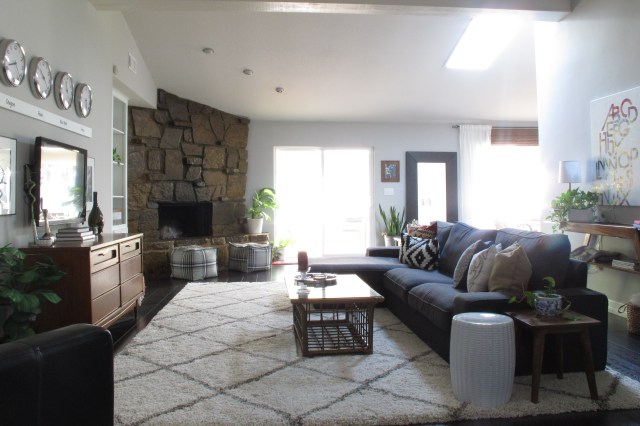
And here is the space presently after we plopped our furniture down transformed a mid-century dresser into a media cabinet, found a large herringbone rug that makes me smile for days, as well as two magical poufs. The newest project is the DIY clock art which I love. The plan here is to add additional overhead lighting/solar tube, plus other fun details to round out the space ….
Before: Our wet-bar:

Current: So far, I’ve painted the cabinetry, removed the mirror, backsplash and sidesplashes, updated the faucet and added a vintage mirror that I found via Craigslist. Next up will be adding a concrete finish to the countertop, adding overhead lighting (and losing that off-balanced sconce), and tiling behind the mirror.

Before: The Kitchen
Here’s how the kitchen looked right before we started our current kitchen renovation…
After a full-gut renovation and lots of tweaking, we ended up here….

Here’s another before angle…

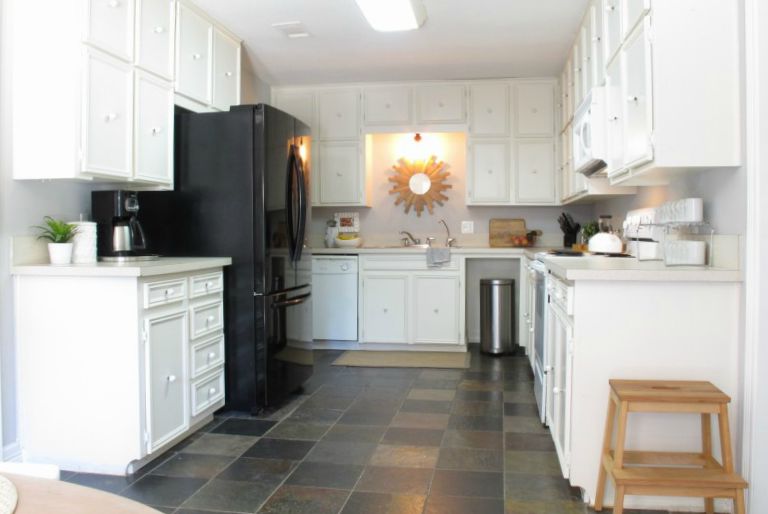
And now, after a year of tweaking…

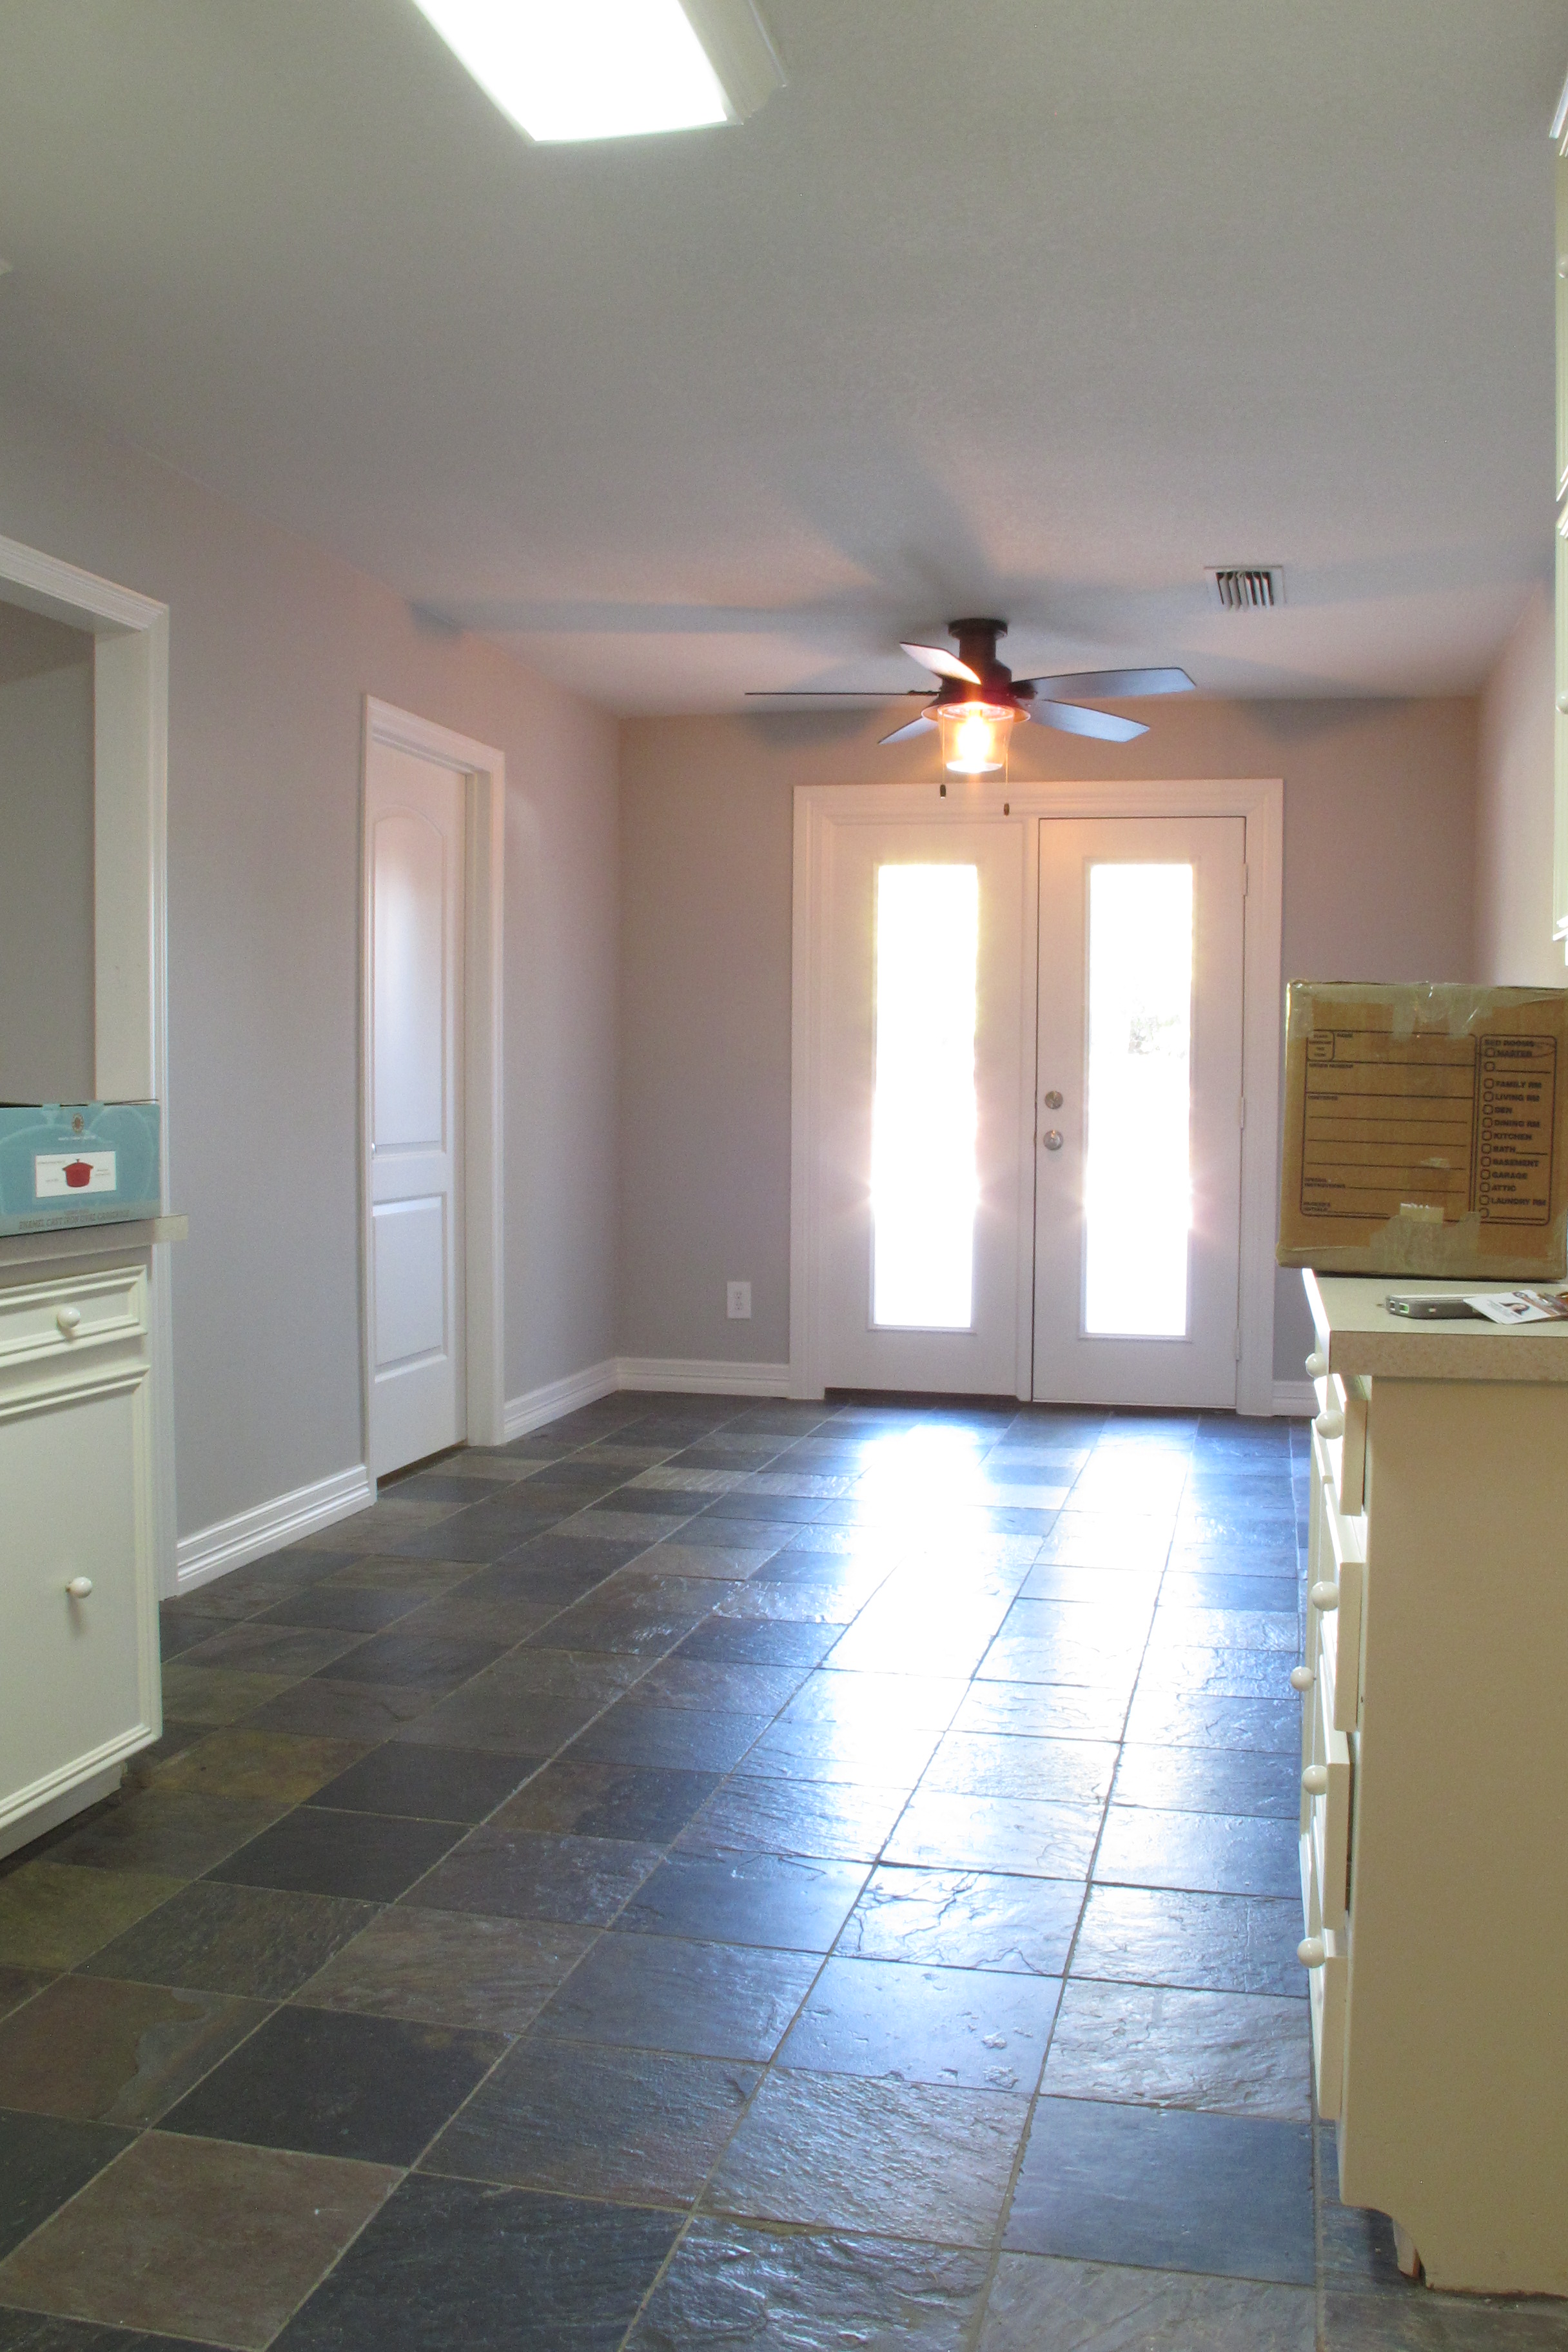
Here’s the before view of our kitchen from the foyer when we moved in:

And now, one year later…

Before: Breakfast nook
And the breakfast nook now. We’d hung a new pendant light fixture, refinished an ugly Craigslist table into sunbleached bliss, added my favorite new dining chairs, and cool accessories including a vintage shoe mirror….
Here’s a view towards the breakfast nook (taken just after the renovation)…

Off of the breakfast nook, you will find THE LAUNDRY ROOM:
Before: Laundry room:
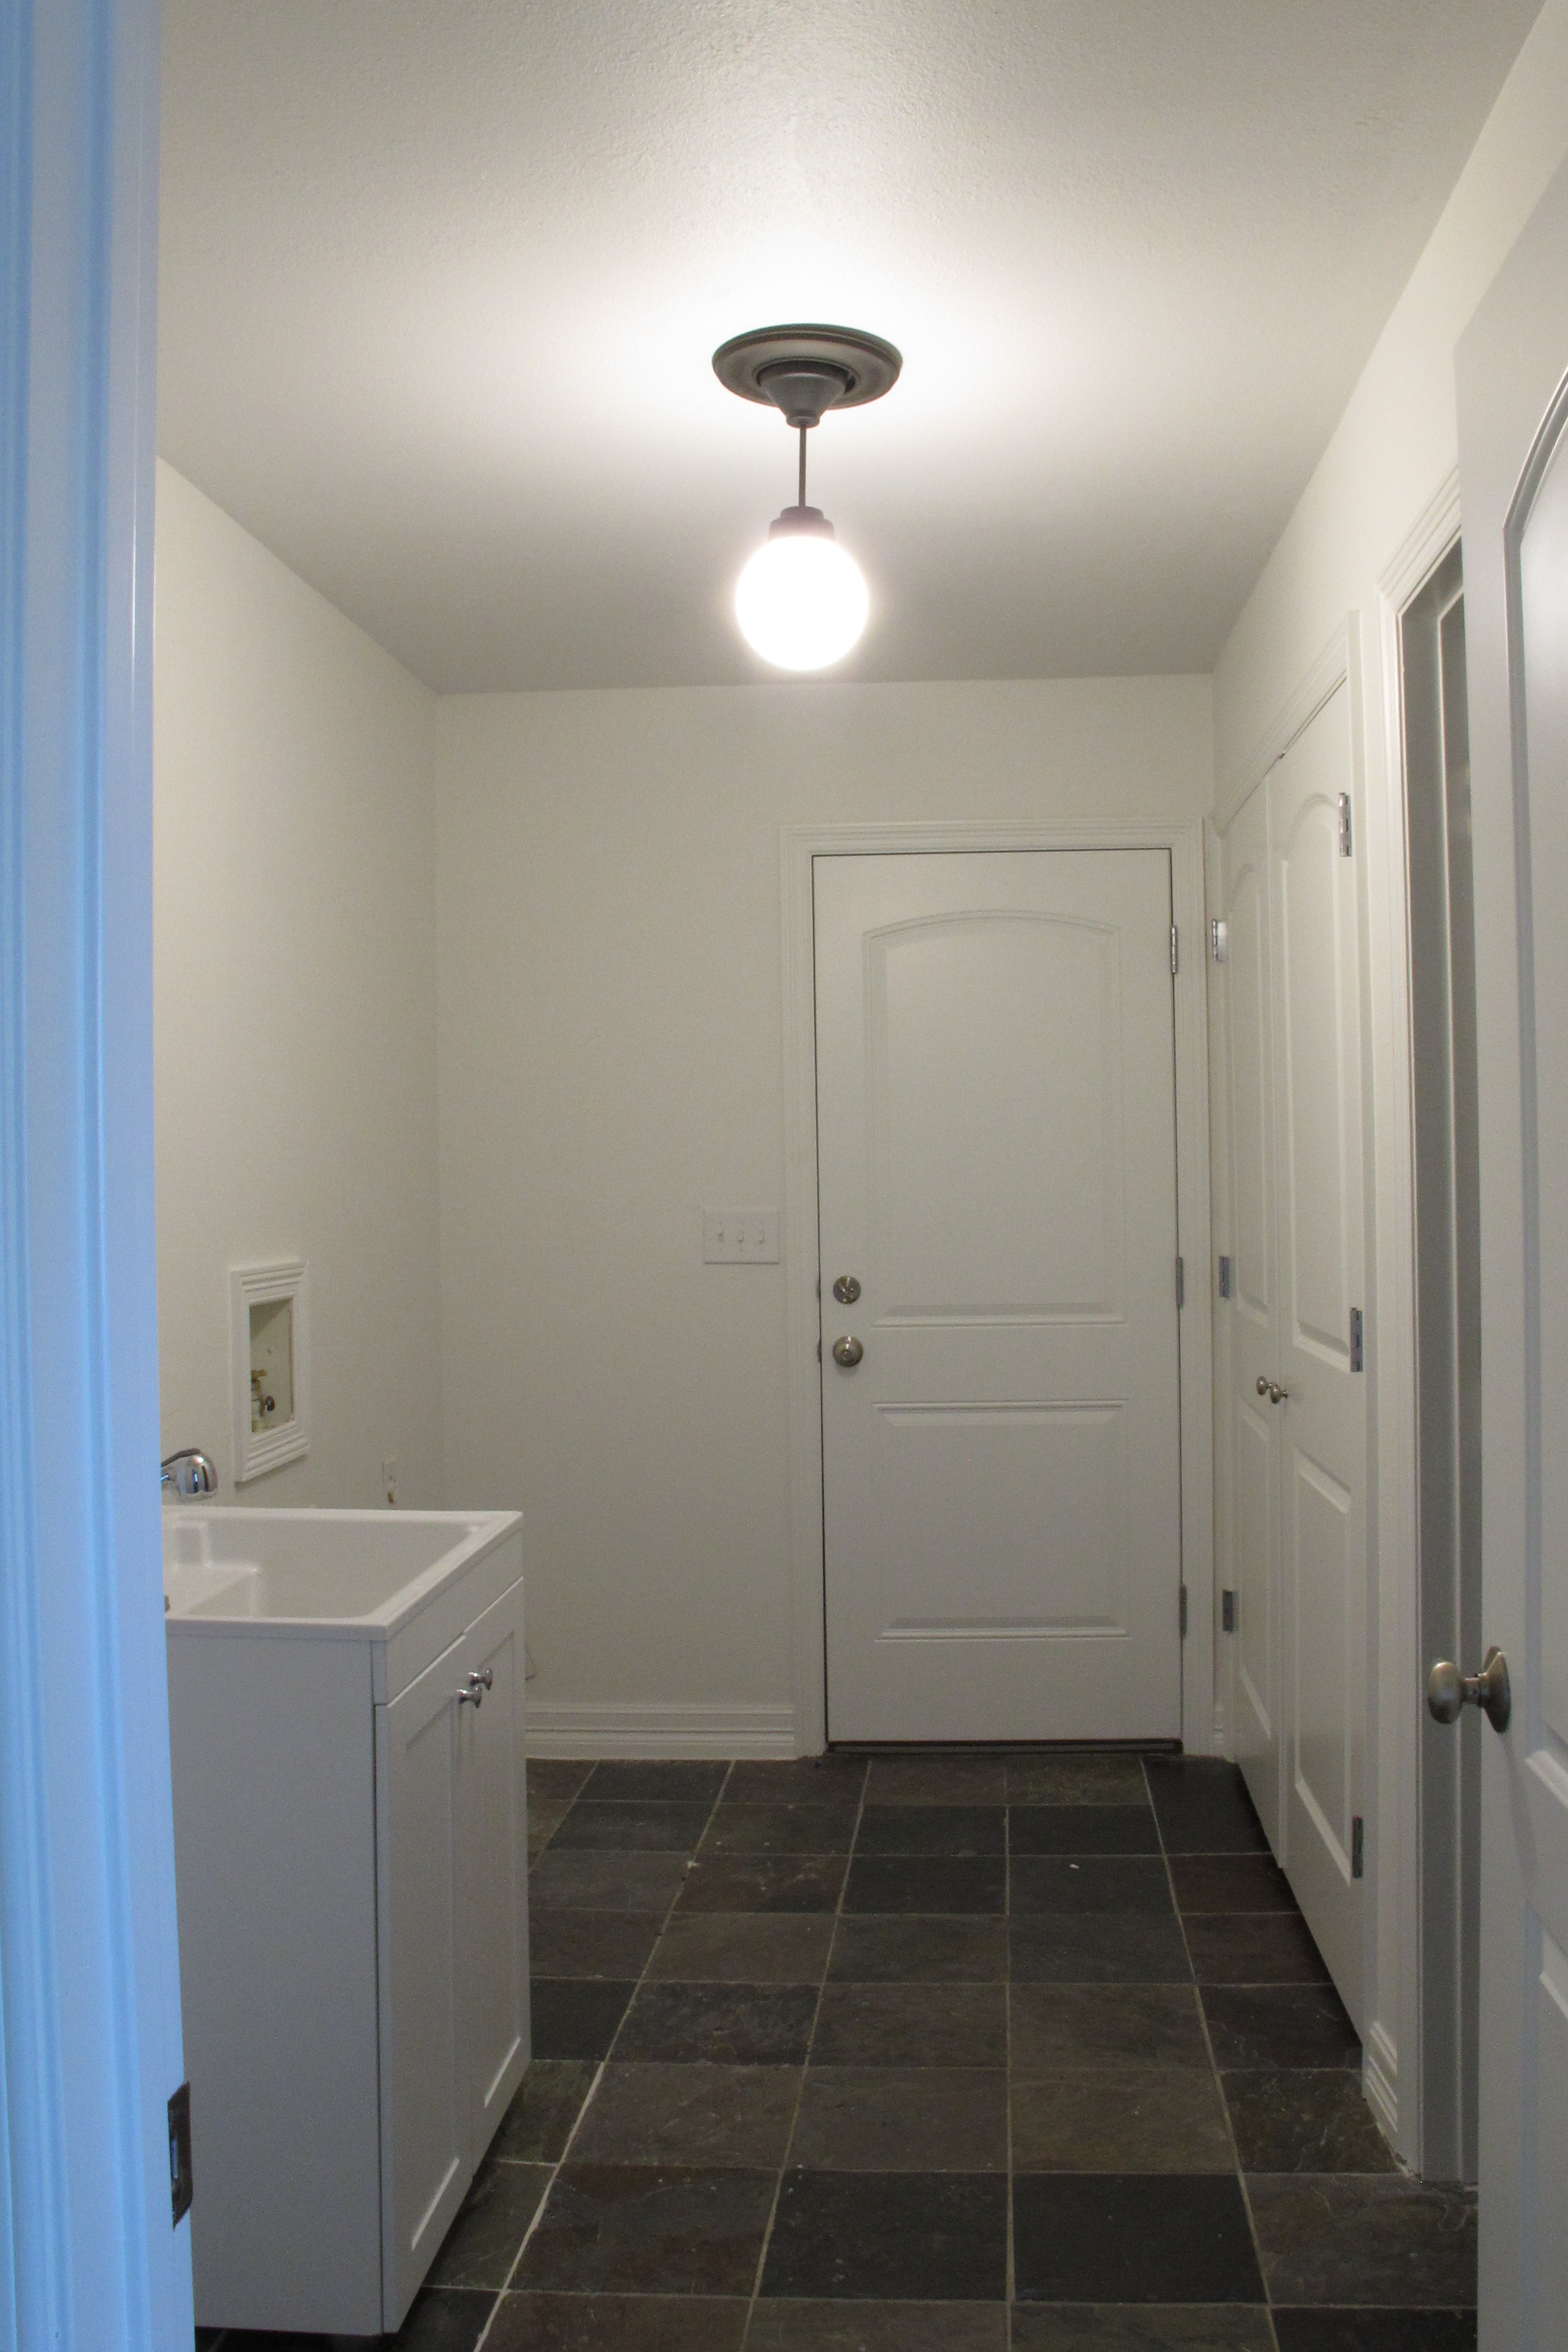
Current: Laundry room:
We added tons of organization, function, and natural light. See all the details in this post.

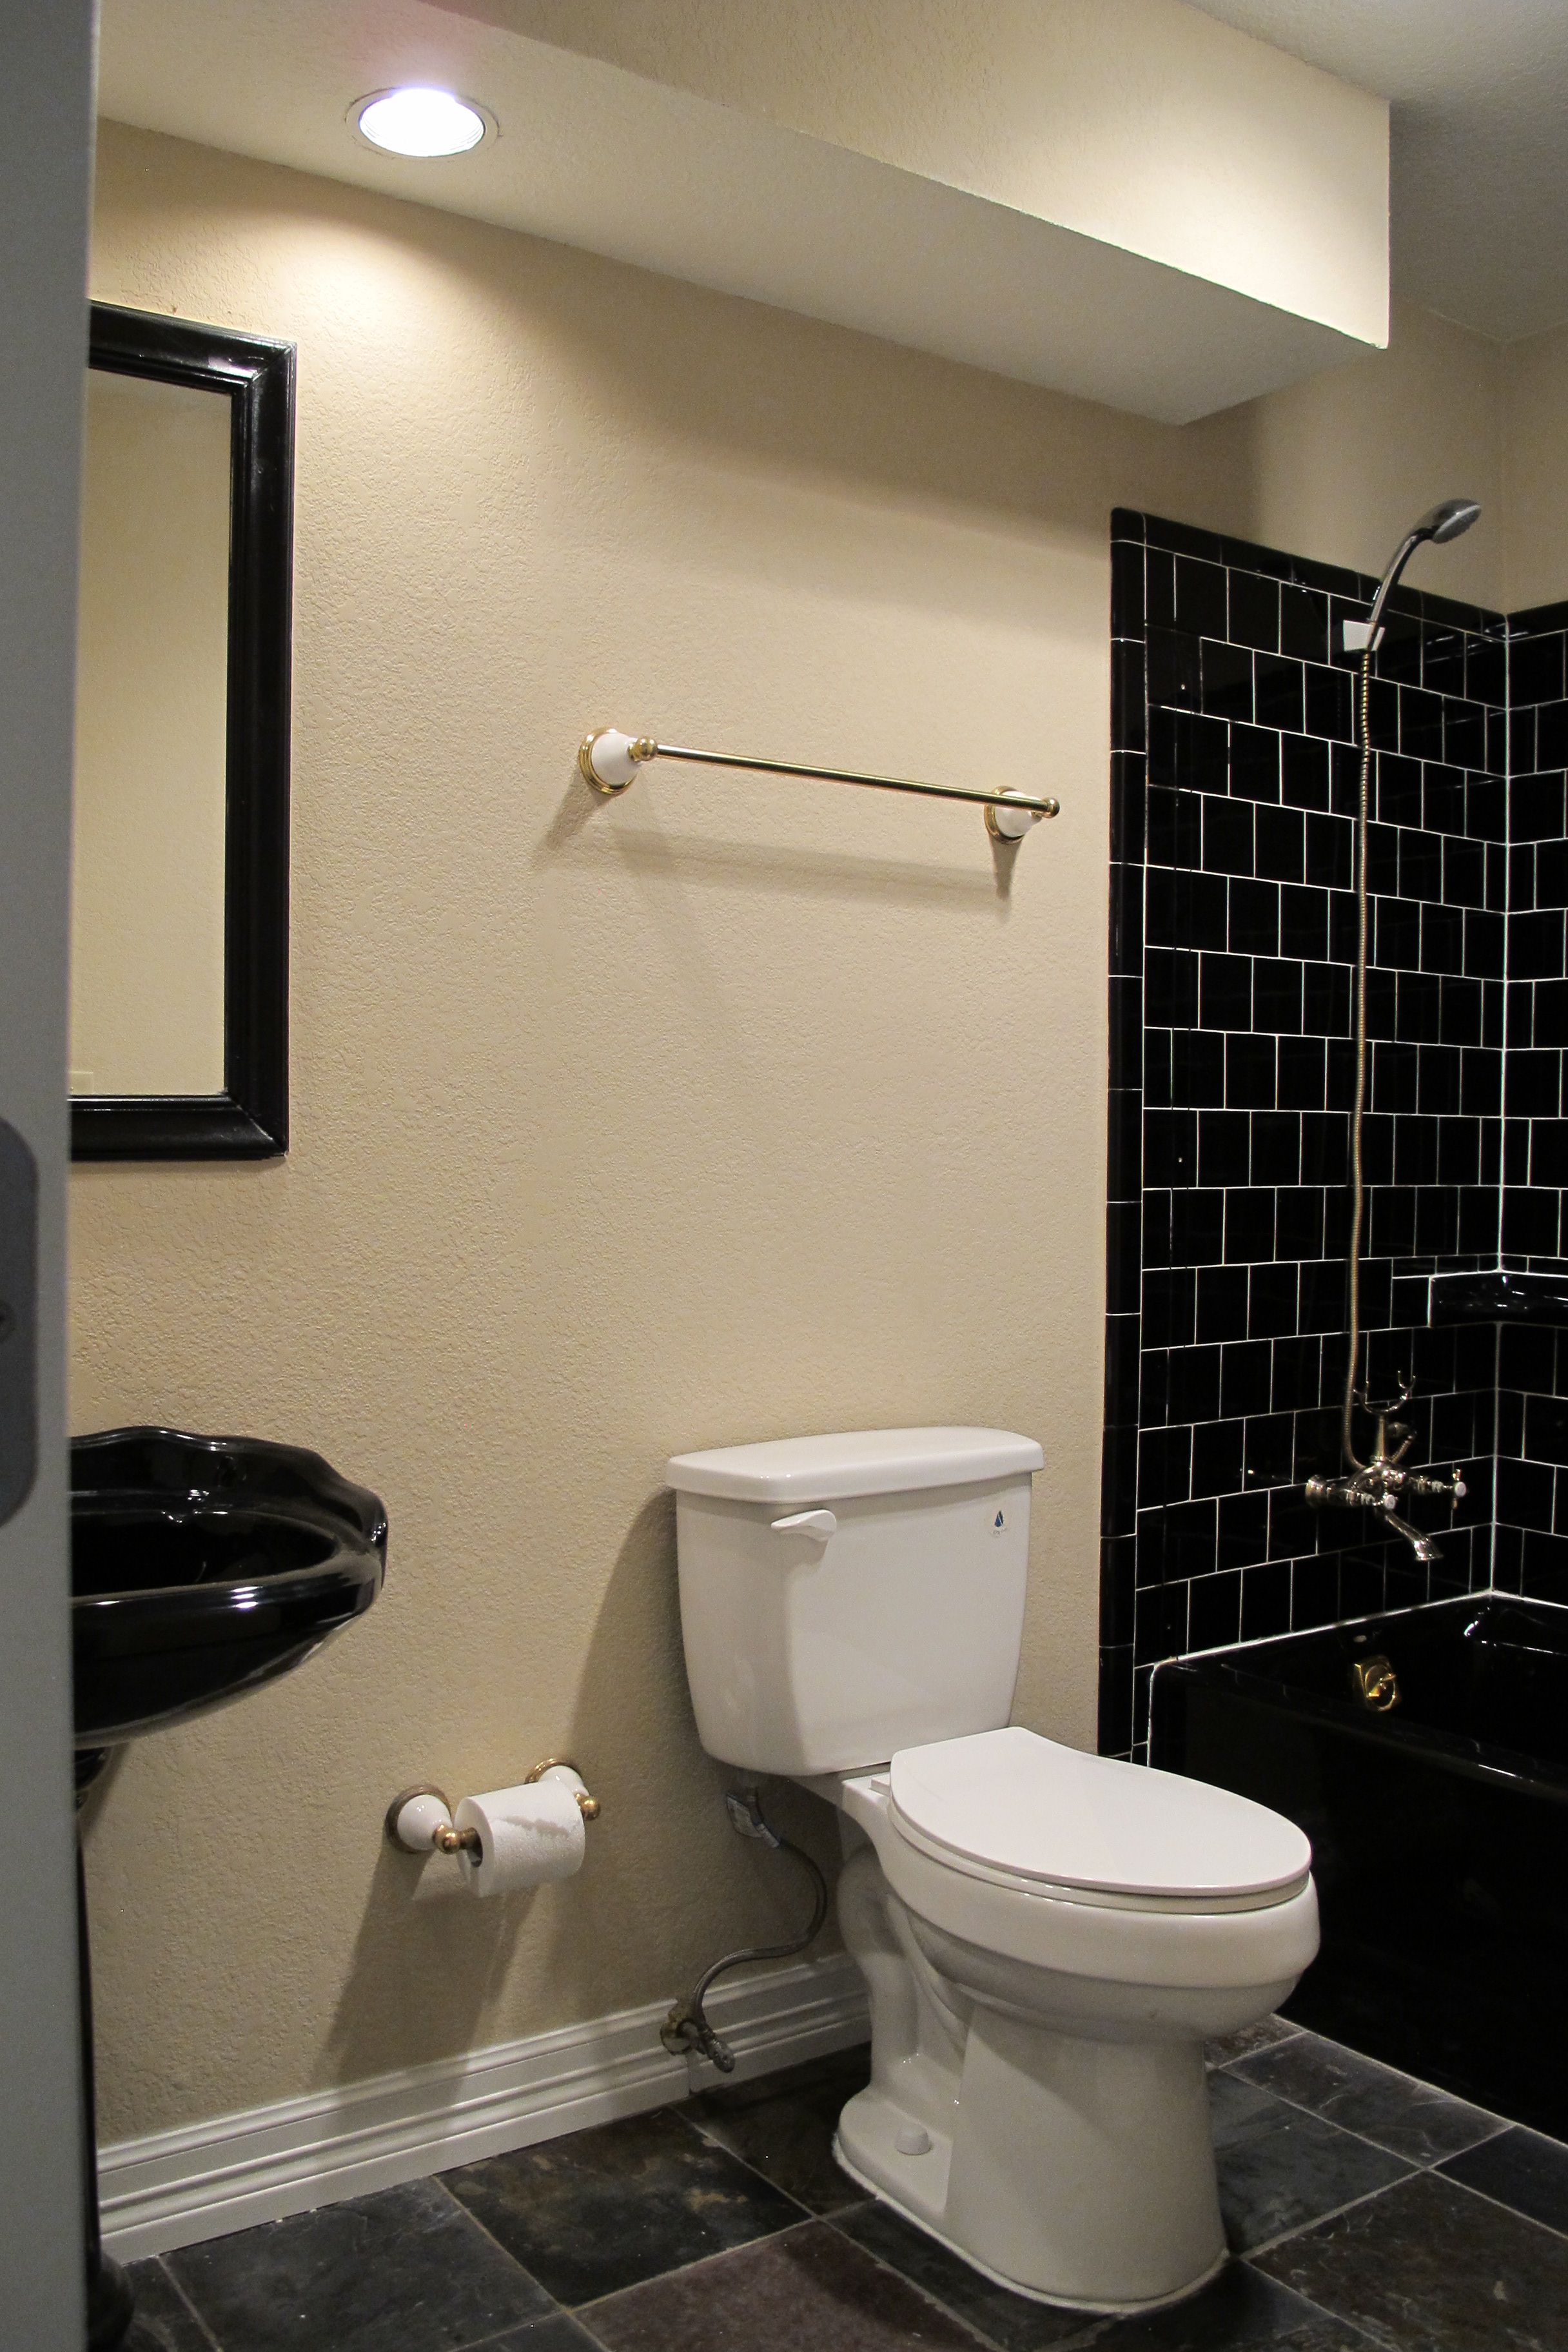
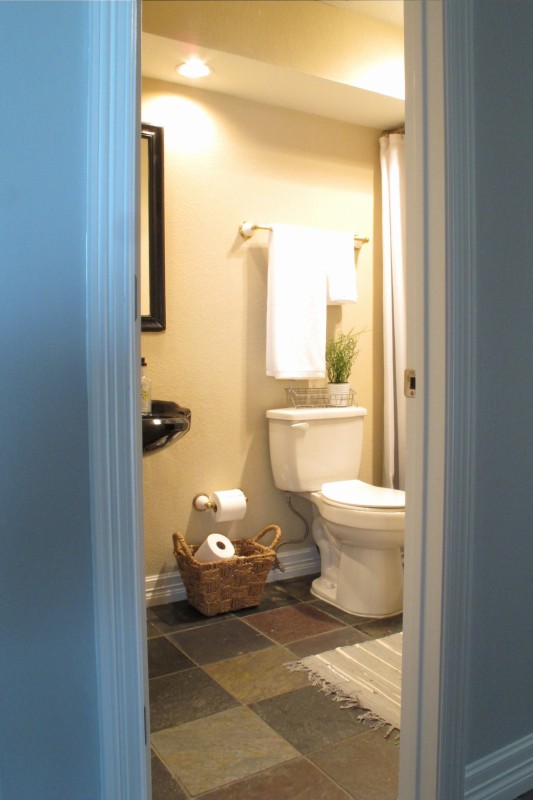
Off of the laundry room, we have a tiny little TOILET ROOM…
Before: Toilet Room
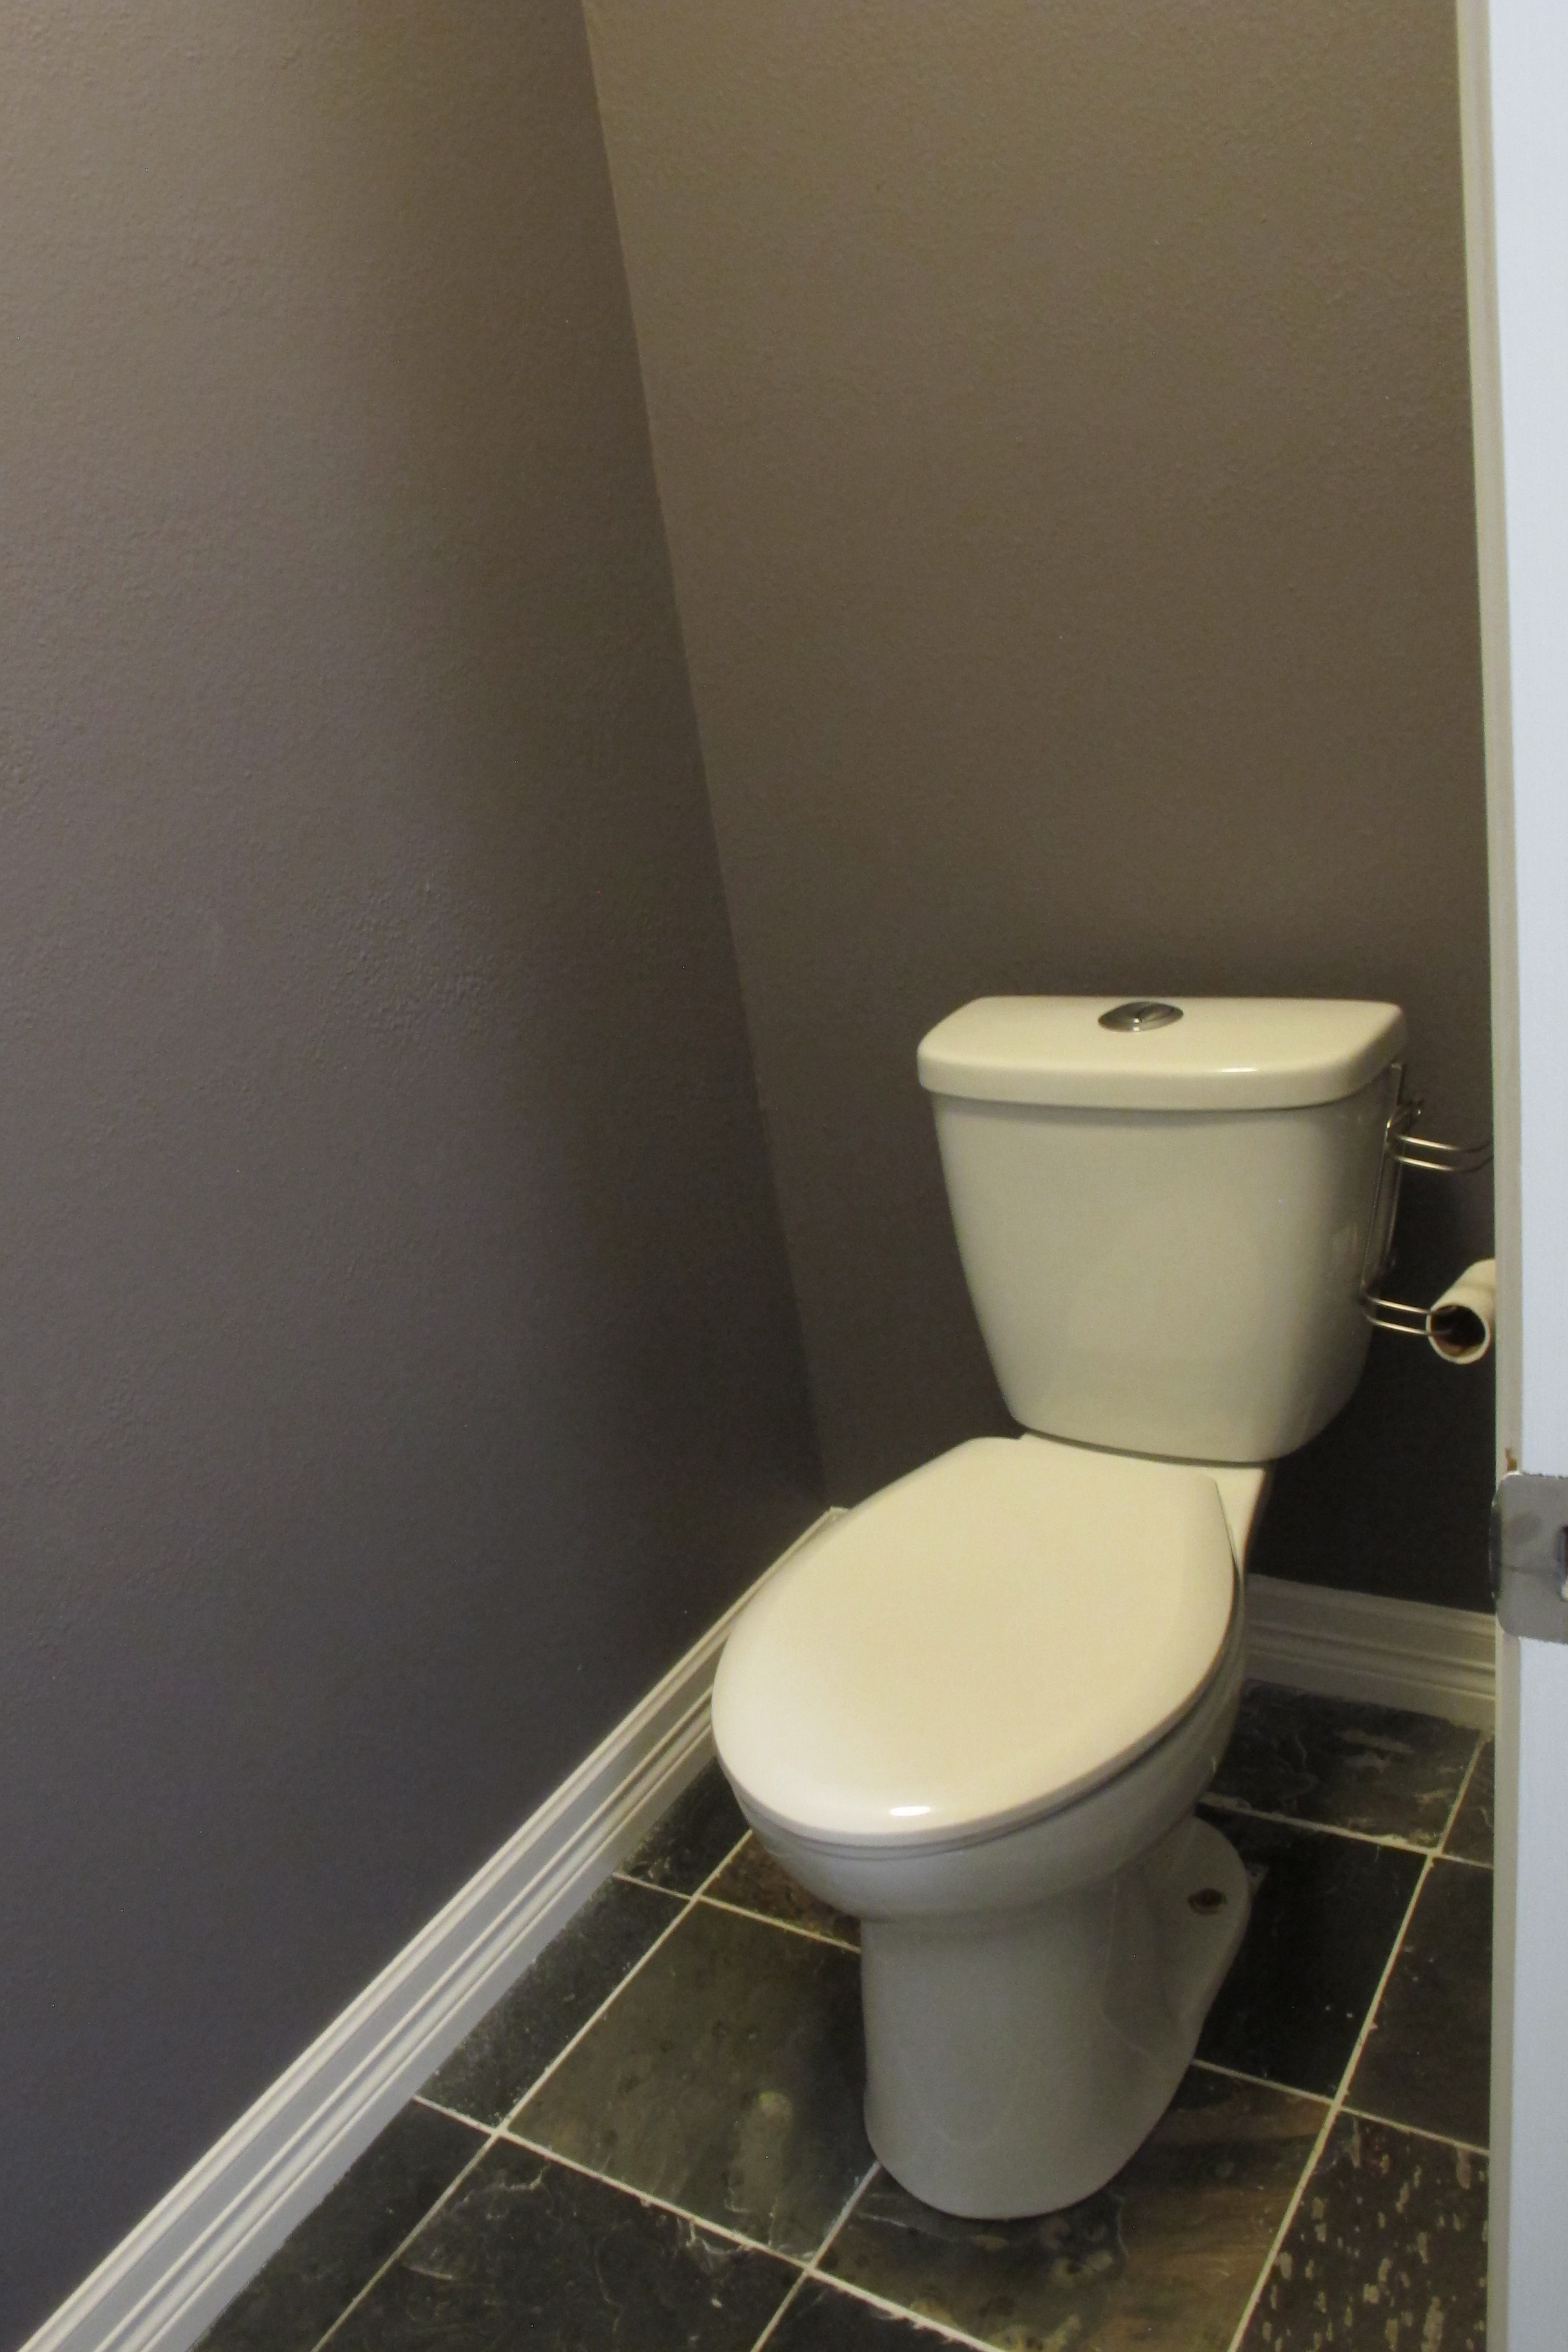
After a few hits and misses with this space (and, like, four paint jobs), we’ve landed here… (check out all the details in this post)

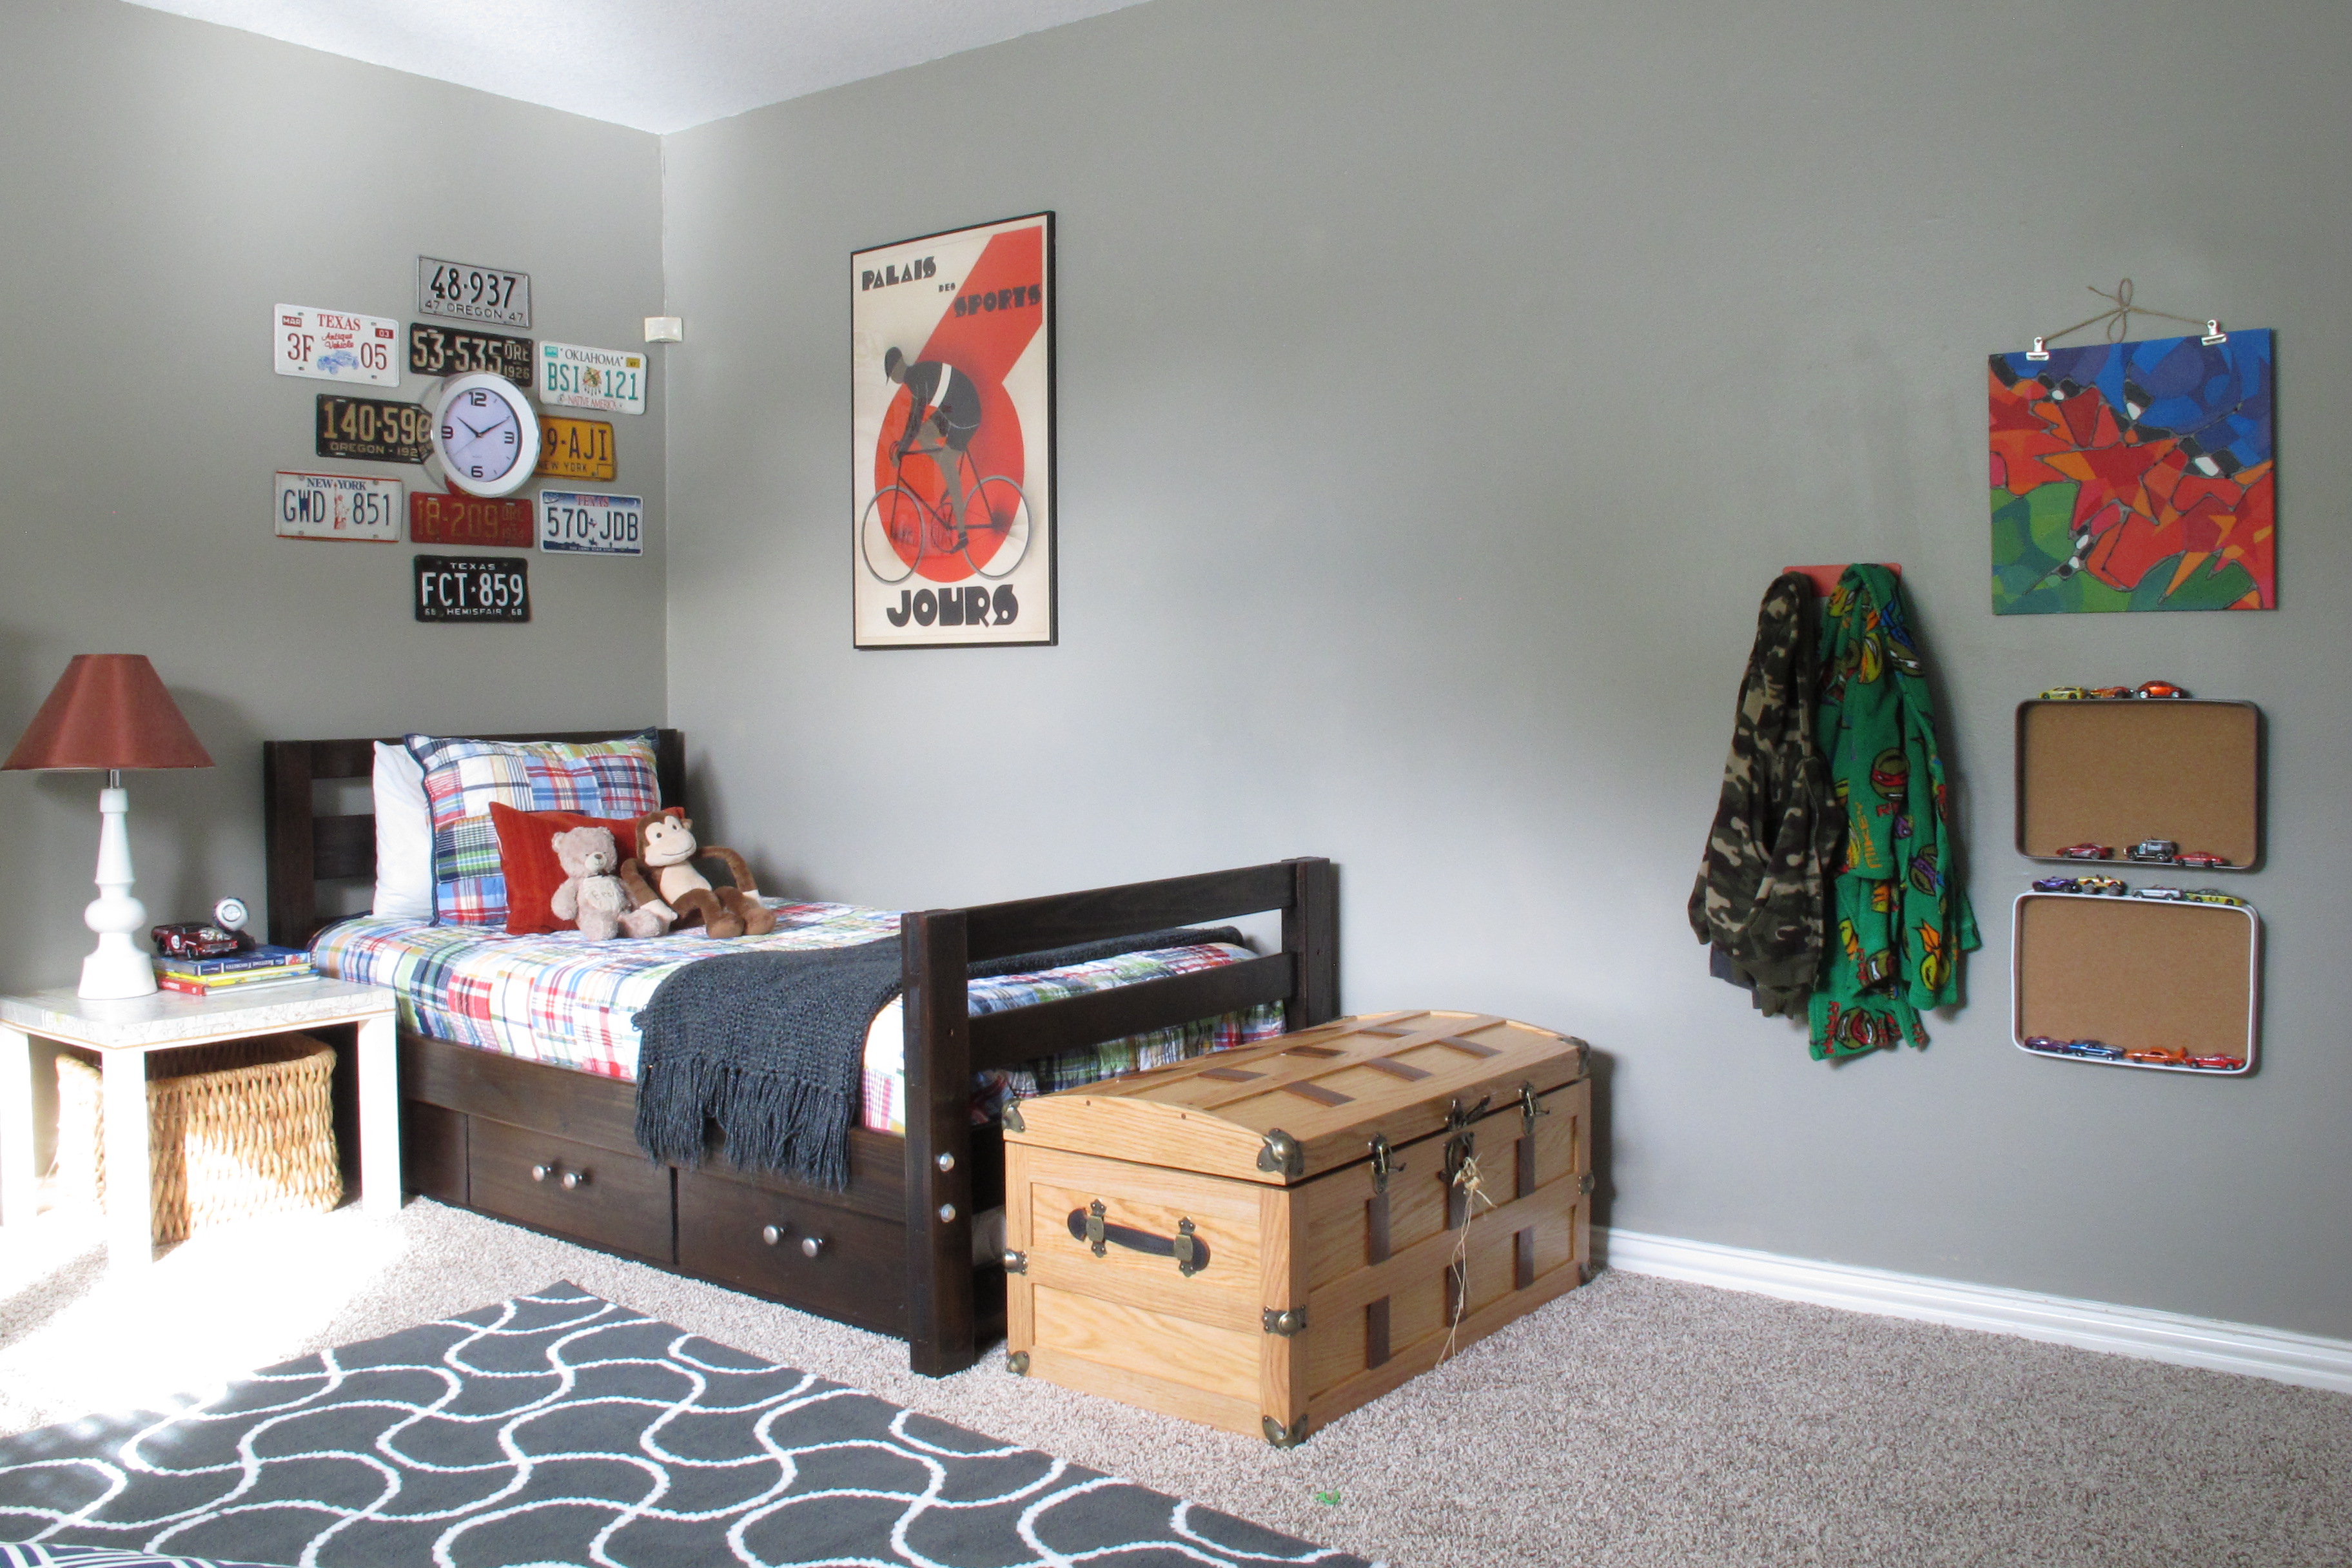
Before: Lucas’s room
After changing out the carpet and windows, painting the walls a gorgeous gray, introducing a newly-refinished bed, and hanging curtains… And then rethinking his room again… 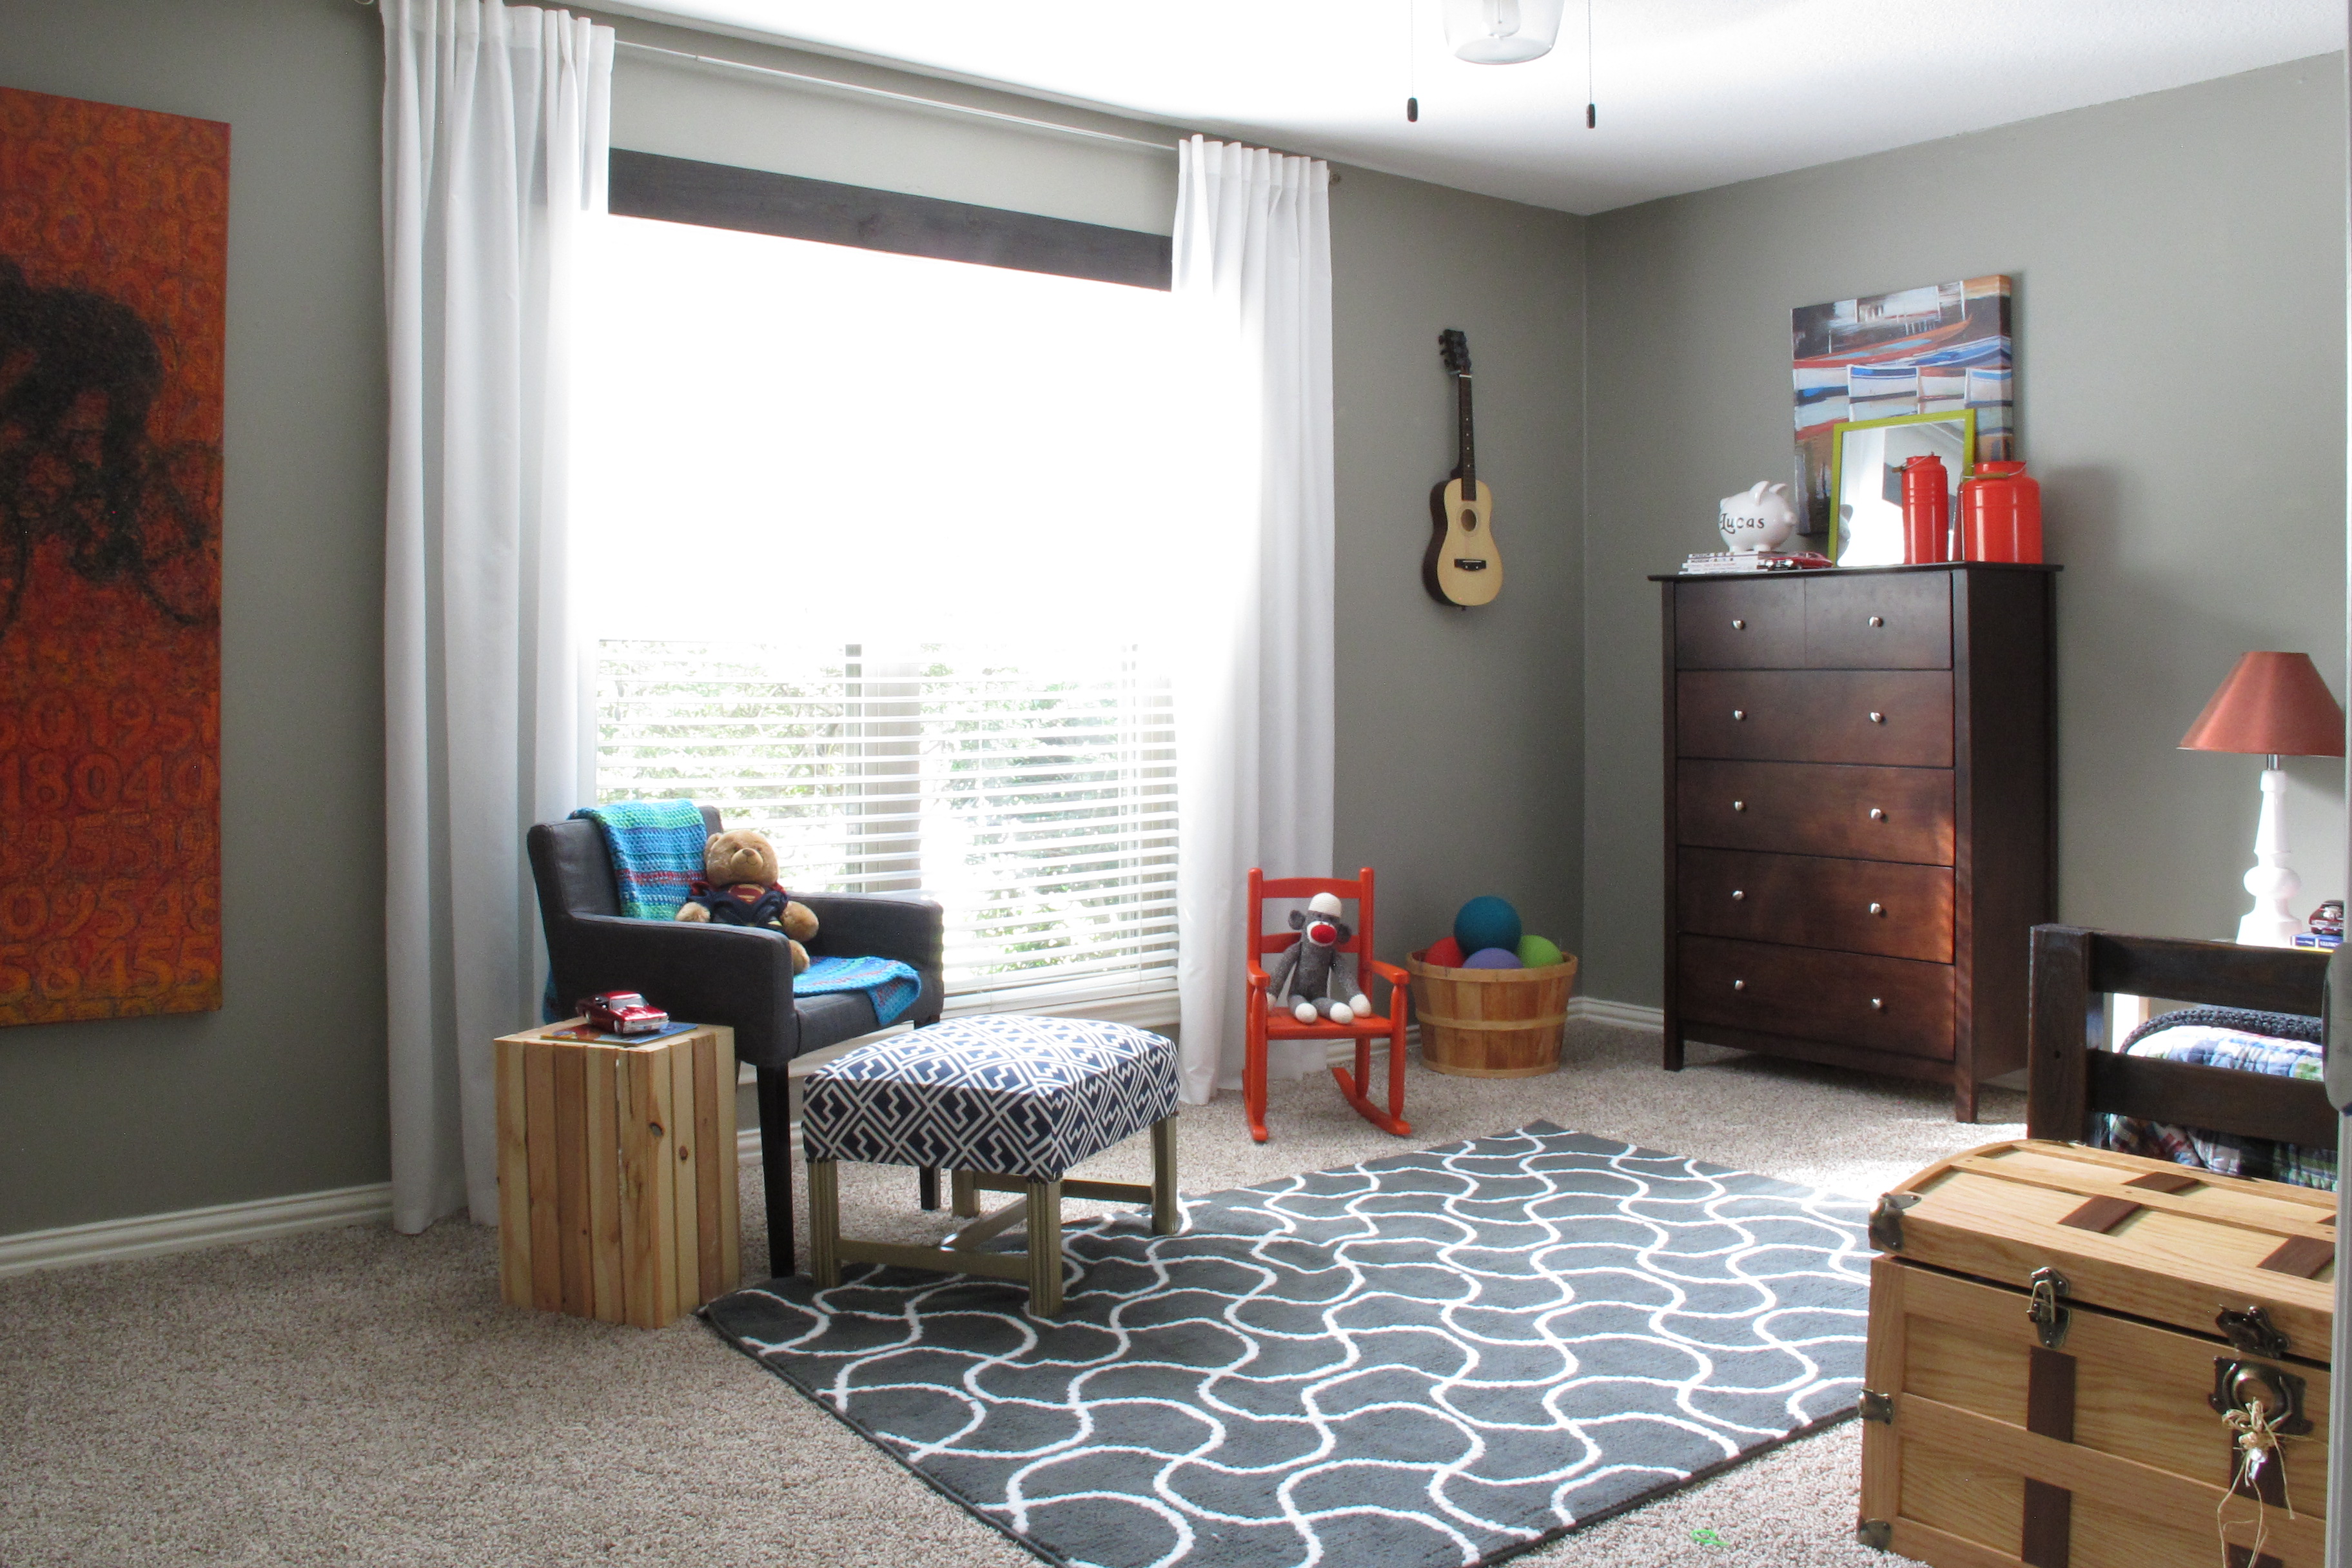
…although, I did create a matchbox car organizer from trays and hang license plate/clock wall art…
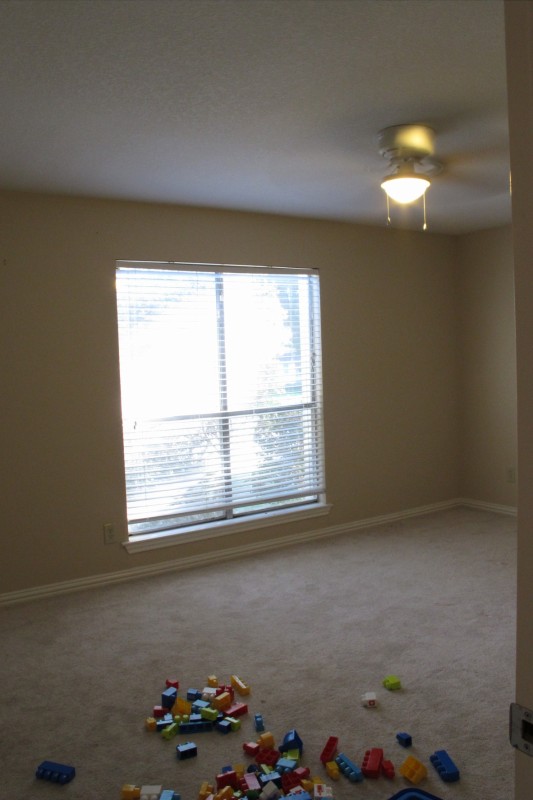
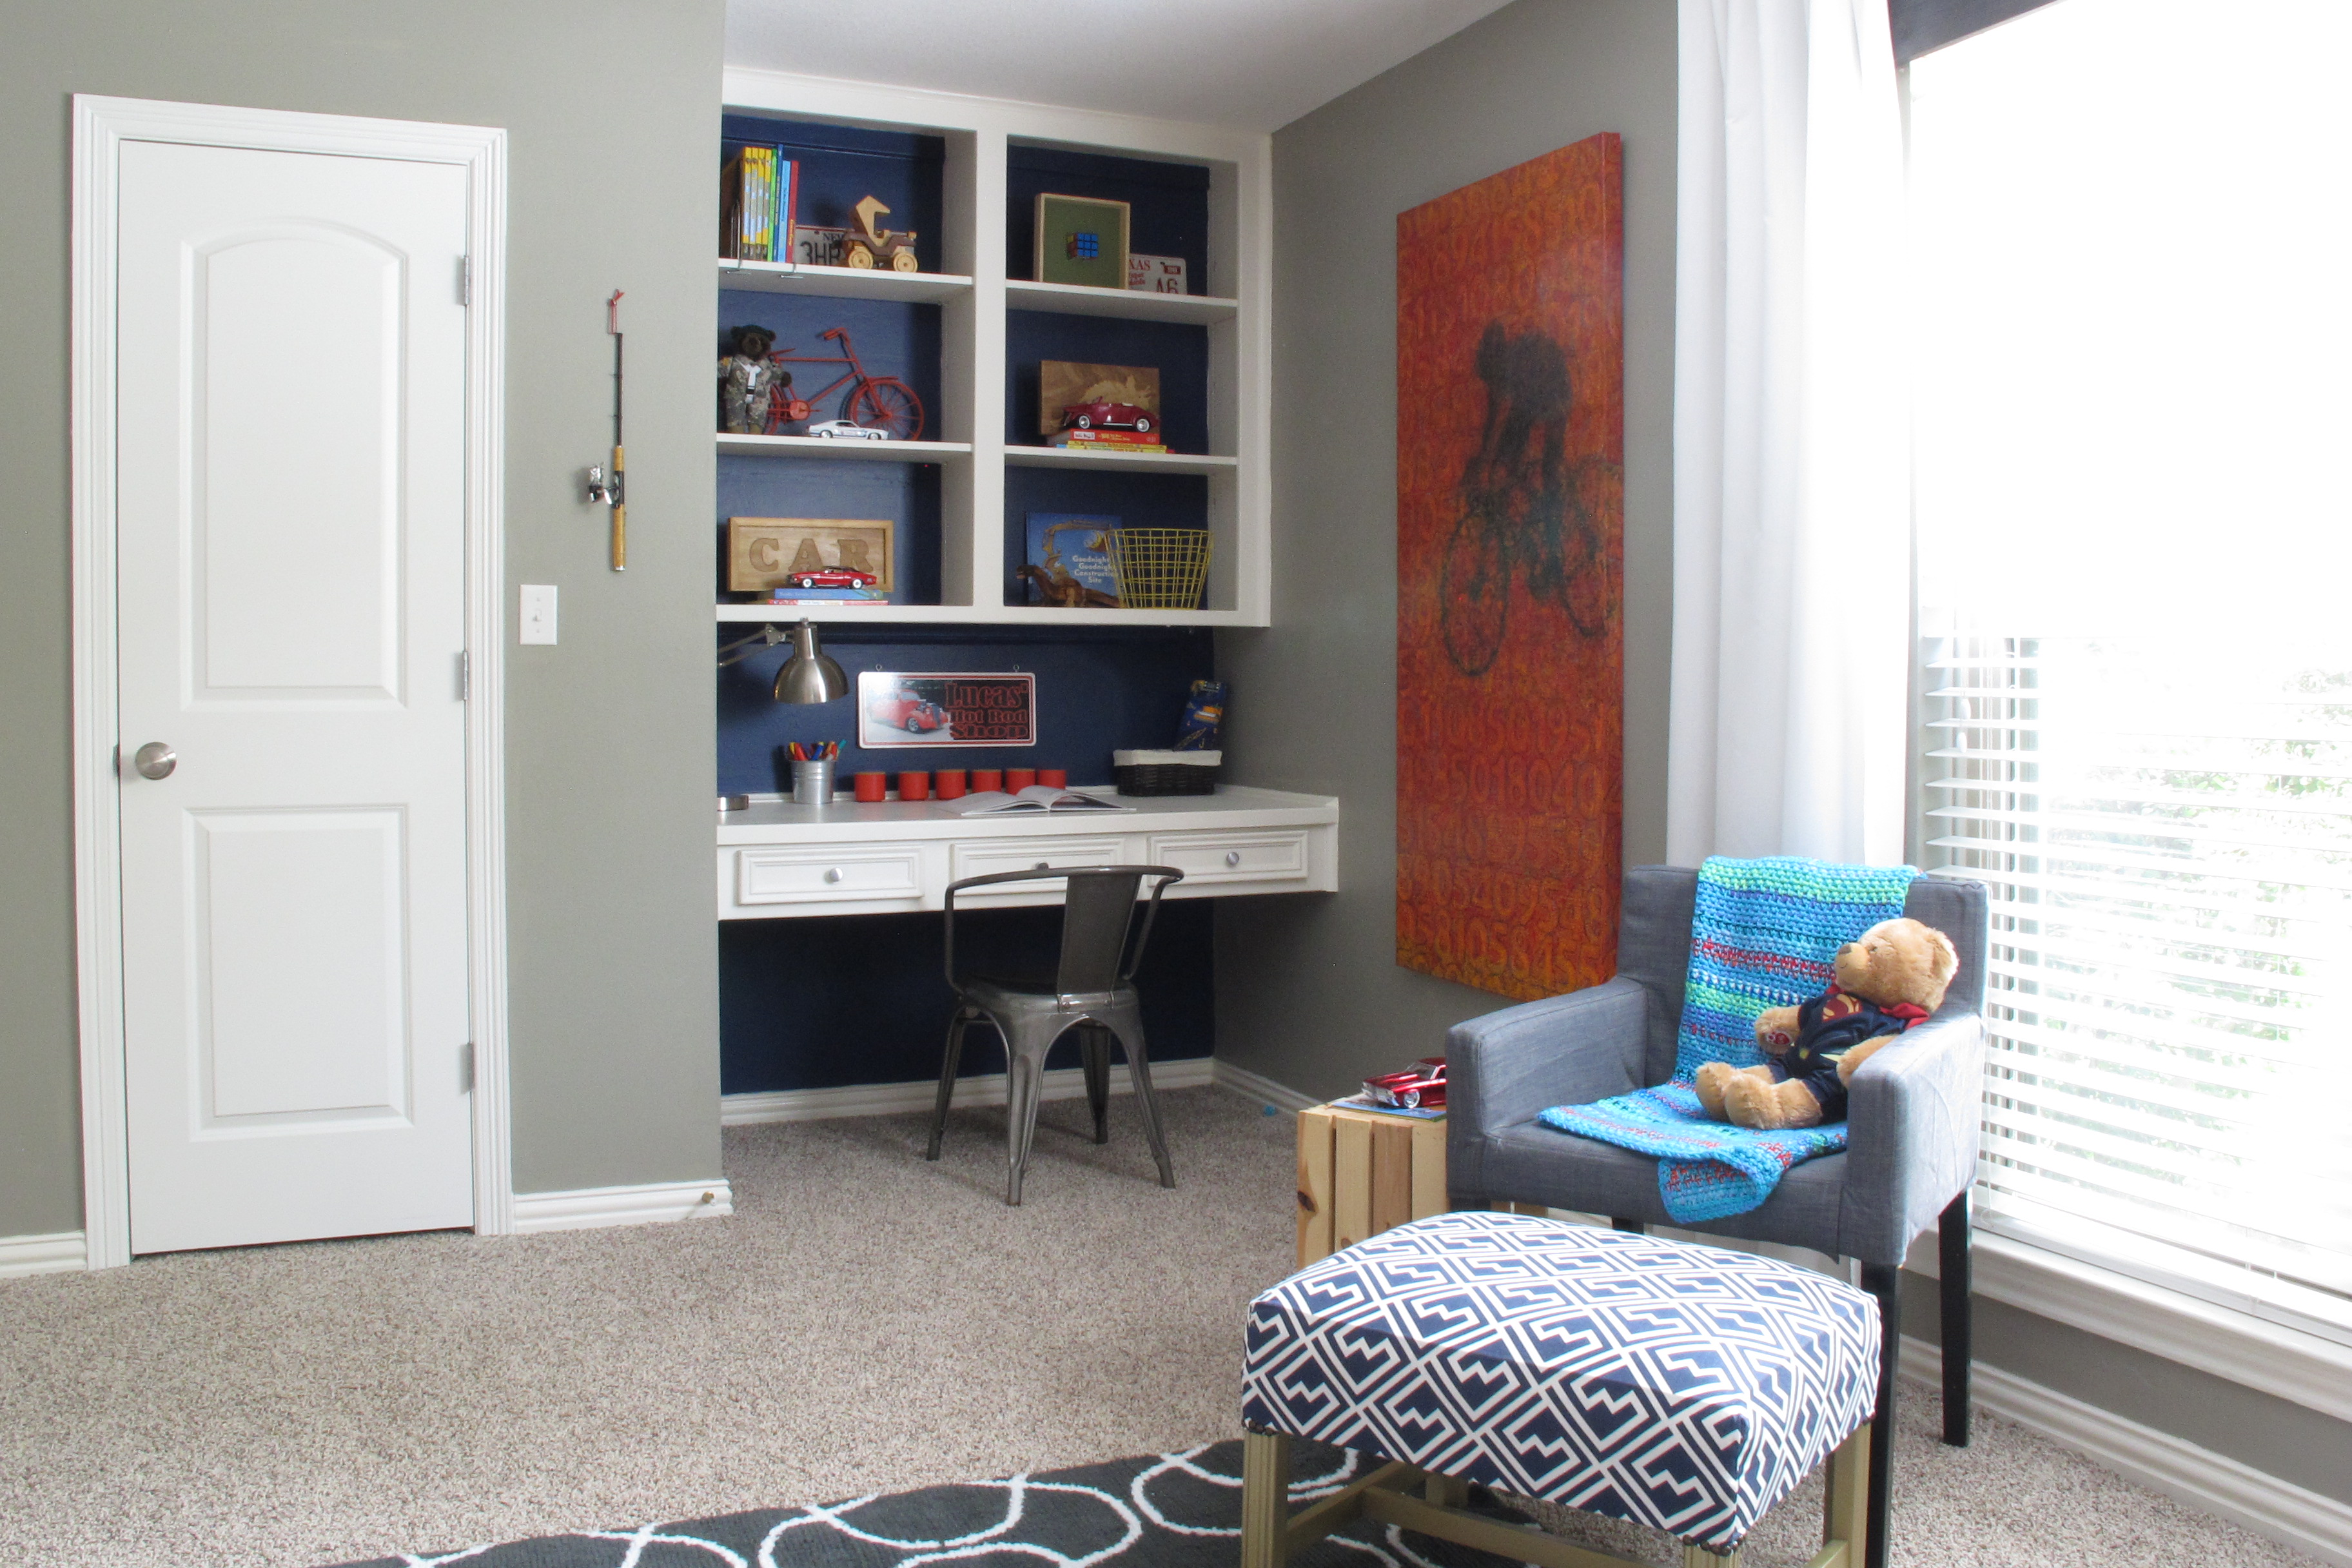
The following pic shows his desk area when we first got possession of the house…

And here it is now after I painted the room and added navy blue paint behind his desk….
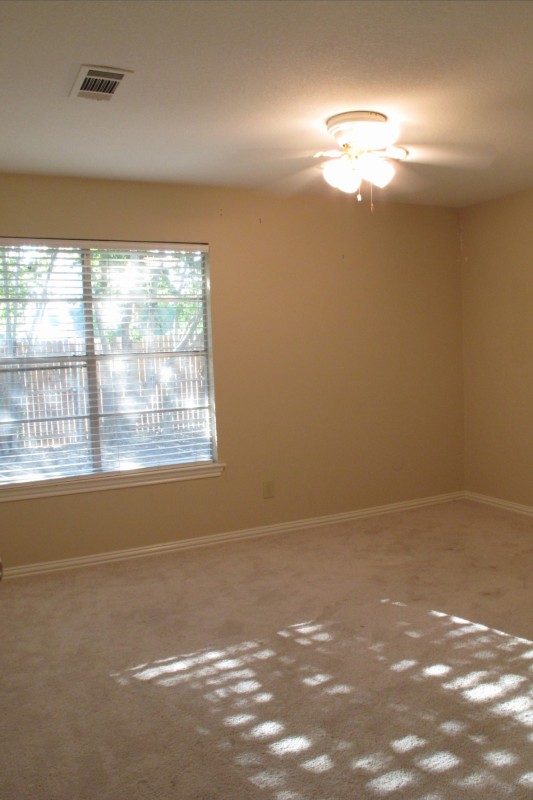
Before: Hang-out room
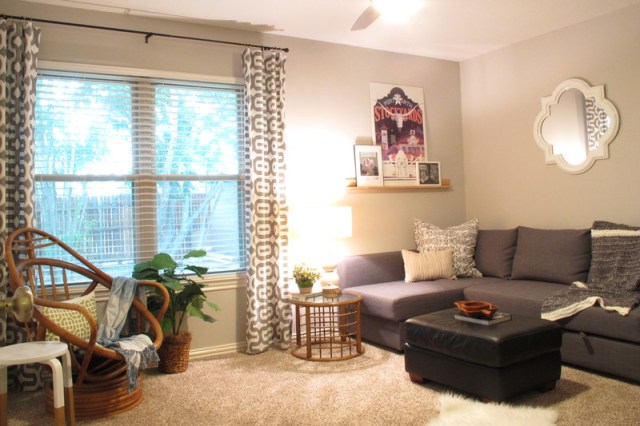
After changing out the carpet and windows, painted the space, finding an AH-mazing egg chair, and completing a mini-makeover on the art front. I still need to tweak the accessories, replace the coffee table eventually, more couch pillows, floor pillows, etc. . And I’m tossing around a few other fun ideas as well. ;)…
Before: Guest bath
Current: I’ve simply accessorized the space as it is. This room will be fully renovated down the line to add storage and rid the space of its black tub, sink, and tile surround.
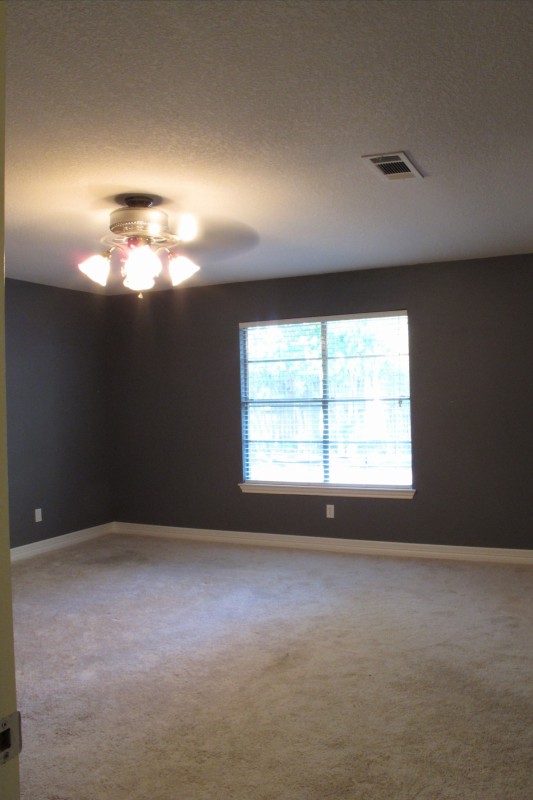
Before: Master bedroom. This was the view from the doorway upon gaining possession of our house…
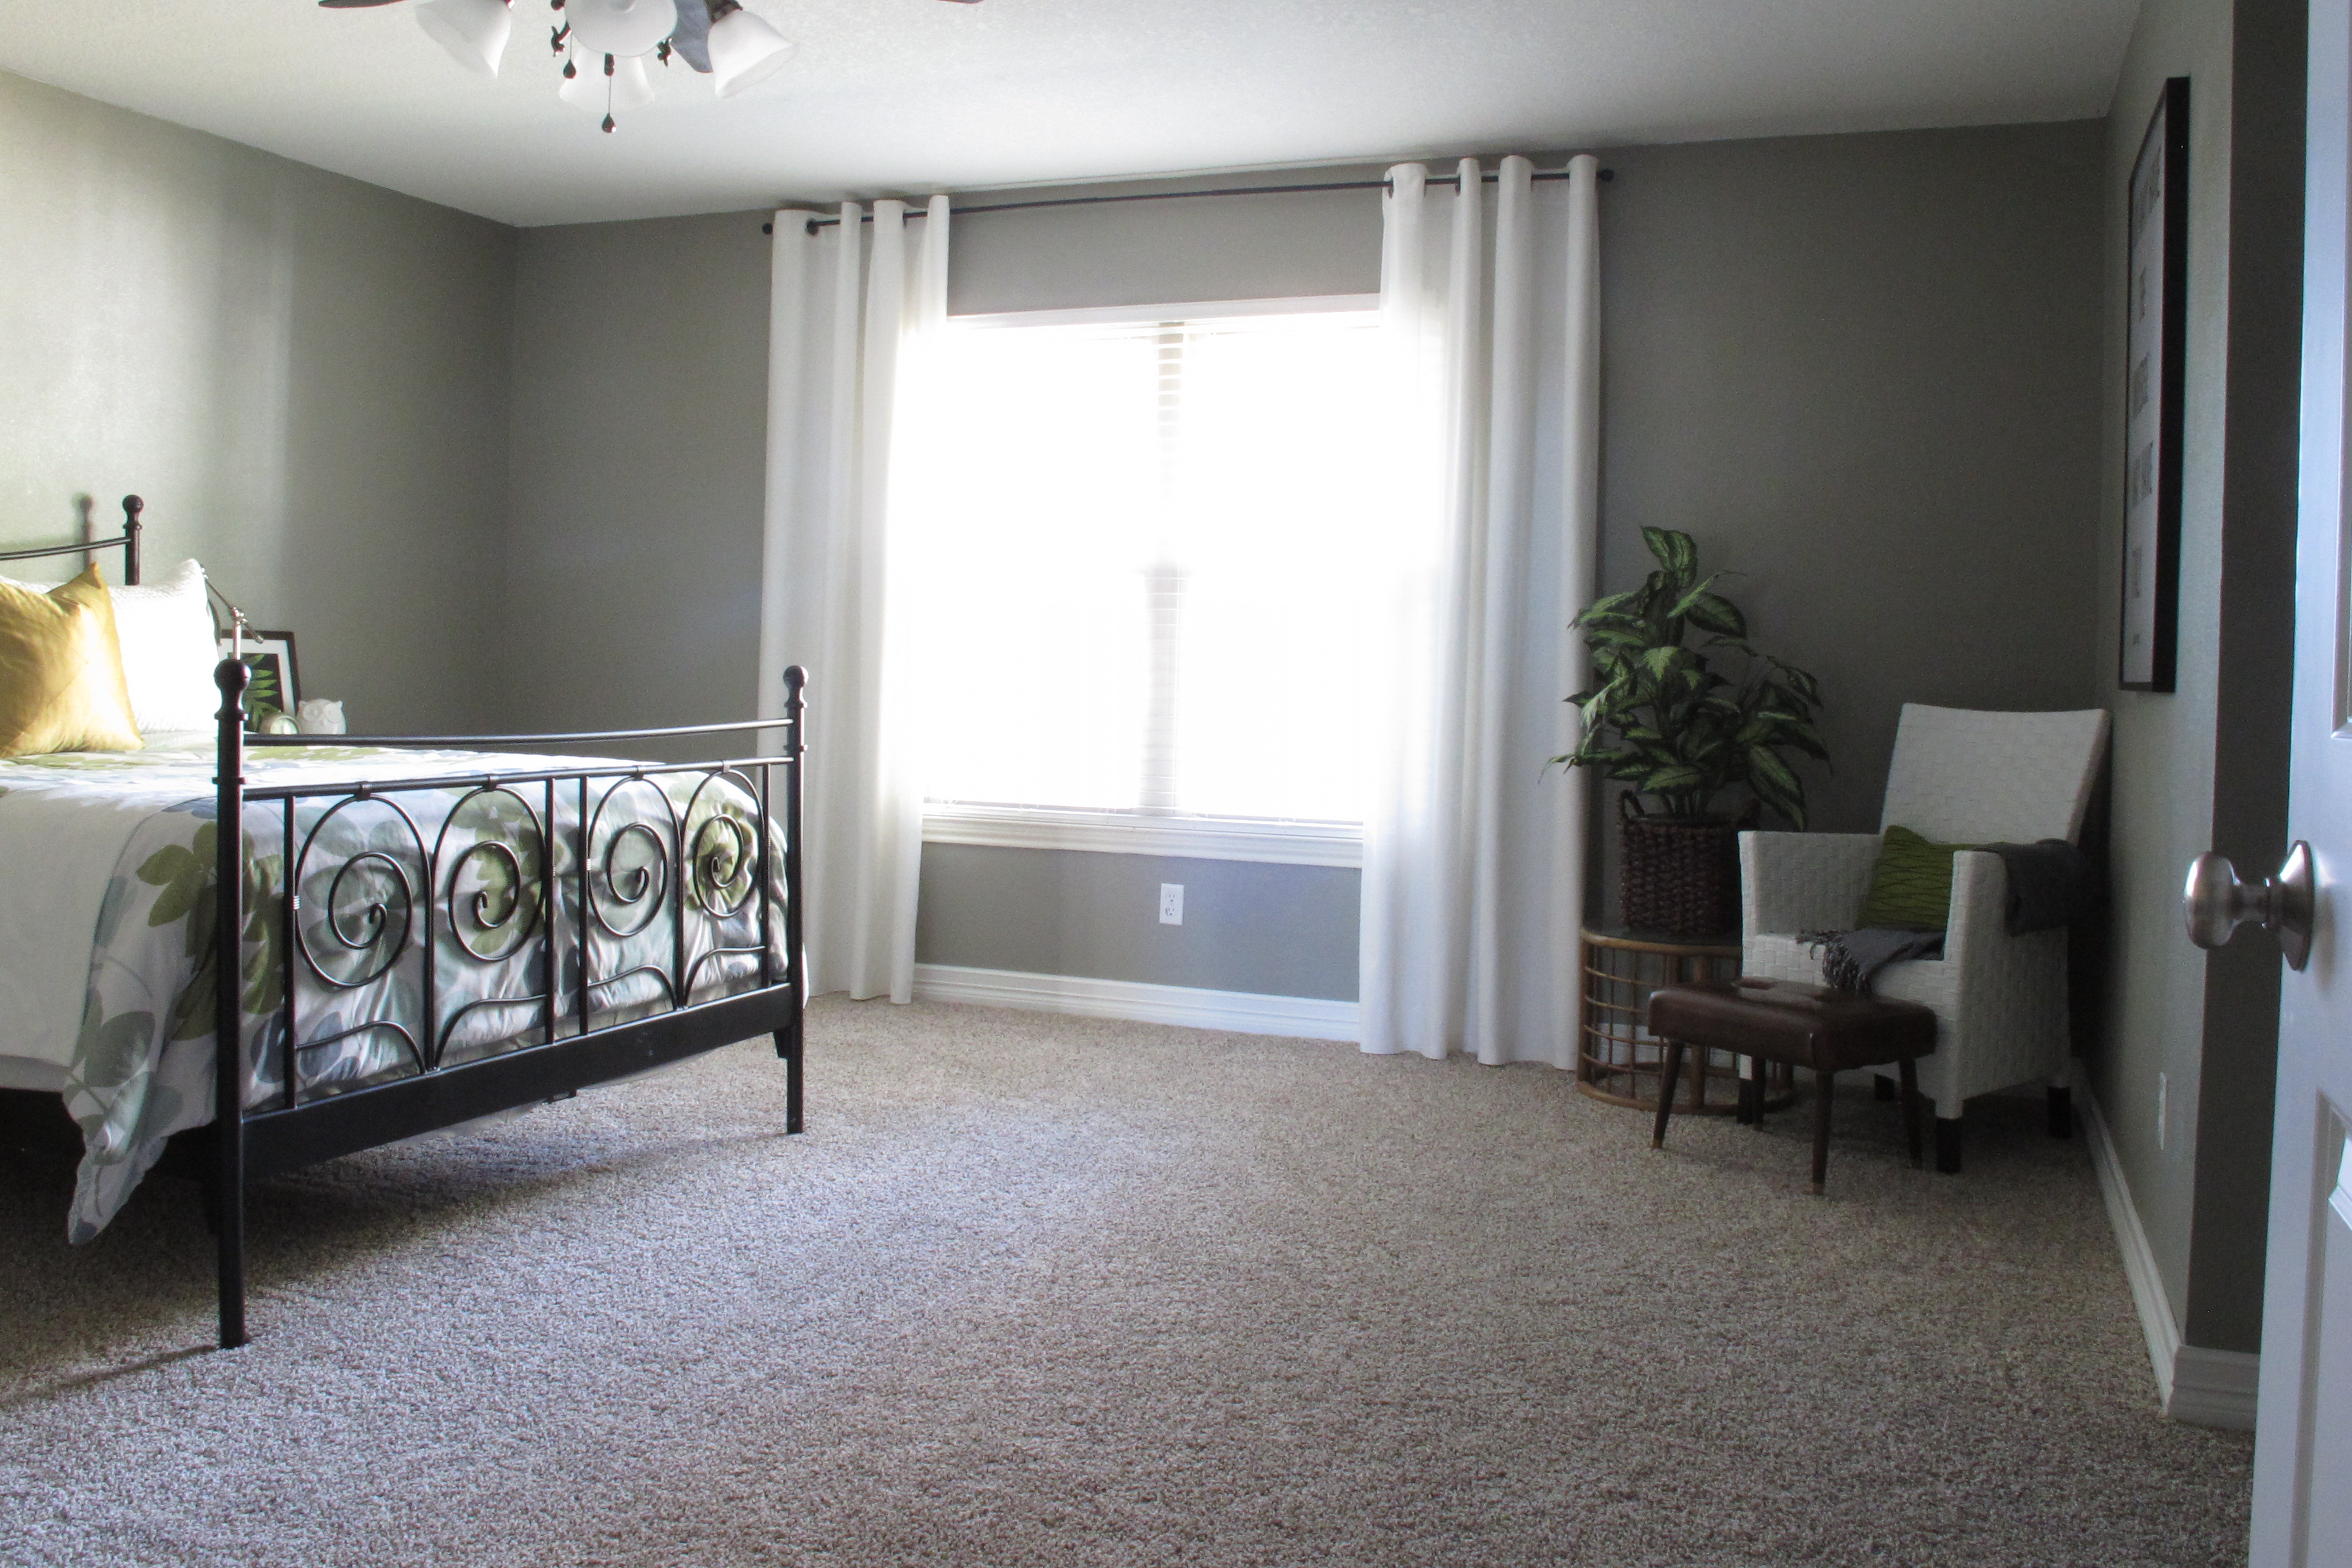
After moving in, we changed out the carpet and windows. I painted the walls a more soothing grey tone and added curtains which were easily hemmed while hanging on the rod. I still need to add art and finishing touches.
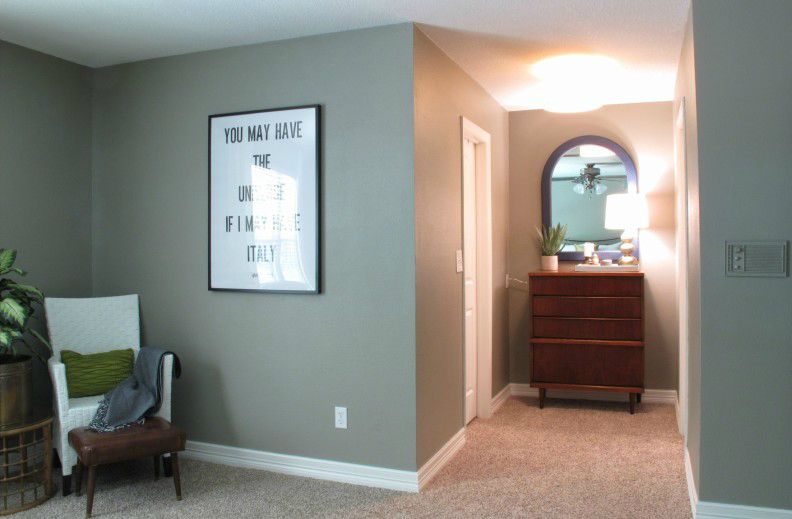
Before: This is the view of our “atrium” area that connects to our master closet and bathroom…
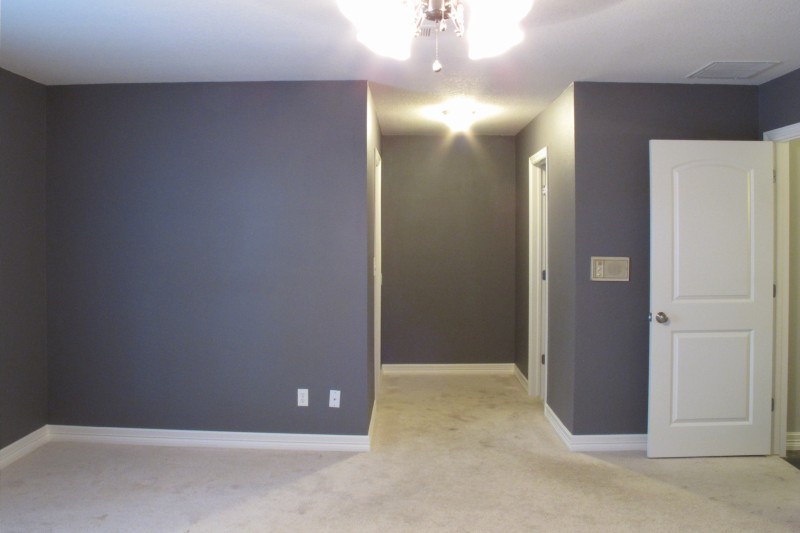
After moving in, we purchased a gorgeous mid-century dresser, which fit nicely in the space. I added a revamped mirror that I found on the side of the road as well as a drum shade to the light fixture. I still want to add graphic fabric on the wall behind the mirror and have that weirdly high outlet moved behind the dresser….
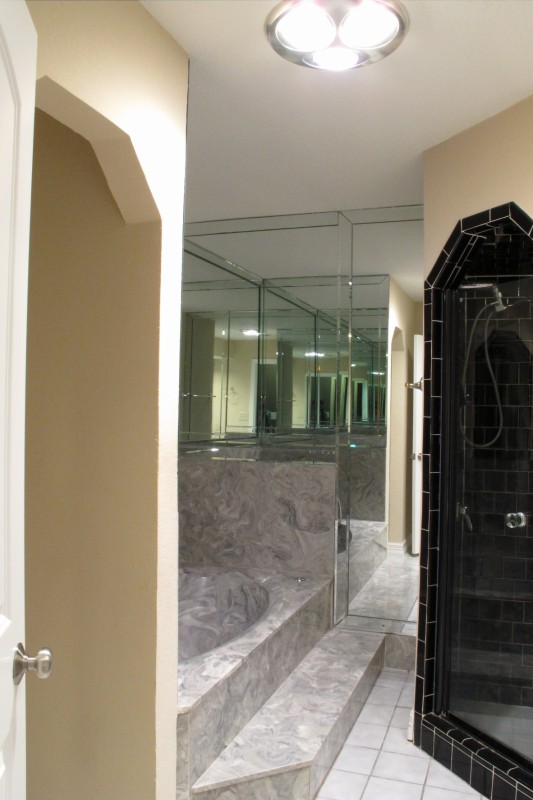
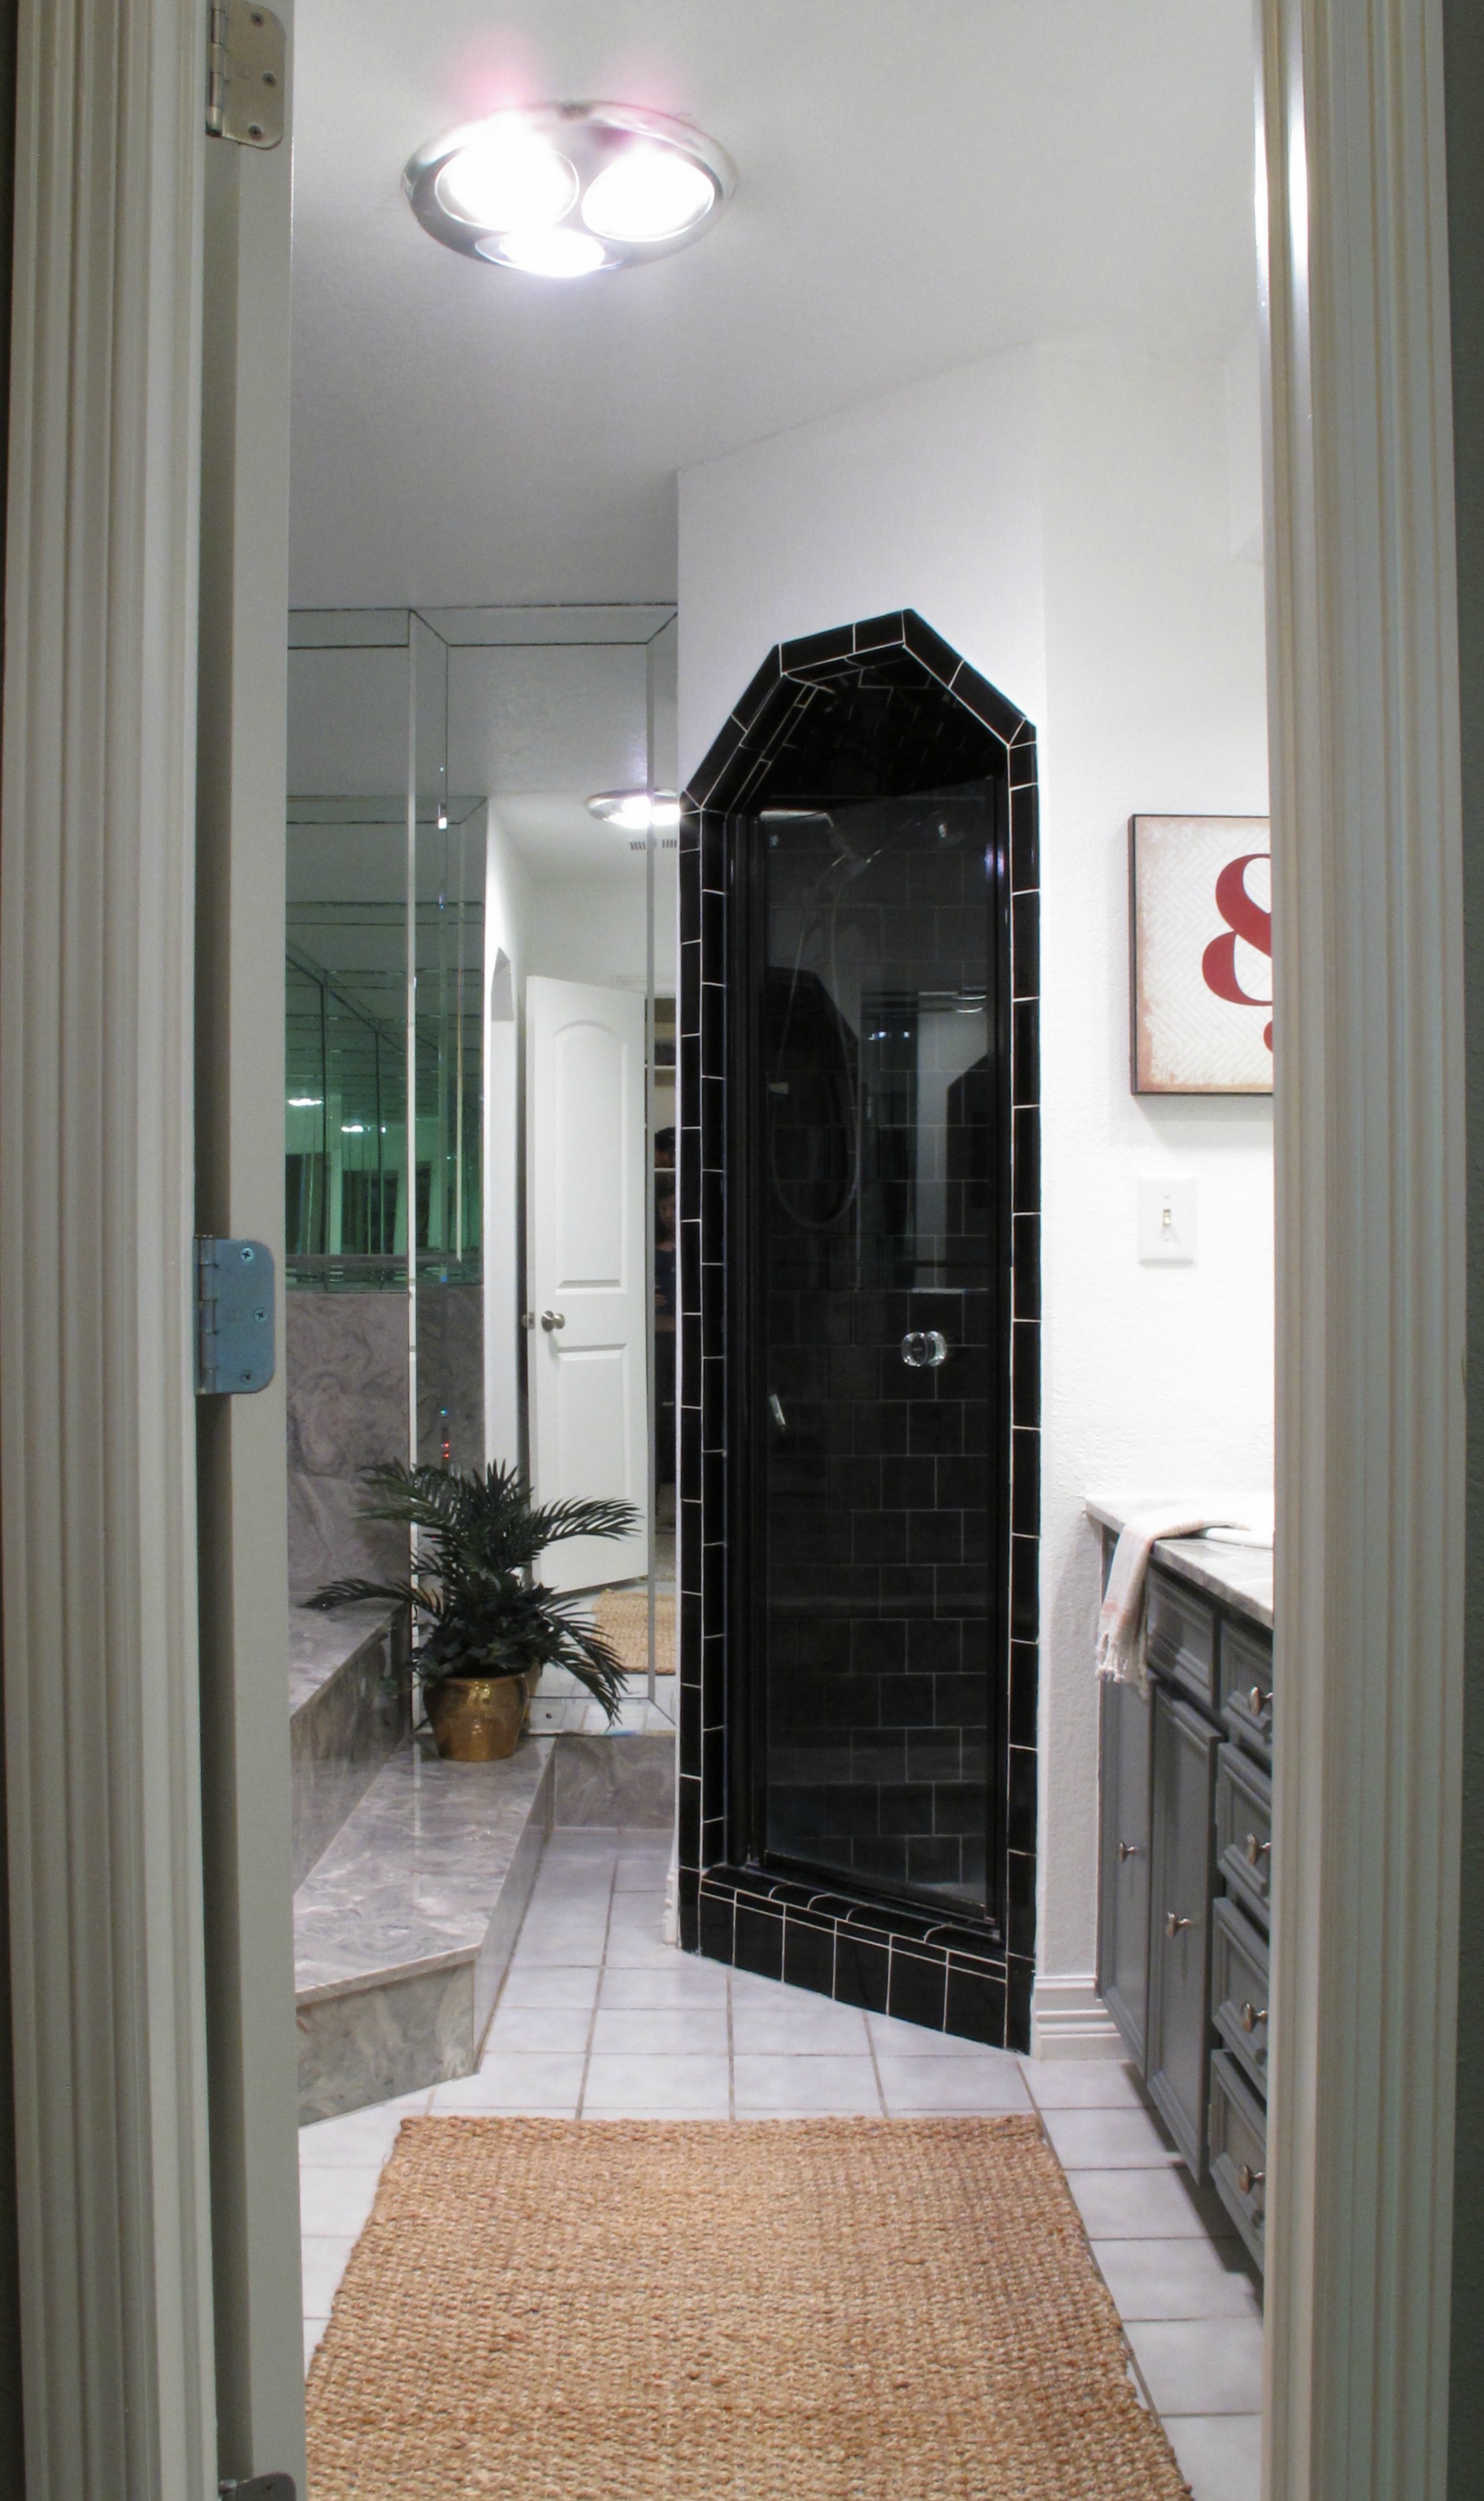
Before: Master Bathroom (#coffinshower)
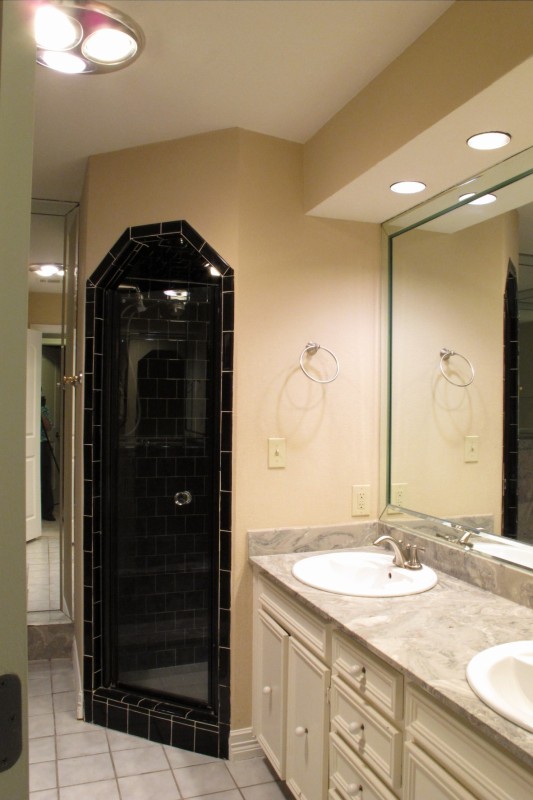
At this point, I’ve painted the room white, painted the cabinets and changed out the hardware. Really… this room needs a full gut renovation complete with a total reconfiguration of the space, a solar tube for natural light, a large glass-enclosed shower with gorgeous tile, maybe a clawfoot tub, new flooring, etc. Eventually this will happen. In the meantime, we’re saving our pennies and planning (and dreaming), but at least now have a space we can sort of live with. 🙂

Another view before:
Now:
The toilet area Before:
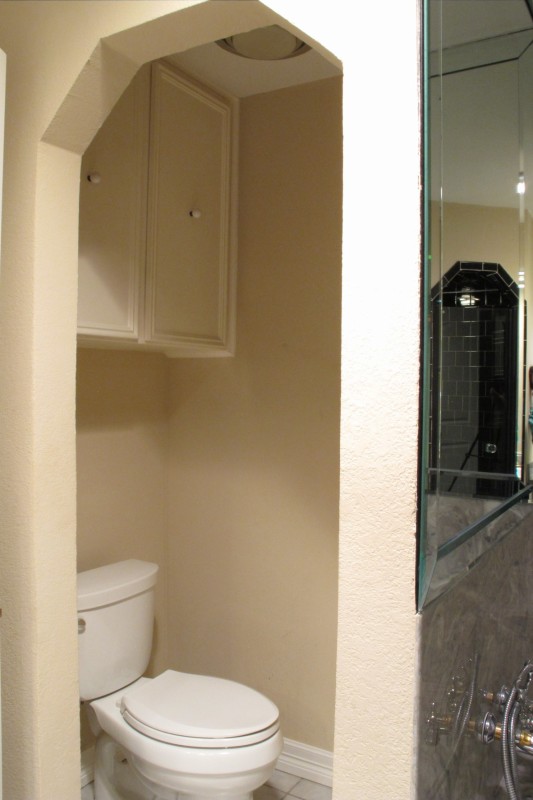
Current:
We decided to leave the doors off when painting the cabinets for some open shelving. This is SO much better. The doors hit the lighting fixture and were cumbersome in the space…

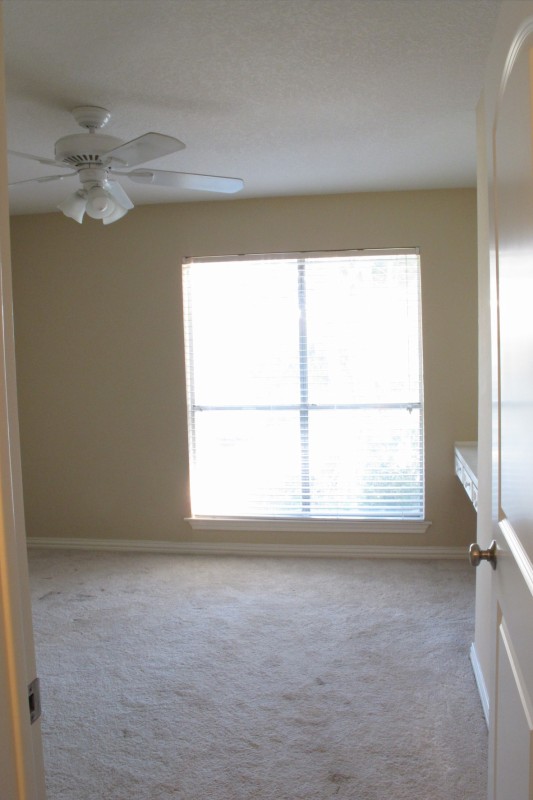
Before: Office/Guestroom
And now, as a home gym…
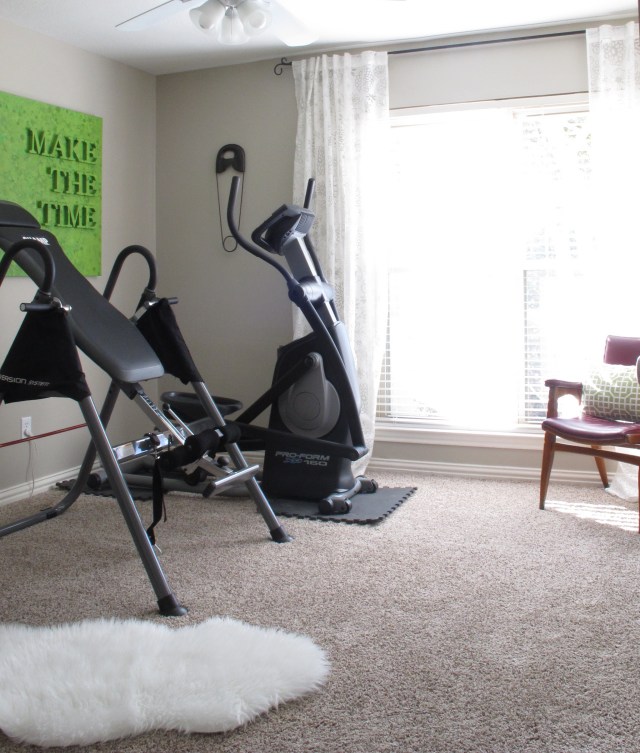
I still need to add bamboo shades over the windows and change out the curtain rod/curtains. I feel like that’d warm it up a ton.
And the other view before…

And after refinishing the desktop and reorganizing a bit…

And finally, THE BACKYARD (check out this post for more details and pictures…. Guys, my husband KNOCKED IT OUTTA THE PARK WITH THIS ONE.)…
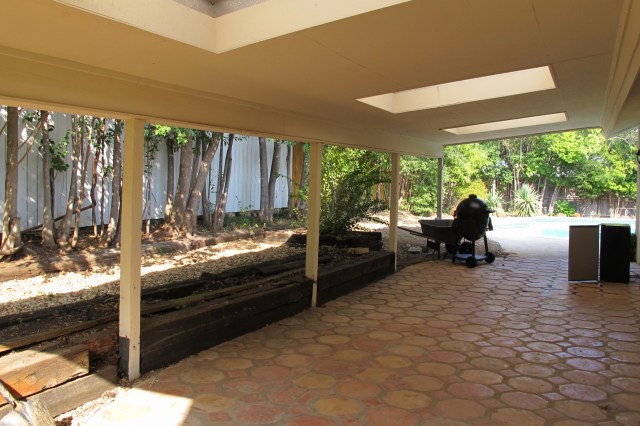
Back Porch: Before..

It was dirty, with spots of mold on the ceiling, and a decrepit railroad tie retaining wall which did nothing more than collect moisture and insects. We started by cleaning up the porch, and I sealed and enriched the terracotta floor, Joey replaced the moldy boards overhead, we had the exterior of the house painted, and Joey installed a new stone retaining wall (along with better drainage and many plants). He also built a stained wood surround for our HVAC unit (the inspiration for which I found on Pinterest).
Now, our patio looks like this….
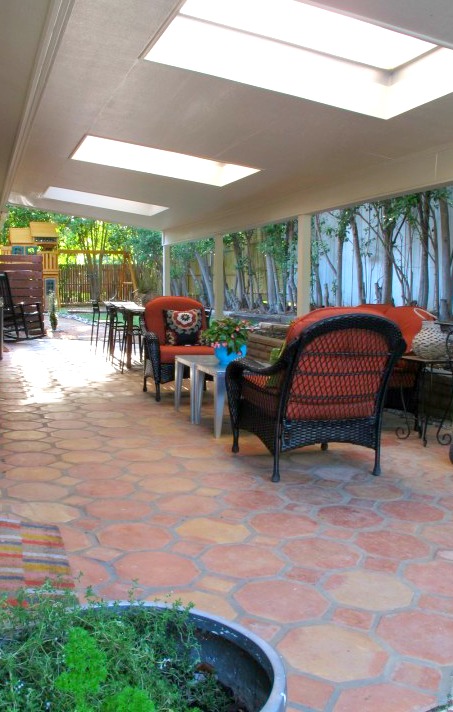
Back Porch: Before (other view)…
And now…

Back yard: Before…

And Now:
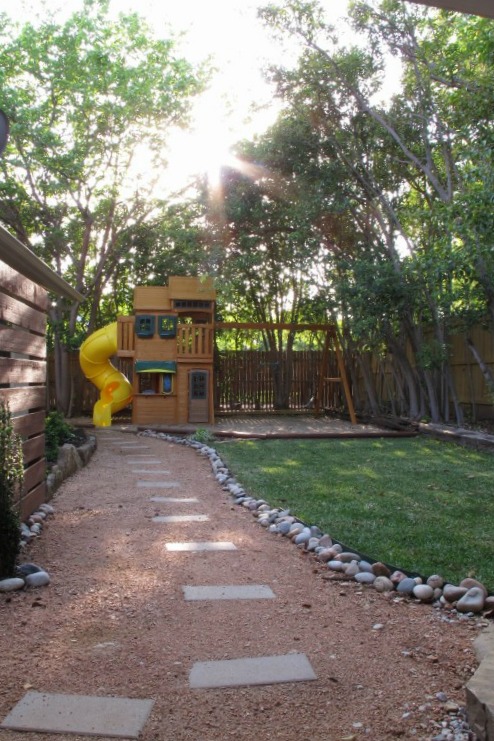
We added a playset (The Clarington Resort from Costco). Joey boxed in the playground with landscaping timbers and used rebar to secure it to the ground. Then, he filled it with pea gravel. He used concrete pavers for the walkway, and surrounded them with decomposed granite. He bordered the walkway with metal border and river rock. Then, he added sod.
Backyard: Before (other view)…

And now:

Things still on the agenda include updating the decking around the pool, removing and replacing the remaining railroad ties along the perimeter of the yard, Making the fence look better, attacking the part of the yard on the side of our house next to the playset, painting the ugly brick surround for the pool filter (which I’ve tactfully cropped out of these pictures. You’re welcome.), boxing in the columns on the covered porch to give them a wood look, plus more. But seriously, I never thought that our backyard would look like this just 6 months after moving in. I’m fully in awe of my hardworking husband.
Needless to say, we’ve still got lots of work in store to make this baby our own. We’re lucky that the previous owners added the gorgeous slate floors, new doors, baseboards and lighting fixtures, but there’s still lots to do. On the list is new paint in the remaining rooms, and of course all kinds of fun decorating projects (woop!). A little farther off will be a new roof, a full-gut of the master bath, and a total kitchen upgrade. Lots of stuff! So, stay tuned… This is about to get fun!!!

Awesome house!
Thanks so much! 🙂
I love how much you’ve done in your new place! We also recently moved into a Brady Bunch house and there are so many elements that are similar to yours. The previous owners were almost original so we did A LOT of updating – of course I have yet to post about any of it. Thanks for some good motivation to show before/after shots even when it’s still a work in progress! Yours looks great 🙂
Thanks so much! You should totally post those pics! It really helps to have those pictures when you feel like you still have an overwhelming amount of work to do (like a total kitchen reno and two bathroom guts for us). It’s nice to be able to see how far you’ve come even if stuff isn’t completely done. 🙂