Making an Easy Placemat Pillow

Howdy guys!  I have a super simple and inexpensive project for you today, the idea of which came from my friend, Emily.  Funny story… she told me how to do this a long time ago, but I’d actually never seen the pillow she’d created herself.   The other day she came over for a playdate with her ridiculously cute son, saw my pillow, and proceeded to tell me that she’d made her pillow using the EXACT same placemat.  Haha!  Great minds think alike! 🙂   Anyways, I’ve seen placemat pillows on other blogs before, but they involved sewing two placemats together.   This version requires much less sewing and can be done by hand (or even with Liquid Stitch if your stuffing isn’t too bulky).

Ya see, after I started the transformation on our Hang-out room….

I knew that I needed to add some additional softness and pattern to the space to warm it up and I decided to start by adding a new pillow.

I’m not sure what it is about buying pillows.  I just don’t do it often unless they’re on sale for about $5. I’m SUCH a cheapskate and can’t for the life of me figure out why even the less expensive pillows are typically still around $25.   I’m not sure why, but that still seems like a lot for two small squares of fabric and some stuffing.  MAYBE I can justify it if the pillow has a lush down insert, but otherwise, I just can’t.

So, the last time I visited my lover Target, I picked up a couple of these placemats for around $4 a pop…

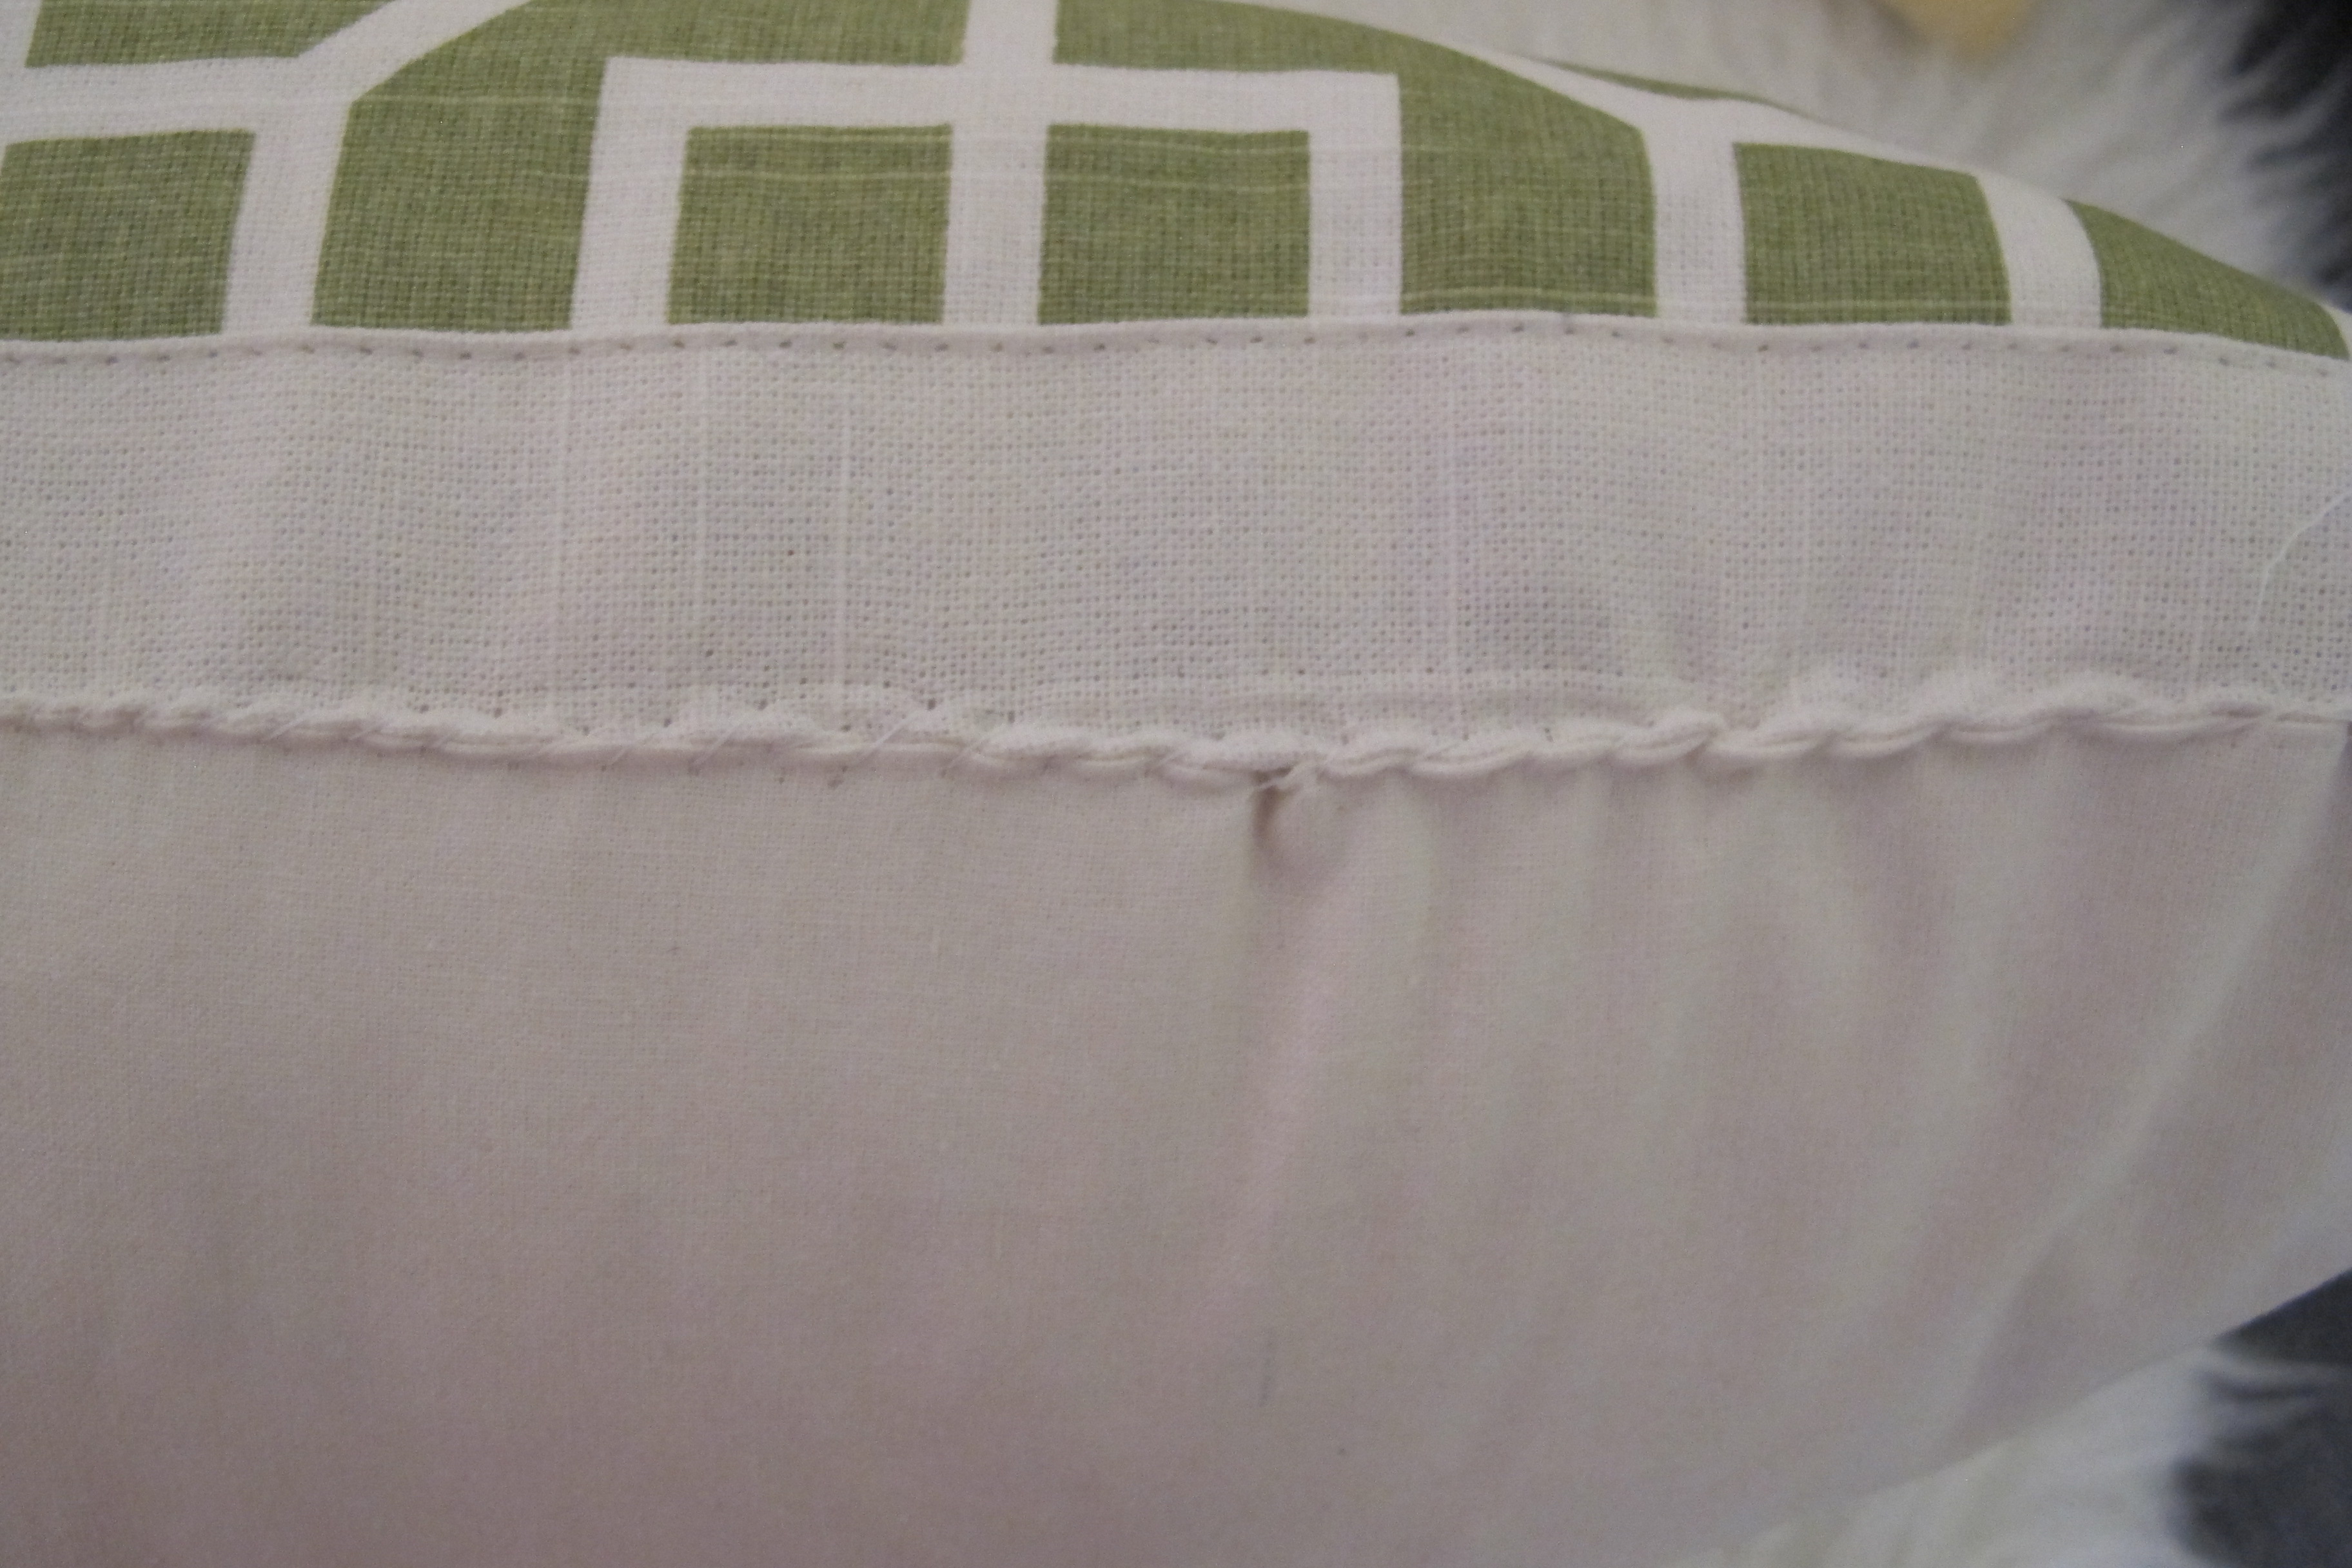
I liked the pattern and color and thought it would be a nice addition to our pillow family.   I began by simply opening the seam between the front and back panels…

Then, I simply stuffed in an old white lumbar pillow that I had on hand that was slightly larger than my placemat. I NEVER get rid of pillows for this reason.  Even if I’m completely over a style of pillow, I keep it so that I can at least reuse the filling if need be.  This has come in handy time and time again.

Once the pillow was in, I pinned up the open seam…

And hand stitched it shut with white thread…

IMG_8272

It’s not perfect, but it works.   Now feast your eyes on our new pretty lady…

Ain’t she a beaut??  This project only cost me the price of my $4 pillow case and about 10 minutes of my time.   Yup.  This is one that I’ll be doing again.   For.Sure.

So, have any of y’all ever created a placemat pillow?  Any other tips or tricks you’d like to offer up?

TDC Before and After

Easy Ninja Turtle Cupcakes

So, our little man turned 4 this week!  And when it came to his cupcakes I wanted to do something a little special.  Yup!  You guessed it!!  NINJA TURTLES!!  Thisismylifelately.

Now, I must warn you.   I couldn’t find my camera as I was making these.  Go me, right?  Lose your appendage, why don’t ya?   So, this post is riddled with some not-so-great shots from my phone (pleasedontleaveme).  Luckily, you still get the general idea of how to decorate these little guys, though.  (P.S.  I found my camera as I was cleaning the kitchen afterwards.  It was on the counter.)  :/

Anyways, as I was figuring out how I wanted to devise my cupcakes, I trolled Pinterest and the internet for ideas.  Unfortunately, many of the ninja turtle cupcakes I found looked way too complicated for my taste ability. I mean, super cute, but way beyond my skill-set and time constraints.  I’m talking detailed fondant with various layers, molded turtle heads, etc.  So, my goal was a cute and simple ninja turtle cupcake that was quick to create.

With that in mind, I went to Walmart and spotted these eyeballs in the cake decorating section….

/home/wpcom/public_html/wp-content/blogs.dir/b1b/57380719/files/2014/12/img_2577.jpg

And the cables connected.

I purchased the following ingredients…

/home/wpcom/public_html/wp-content/blogs.dir/b1b/57380719/files/2014/12/img_2578.jpg

And got going.    First, I simply baked vanilla and chocolate cupcakes from a box (They were the Betty Crocker Super Moist variety).   And, well, if you’re friends with me on Facebook you already know this.  For those who aren’t, allow me to share…

 IMG_2640

Yeah.   Not my finest baking moment. Heehee!   At least my cupcakes resembled frogs, though.  Anyhoo, I couldn’t taste the cupcakes myself since they had gluten (I have celiac), so when Joey got home, I fed him about three of them to make sure that they were palatable.  Luckily, he said that not only were they miraculously cooked through, they were actually really moist and delicious.

And I rejoiced.

So, with that bullet dodged, I began the frosting process by mixing this green coloring gel into my fluffy white frosting to get a rich green tone….

/home/wpcom/public_html/wp-content/blogs.dir/b1b/57380719/files/2014/12/img_2580.jpg

I really prefer the coloring gels for frosting because they allow you to obtain a rich, bright color without watering down the frosting like liquid food dyes can.   I piped the frosting onto the cupcakes using an extra large round tip so that the frosting was relatively smooth.   I used the same simple piping method that I described in detail in this post from last year.

Once the frosting was piped on, I attached a flat piping tip directly to the tubes of colored frosting that I’d purchased…

/home/wpcom/public_html/wp-content/blogs.dir/b1b/57380719/files/2014/12/img_2585.jpg

You guys.  I’m so excited that I found these!!  They make decorating a breeze since I no longer have to mix five different colors to acheive my desired effect.  And since they’re in a capped tube, you can store and reuse them over and over.  Woot!

I wanted to to use these to create my ninja turtle masks by simply adding one stripe across each cupcake.  I practiced first on a paper towel to perfect my technique as well as rid the tube of air bubbles…

/home/wpcom/public_html/wp-content/blogs.dir/b1b/57380719/files/2014/12/img_2583.jpg

Then, I applied my stripes to the cupcakes and added my candy eyeballs….

/home/wpcom/public_html/wp-content/blogs.dir/b1b/57380719/files/2014/12/img_2584.jpg

Heehee!   He makes me smile.  I repeated the process with all the different colors so that all the ninja turtles were represented…

IMG_2586

And Lucas loved them….

/home/wpcom/public_html/wp-content/blogs.dir/b1b/57380719/files/2014/12/img_2611.jpg

And I mean, REALLY loved them….

IMG_2622-0

Check out the determination on his face!!  He was taking that cupcake DOWN like a BOSS.   Sorry cupcake, your life-saving pleas mean nothing here.  You do not stand a chance.  😉

So, anyways, these were super easy to make (I think decorating them all took me maybe 15-20 minutes, tops, from start to finish) and I’d gladly make them again.   So, with that, we wish our baby big boy a happy birthday and a brilliant 4th year.  🙂

TDC Before and After