Such(culent) fun

Joey: “Wait, that plant’s REAL??”

Me: “Sure is.”

Joey: “Why is is still alive???”

That’s right, folks.   This conversation happened the other day.   Much to the amazement of… well… everyone, Pete is still healthy, alive, and tap-dancing after several months under my care.  Bona fide miracle if you ask me.  Remember Pete??   This spunky guy…

IMG_1492

I originally purchased him to replace the sickly palm that I pretty much killed.    And I was scared.  Scared for Pete’s life.   But fortunately, the Home Depot lady was right when she said that he’d be a good catch.   He definitely has been, for sure.

What’s my point?  Well, Pete’s given me confidence.  Confidence to take more living beings into my charge.   Enter succulents…

IMG_3487

…purchased at Home Depot for just under three bucks a piece.     But, wait.. I’m getting ahead of myself.  You see, it all started with these guys…

IMG_3475

Four galvanized metal outlet boxes.  I found them at Goodwill for 50 cents a piece.   And they reminded me of a restaurant called Bolsa in the Bishop Arts district in Dallas.   They used them as succulent planters for their centerpieces.   My friend Ashley mentioned a while back that she’d followed their lead and DIYed some of the same.  So, I decided to copy both of them and make my own, preferably to display on our sofa table.  Remember how I mentioned that I needed to redecorate this area a smidge to allow our back door to shine?  I thought these would be perfect.  Industrial with a hint of nature and unobtrusive enough to play second fiddle to our newly painted door.

I remember Ashley mentioning that she needed to caulk the cracks in the metal boxes to keep the soil in, so I busted out some silicone caulk that I had on hand and did just that.  I covered the bottom holes with duck tape (mainly to give the caulk a supportive surface to stick to for the larger holes)…

IMG_3479

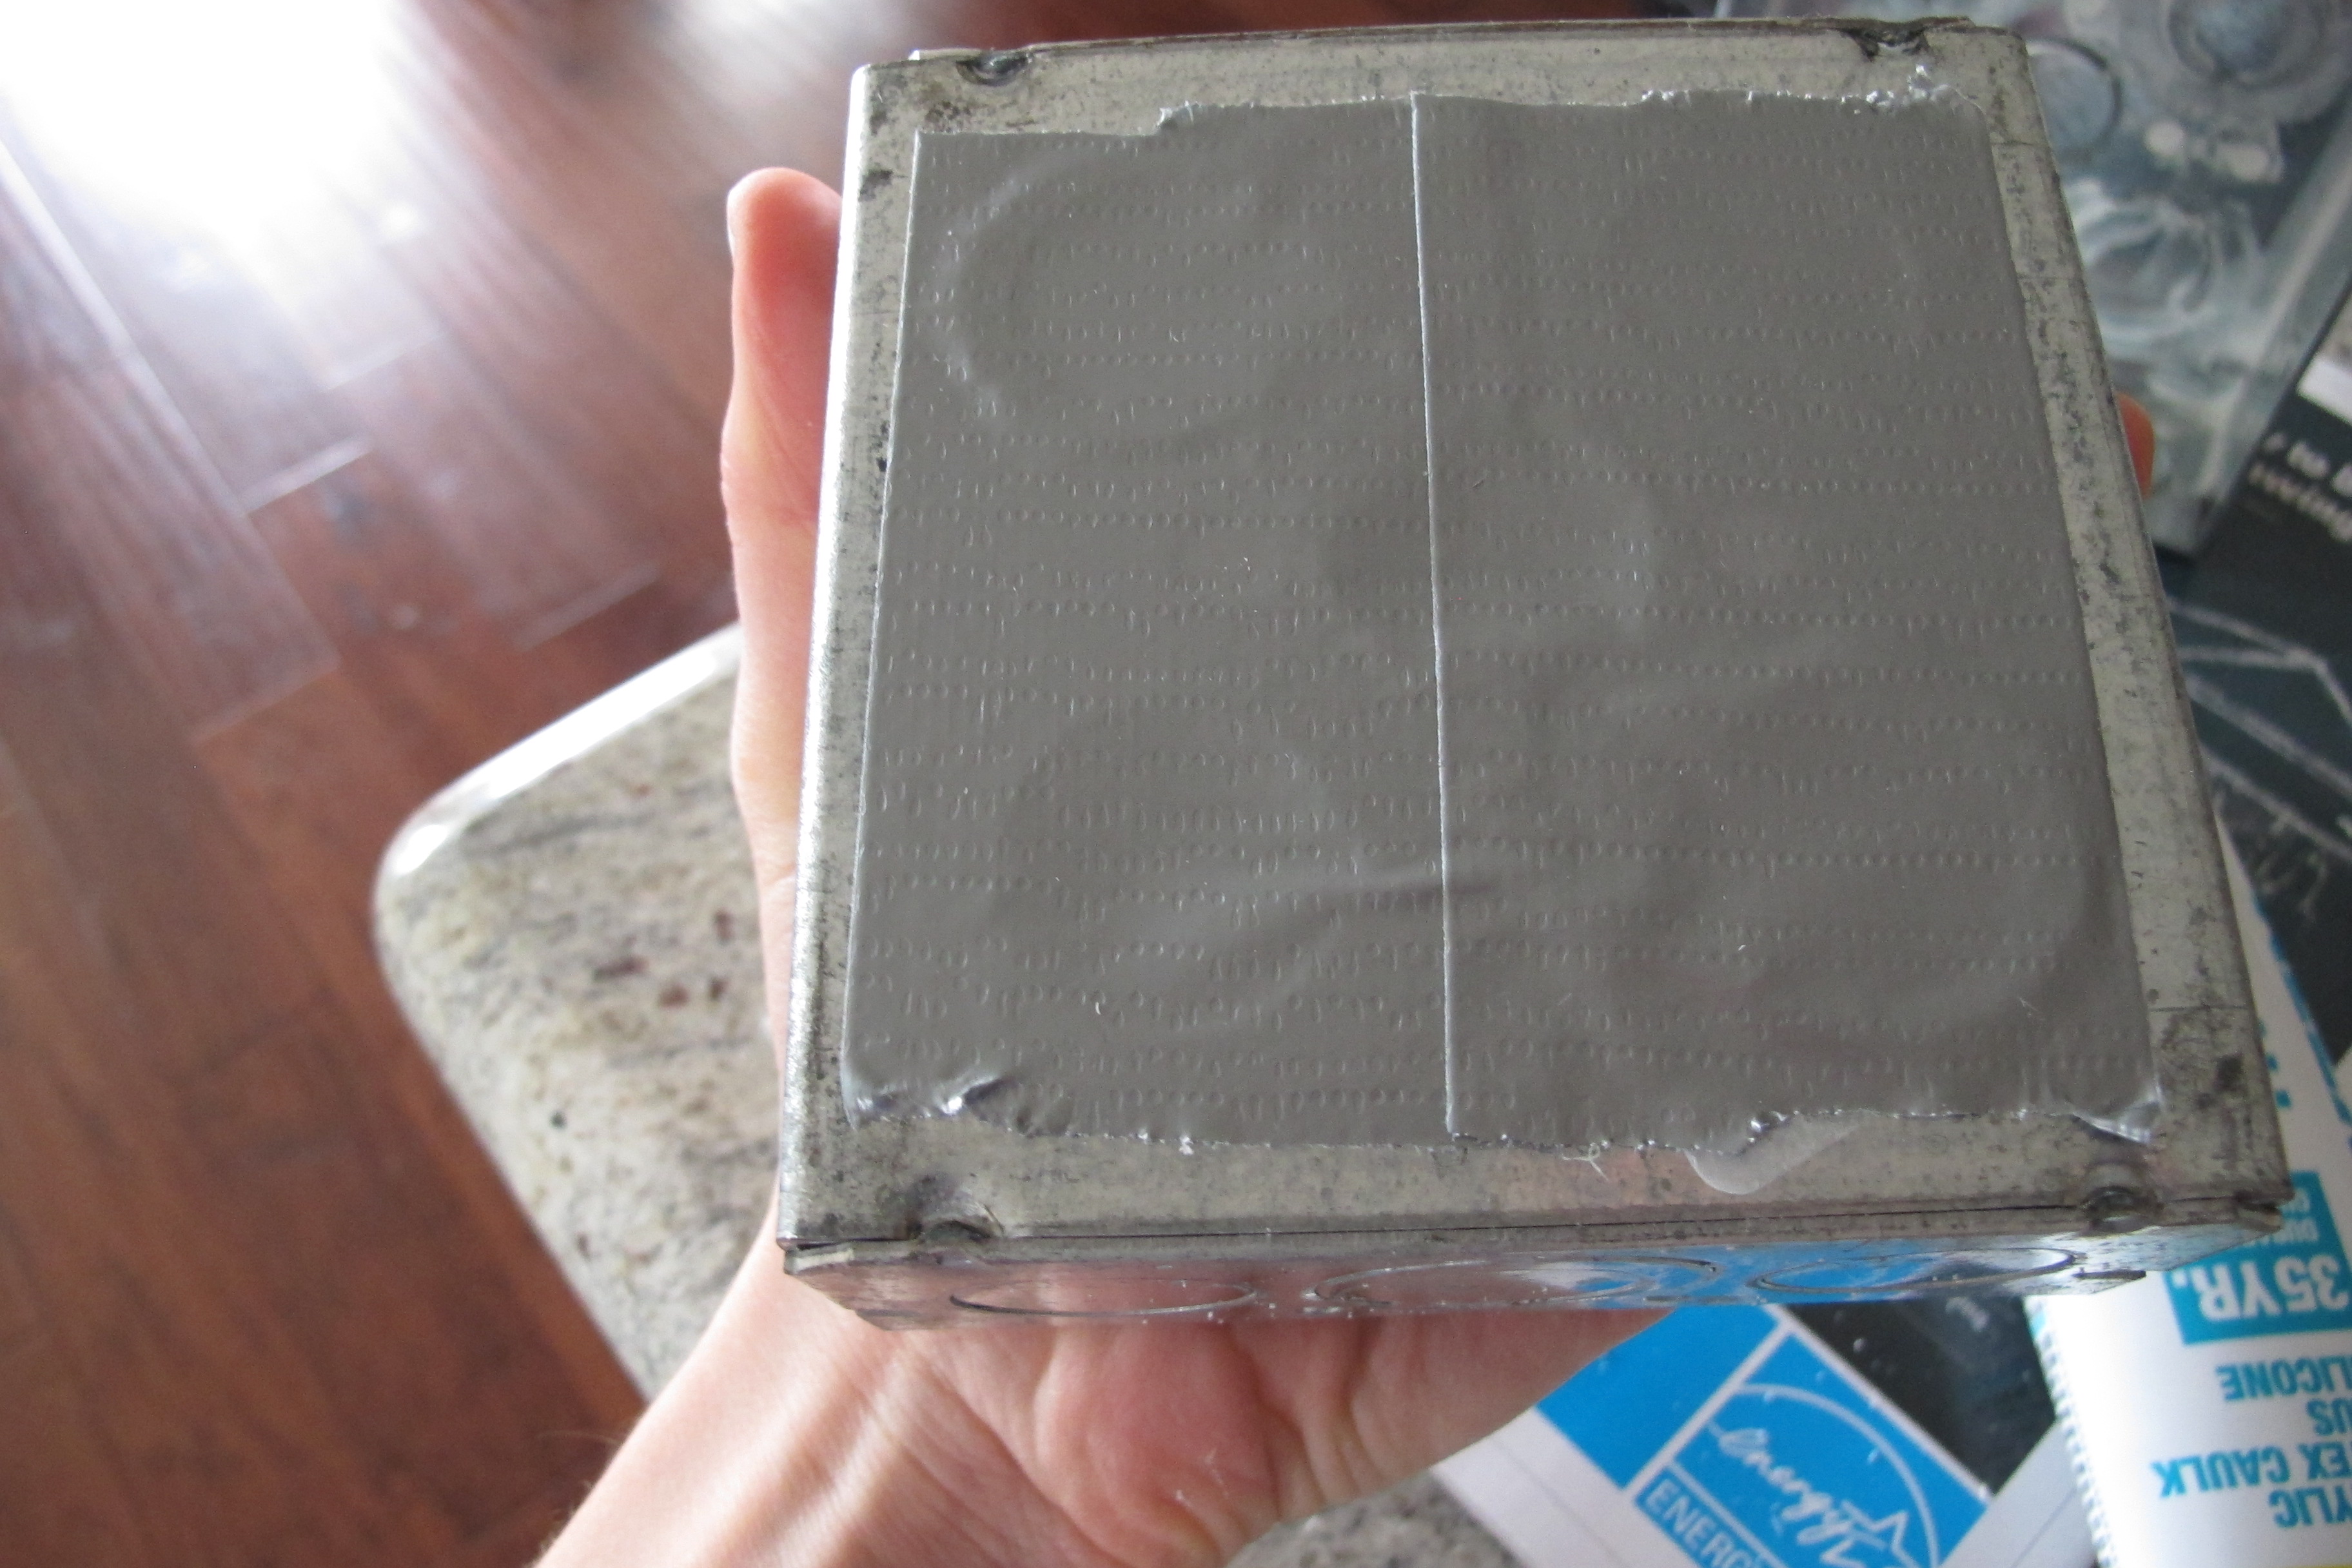
And I caulked all of the nooks and crannies…

IMG_3478IMG_3481

Next, I did some research on the proper planting method for succulents.  They recommended mixing the soil with gravel, so I stole a large handful of pea gravel from Lucas’s rock box and blended it with my soil.

IMG_3490

Does my hand look weird here or is it just me?  And yes, that is tile-paint on my fingernail.  It loves me.  It refuses to leave.  Anyways, I planted my succulents in the metal boxes.  And here they are now.  Succulents, who are you wearing??

IMG_3504

Well, Ryan, I’m wearing metal by Goodwill.  And I make this stuff look hot!  (Can you tell I’m watching the SAG awards while writing this post? And maybe drinking a glass of vino (ortwo)?)   Anyways, here are a few more red-carpet moments…

  IMG_3491  IMG_3492    IMG_3503 IMG_3511 

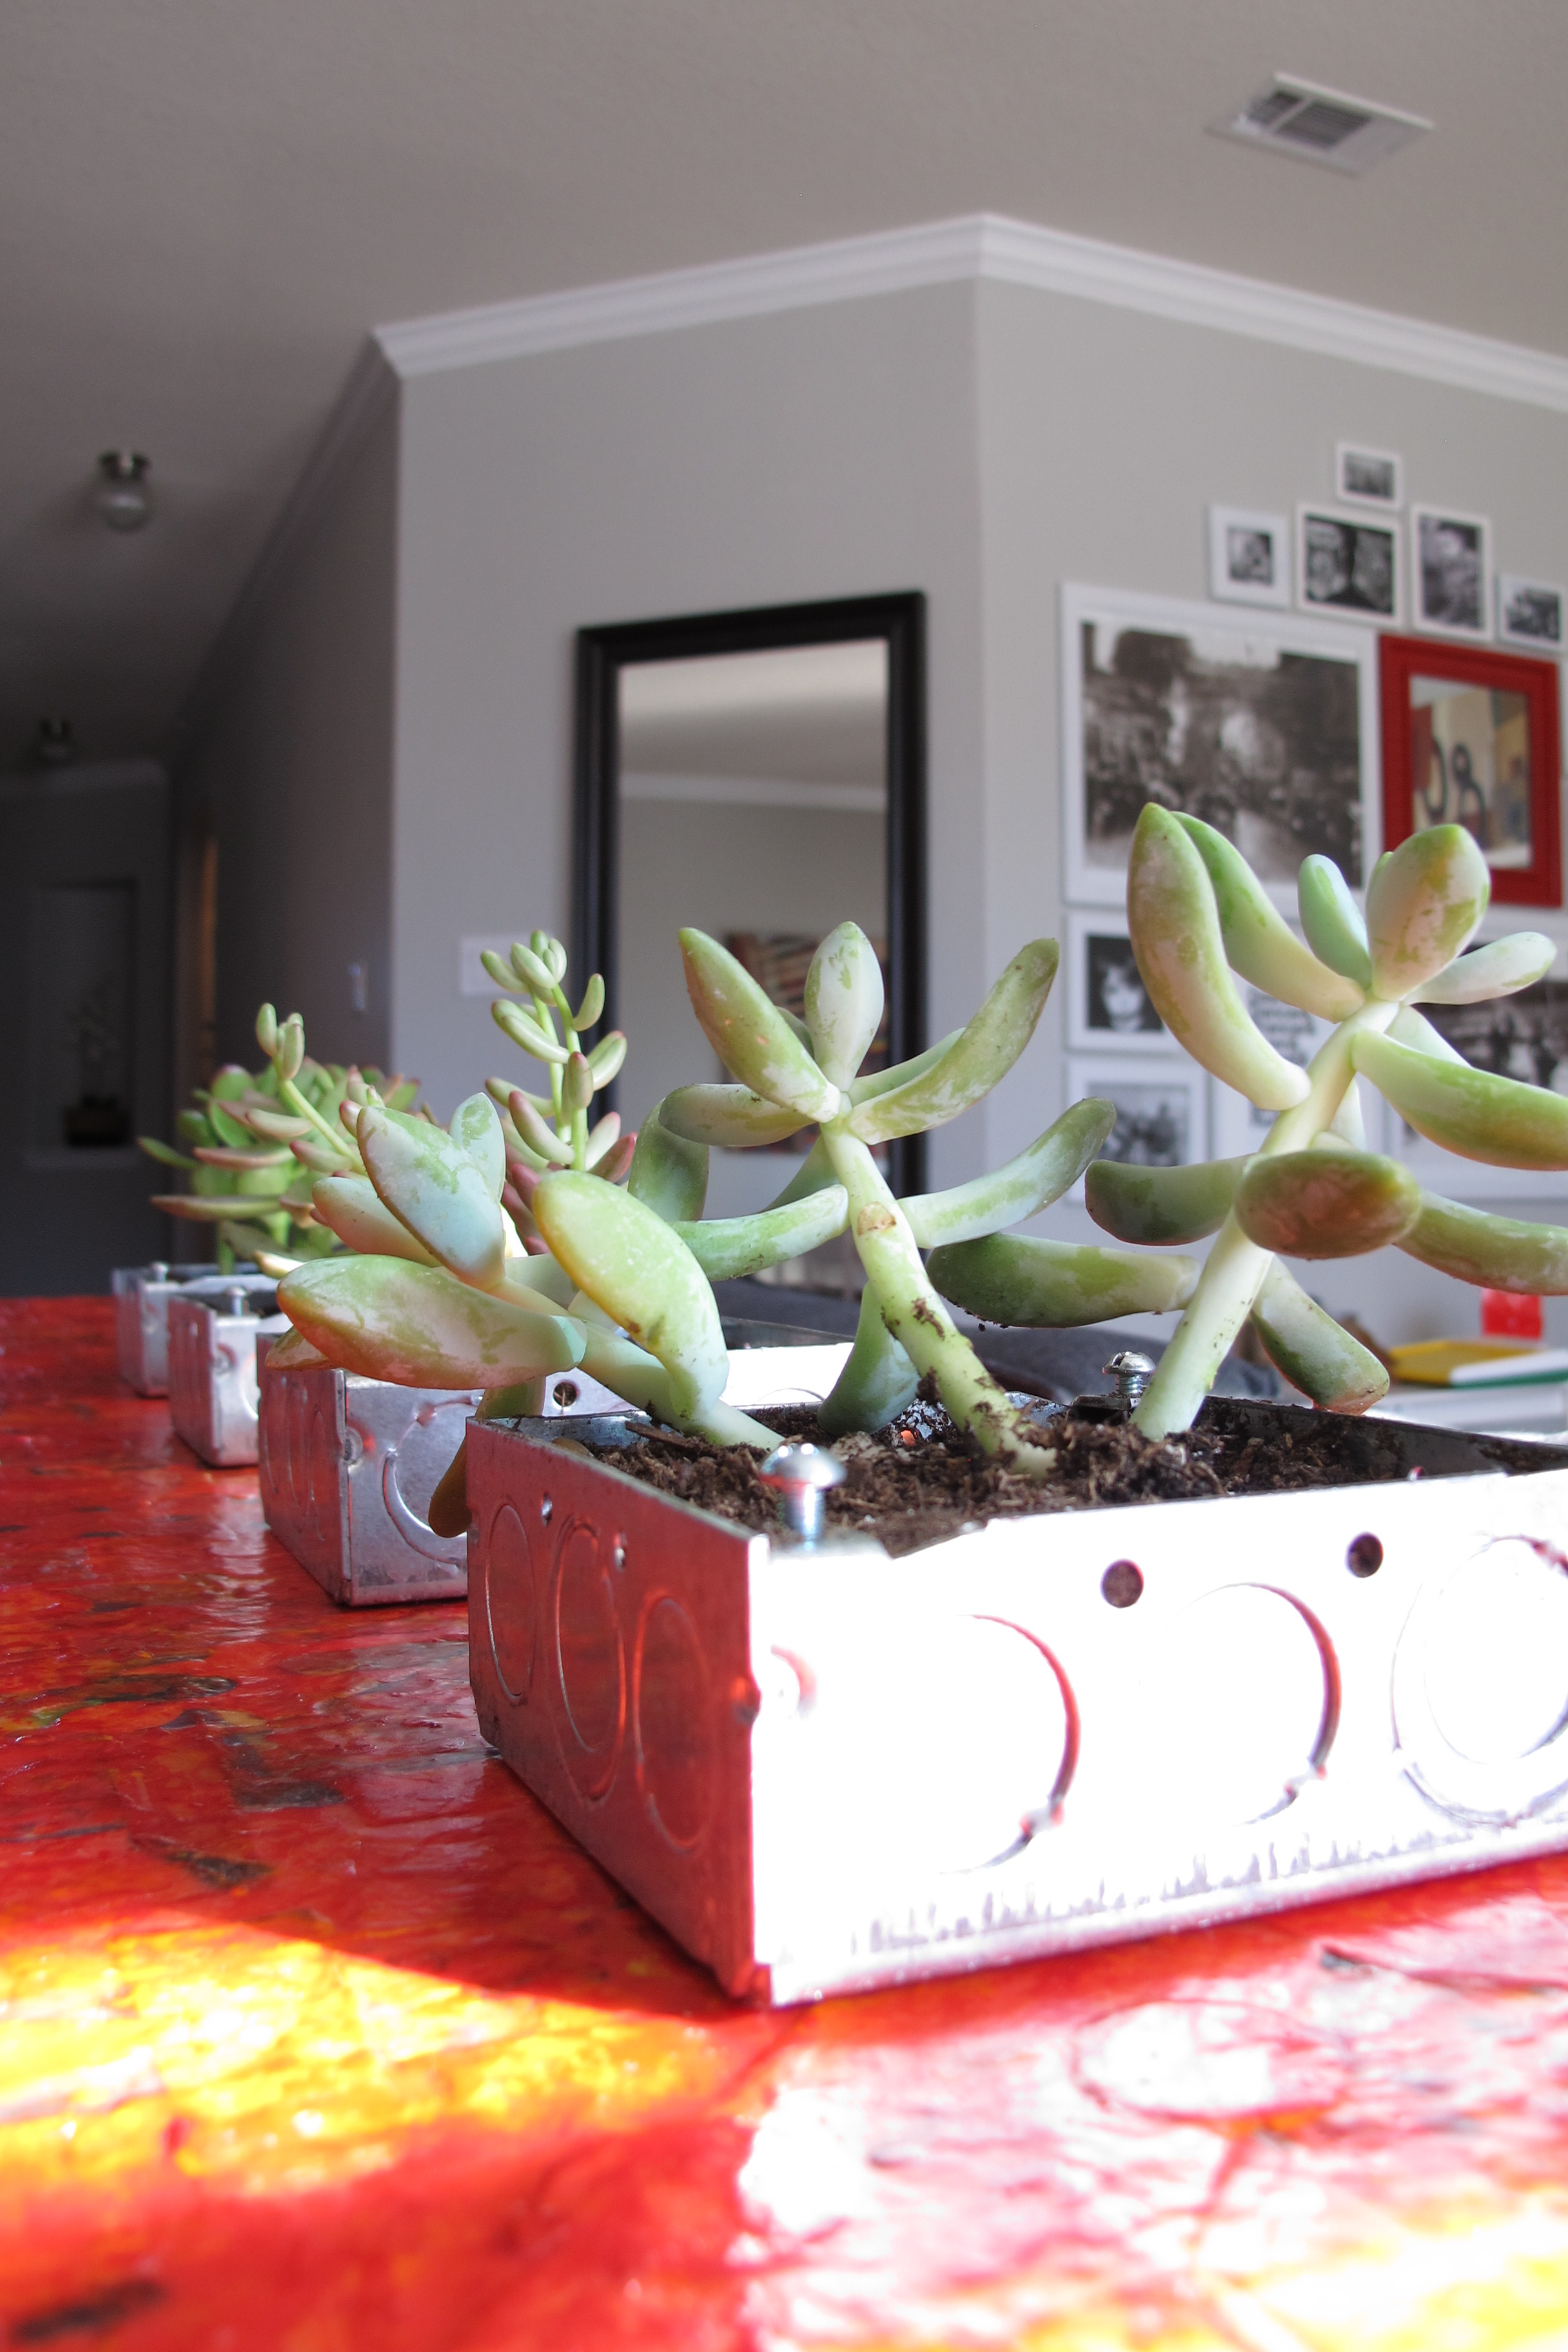
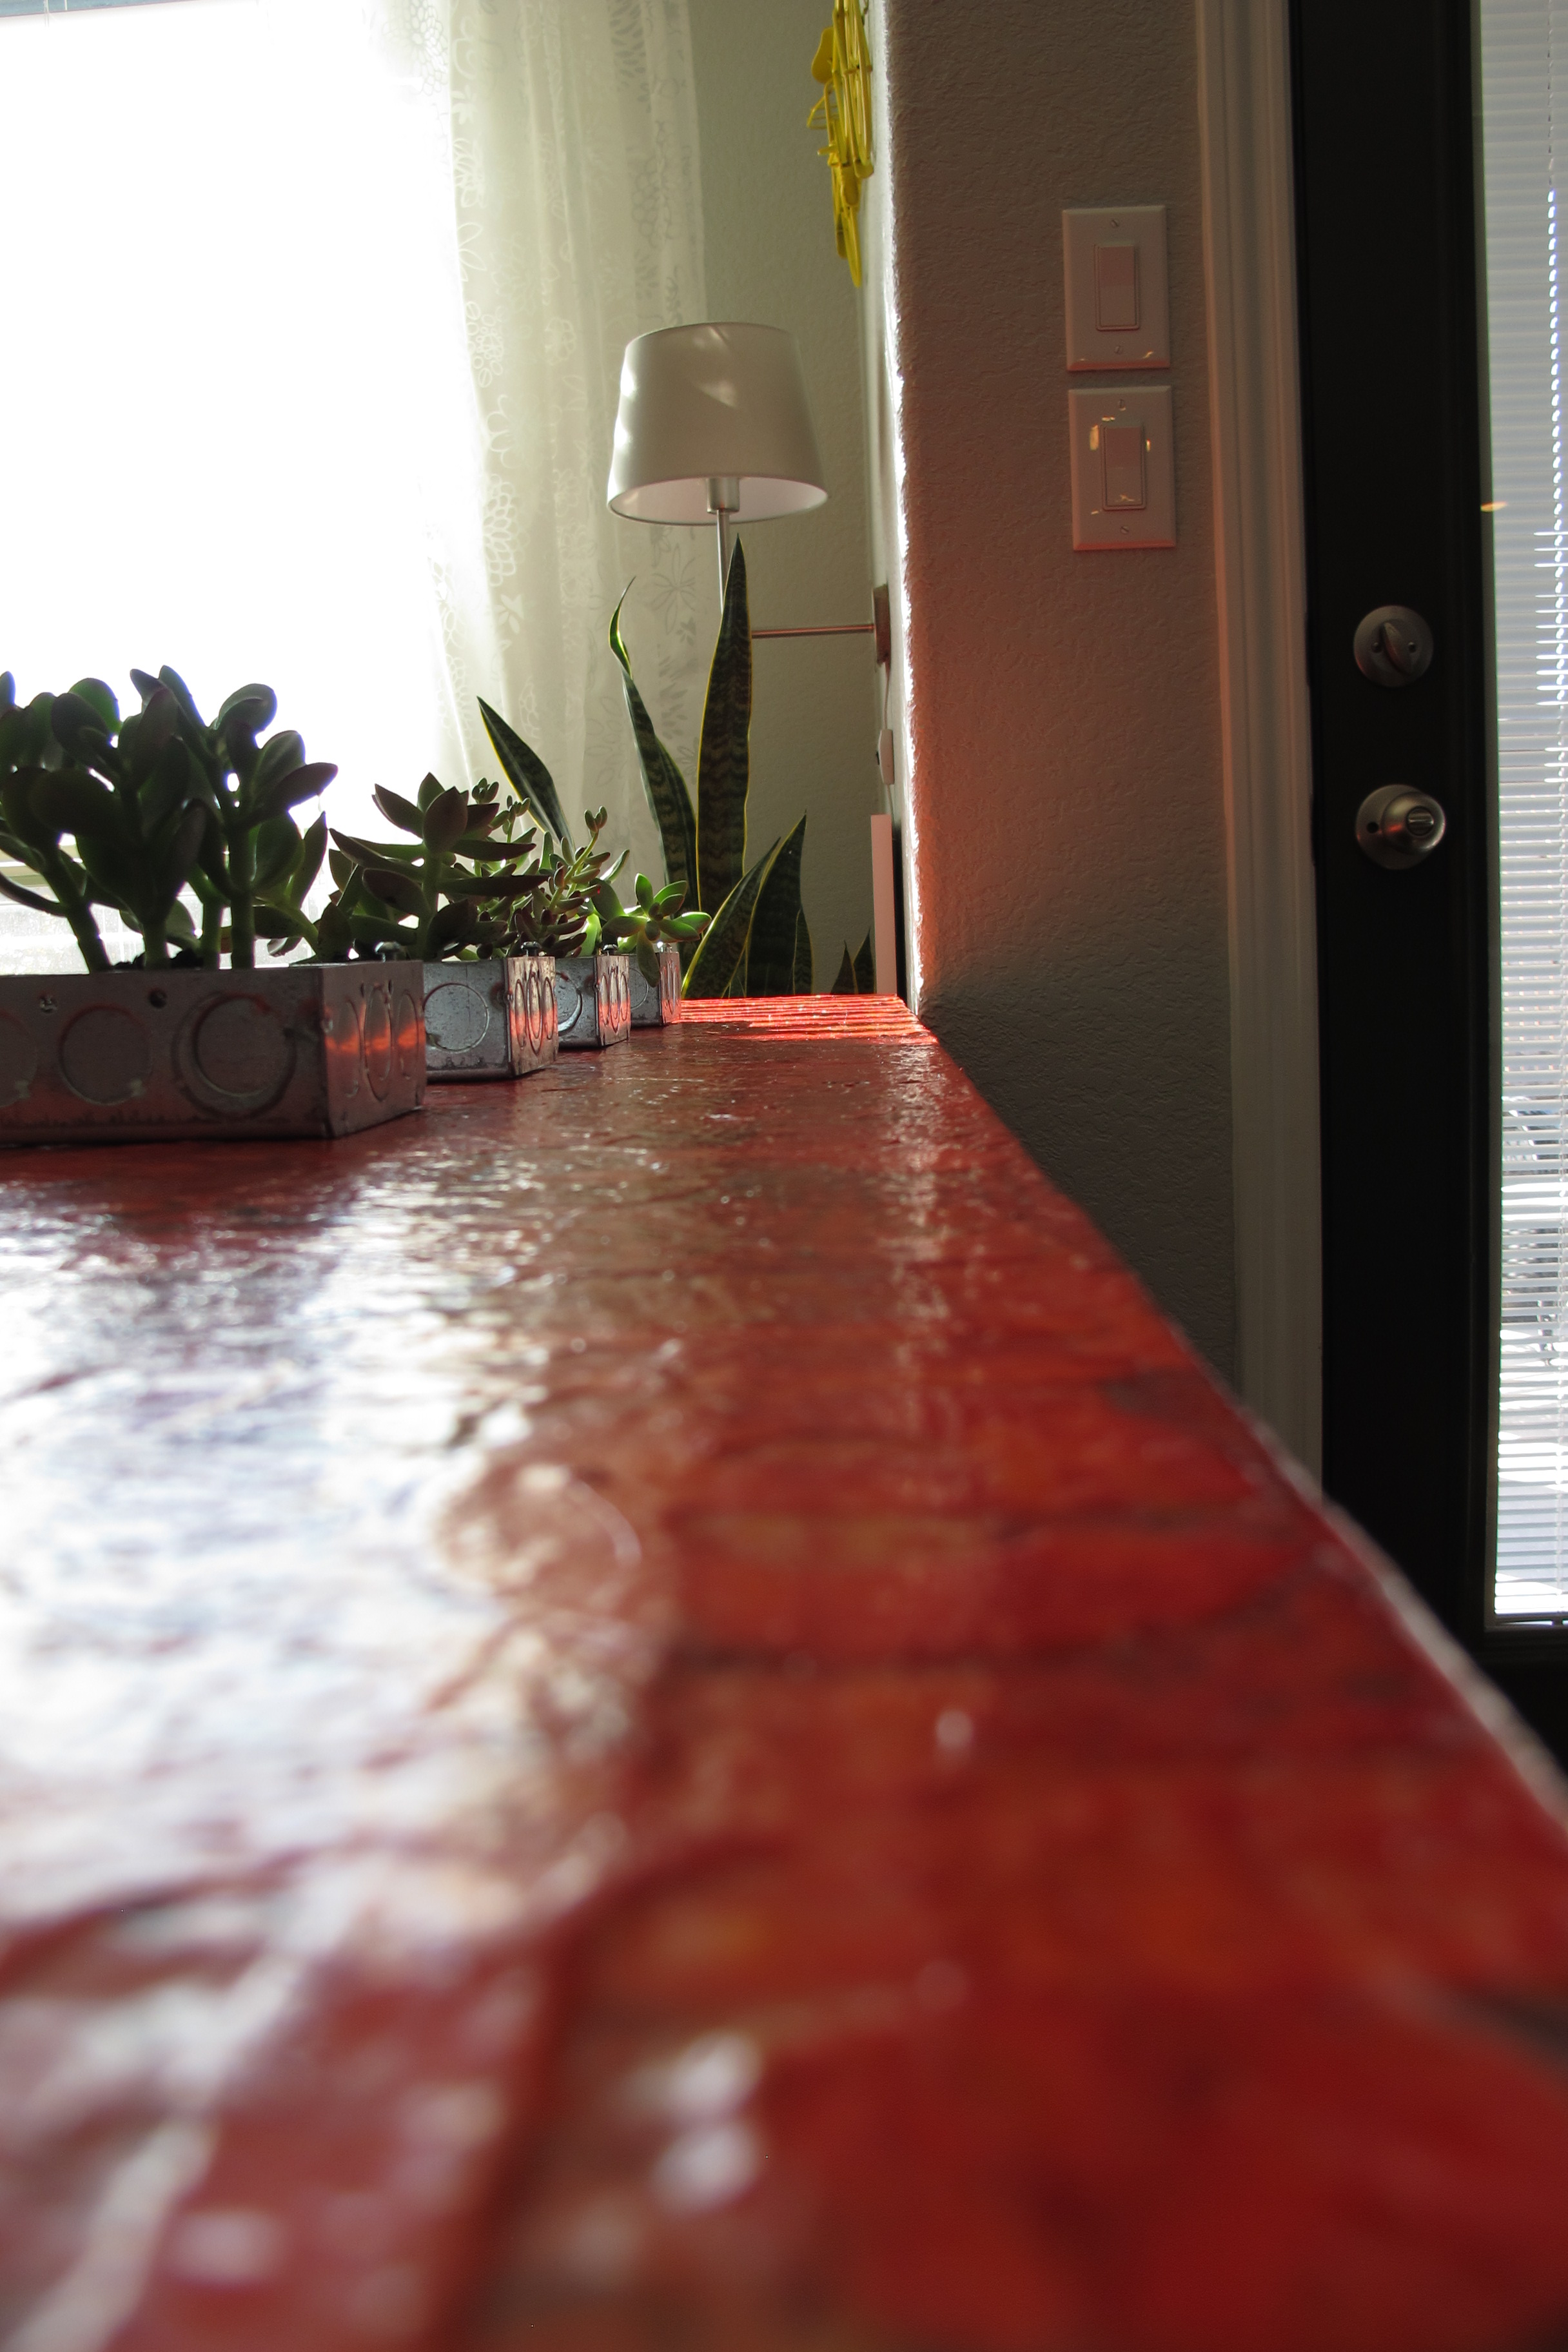
Easy and cheap!  I love them.   Not too shabby for around $3.50 a pop ($3 for the plant and $0.50 for the box).   I’m currently working on something for below the sofa table which should help warm it up a tad.  And if you look closely, you can see our new centerpiece peeking through the crowd… 

IMG_3515

I changed it up (again… It’s been morphing on a weekly basis lately.  What can I say? I like variety.)

IMG_3522 IMG_3525

The sparkly vase was a $7 find at TJ Maxx.  Had to do it.   And the runner is actually a folded up tablecloth that I got on clearance from Target for $4.   The other stuff I already had.

So, I get oddly giddy when talking/writing about decorating.  I’m seriously typing with a goofy smile on my face right now.  It may be the wine.  But I think its the decorating chit-chat… does this happen to anybody else?    Or is this just me?

The Guest Bath Plan

For those who may not know, I undertook a little tile-painting last weekend.  It was my first step to giving our guest bath a full (and inexpensive) makeover to turn it from generic-builder bath….

Welcome!!!!!IMG_3324

…into something a little more “us”.    I’ll be honest, when it comes to making over rooms, I’m not much of a planner.  I usually go step-by-step making decisions as I go (and making corrections along the way).   This time around, I thought I’d give planning the ole’ college try.   I can’t guarantee that I’ll stick completely to this plan… sometimes just discovering one random item along the way can change my whole vision… but I think its a good starting point.  A good general direction.

I recently signed up for a Polyvore account and tried my hand at creating a mood board.   And here she is…

Starting at the top left and working clockwise…

First, we have two pretty light fixtures.  The reason I included two is that we currently have the galvanized steel barn light (it’s not installed yet), but I’m considering spray-painting it the lovely sage-y green color of the second fixture. (Thoughts? I’m a little nervous about this. Has anybody painted a fixture like this? Any advice?)    

Moving along, the white tile represents our newly painted tile (smiles).  And then the fun, striped shower curtain from West Elm had me at hello.  My only hesitation here is that this particular shower curtain doesn’t come in long lengths,  so I may try something similar that I could adapt (maybe a window curtain, or fabric panel) so that it just grazes the floor.

The lovely patterned rug comes next… This is just an example of what I’m looking for (this one doesn’t come small enough for our room).  Basically, I want something with a smaller scale, more organic pattern to balance the large, bold stripes and I want small pops of bright red to contrast the sagey green and neutrals.  Another option is to go for a more neutral rug (maybe a hemp or slatted wood mat) and then frame a fun fabric in a similar print for a  comparable look with slightly different elements.

The next two items simply represent our current floor tile and vanity.  Above the vanity is a simple sleek Ikea faucet that I would love to replace our more traditional faucet with.

Next… Ah, the pallet mirror.  We have a few pallets outside that I’d love to use to frame out our simple builders mirror.

Then, in the center is a potential paint color.  It’s a taupey hue with greenish undertones that I think would be a great backdrop for all of the pattern and splashes of color. I’m waiting to determine the actual shade until the light fixture is installed since the change in lighting can dramatically alter how the color appears in the room.

I have a few artwork ideas, but want to see how the room is coming along before I solidify them.  Also, all of the towel rods and rings are going away in favor of hooks.    Much in store for sure.   And like I mentioned before, some of this is subject to change depending on what goodies I find along the way.   And sometimes things don’t always play out the same way in person as they do on paper (‘er computer screen), so I’m going to try to be flexible if things don’t go my way at first.

So, that’s my preliminary plan.  I’m kind of excited about it, too!  Any thoughts or suggestions??  🙂