Howdy, folks! It’s that time again for our…. (cue announcer voice) MONTHLY DIY CHALLENGE!!! (challengechallenge) <- echo.

For any newbies, this is a challenge that several awesome bloggy friends and I team up for each month. The rules are simple… we’re assigned an item and must make something with it. Easy peasy. This month’s theme was to use baskets, boxes, or bins for an organizing project.
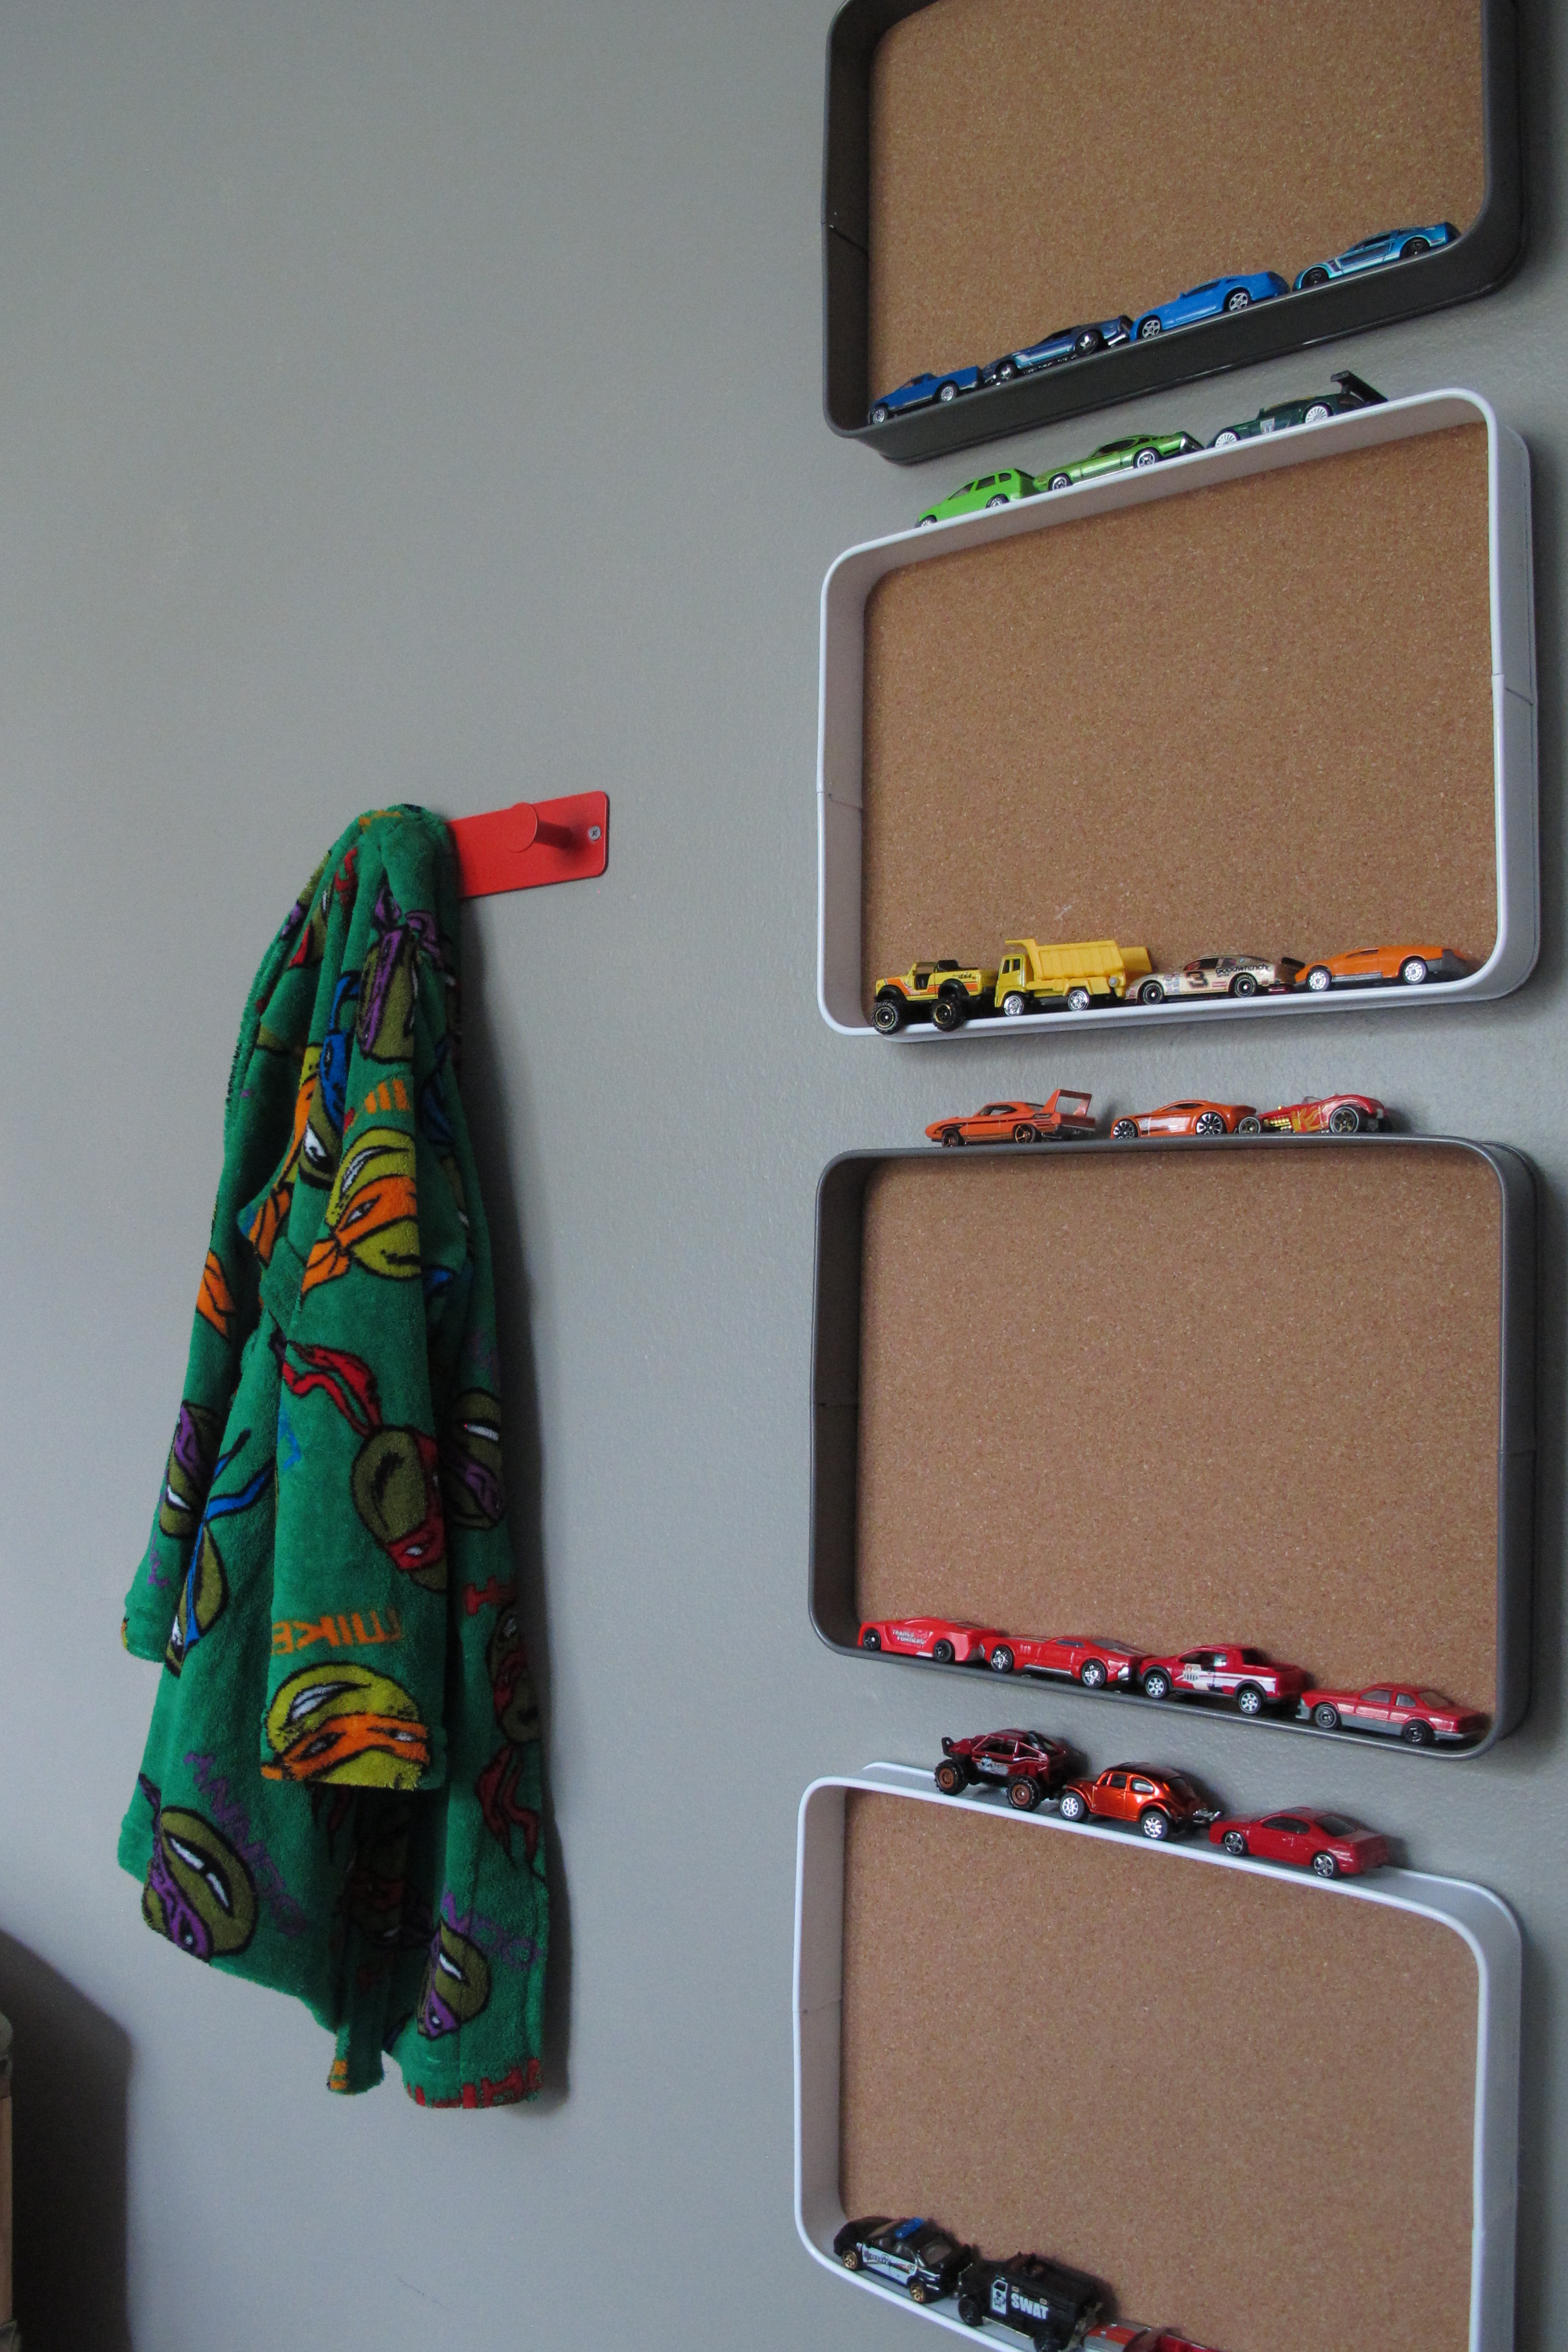
Like most months, it took me a while to pin-point exactly what I wanted to create for my project. I hemmed and hawed, and finally one day last week, I remembered these fantastic metal trays that I’d purchased from Target a few months back…

….. for (drum roll please)…
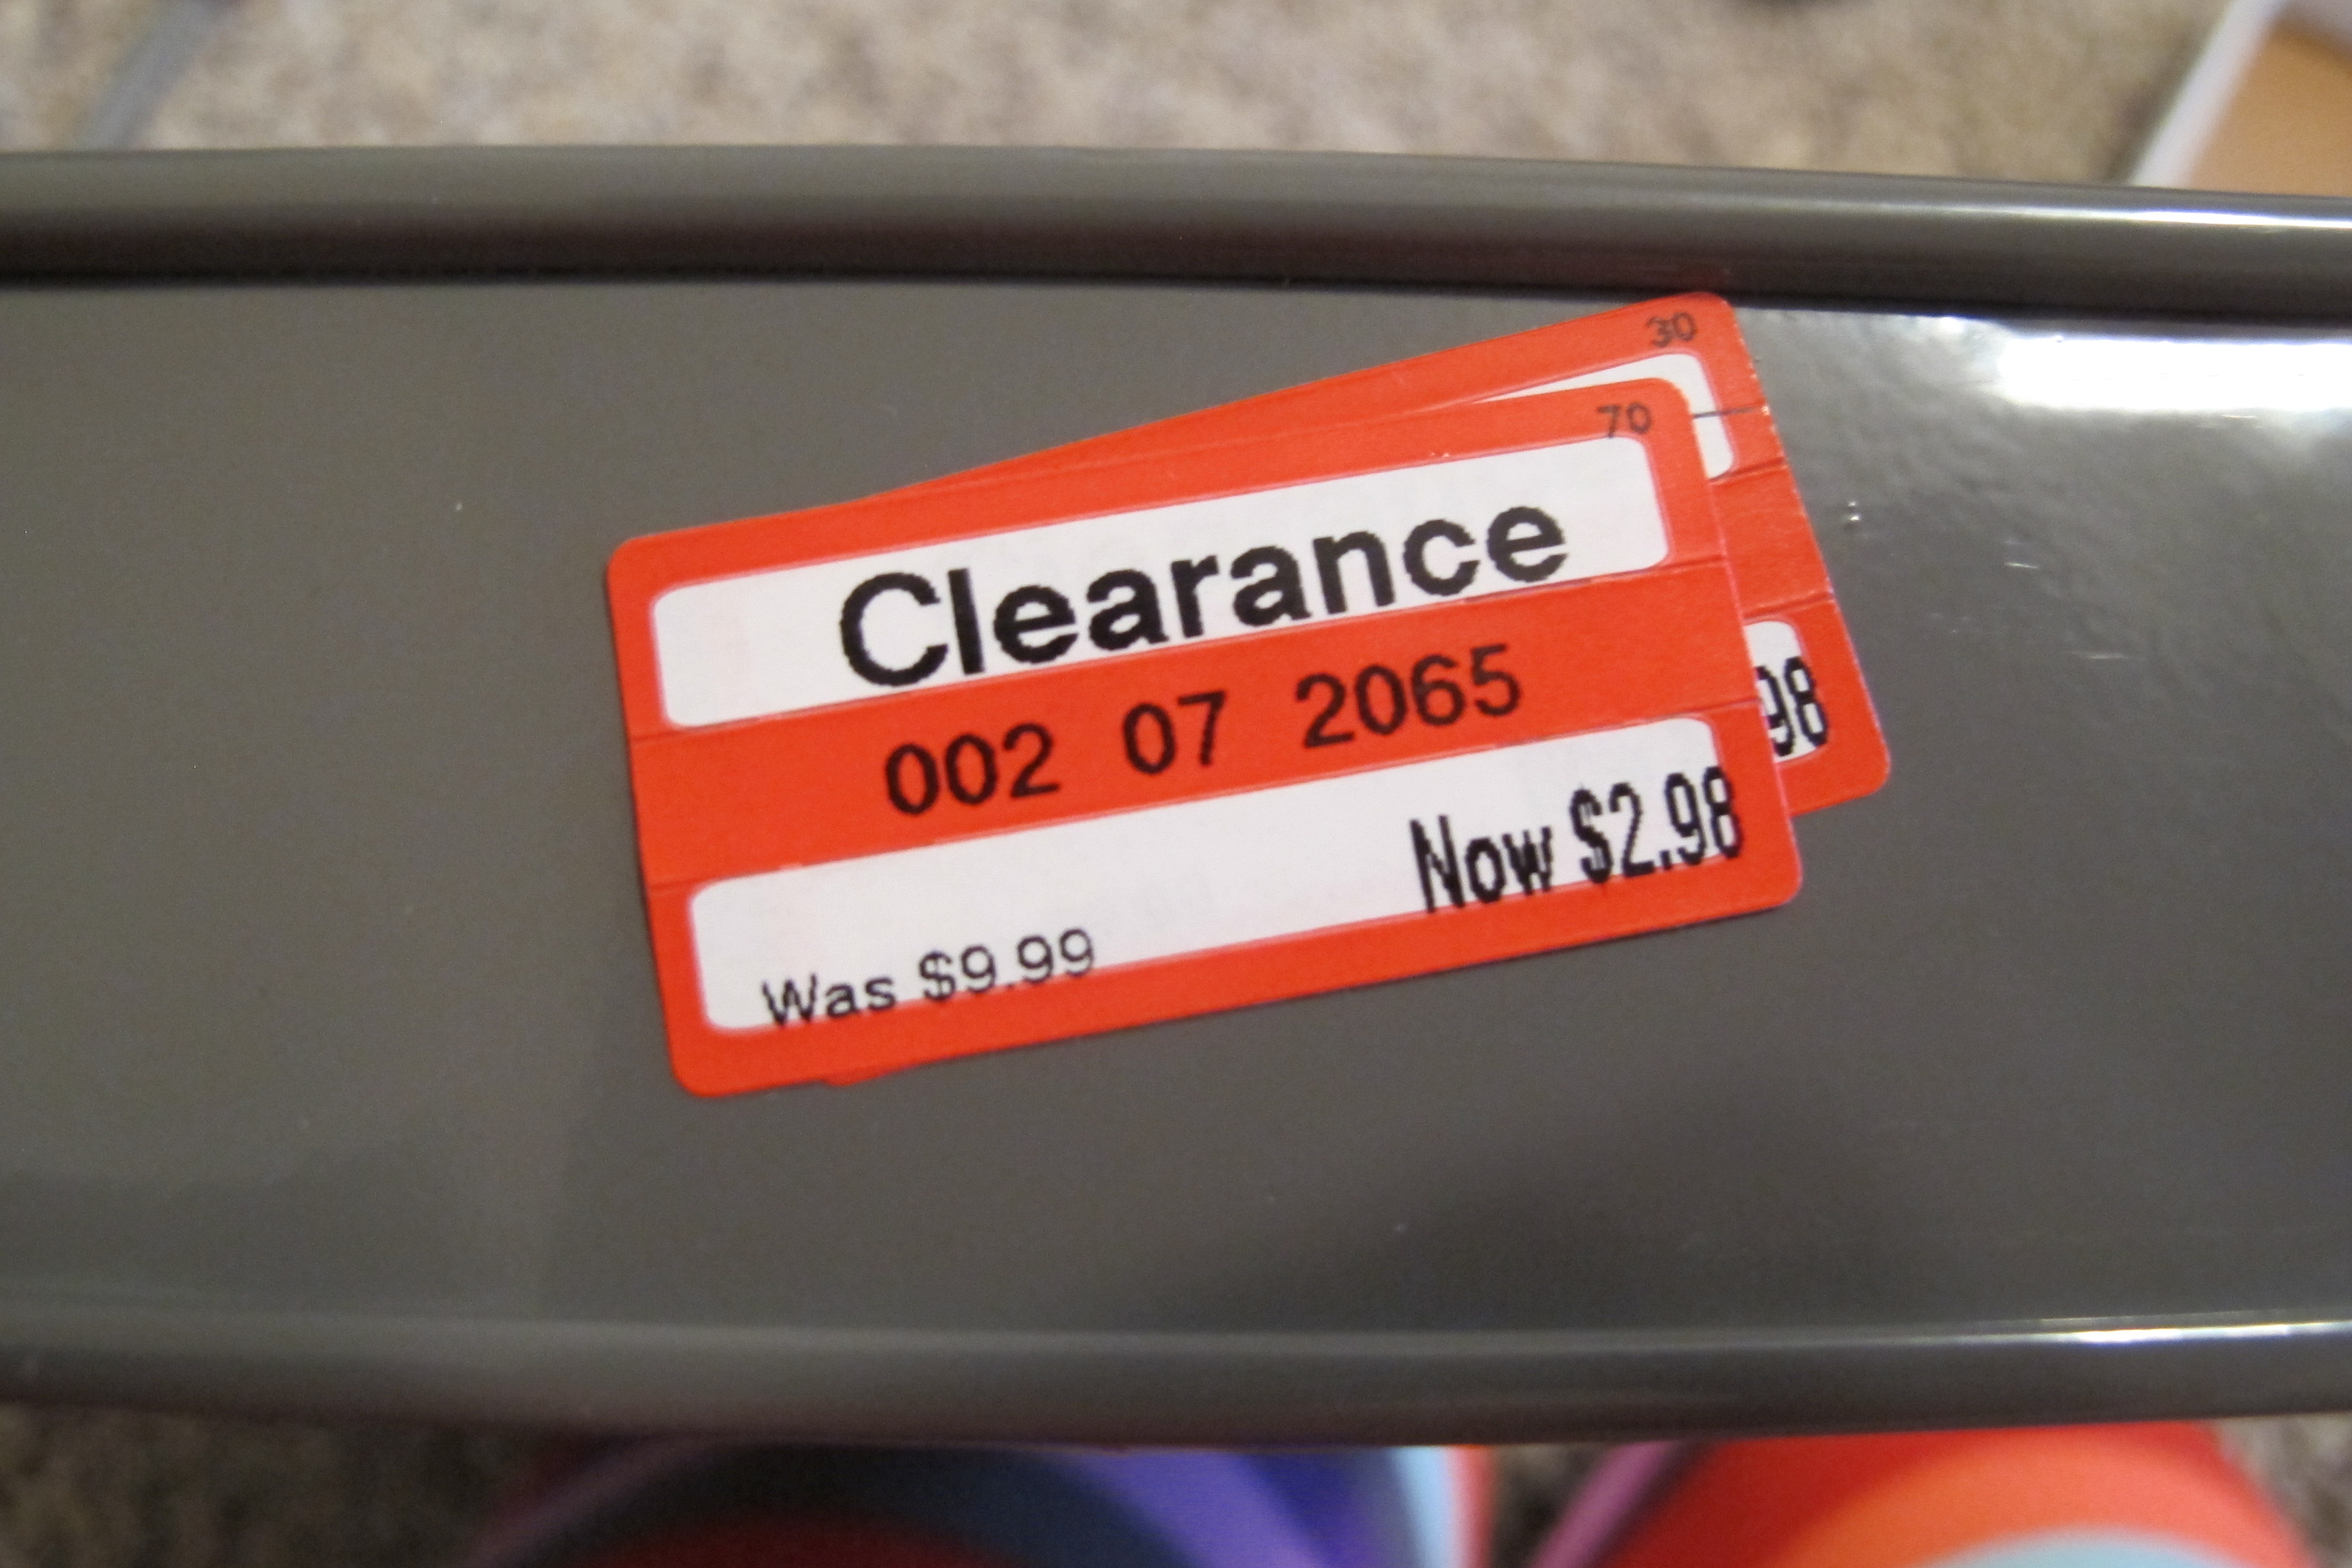
$2.98 a pop!! I pretty much did the happy-dance right there by the clearance end-cap when I found them. And then proceeded to possessively shove all remaining trays into my cart and make for the hills. I took six of these babies home that day. SIX!! Two are currently residing in various parts of the house, but I still had these four little guys to find homes for.
Now, I’ll be honest… When it comes to organizing, I dub our home’s progress as “sub-par”. We’ve been so busy working on larger projects since moving in 2.5 months ago that organization has sort of fallen to the wayside. There isn’t a single space in this house that has reached the point of organization. It’ll definitely get there once all the larger players are in place (painted walls, larger decor pieces, etc), but for now… well, suffice it to say that I had my fill of choices as to where to utilize my kick-bootie trays.
Ultimately, Lucas’s room won out, though. His space is the closest to complete (though definitely not there yet). The more finished a space is, the easier it is for me to visualize and create useful storage solutions that make sense. Plus, he has a lot of toys. Most of which are piled in the closet. And drive me crazy every time I walk in there. Thus, I decided to tackle the beast one Matchbox car at a time.
Ya see, my light bulb moment occurred when I realized that my trays were the perfect depth to serve as matchbox car shelves if I were to simply mount them to the wall. Having my project decision finally made, I completed yet another happy-dance and got going.
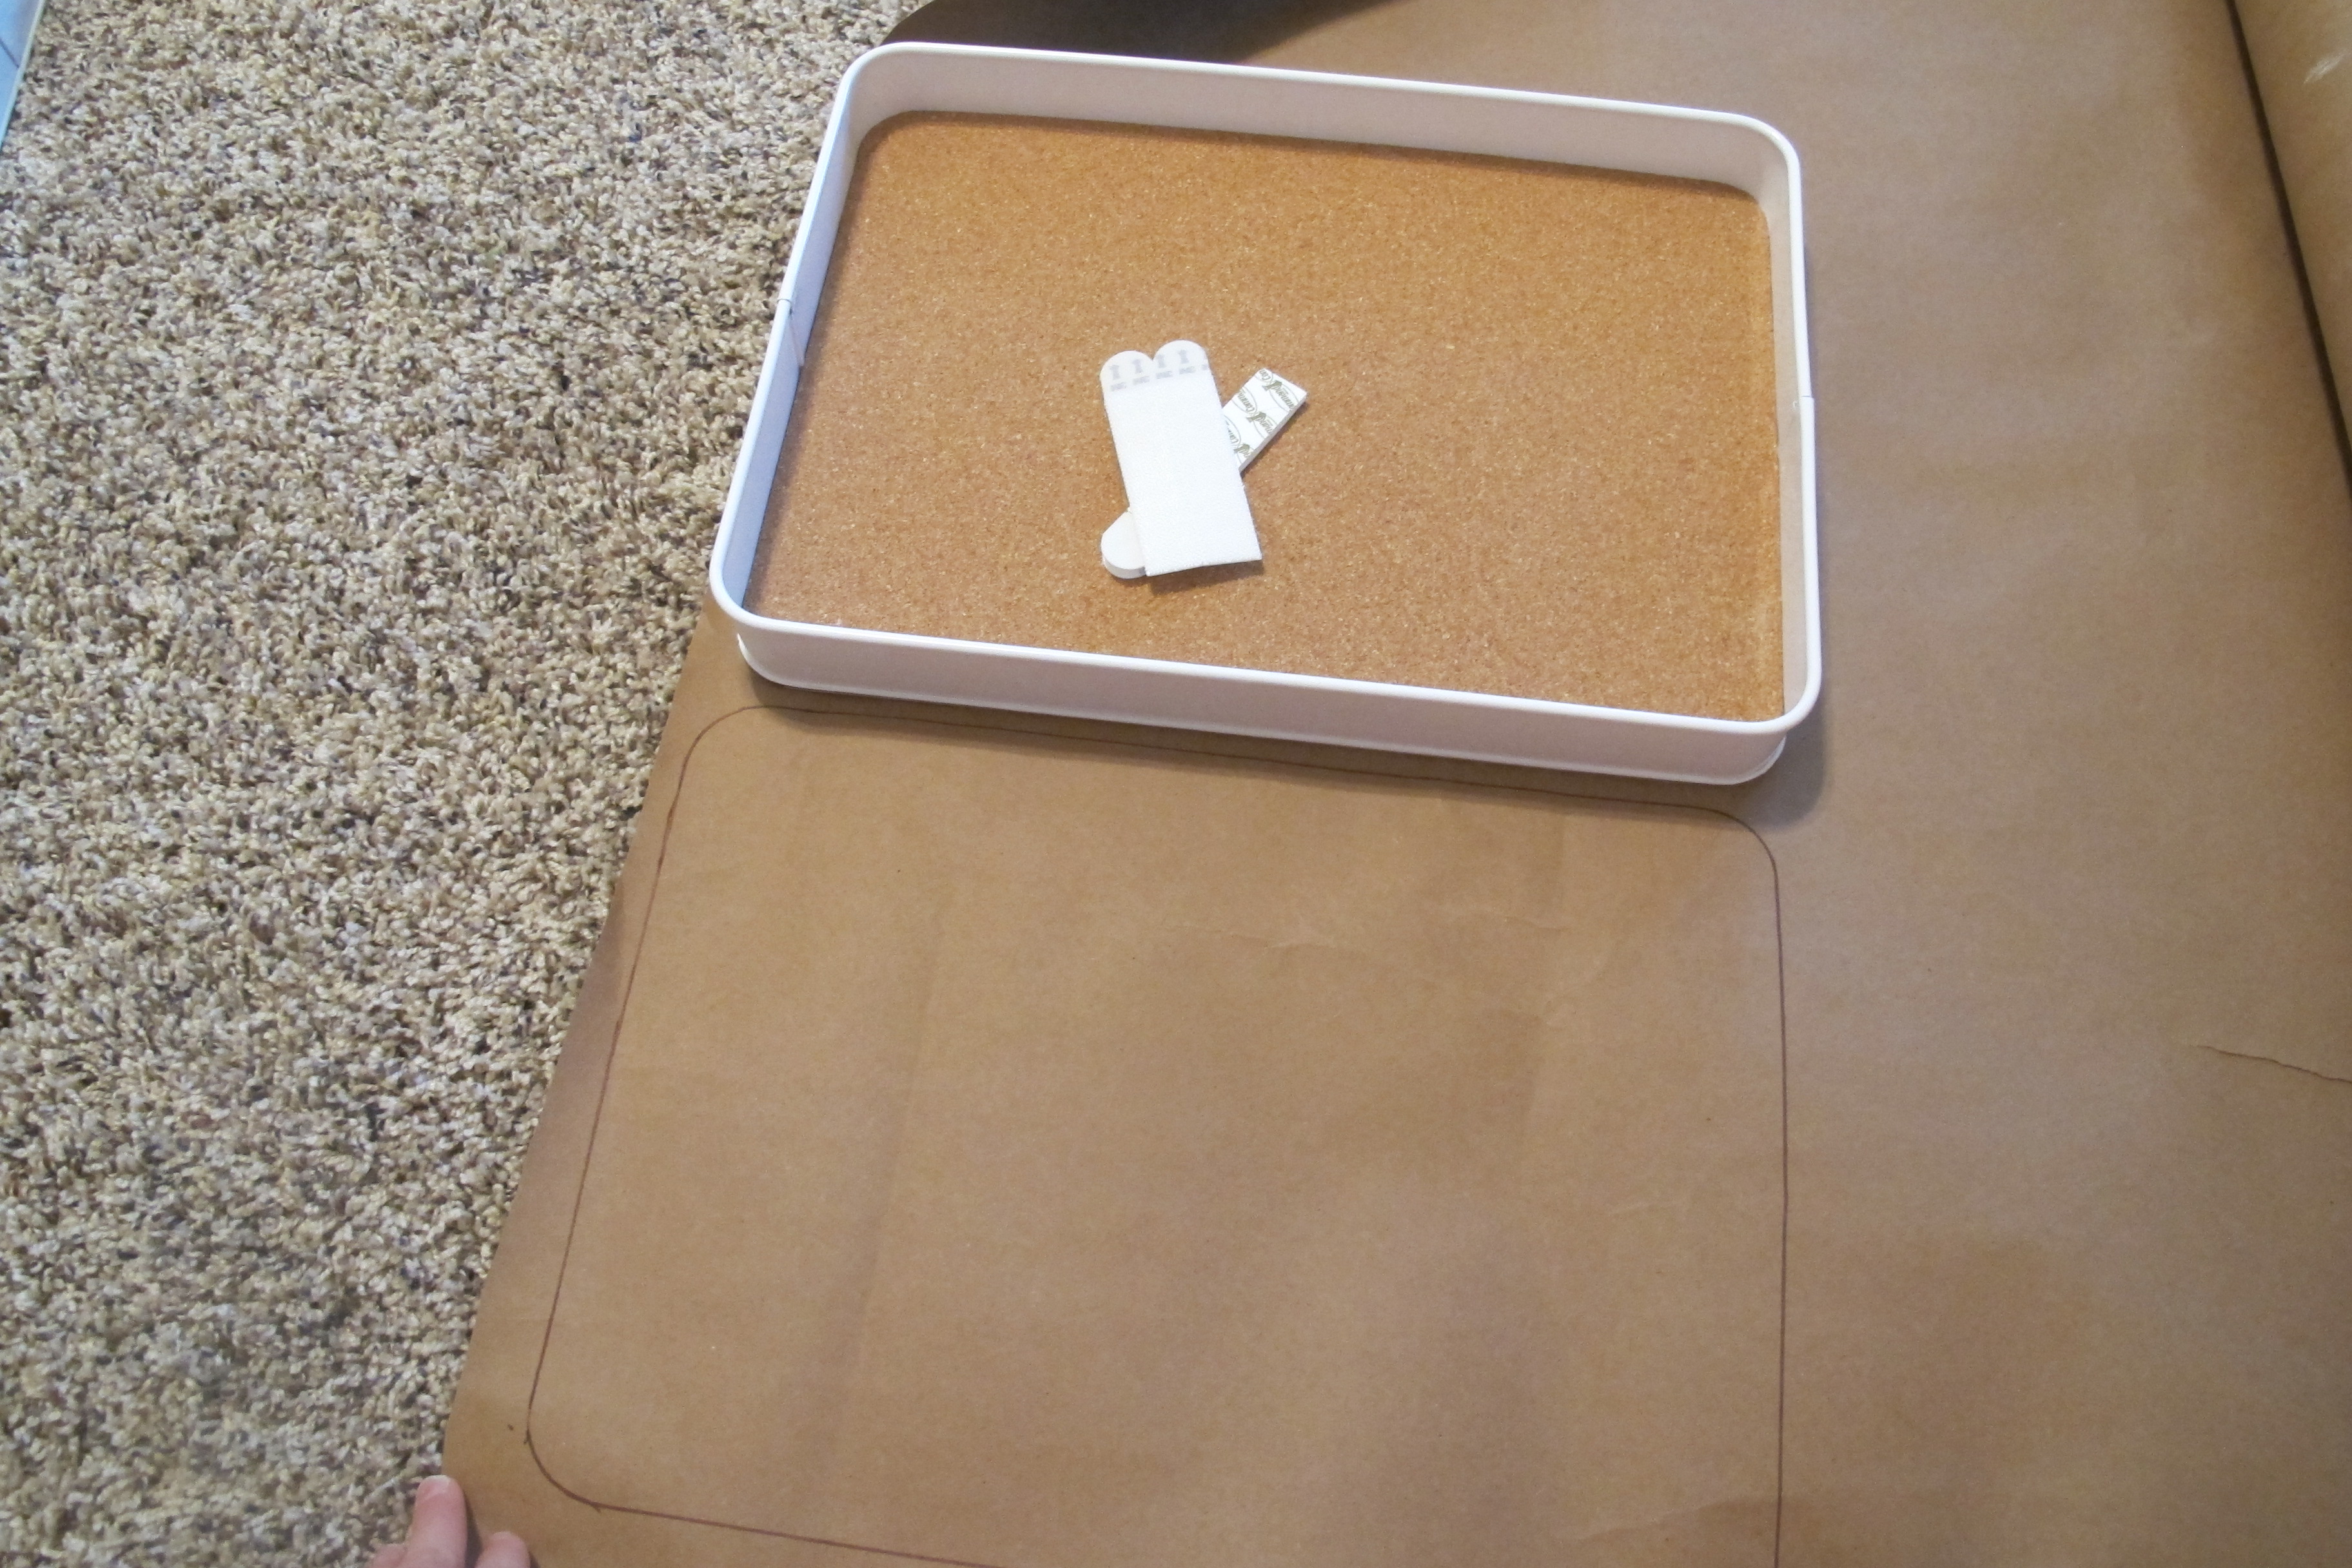
Upon examination, I realized that my trays had a raised ridge along the back, which made hanging difficult. After mulling over a solution, I decided that the best course of action was to hot glue several layers of heavy-duty cardboard…
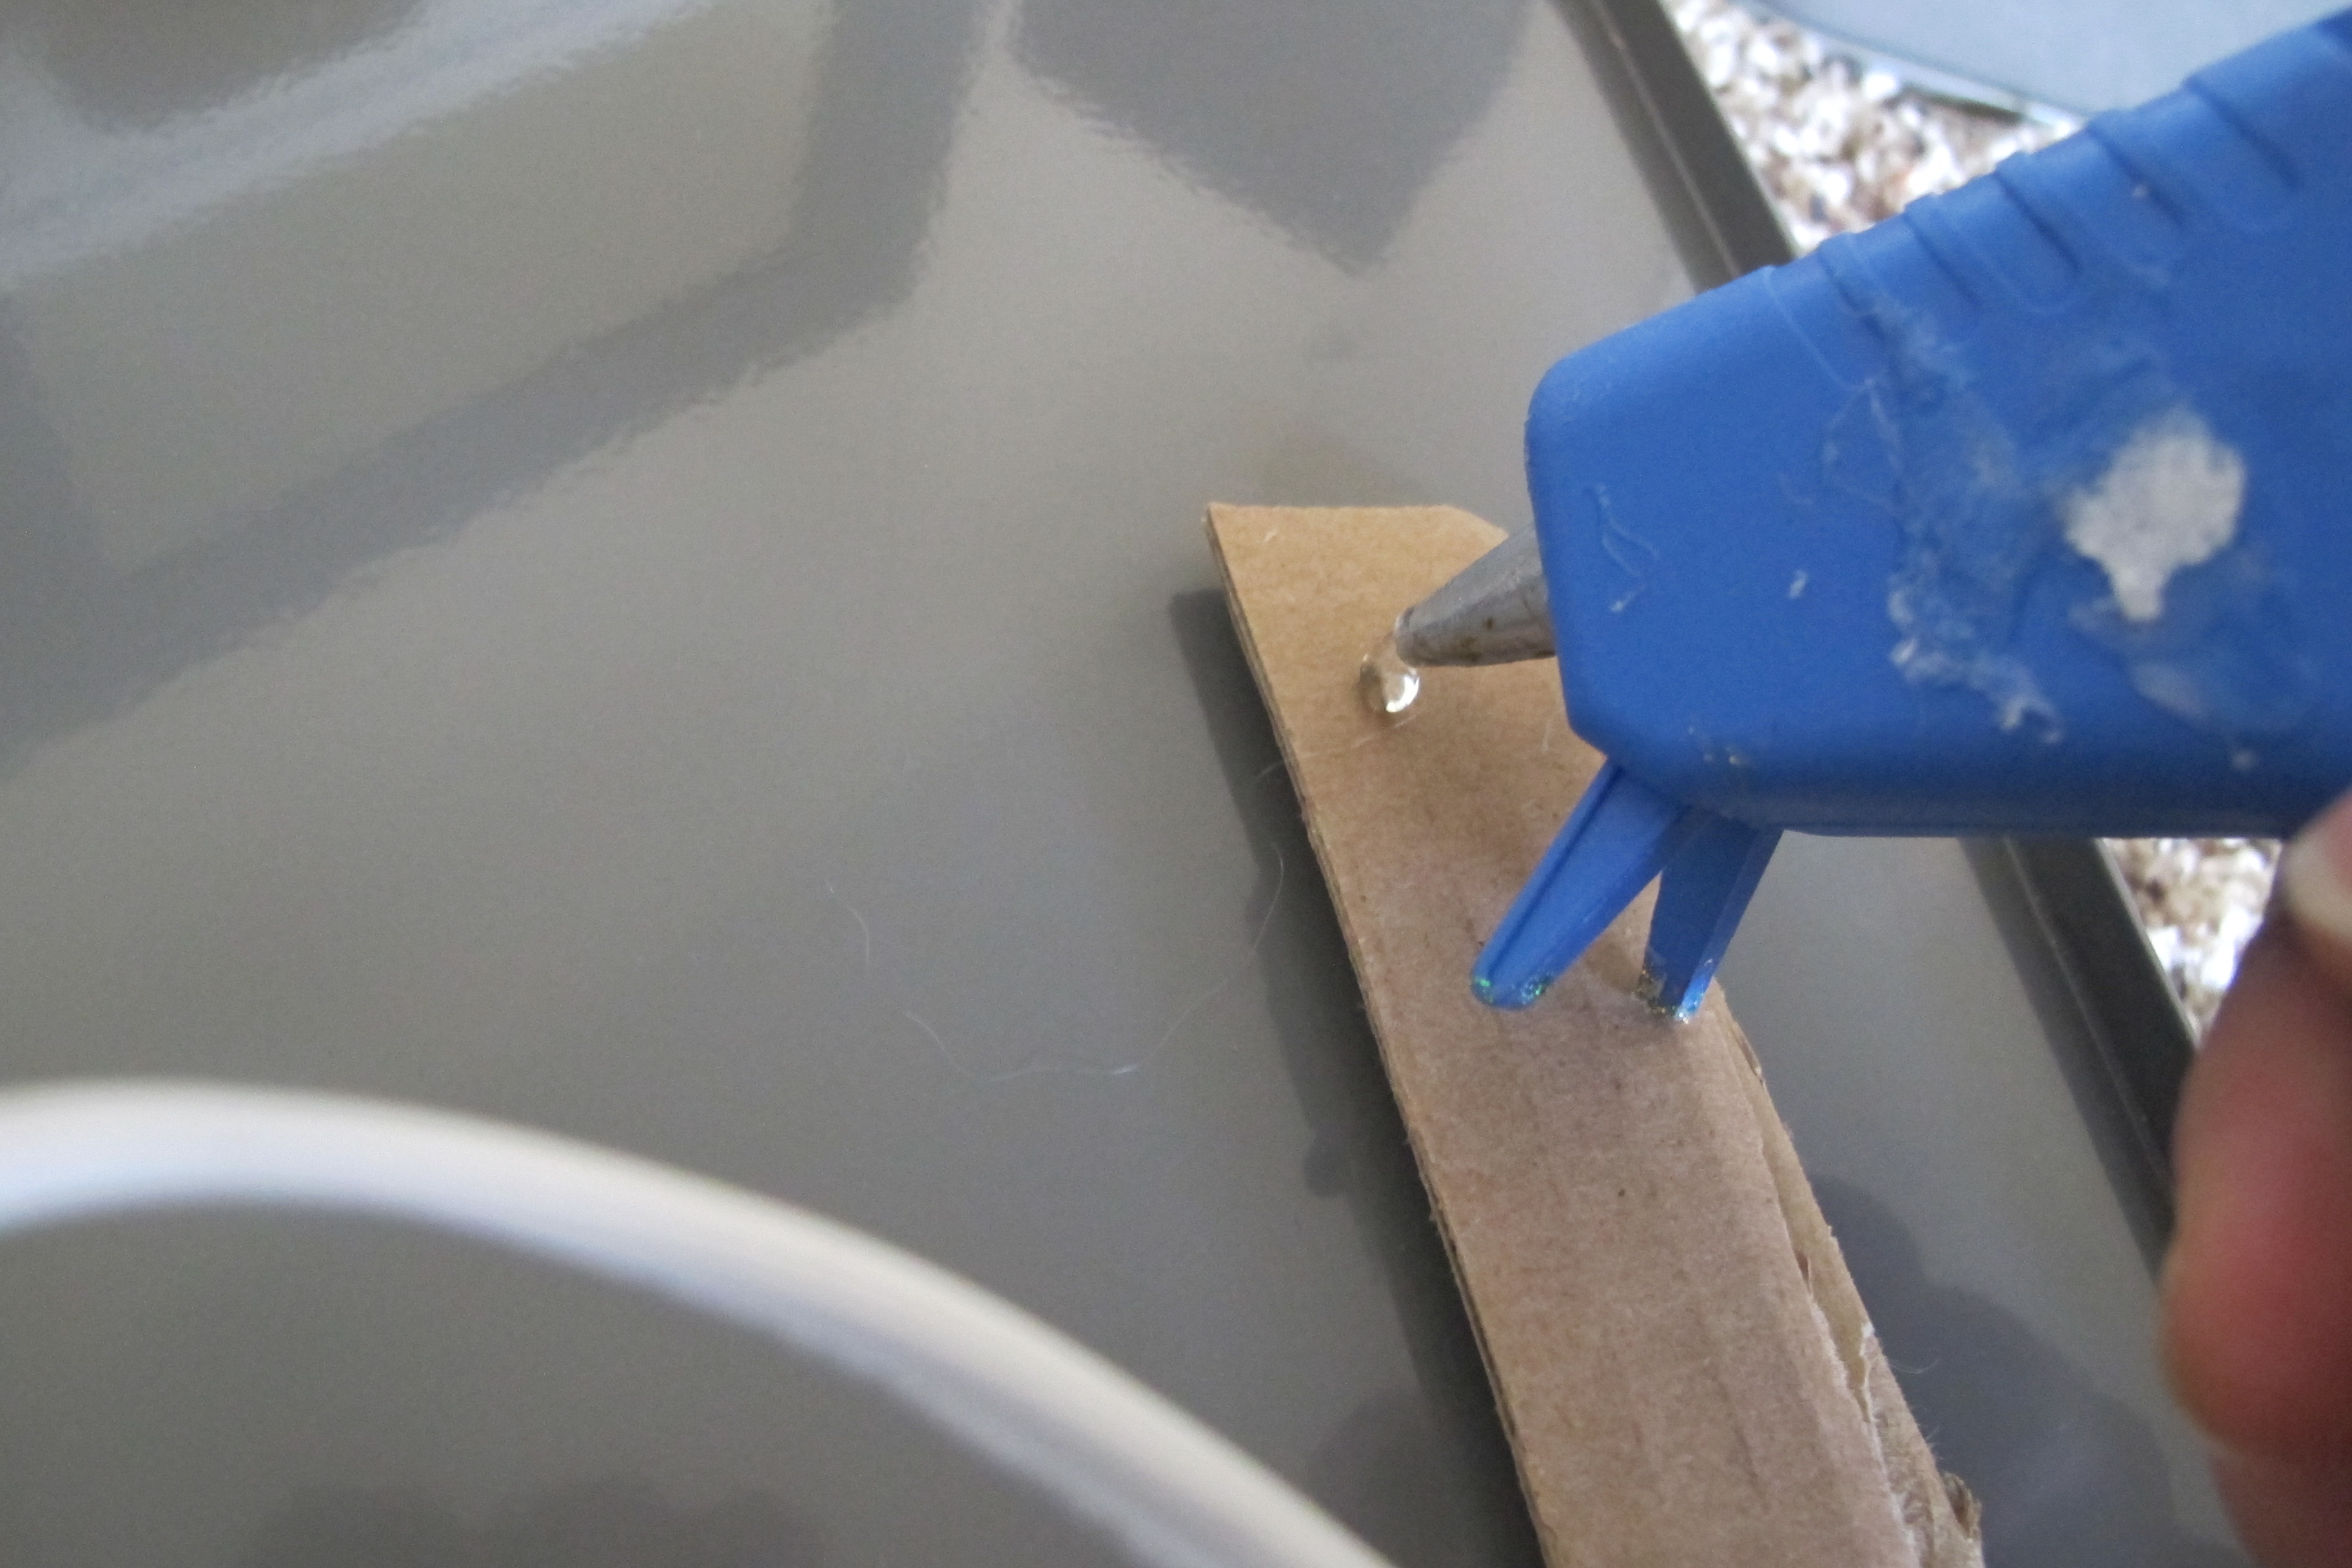
…to the back of the trays to create a little “plateau” that would be even with the ridge…
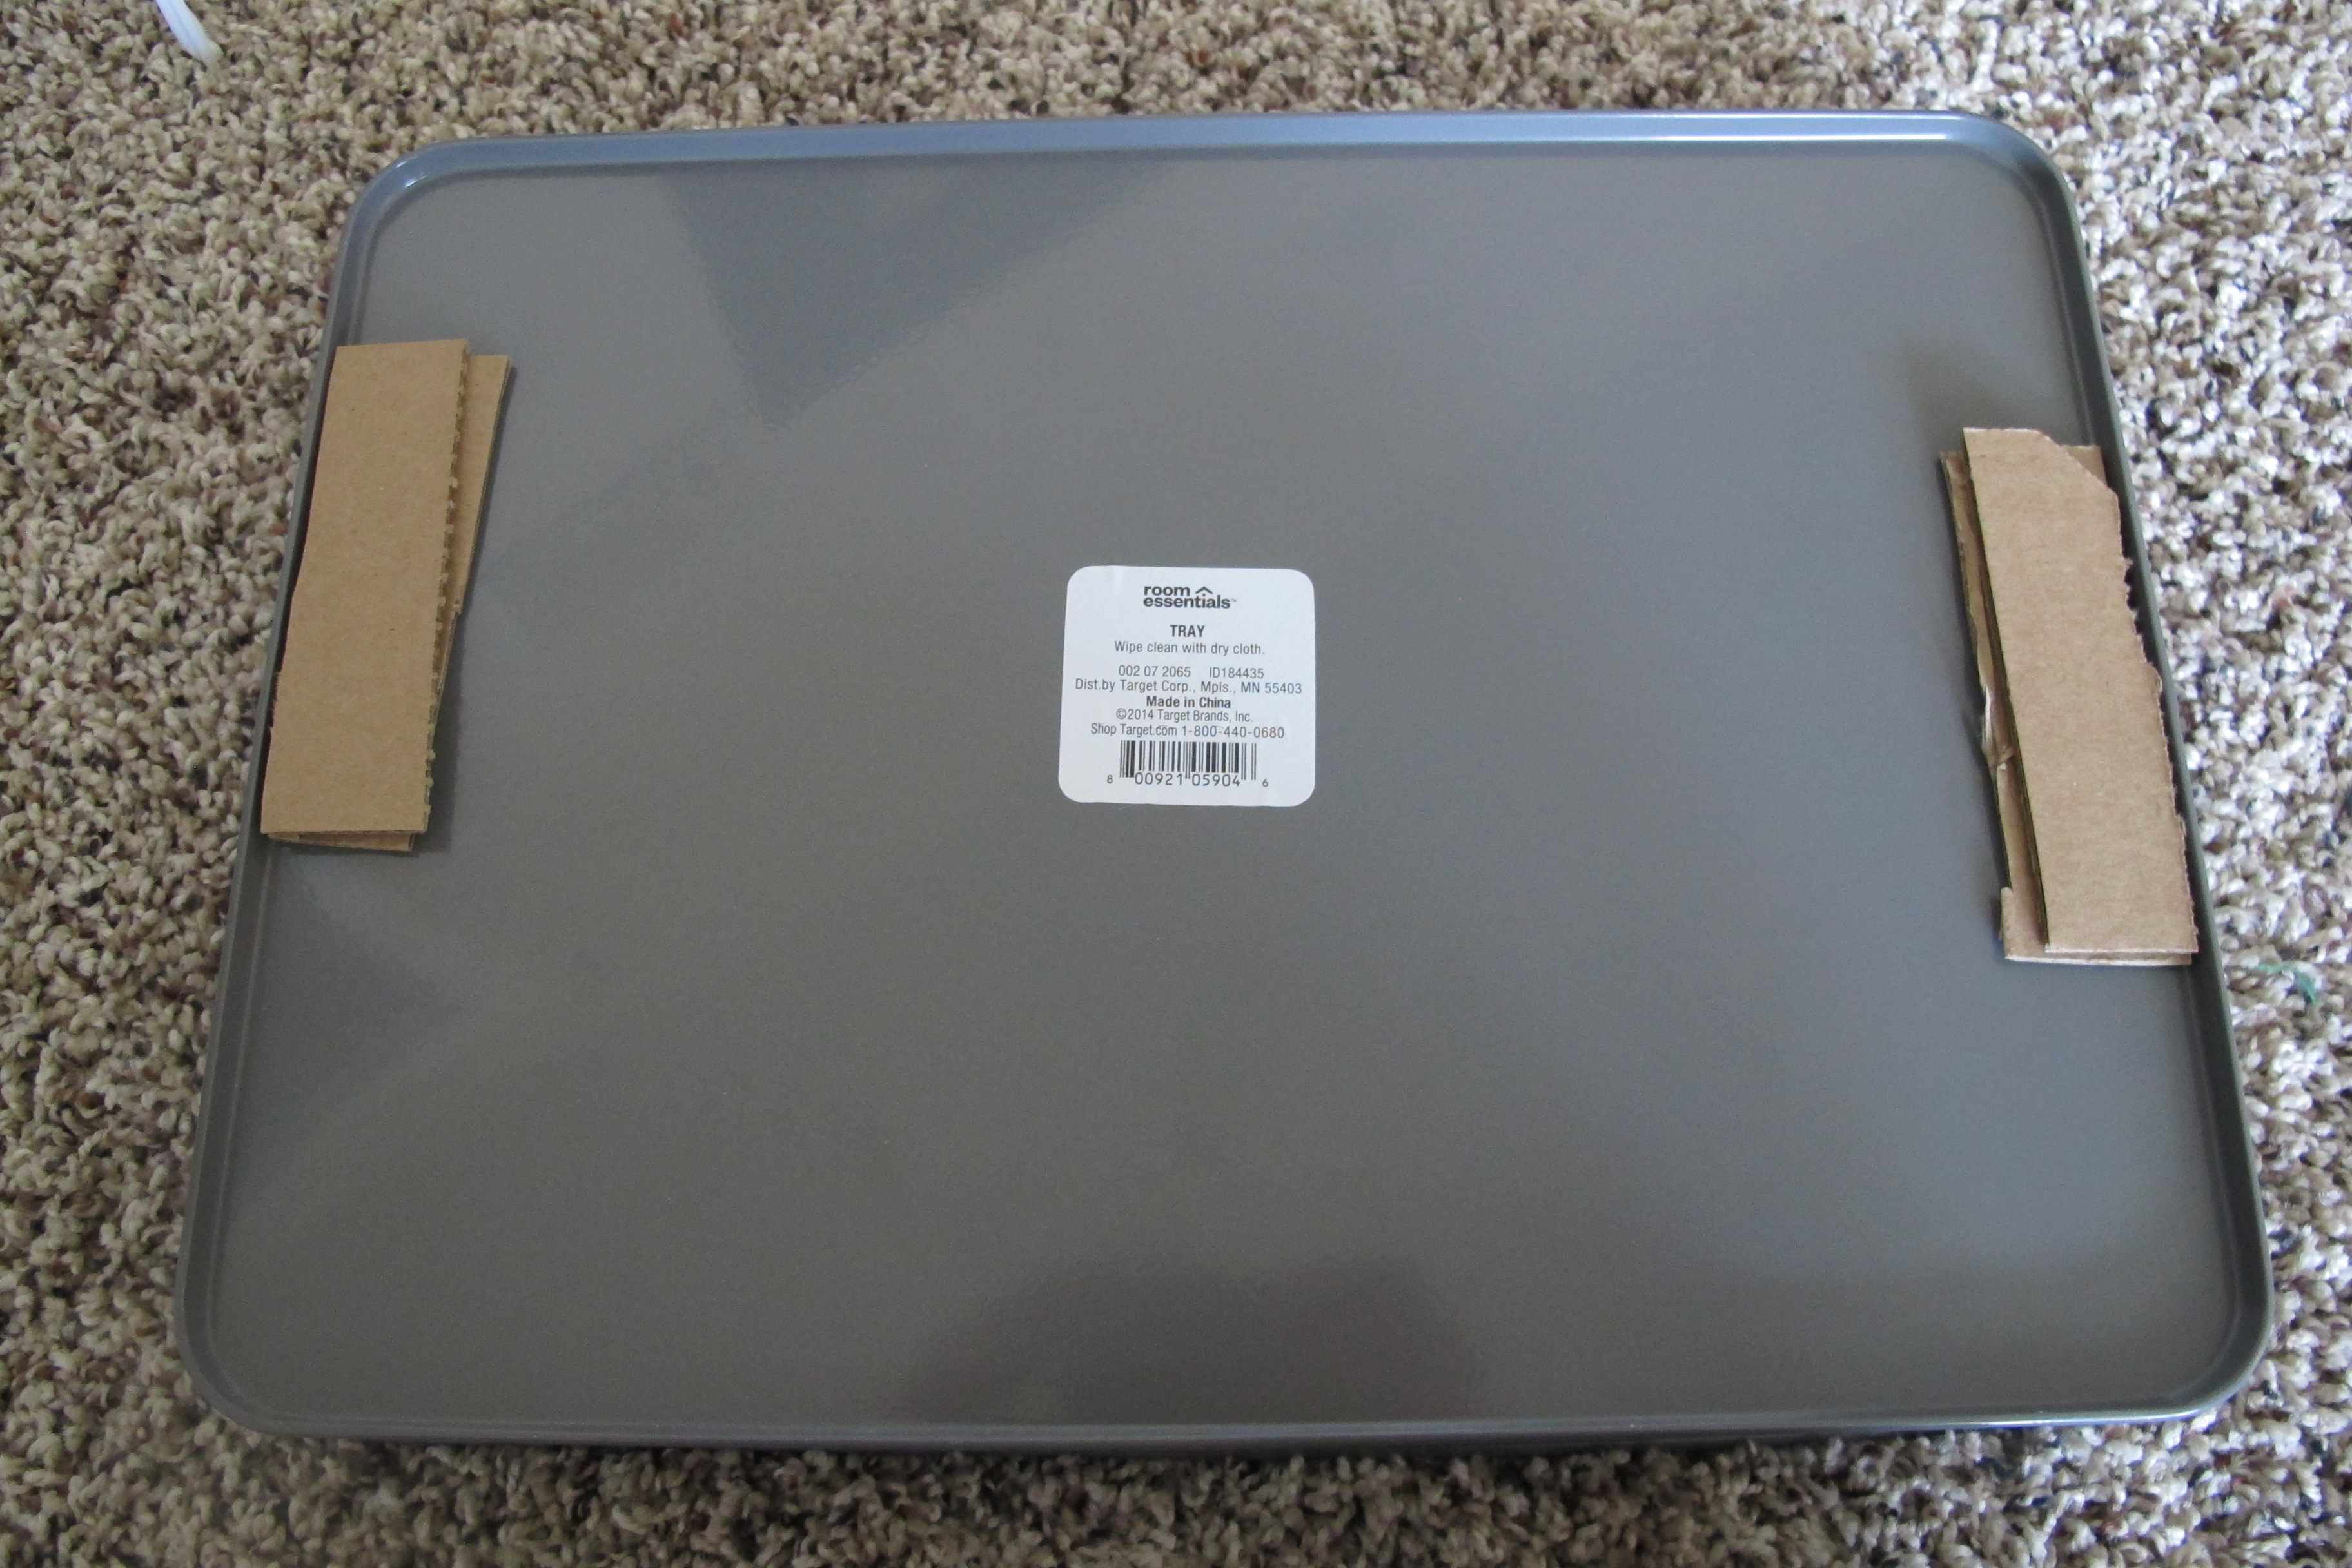
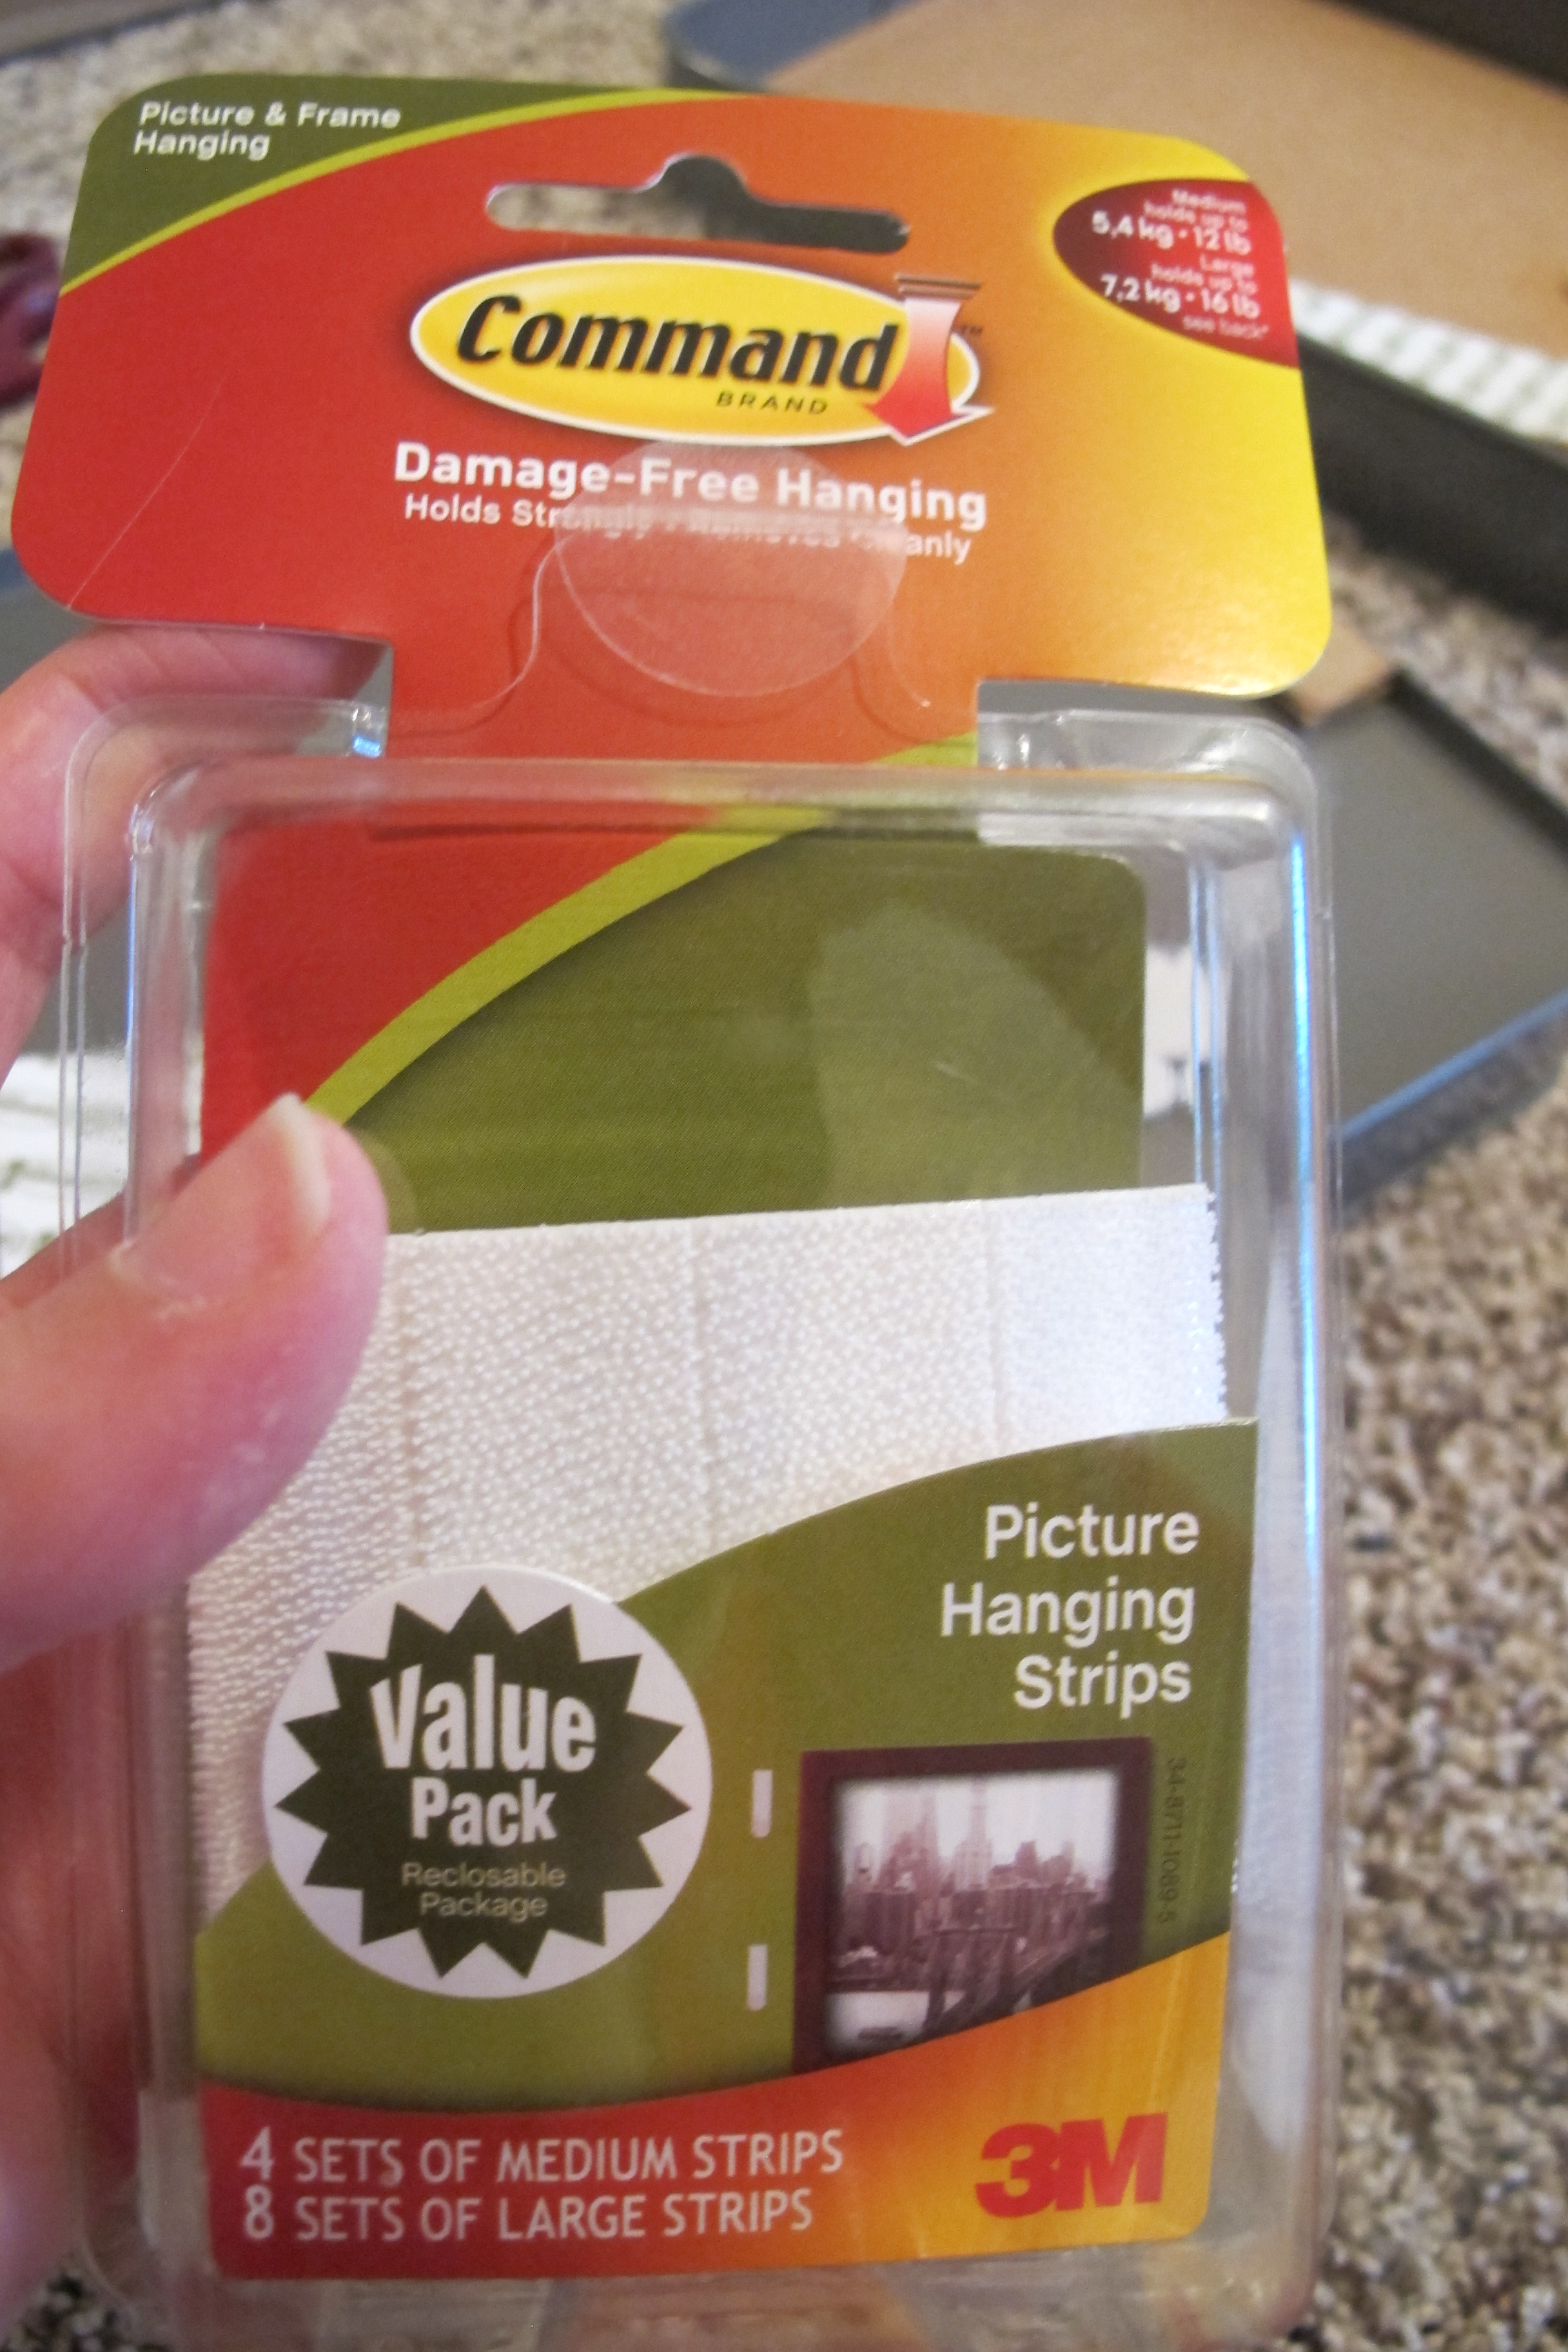
These would act as mounting blocks for some Command picture hanging strips…
Next, I needed to determine placement for my trays, so I created templates by tracing the trays onto brown paper…
I cut them out and adhered them to the wall with tape (as is demonstrated by this fantastically crummy picture)…
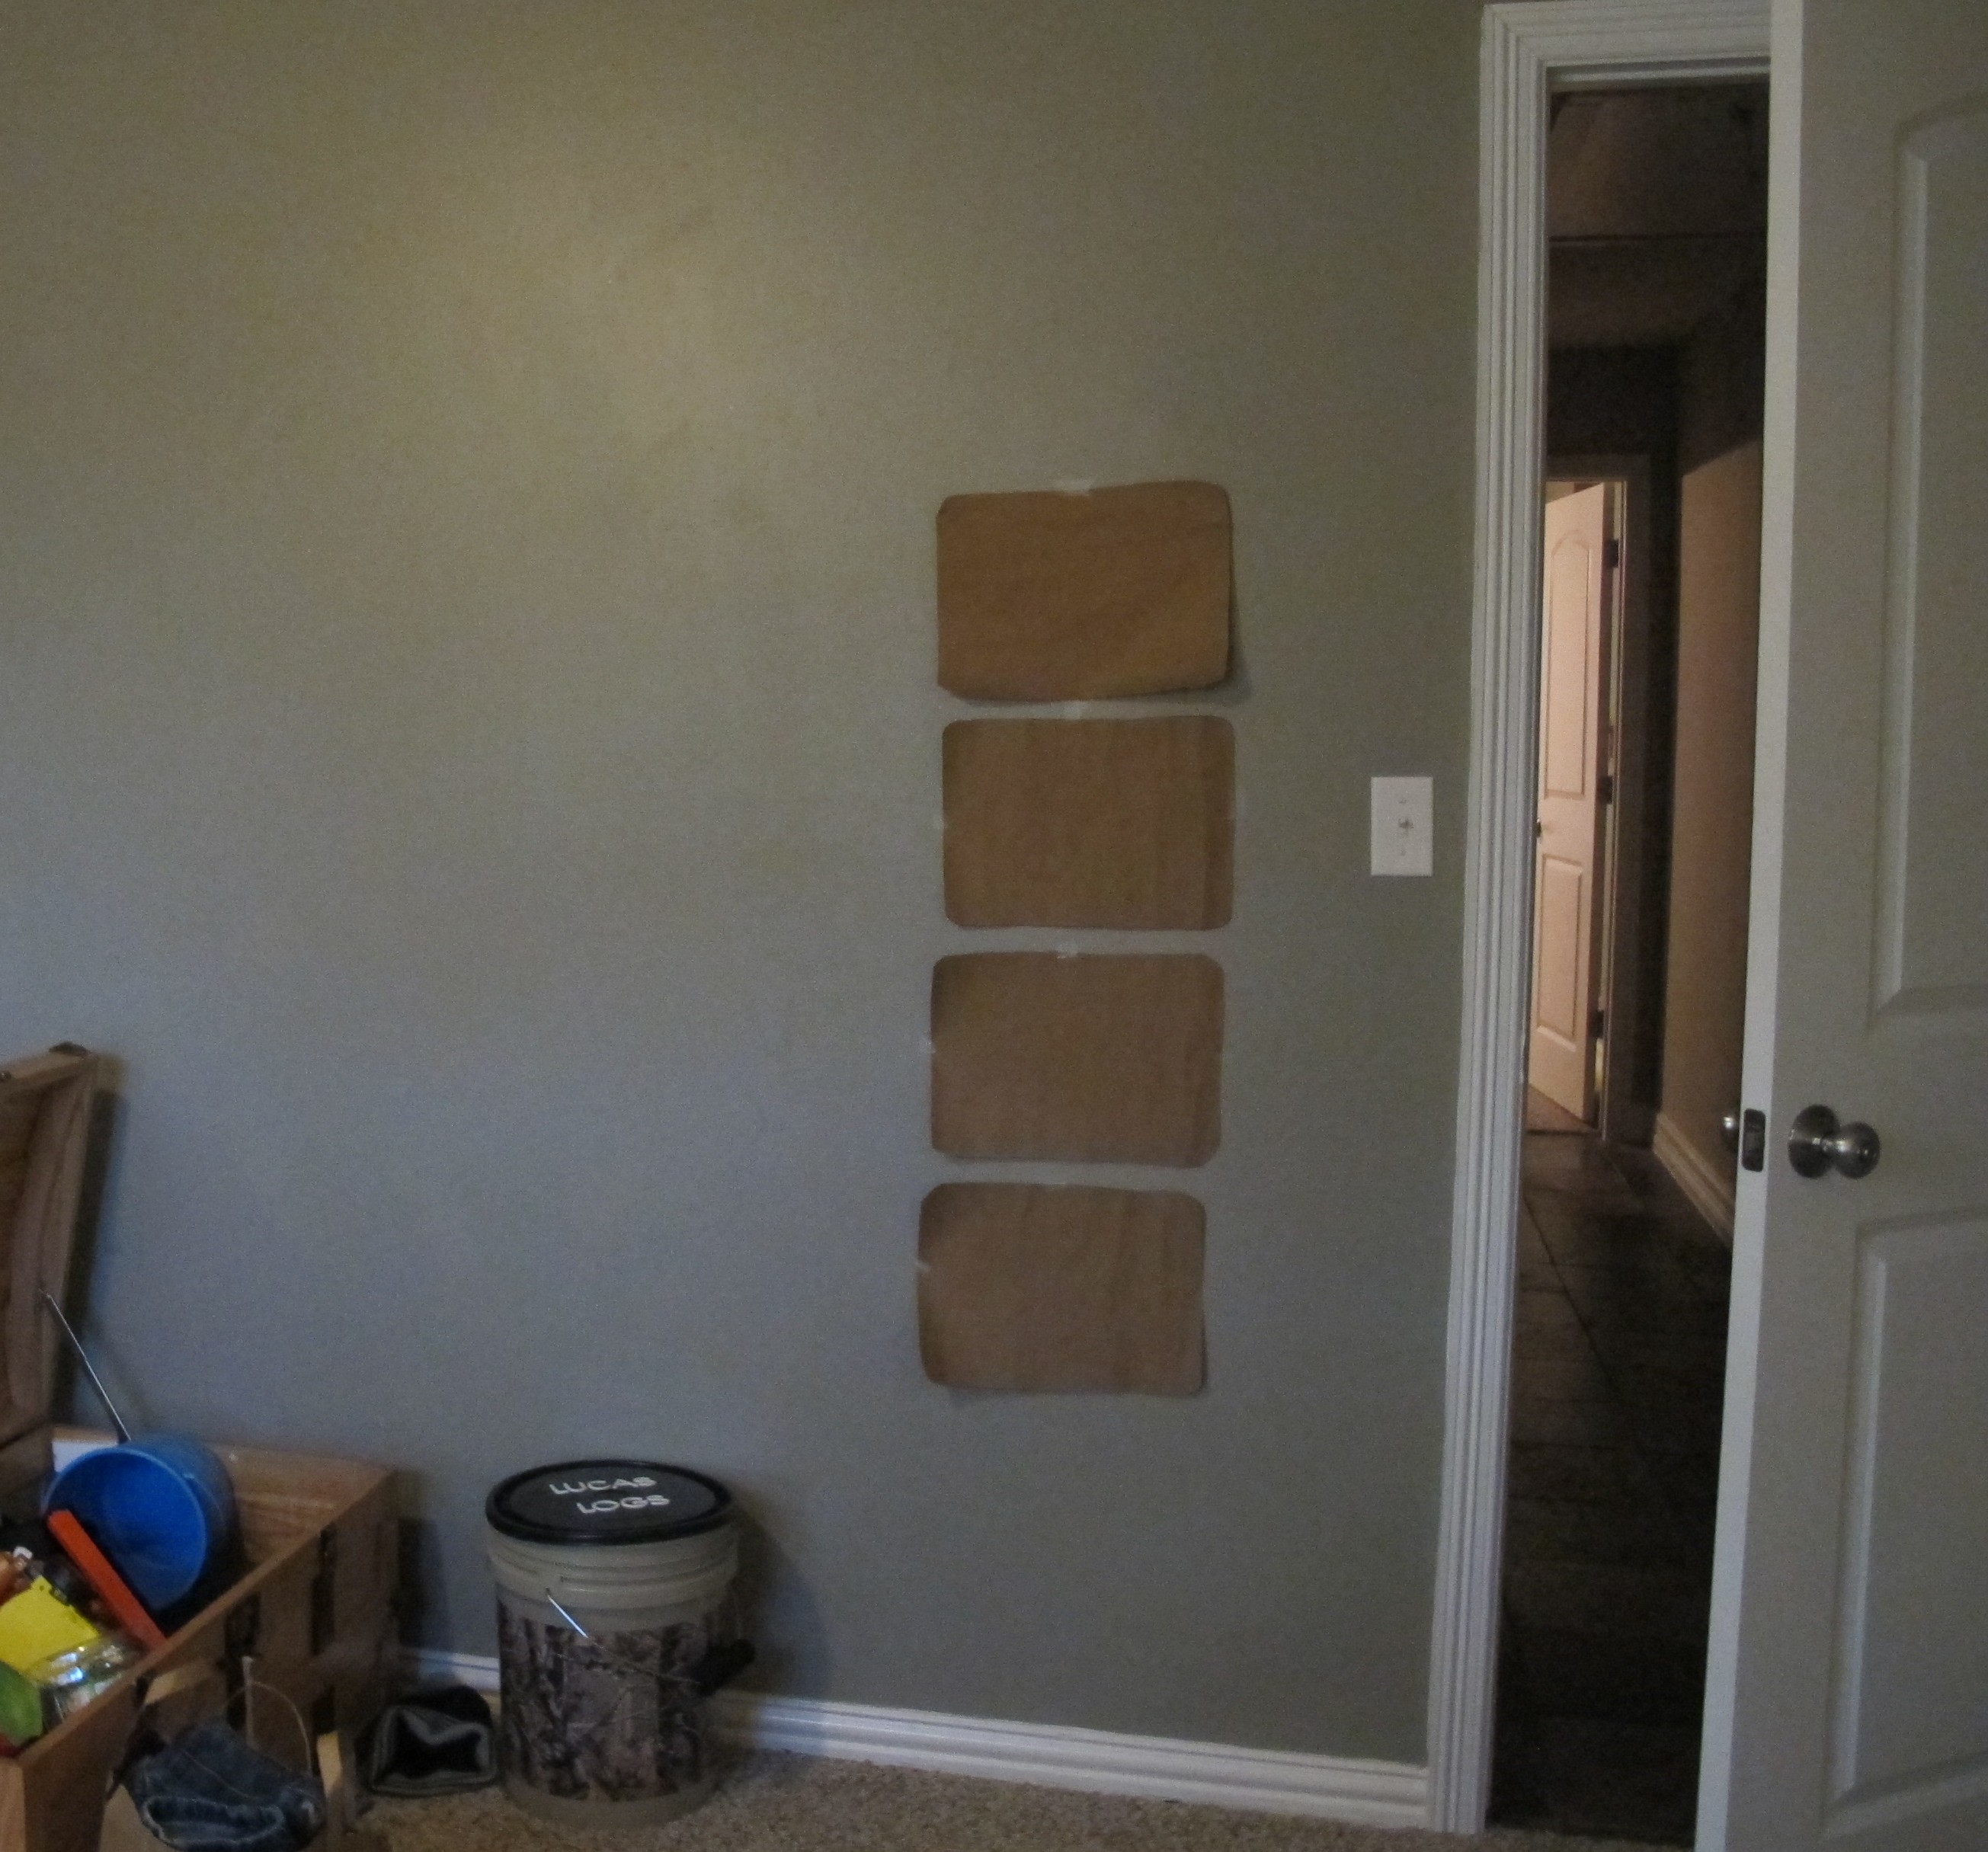
I played around with placement and once I was satisfied, I marked the location of my templates with a pencil. Then, I made a more precise vertical line along one side with a level. This was my guide to ensure that my trays were stacked exactly above one another (P.S. I erased it later)…

The rest was as simple as following the instructions on the back of the Command box and adhering my trays the wall…

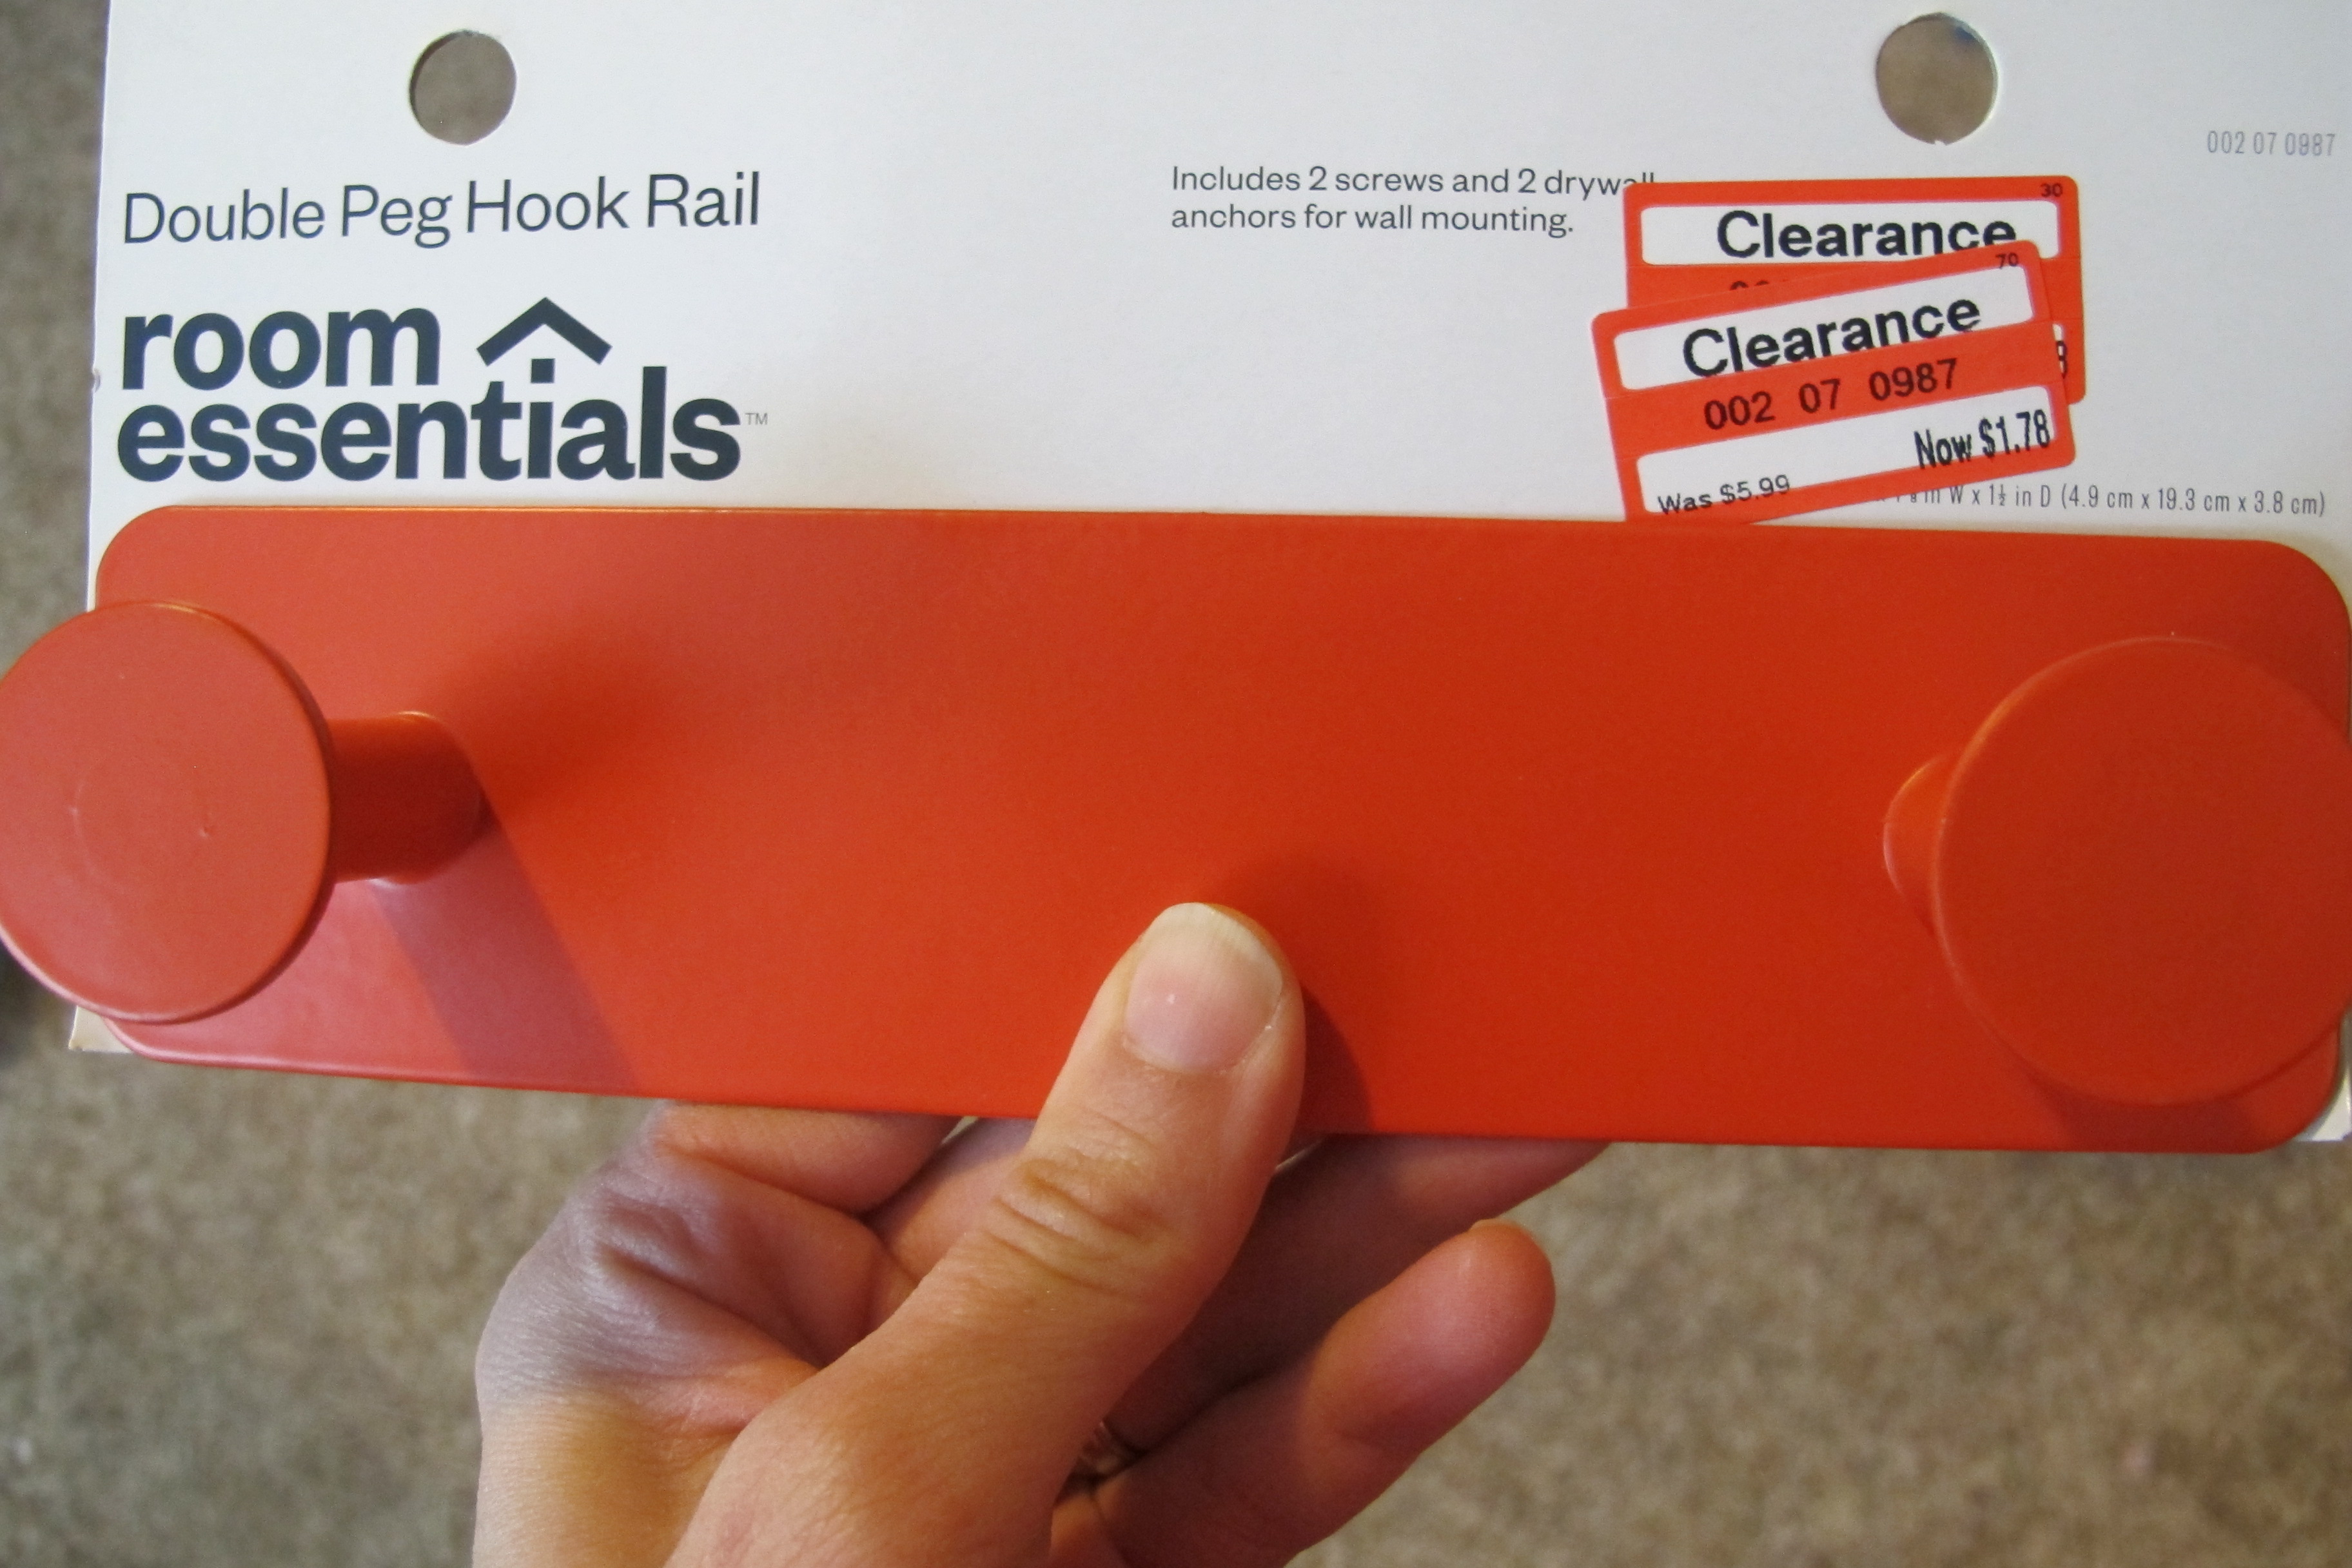
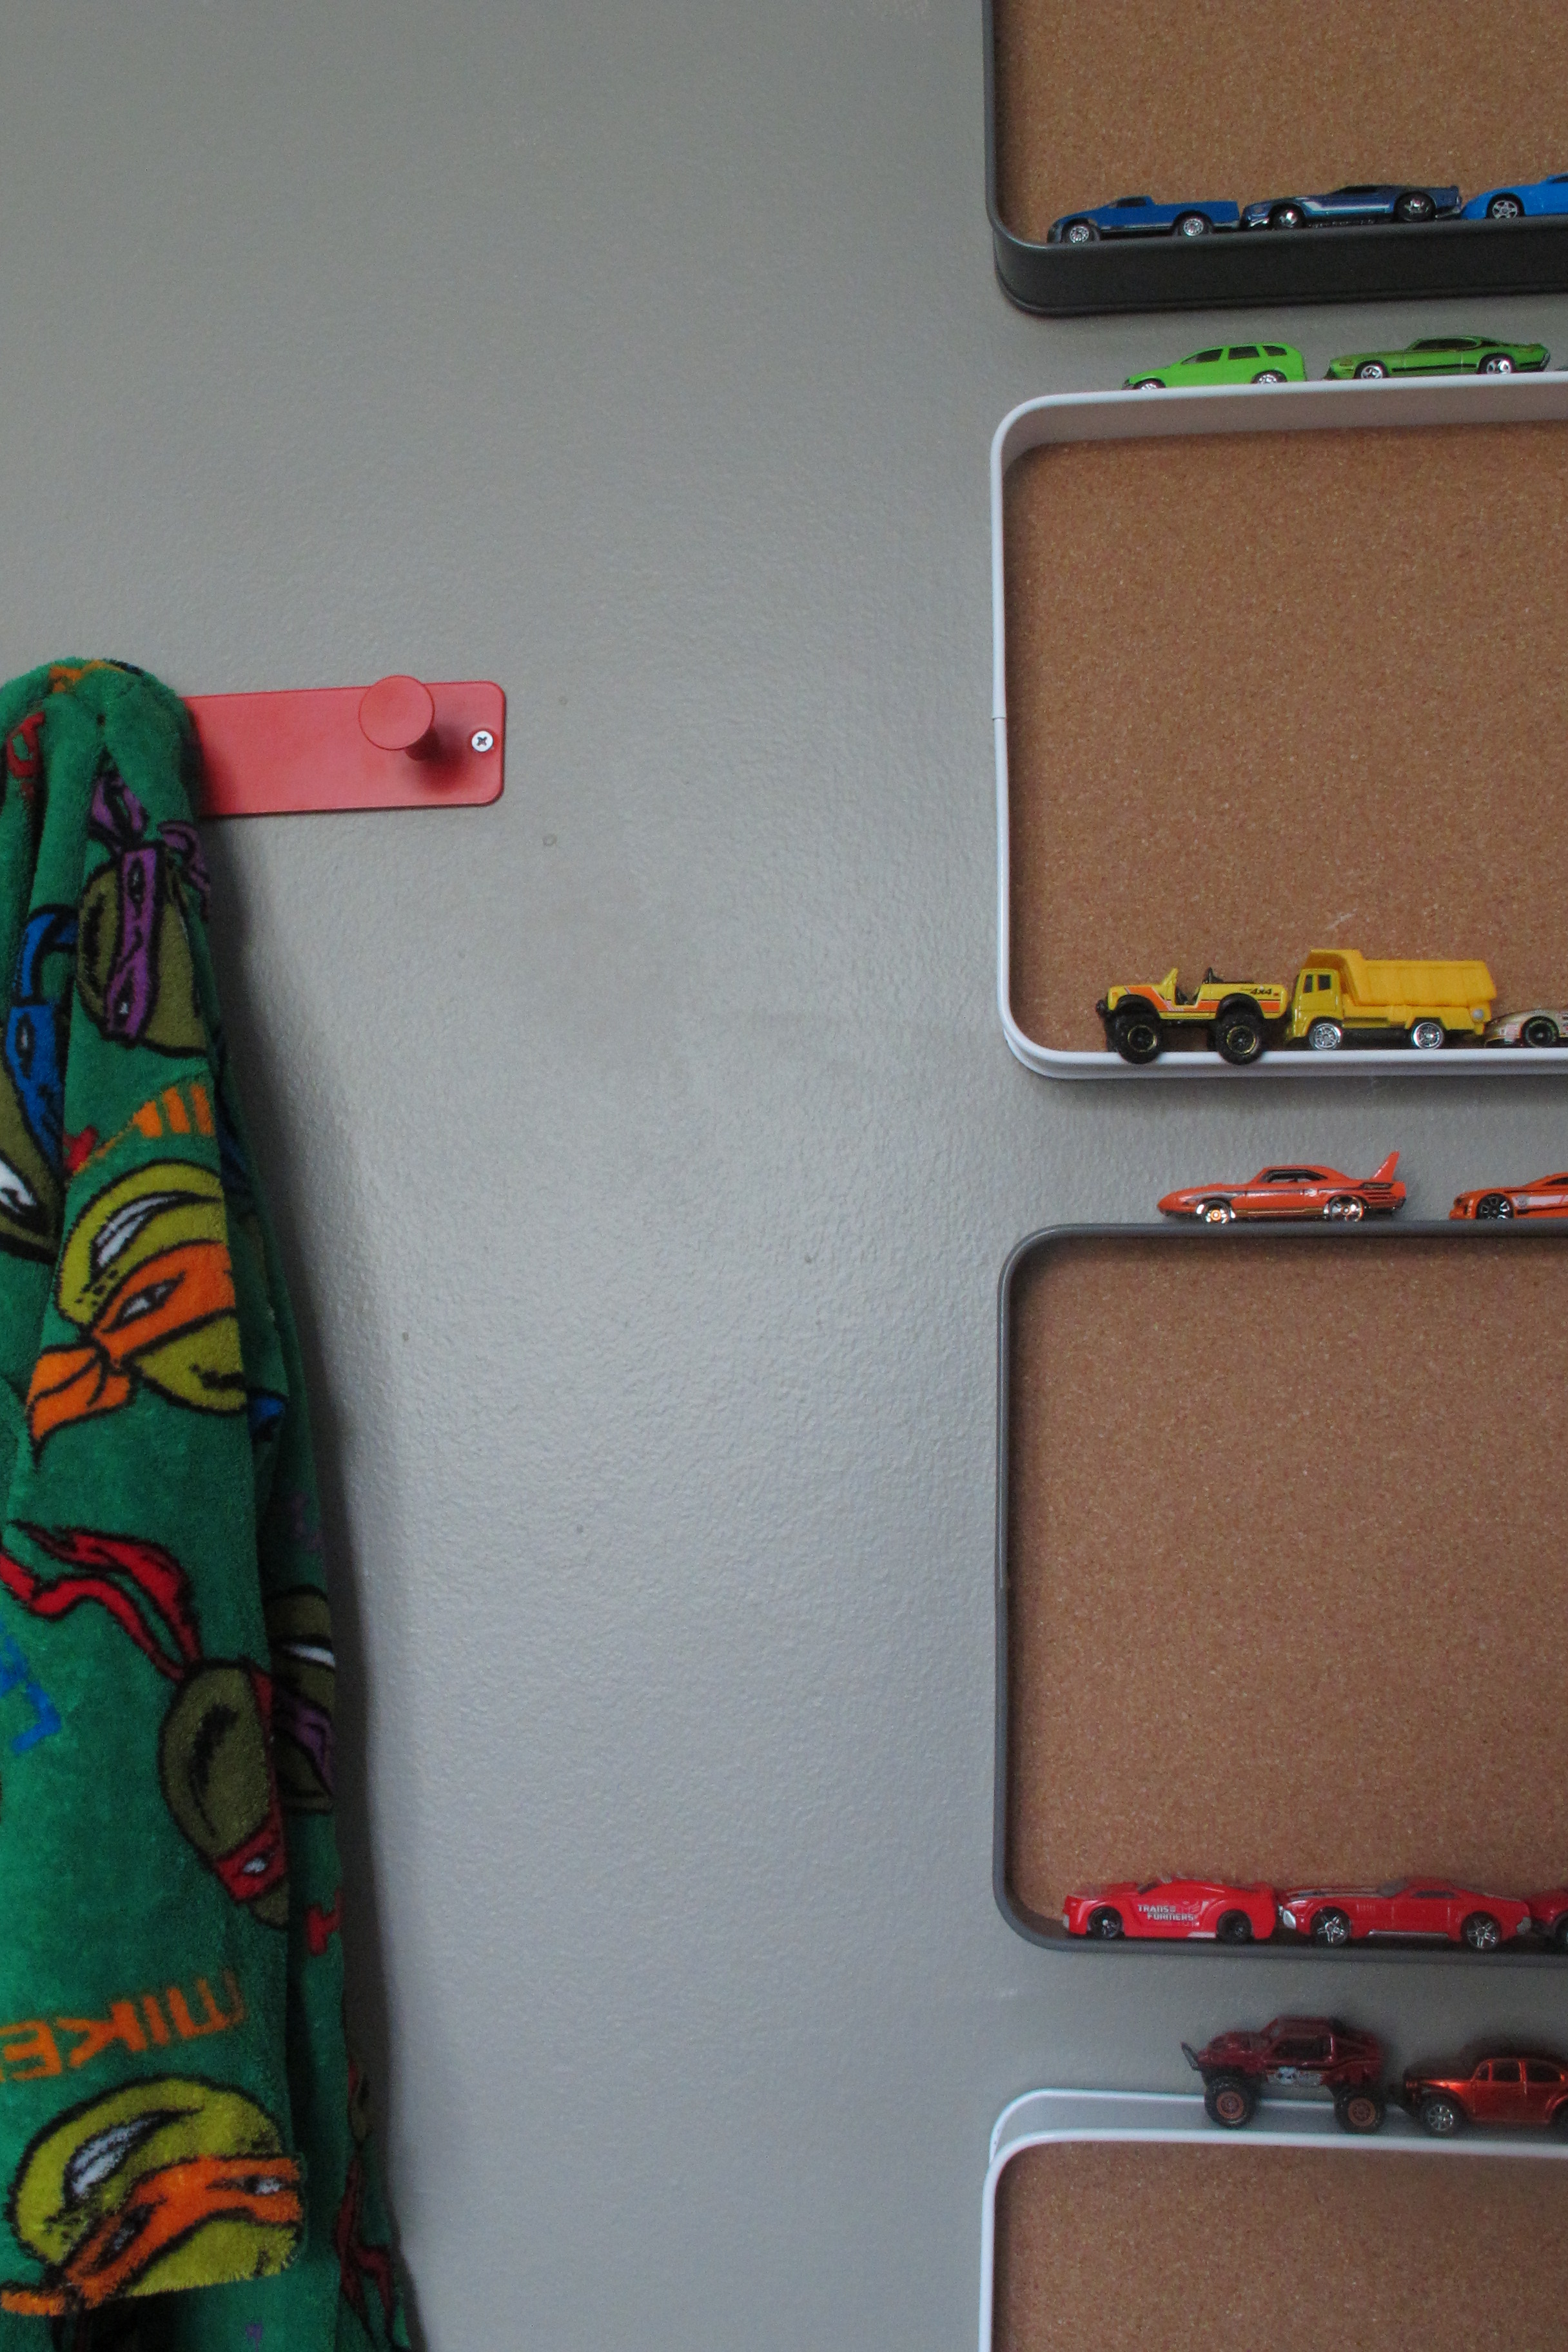
Next, I decided to add a little more color and function to fill the spot to the left of the trays. I simply hung this neat orange hook (also found on clearance for $1.78) next to my trays for some hanging storage…
I added Lucas’s matchbox cars, aaaaaand here’s the final product…
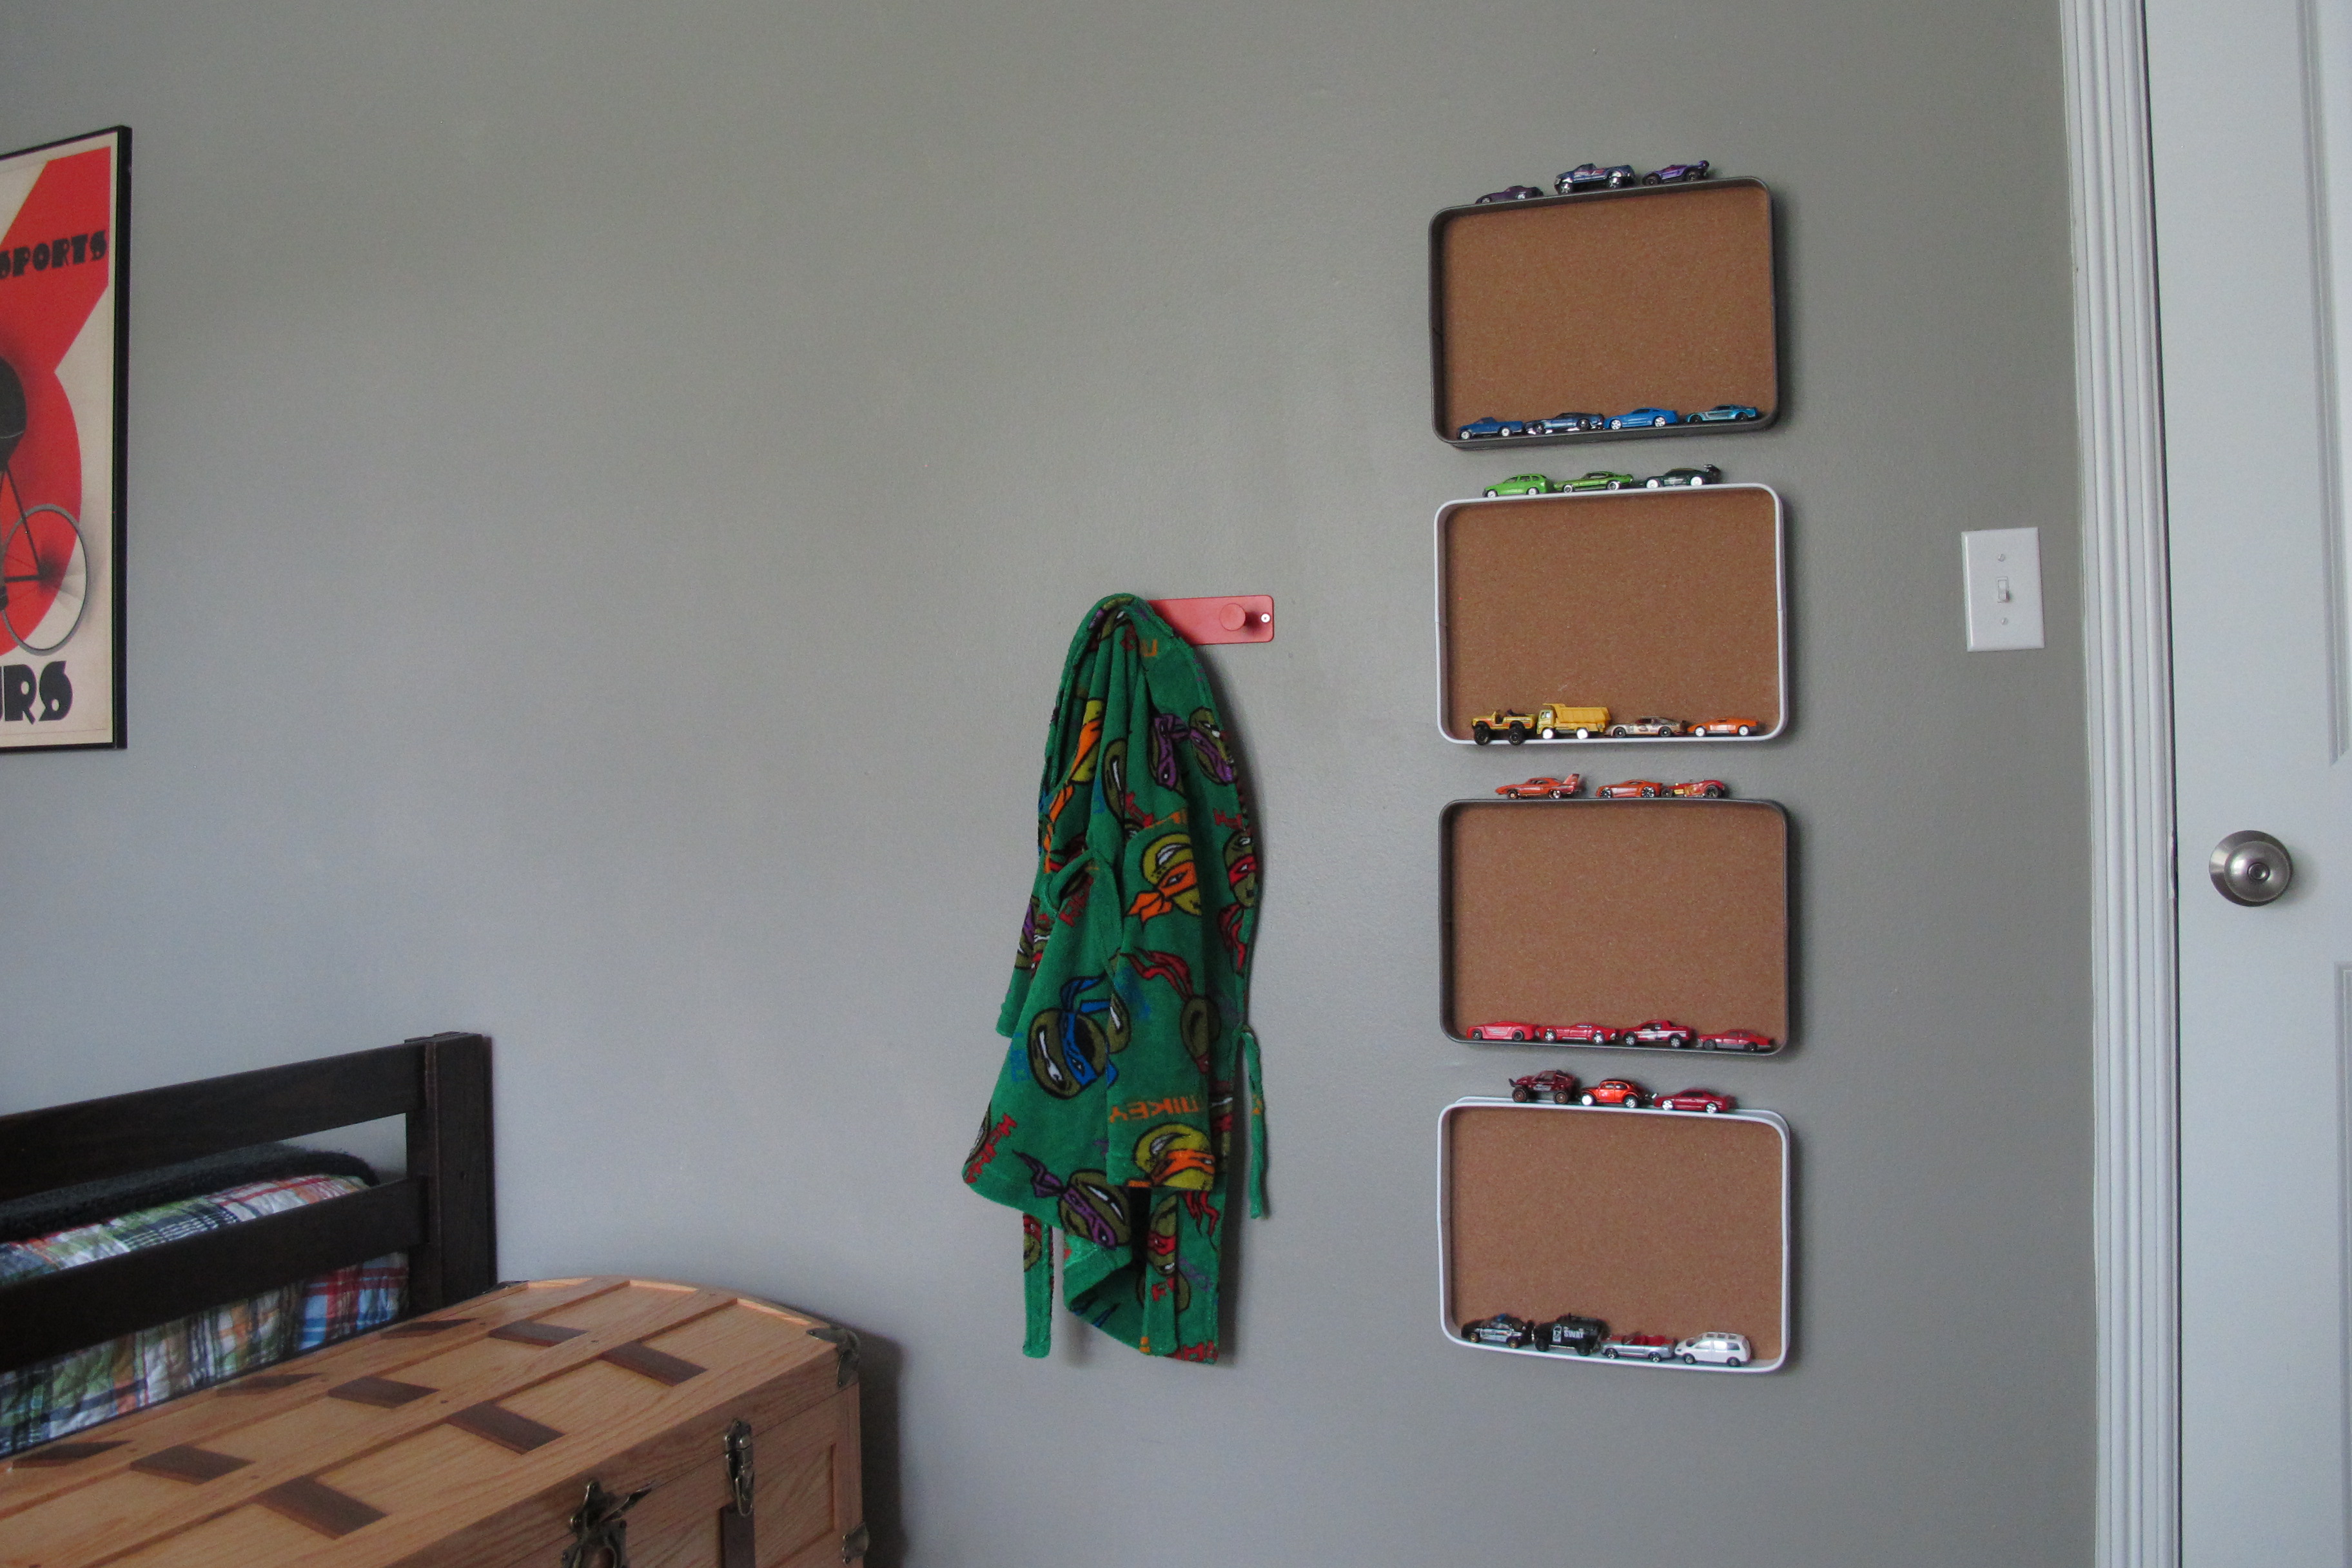
And the corner of the room, complete with his Ninja Turtle bulls-eye game…
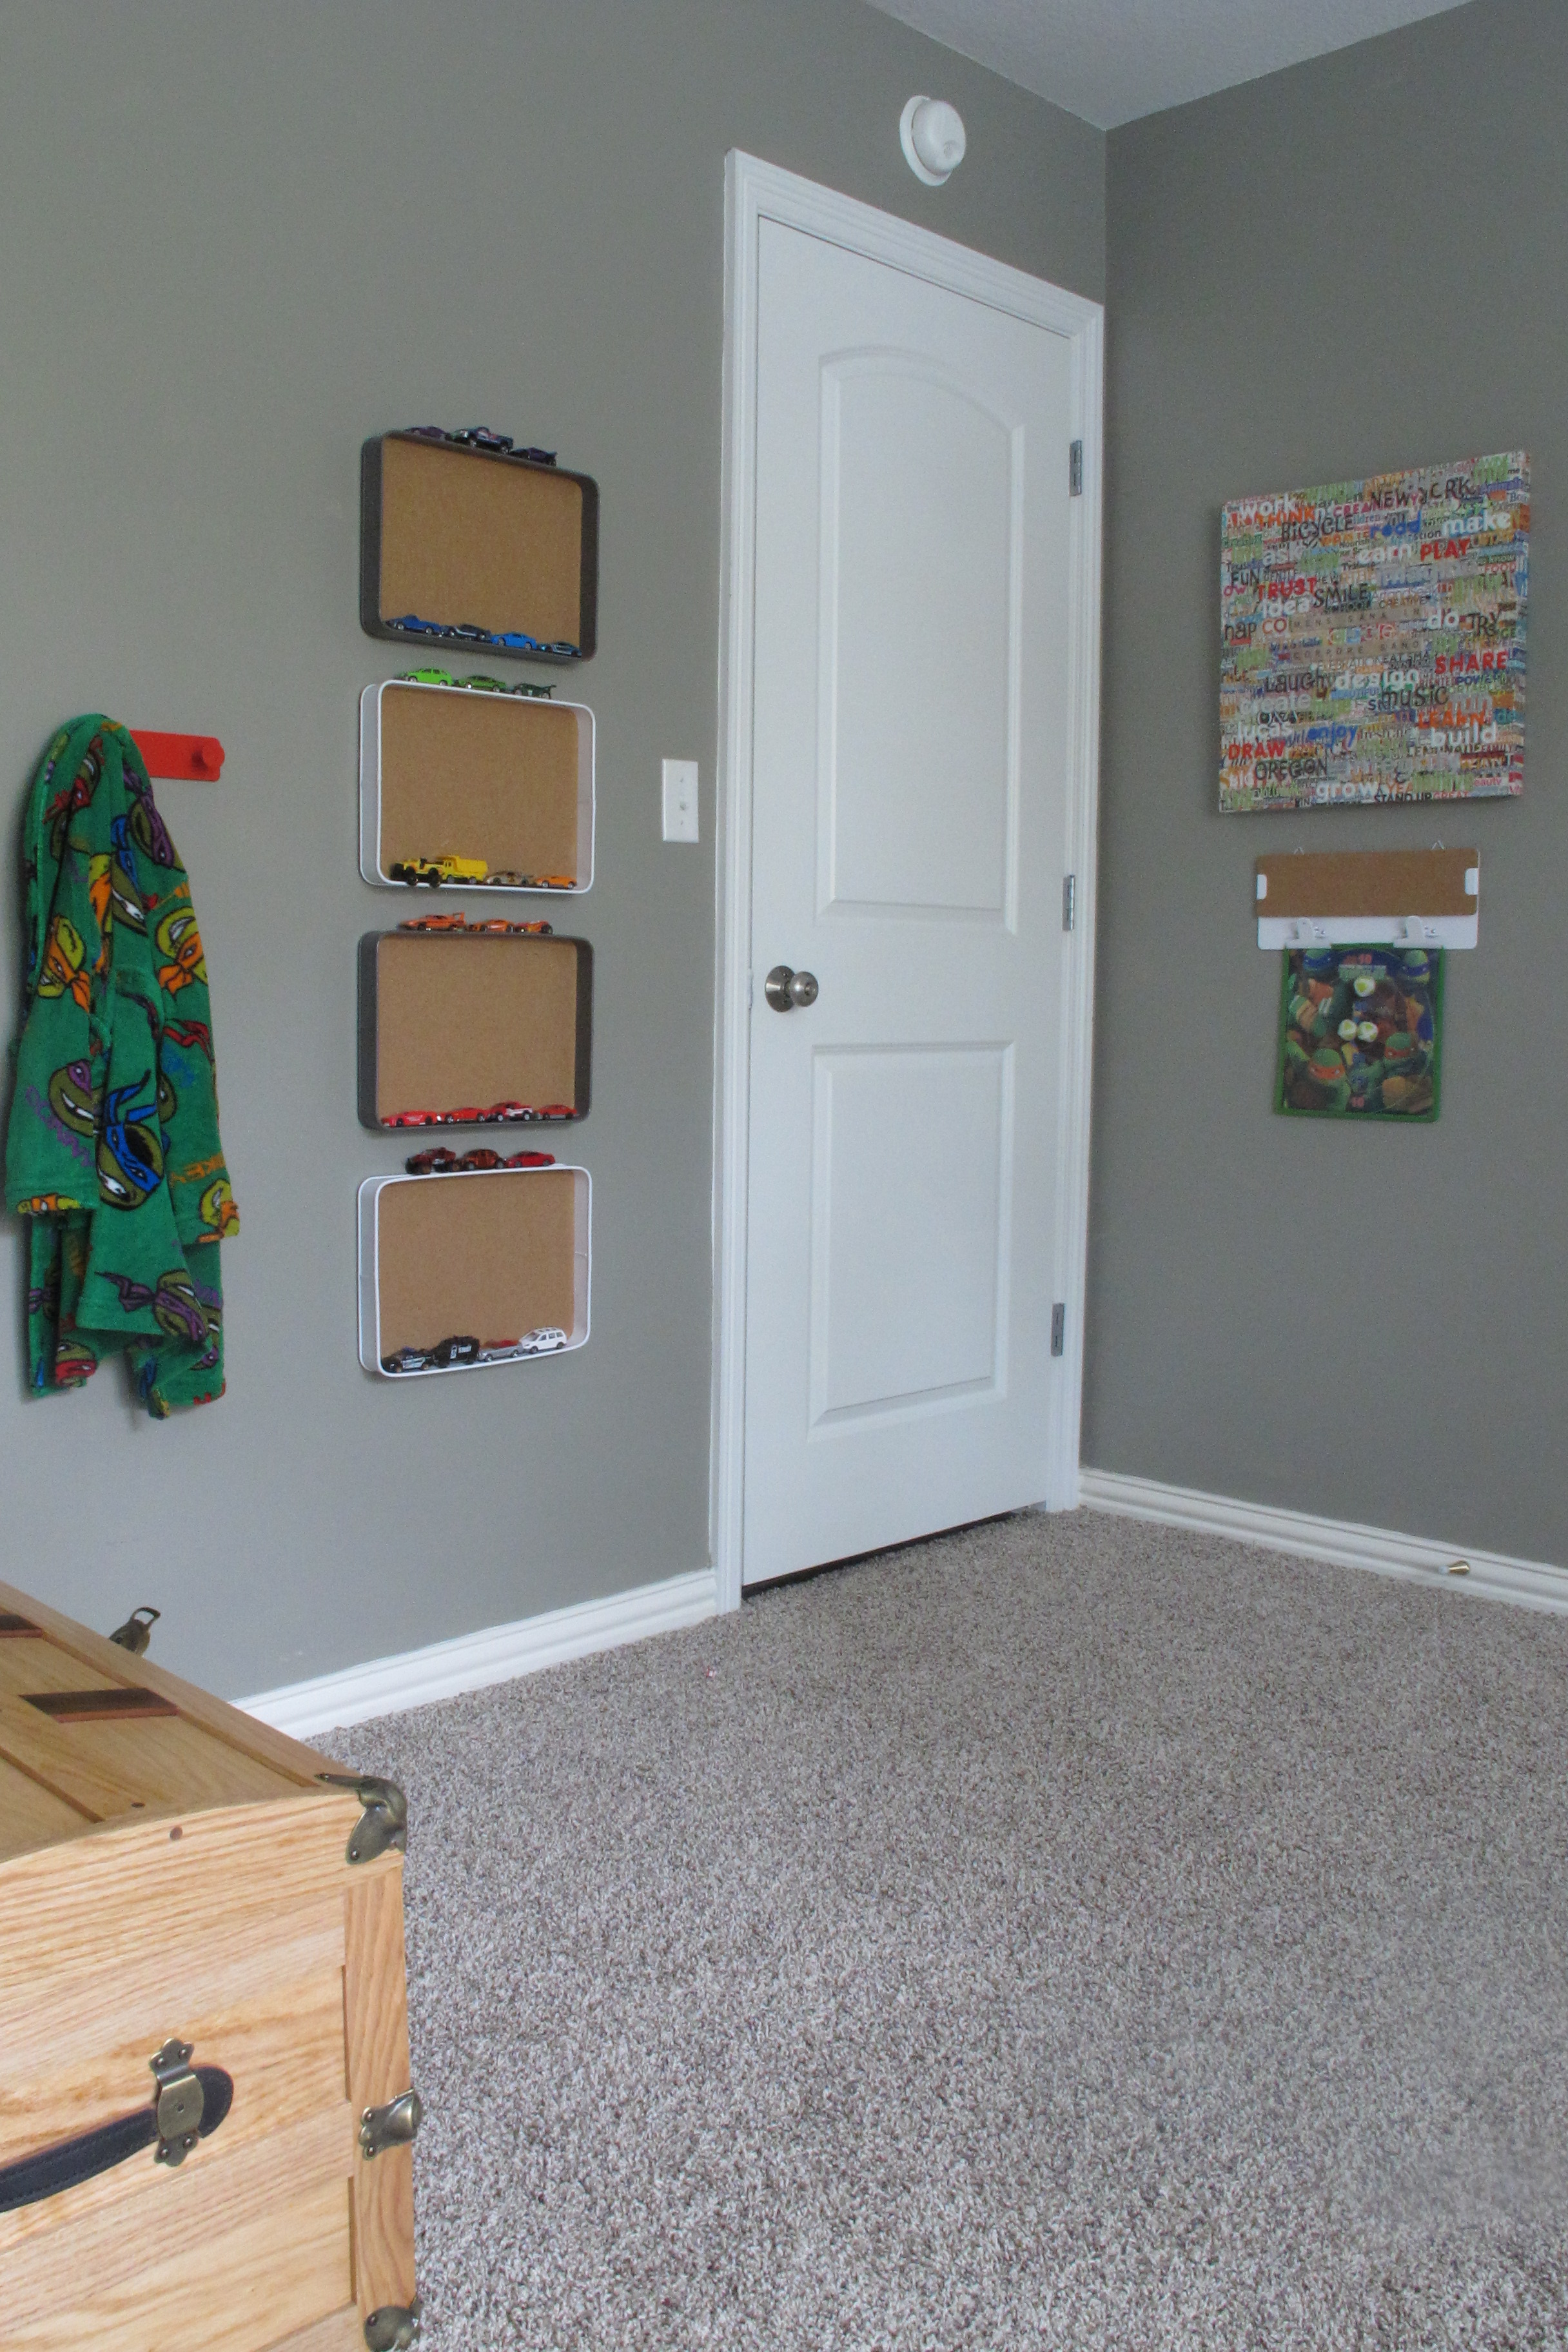
And a farther shot of this side of his room with the new addition…

There’s still WAY more to come on these walls, but hey… progress is progress. And I’m totally content with progress. I still need to add art above the head of his bed (and possibly shift that bicycle print down a bit) as well as incorporate a few other decorative elements to help tie everything together. In any case, though, I really have to thank my bloggy friends for this one. Honestly, I’m not sure I would’ve thought to create this if I hadn’t been pushed to do so with this challenge. And I LOOOOVE it. And so does Lucas. He was so excited when he saw it. He immediately began rearranging the cars and has been playing with them much more frequently now that they’re in plain sight. Total Win-Win if you ask me.
So, with that, I give you the lovely projects created by my fellow bloggers. Do yourself a favor and check them out!


SUPER cute idea Christina! LOVE how that little man’s room is coming together!!!
Thanks, Kristi! It’s slowly getting there and I’m loving every minute!
I just LOVE it! So clever and it’s always such a win when you find great things on those Target clearance end caps! Are the insides of those trays cork? It’d be so fun to pin little messages are car-related things in there!
Yes, they are! It’s so funny that you say that because I literally just talked to Lucas yesterday about hanging some of his artwork from school in there. He got all excited. Haha! Gotta love when projects are multi-purpose! 🙂
What a great idea, Christina! Love your little boys room too!
Thanks, Tara! It’s slowly coming along. 🙂
These are fabulous and such a steal! Are they cork? How cute would that be to hang your little guys artwork in the trays! Side note, I also picked up 6 of those orange hooks on clearance for the same price! Gotta love a good clearance find!
NICE!! I seriously heart that place. You gotta wonder how many clearance-related- happy-dances happen there on a daily basis. 🙂 I actually suggested hanging his artwork in the trays to Lucas yesterday and he was all about it. He started jumping and doing Ninja Turtle poses (I guess that’s his happy-dance?). Haha! That kid… 🙂
What an awesome use for these trays! Really, really clever. And you cracked me up with your announcer voice. Love it!
Haha!! Every kick-butt challenge deserves a proper introduction. Heehee!!! 🙂
So clever! I would never think to use trays that way but I love how unique they look! Awesome job!
Thanks, Bre! 🙂
Such a great idea, Christina! The whole room is really coming together!
Thanks, Amy!
What a cute way to store your sons little cars!!! SO fun that he gets to have them on display too!
Thanks, Nicole! We’re really enjoying it!