Easy Industrial Pipe Toilet Paper Dispenser – Monthly DIY Challenge

HappyDance!! It’s that time again. Time for what??! Time for our Monthly DIY Challenge. The Monthly event where several bloggy friends and I are assigned a specific theme or item which we must simply make something with.

plumbing_graphic

This month’s mission??? Plumbing parts.

Unlike our previous few challenges, I instantly knew what I wanted to do for this one. I was going to make a toilet paper dispenser and matching shelf for our newly-painted, blank slate of a pool bath…

IMG_8208

Actually, blank slate may be an understatement. Literally. The room had nothing in it but a trash can and a basket of toilet paper (andatoilet). It needed help. And a butt-load of function. That’s a measurement, right?? A butt-load?? Heehee!  I say yes.

Anyways, unfortunately, around the time that I was supposed to be working on these projects, I came down with a stomach bug which drastically limited my functional capacity. Thus, the wood for my shelf didn’t get cut, sanded, stained, and finished as planned. So, the shelf will be a project for another day. And it WILL happen. I already have the stuff. Plus, now that I’ve seen how cool the toilet paper dispenser looks, I just wanna spread the cool.

So, without further adieu… allow me to present you with my super simple, industrial toilet paper dispenser (permasmile plus tooth-sparkle, aaaaaand wink!)…

IMG_8483

Eh? Eh??

Pretty neat, right??? Plus, it doesn’t hurt that it was the Easiest.Project.Ever. No joke.

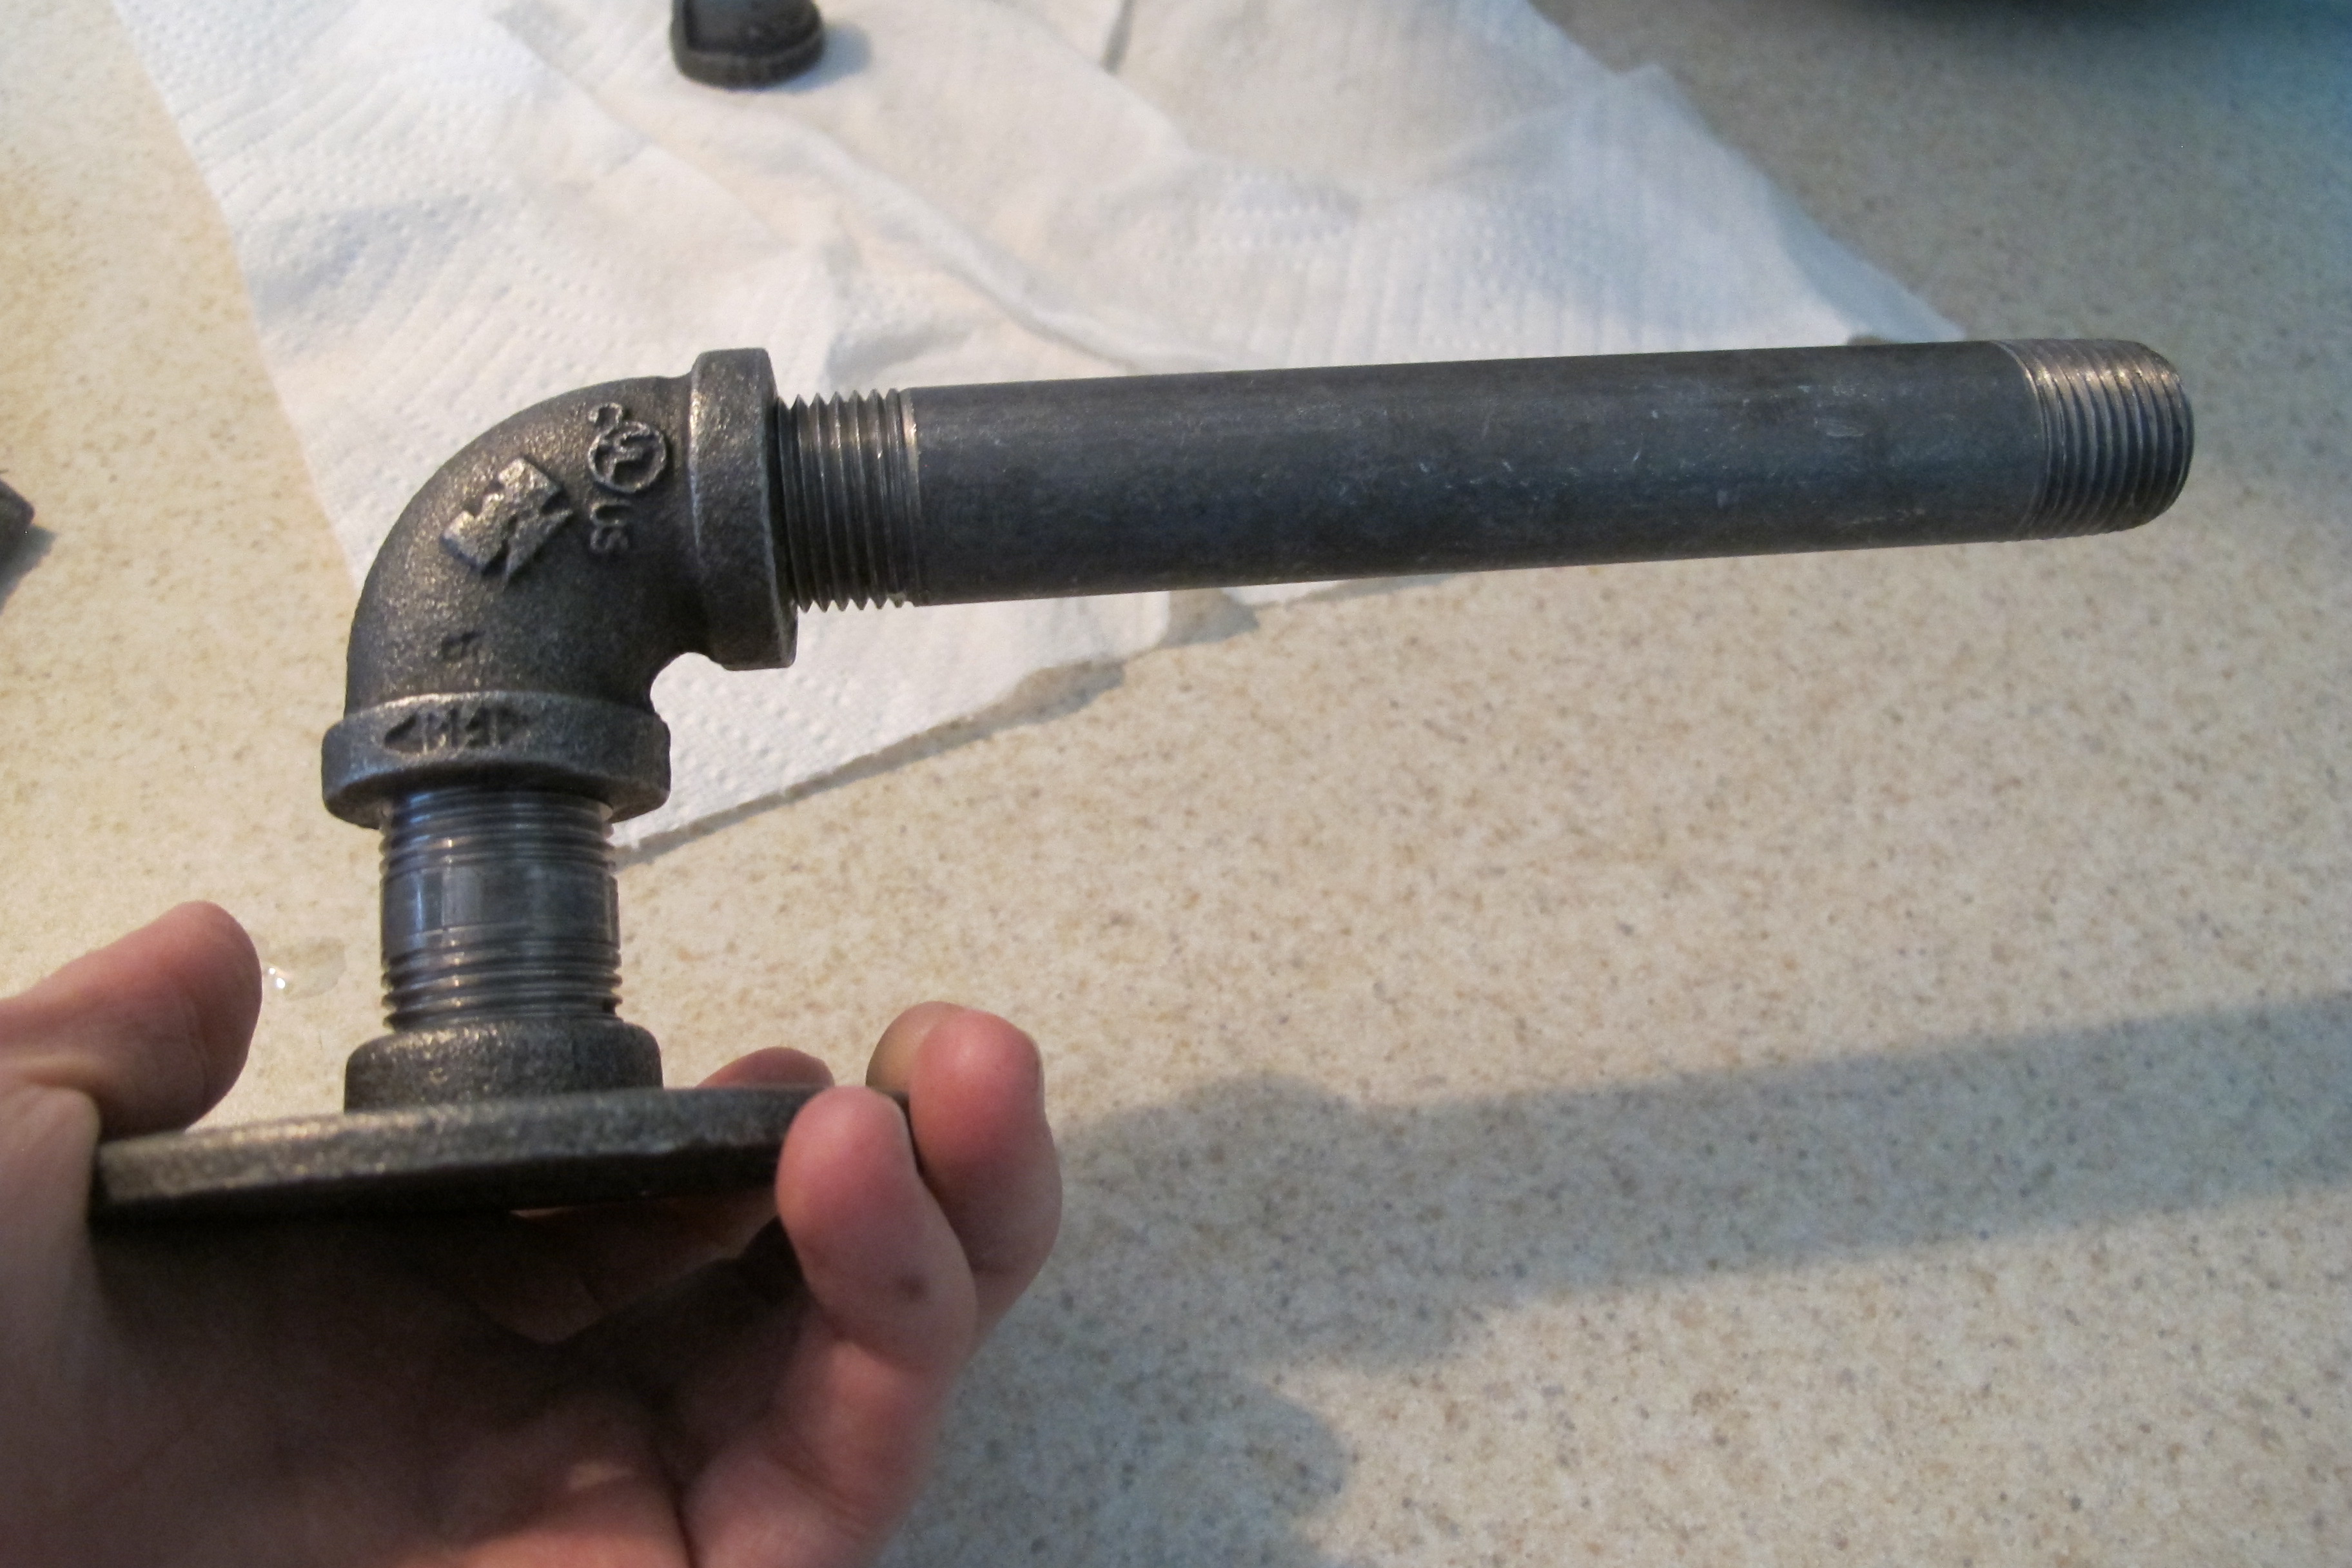
I simply purchased these items from Lowes….

IMG_8471

– 1/2″ floor flange
– 1/2″ cap
– 1/2″ x 6″ nipple
-1/2″ x 1 1/2″ nipple
-1/2″ 90degree elbow
(All were in the black steel color)

And washed them thoroughly, because dang… They were greasy…

IMG_8472

Once they were dry, I simply did the following…

One.

IMG_8475

Two.

IMG_8476

Three.

IMG_8478

Four.

IMG_8480

And then attached the holder to the wall with anchors and screws (using a level to ensure it was installed straight… It was.  Despite my slightly crooked picture).

IMG_8491

Now, for a REEEEALLY important life question… Can you really call it a “beauty shot” if it involves toilet paper? …I say yes again. 🙂

VOGUE!!!!

IMG_8497

IMG_8483

IMG_8487

IMG_8490

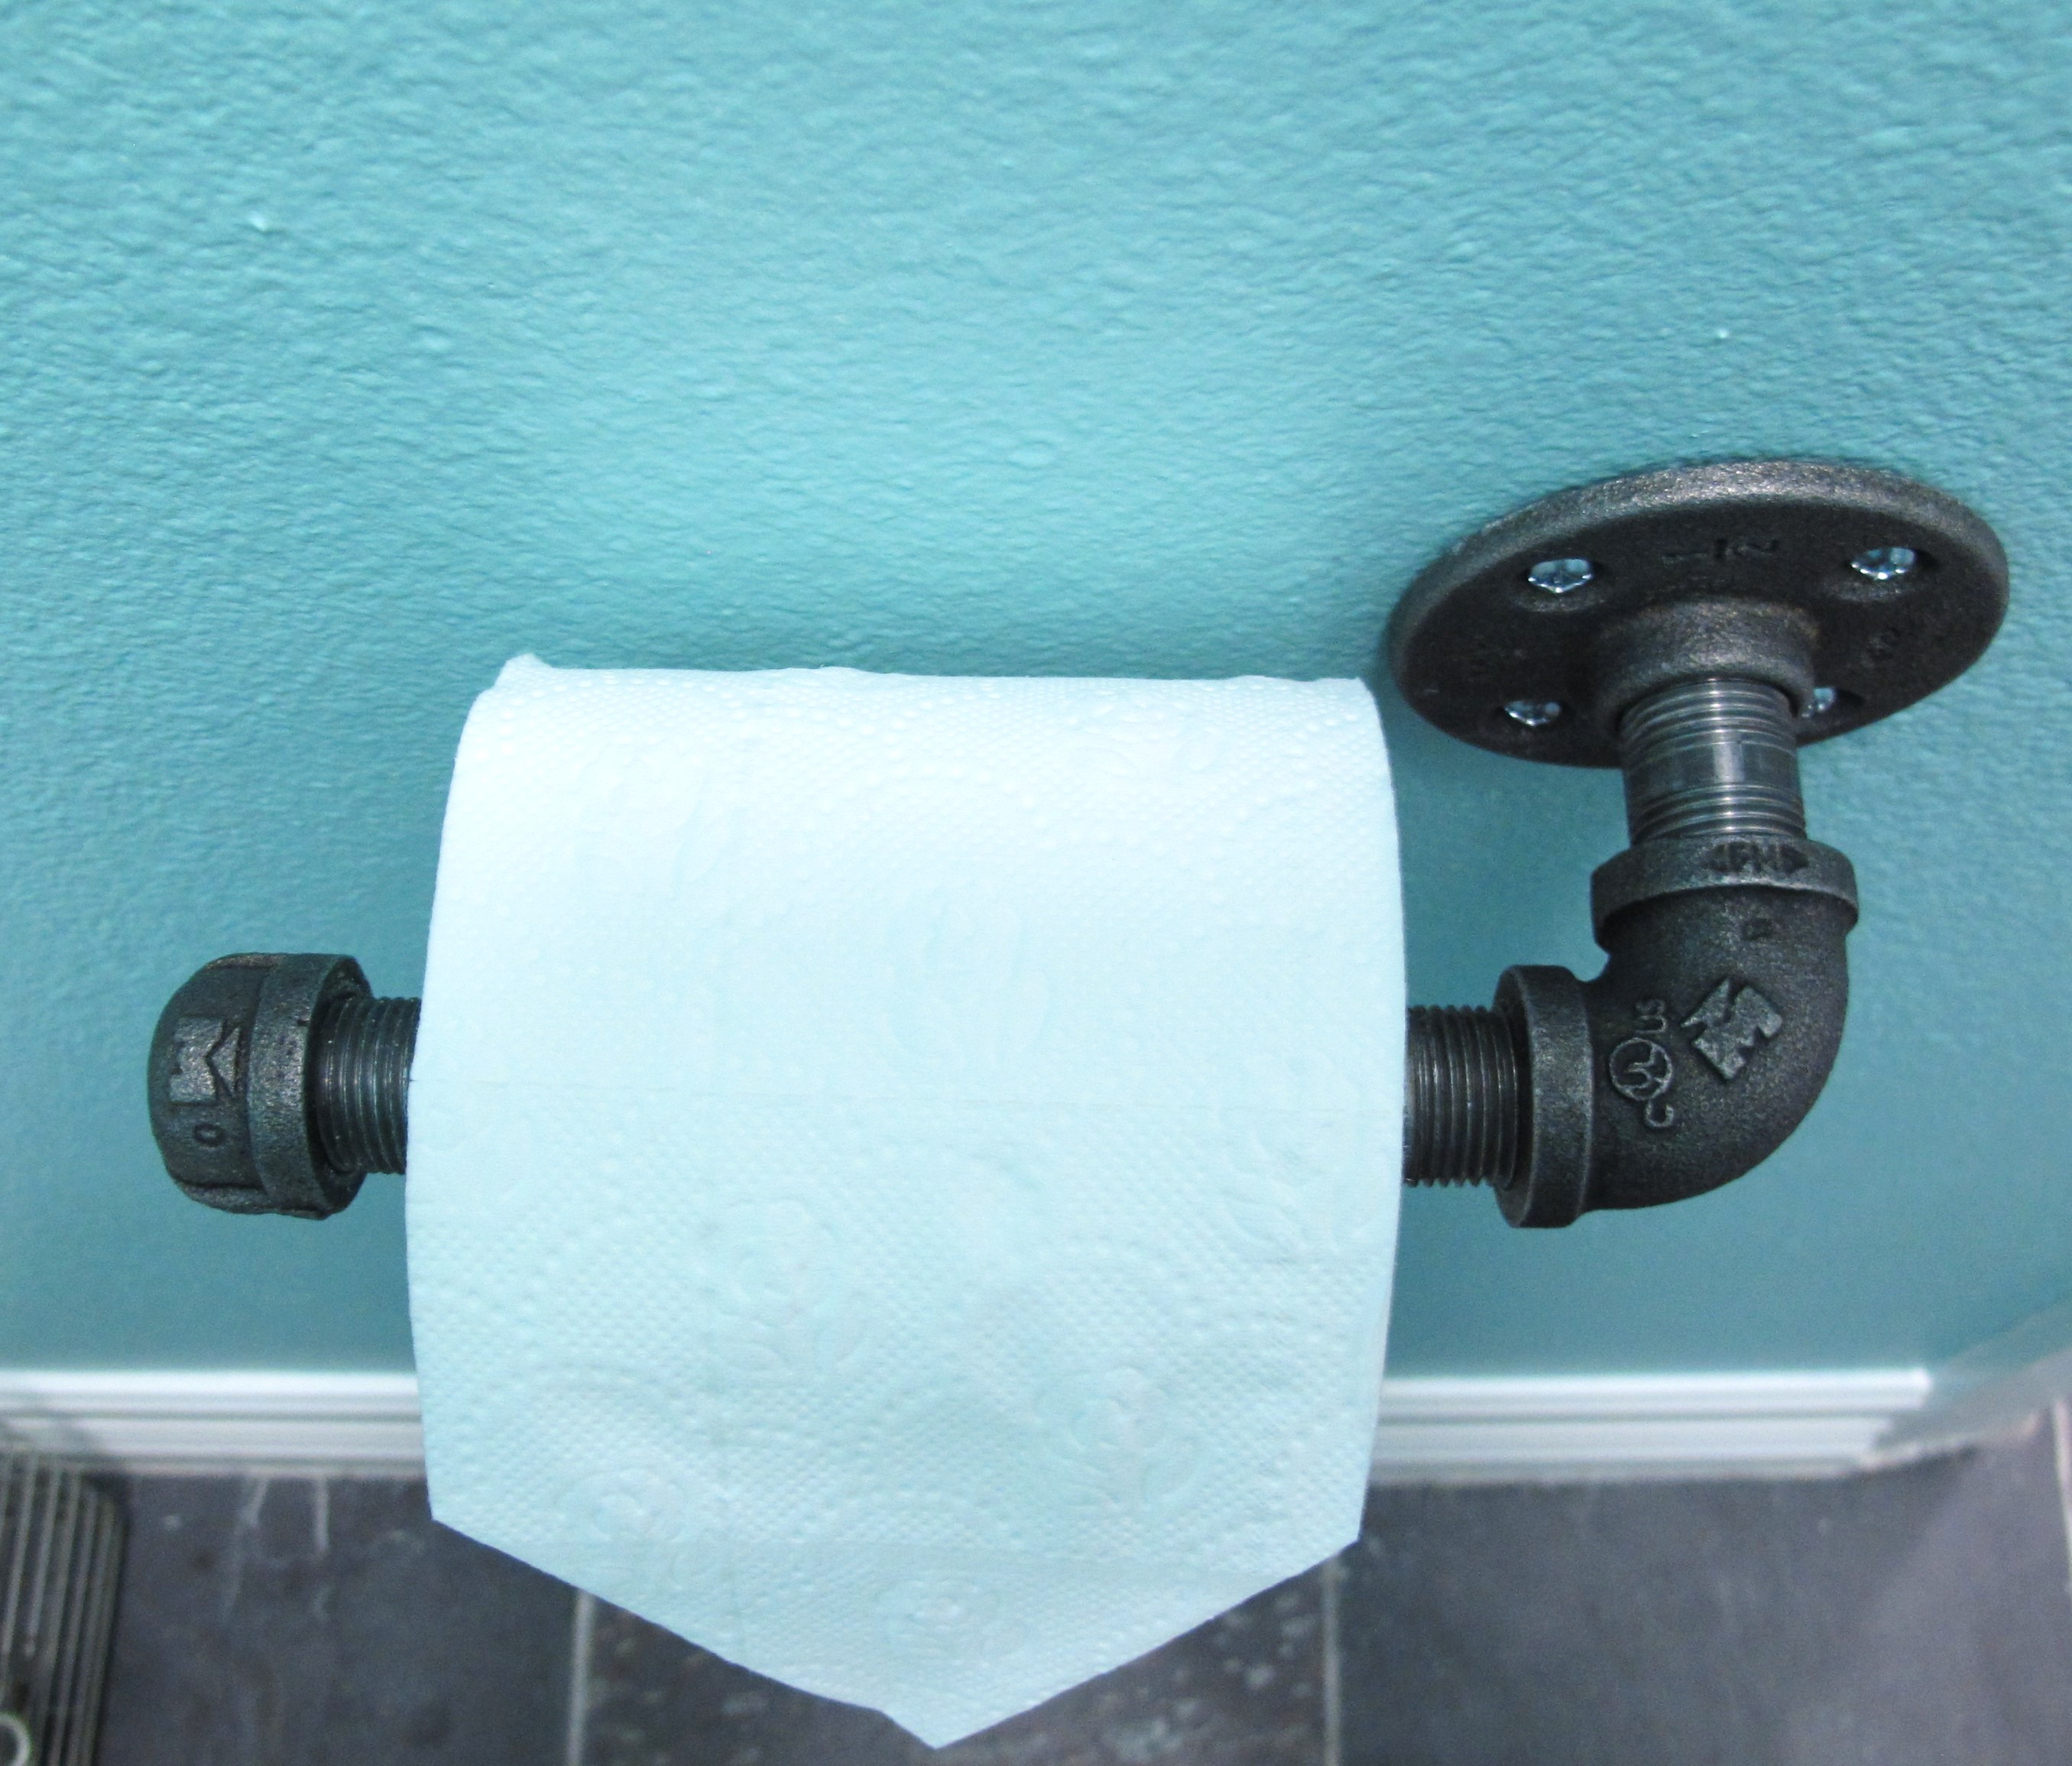
So, ten minutes was all it took to add function and a style that mustn’t be reckoned with to our pool bath.  Serious style.  With muscles.  And possibly a Mom tattoo on his forearm.  😉  Anyways, this guy is super sturdy and I can’t get enough of that tough steel texture against the softer aqua/turquoise color on the walls.  The contrast makes me so darn happy.  Now, to just get going on the rest of the space.  Heehee!

So, that’s my contribution to this month’s DIY challenge!  Do yourself a solid and check out the other awesome creations made by my lovely peers…

TDC Before and After

Found a rug!!!!

You guys.

Mission Find-Living-Room-Rug = Complete!

And ya know what’s funny?? When I wrote this post and stated “I think the biggest thing will be simply FINDING the rug”, well, I’d already found it.

I just didn’t know it yet.

Ya see, I have a Tuesday Morning roughly a mile from our house. I love that store. They have really nice stuff for pretty good prices. I’d been in and outta there many times over the past few months and each time, I noticed this grey, nubby rug for sale. It was on the floor, all rolled up in plastic.

Each time, I’d look at it. Note that it was the perfect size (8×11… Which was the minimum size that would work in our space) and that I liked the color. The label said it was a herringbone pattern, which I thought would be neat. But each time, I walked out without it. For whatever reason, I thought the grey was too dark for our space. Plus, the $299 price tag was hard for me to swallow.

Fast forward to several weeks later… I’ve now done lots of research on rugs. And know how expensive anything larger than an 8×10 can be. The built-ins are now painted white which gives me a much better idea of what’ll work in the space. I go back to Tuesday Morning. The grey rug is still there.  It’s now unrolled and hanging on their large rug rack. Now, I can truly see the color. It looks lighter than I remembered it. It.May.Just.Work. And the price tag now states $249 (original price $699) — That’s 65% off the original price!!!  Having done my research, I know that this is a good deal. The tag says it’s jute but feels more like cotton or wool to the touch. Very soft. Good quality.

But still, I leave without it.

I go home.

I tell Joey about the rug. He knows ALL about the rug-hunt and how pricey they can be but states that if it’s a nice rug that’ll last us, it’s worth it.

He picks my brain a bit about what the rug looks like, then goes to pick up a few things from the grocery store for dinner.

And he returns with the rug.

Did I marry well, or what? I’d been sick the previous few days (my trip to Tuesday Morning had been my first attempt to leave the house) so he thought it would make me feel better. It did.

The rug is the perfect shade of grey. The herringbone texture adds just enough interest without being distracting. And the size… Perfect.

The couch sits on the rug entirely with a few inches to spare on each side. Once we had it down on the floor, I stared at it in wonderment as it made the room feel about 30x cozier. It was like the floor was wearing a luscious cable-knit sweater. Plus, the grey tones pull from the grey dining chairs nicely, tying the rooms together.

(Pretend that the yellow transformer on the table isn’t there) 

And I love that you can actually SEE the rug from this angle…

(And ignore the green ball, too… Any other moms out there just stop seeing the toys after a while even though they’re right there in plain sight??) 

Before, our rug was so small, that you couldn’t.   And now that the old rug is gone, that’s one less brown-toned item in the space.

I’m actually thinking about painting our coffee table white to add some contrast but I haven’t quite decided. Thoughts?

So, anyways, that’s the story about how a beautiful, awesome rug found a home.  Next up in this space will be revamping the wet-bar, hanging art, etc. plus, we’re thinking of some of the longer term, down-the-road type projects like adding overhead lighting, a solar tube, etc.  Slowly but surely we’re getting there with this space and the rug was a big piece of the puzzle, so I’m ecstatic that we found it..