Treeeeeeeeees!!!

Our Christmas tree(s) are up. Hallelujah! And here’s our main tree…

IMG_2709

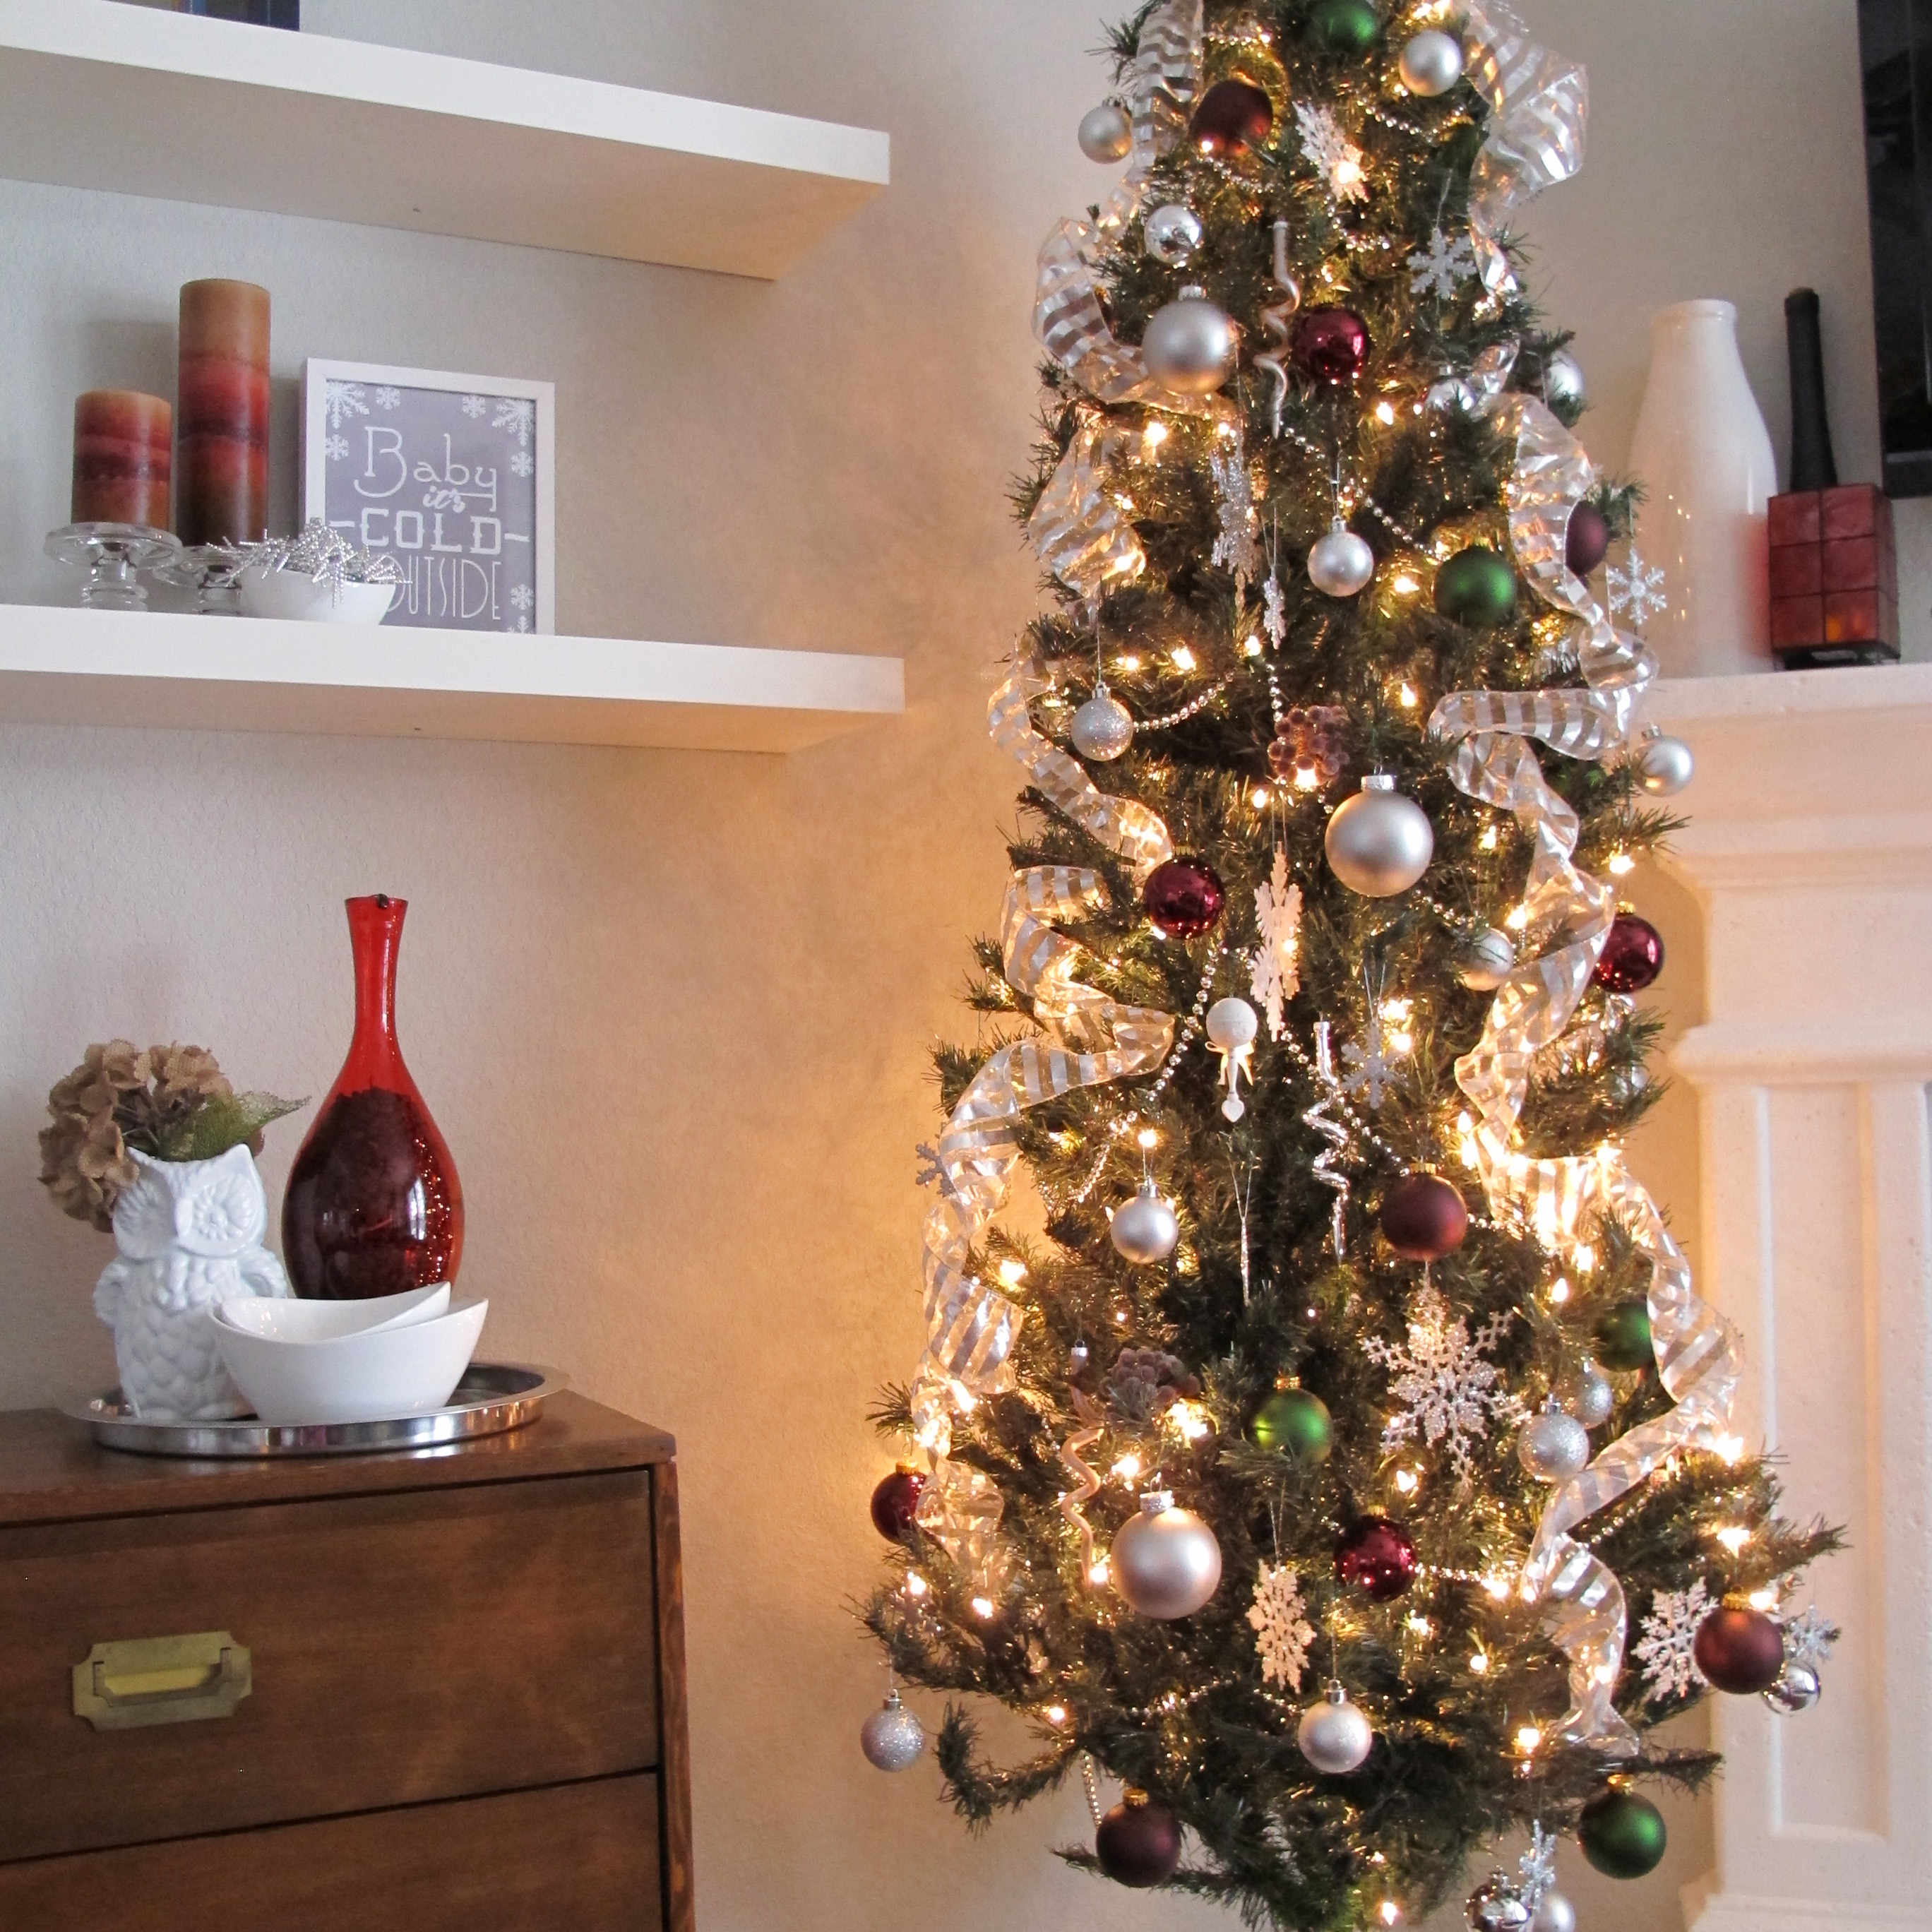
I know what you’re thinkin’… Why there?? The logical, practical place for a Christmas tree in our house is in the front room, centered on the window. There’s more room up there, plus the tree would be seen from the street, which is nice. The thing is, when it comes to my (ahem, our) Christmas tree, I’m not logical. Not practical. I’m selfish. TOTally selfish. I want that sucker visible for us to admire as much as humanly (treely?) possible. And while we definitely use the front room, we’re not in it as much as the living room. So, after trying a few spots for the best placement, we settled on this.  Squeezed between our media cabinet and fireplace. Visible from living room, kitchen and dining nook. It’s the first thing we see when we walk out of our bedroom in the morning. Nice. I can deal with a bit of space crampage if it means a month of sparkly tree enjoyment.

IMG_2699 IMG_2700 IMG_2697

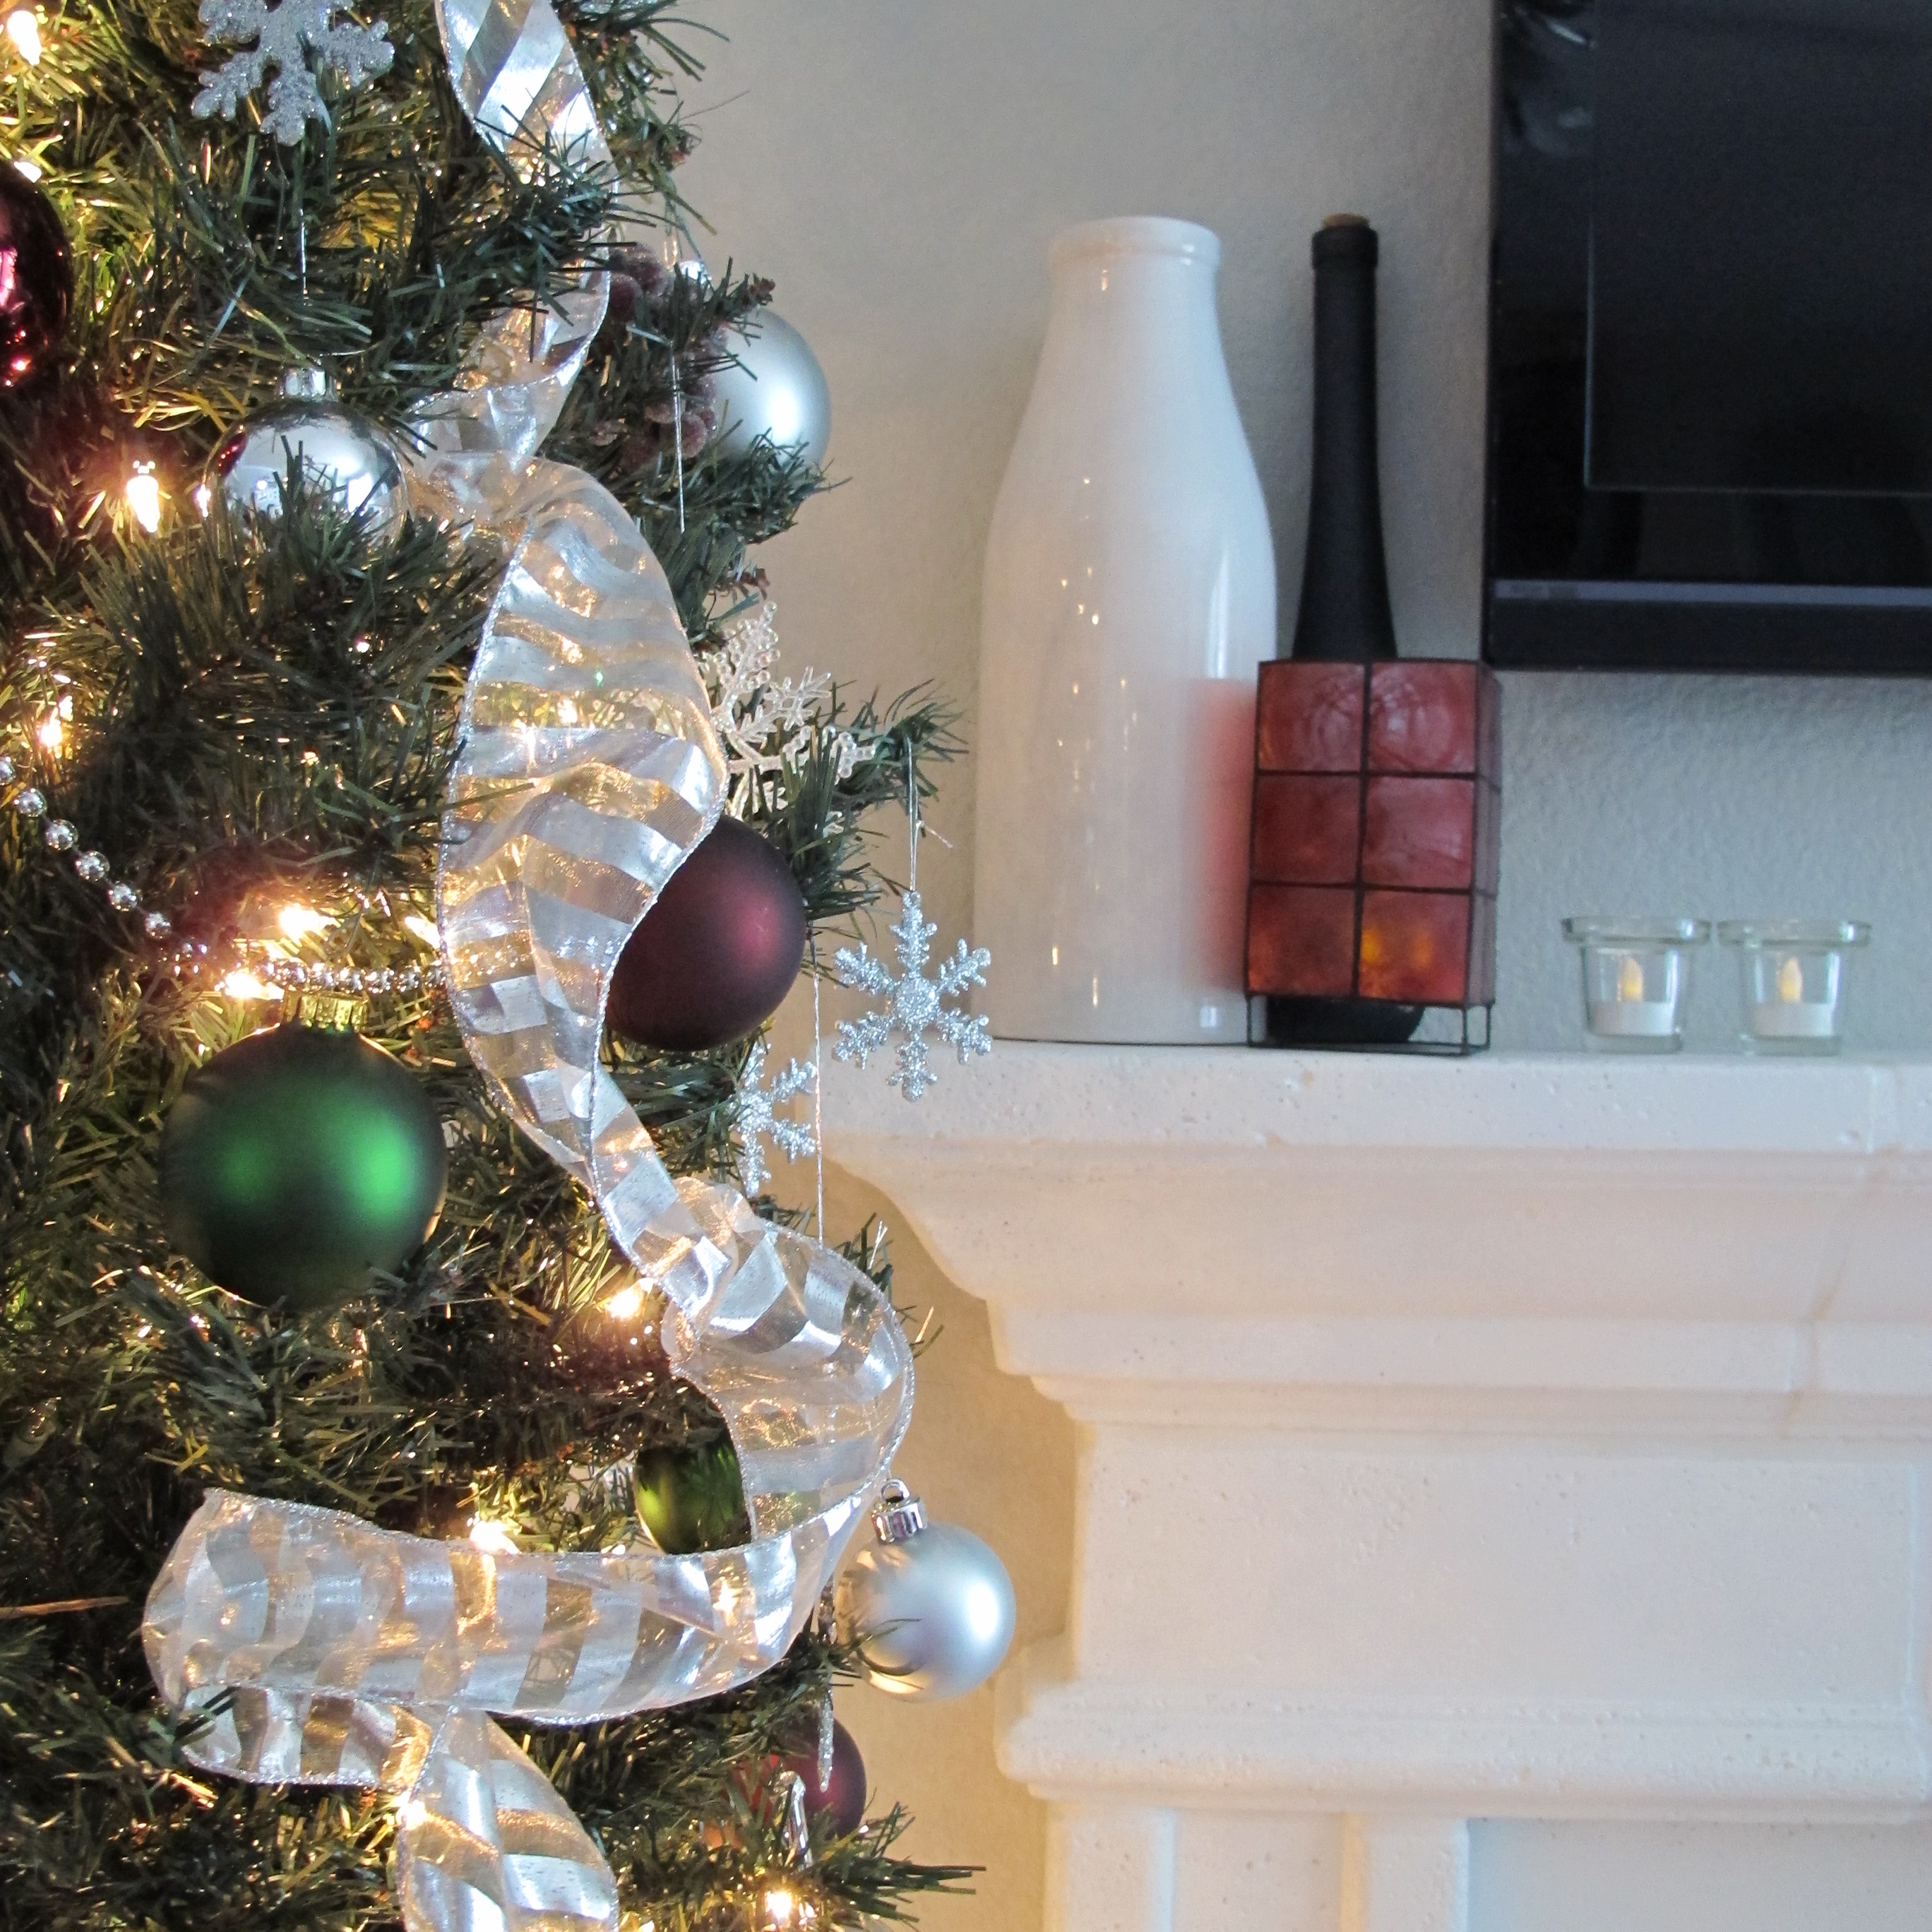
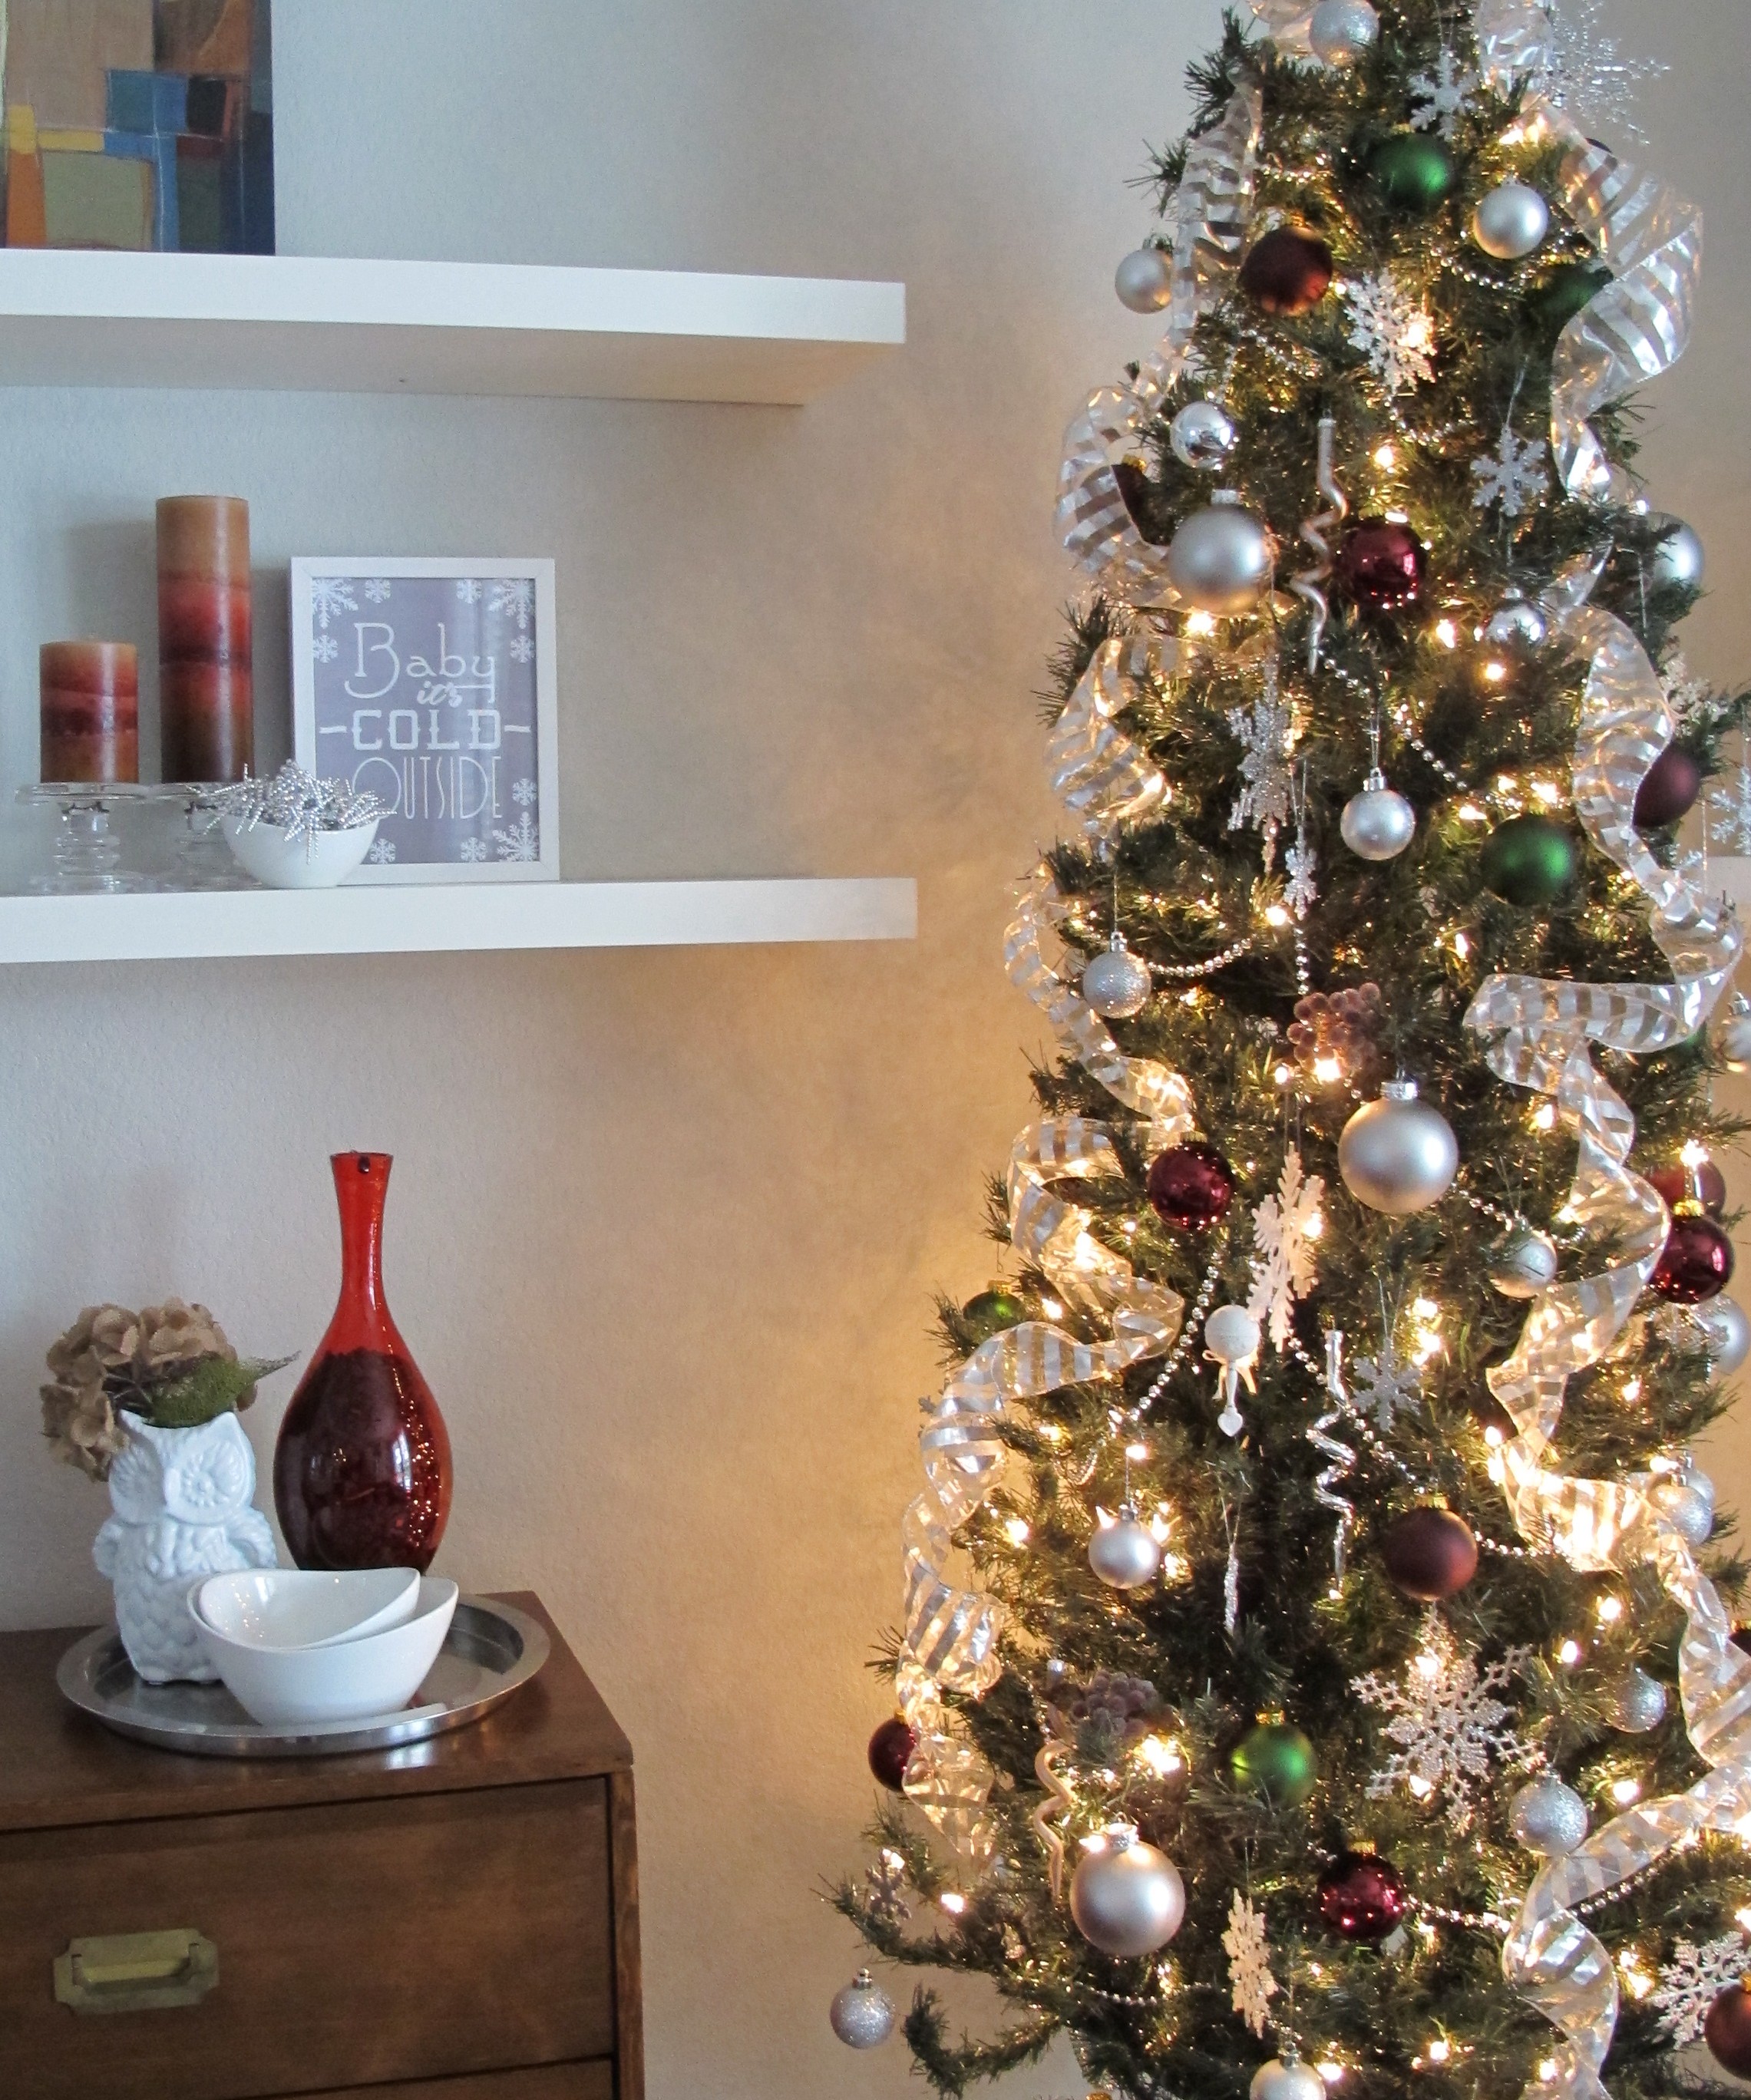
For adornment, we went with a silver, burgundy and deep green theme. Partially sheer, striped silver wire ribbon simply looped down from the top. Strands of silver beads. Colored, round ornaments in various sizes. Plastic, glittery snow flakes and a few randoms to break it all up. Super simple.

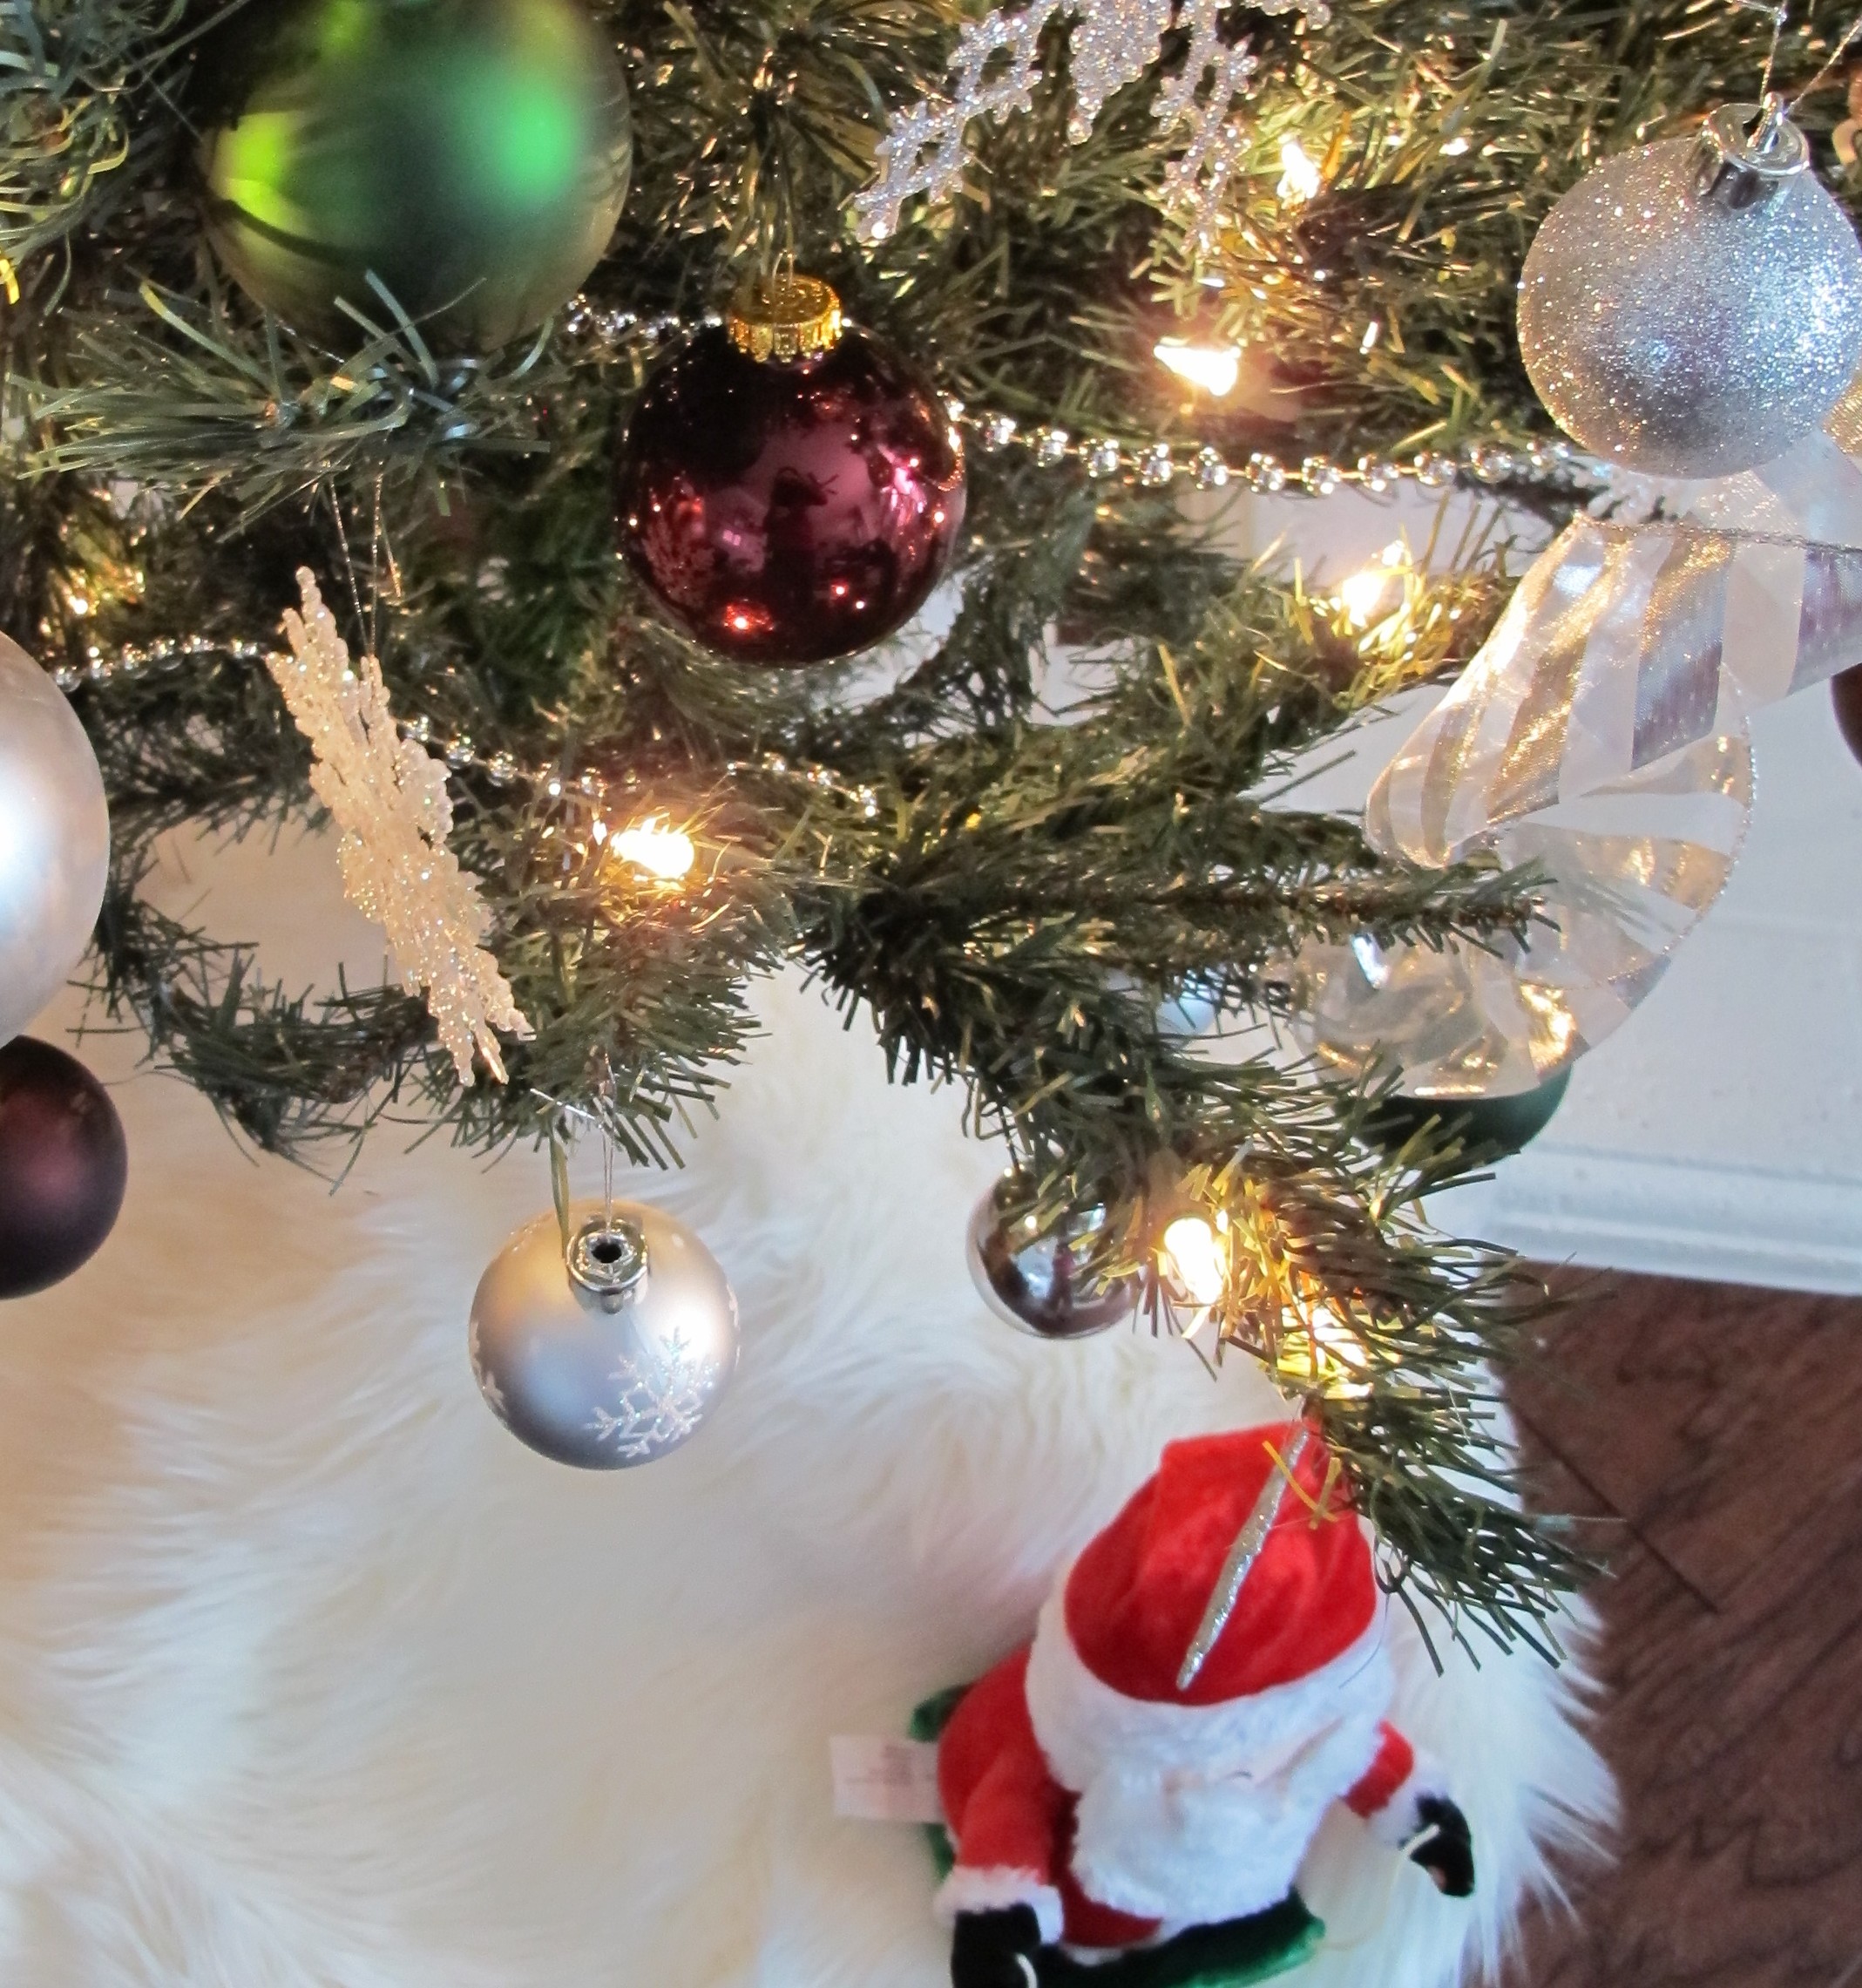
We have a nice tree skirt, but it didn’t mesh well with our dark floors (it’s a dark olive color that looked great with the floors in our last house, but here, not so much). So, I used an old white curtain and draped a faux sheepskin over top instead. FYI, the Santa dances. And is awesome.

IMG_2707

We need a tree topper, so I’ll have to think something up for that. We’ve gone without one for years now because I was lazy uninspired. I’m more motivated this year, so we’ll see what comes out of my crazy brain.

Our other tree is our Charlie Brown Tree….

IMG_2758

Ignore the cord… it’s been too icy over here in TEXAS (right???) for me to drive to the store to get a suitable, hideable extension cord which will allow for cord camouflage. But it will happen.  Anyways, doesn’t this teeny tree remind you of the spindly, little tree from A Charlie Brown Christmas??? It even has two (yes, two) blinking lights (the rest are constant), which remind me of the random enlarging/spinning stars in the sky at the end of the show when Charlie’s trying to save the tree. We originally wanted to decorate it using some wooden ornaments (made by Joey’s dad) along with some other homemade gems. So, it started out looking like this….

IMG_2686

…Meh. The basket was a bit blah, and the ornaments were too big and too few. I decided to paint the bottom of the basket to make it pop. I used simple black craft paint that I’ve had for a hundred years (I’m totally channeling Dane Cook here… “I got home from work today and took, like, a Hundred Hour Nap… NO YOU DID NOT..You’d be very sick if you were taking hundred hour naps. That’s a coma, say you took a coma after work and I can follow the story!”). So, anyhoo, this paint is ancient. But it worked….

IMG_2729

I simply chose a row on the basket roughly halfway up to use as my stopping point and free-handed the top row with a small craft brush. Then, I filled in the basket below with paint (sorry, no pics). In the end, it looked like this (It’s still partially wet in this pic)….

IMG_2731

I hung three stockings that my mom embroidered for us below it.

IMG_2757

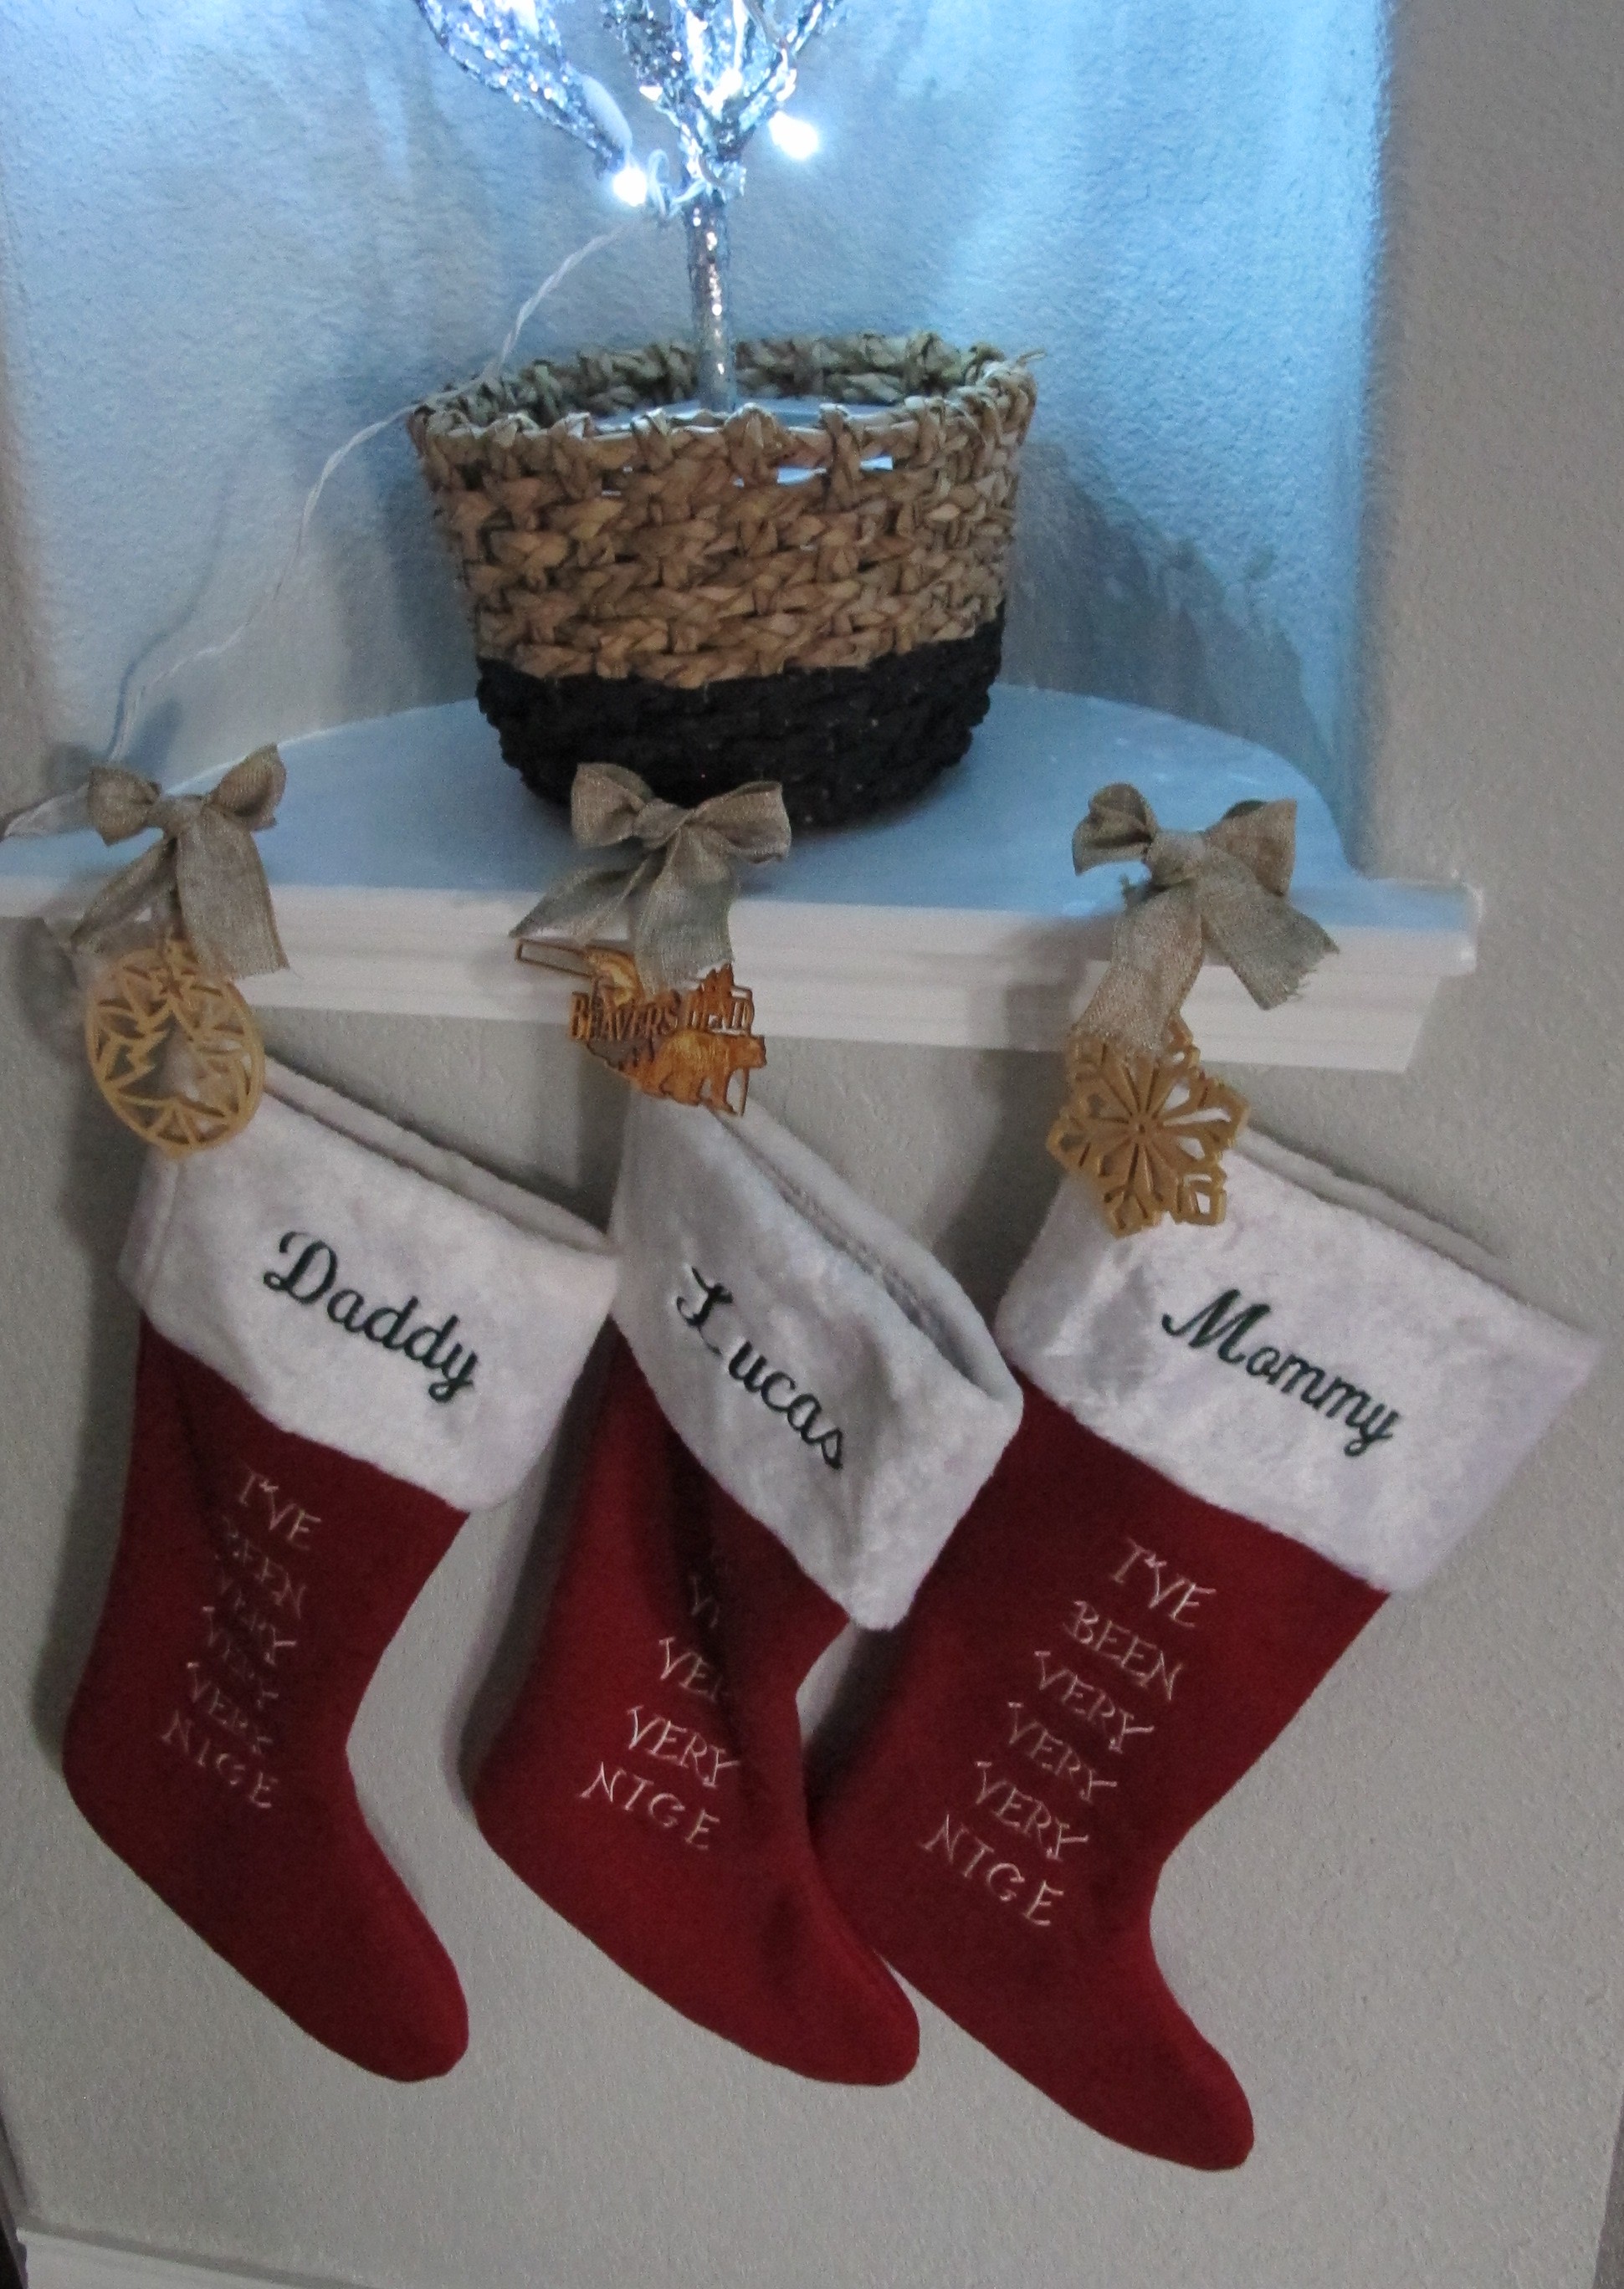
I tried them on the fireplace first, but they were GINORMOUS. Our fireplace looked like it belonged in the Keebler Elf House while they were up there. I couldn’t bear not displaying them, though, so I decided that our little hallway alcove was as good a spot as any and went for it. I used a few 3M utensil hooks to hang them. Easy peasy.

IMG_2754

I decided to use the ornaments atop the stockings, instead of on the tree. I definitely prefer the tree bare to decorated now that I see it. For sure. Then, I added a few burlap bows to hide the hooks (which might not stay… I’m not usually a bow person, so we’ll see if they survive the holiday season.  They’re annoying me in these pics.  But are strangely charming in person. So, it’s a toss up.).

So, those our our trees this year. What kind of trees do y’all have this year?

Lisa’s Guest-Room Makeover: Day One

Meet Lisa.

IMG_2613

Ain’t she pretty?  She’s been one of my best friends for many years. We worked together at my first job and have stayed good friends since then. She was matron of honor in our wedding and everything. And I really like having her for a friend. Mostly because she’s awesome, but partly because she allows me to wreak havoc on her house upon occasion. FOR FUN. So, when we chatted on the phone a few weeks ago and she asked if I wanted to come over and play around with her spare room, I responded with an excited “uh, yeeeeeaaahhhh.”. I mean, obviously. As a primo DIY dork, that’s totally my idea of a good time.

So, a few weeks ago I met Lisa and her equally awesome mom, Nancy, at Lisa’s place.

We assessed the space….

IMG_2614 IMG_2616 IMG_2615

She wanted the room to serve the dual purpose of guest room and music room. After discussing it, we decided to go a little backwards by working out a good layout, buying some bedding and getting the room set up first, than painting the walls another weekend. This way, the room would be immediately useable to sleep guests (as opposed to painting and having nothing for guests to use on the bed along with an inconvenient layout). We plan to go back and paint the walls a deep grey as well as finish some other remaining projects, so consider this post to be the first in a series as we get ‘er done.

Lisa wanted many of the furniture pieces in the spare room to be used in other rooms, so we got to it. We moved the large hutch to the dining area and the desk  along with shelving units and a bunch of other stuff upstairs

IMG_2622

That’s right. We rocked the socks off that furniture-moving business.

Then, we cleaned some, which lead to this attractive shot…

IMG_2623

…which lead to my Family Guy impression: “I need more lemon Pledge“.

Once we were through, we relocated the bed beneath the larger window and the beast of a piano to the same wall (which weighed a TON, FYI)… Lisa did most of it. Respect. Nancy did a good amount as well. And, I mean, I tried to push it, but it felt like I was just pretending because nothing happened each time I heaved (Let it be known, I was not pretending. Swear.).

Then, we broke for lunch. Which was delicious. And shopping (Equally delicious).

We hit up Ross, Marshalls and Target and snagged some pretty sweet deals along with a bunch of stuff. Bedding, pillows, blankets, curtains, curtain rods, rug. Oh yes, it was a successful day for sure. Then, we headed back to Lisa’s to try it all on for size.

The bedding….

IMG_2635

Which we love! We were originally looking for a simple white comforter on which to add colorful pillows, but when we came up empty-handed with the size we needed, Lisa spotted this beaut. The black and white damask print was perfect. Graphic, yet neutral at the same time. And for $39.99 at Ross, it was a steal. Lisa opted for turquoise accents to go with it, so we found the textured pillow at Target and the throw blanket at Marshalls.

I hung the curtains wider than the window and high enough so they just grazed the floor to allow in as much natural light as possible and give the windows more presence.

IMG_2625

I removed the finials from the curtain rods in the corner to allow the rods to extend all the way over. This way, the curtains would appear connected. (And a special shout out goes to Lisa’s dad for driving over with a power drill for those more stubborn screws. You’re a trooper, Dean!)

So, here’s where we left off on the bedroom side after Day One….

IMG_2633 IMG_2640

Oh, yes. Here’s the before again so you don’t have to scroll up…

IMG_2614

And across from the bed is a dresser that was moved from Lisa’s room…

20131117-130340.jpg
<

And the before…

IMG_2616

And here’s the music side of the room….

20131117-130332.jpg
IMG_2643

And the before…

IMG_2615

Our original plan was to hang the instruments on the wall above the piano, but since we didn’t have the goods to accomplish that task this visit, Nancy suggested just setting them up there. And we did. And we really liked it. The artwork on top of the piano was previously stored in the room, and we stuck it up there pre-shopping, before we knew what bedding we’d find. We left it because it looks cool with the instruments, but obviously, its not in tune (har har!) with the more romantic, textural vibe of the bedroom side. As Lisa said, it seems like two different rooms. The painting may or may not stay depending on how the rest of the process goes. Once we paint the walls and finish accessorizing, we’ll decide if we can marry the painting with the remainder of the room. If not, Lisa said she’s perfectly fine with moving it out.

Our “to do” list…

1. Paint the walls a deep grey
2. Iron the curtains and certain bedding pieces (we figured it’d all get displaced whenever we paint anyways, so we’ll get our iron on then)
3. Revamp this piano bench…

IMG_2636
4. Makeover this ceiling fan…

IMG_2639
5. Reassess the space and finish accessorizing.

But, seriously, after one days work, we were all pretty satisfied with what we’d accomplished….

IMG_2641

The room is now useable and pretty.

We don’t have a picture of Nancy, unfortunately, so just know Nancy, we couldn’t have done it without you! 🙂

So anyways, I’m not sure when we’ll paint the room, but that’s the next step. And of course, I’ll update you once that happens!