On a pedestal (table)

HI! IM BACK!

If ya noticed that I was missing. That’s because… Well, I was missing.   On purpose.   Also known as vacation.   We decided to take Lucas on a little road trip to Hot Springs, Arkansas.  A mere 5 hours from home.  We’d never been there before and decided to give it a shot because it seemed to offer lots to do.  Though, Lucas was more excited about the hotel room, the rolling chair by the desk, and his little pull-out bed than anything…


If you follow me on Instagram, you probably saw some pics of the trip as it went on.   We were happy to knock off a few firsts for Lucas including  hiking, an amusement and water park, and eating out for EVERY SINGLE meal.  For a family who mostly cooks at home, this was a hugely huge deal and was very exciting for a self-proclaimed-4-year-old-grown-up such as himself.  So, now we’re home and trying to get organized.   Well, let me rephrase… Were trying to not to have unpacked junk strewn about every room.  I don’t think we’ve lived in our home long enough to qualify as organized.   Yet.   😉

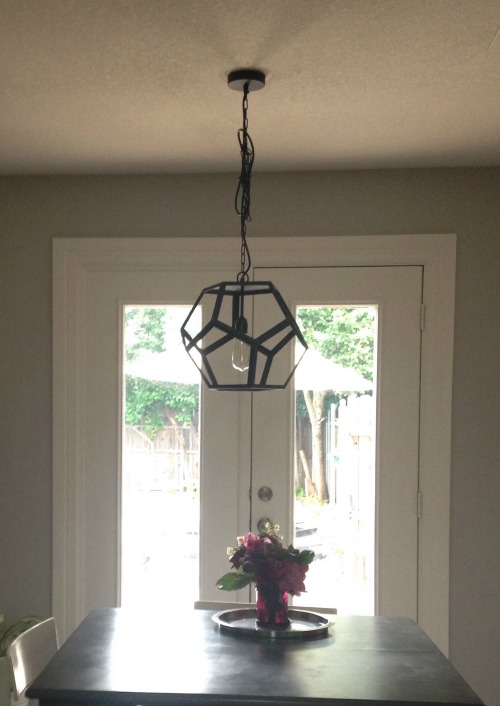
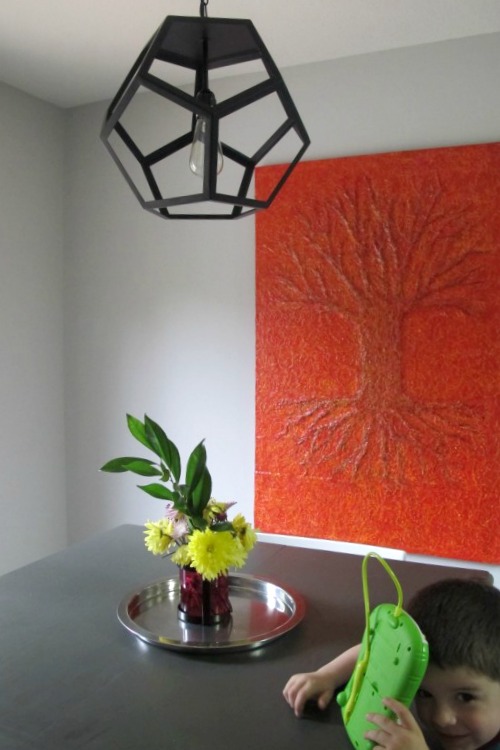
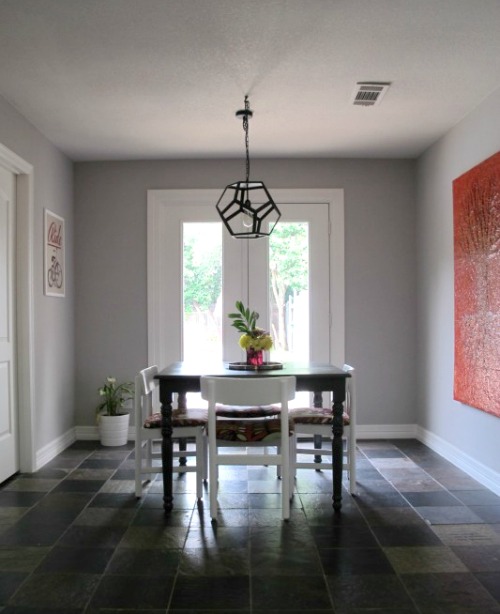
So, now onto the beef of this post.  Before we left, I posted about our new lighting fixture in the breakfast nook, which left the space looking like this…

232323232-fp83232-uqcshlukaxroqdfv3;-4--nu=3396-6-9--78-WSNRCG=3639;;;59;346nu0mrj
And now I’m here to tell you about the newest addition to the fam, our $40 Craigslist table….

Attractive, huh?   #sarcasm.   See, I wanted a round pedestal table with a streamlined base that I could refinish… For preferably under $50.   So, when I saw this puppy listed on Craigslist, I snatched him right up.

And introduced him to my good friend Citristrip…

I thought about trying a different method of stripping furniture this time around, but I already had the Citristrip on hand and knew that it’d not only remove the varnish, but most of the stain as well.  From the start, I knew that I wanted a lighter toned, white/grey washed finish on this table, so the removal of the darker stain was a step in the right direction.

Now, I’ve talked about stripping furniture before (here and here), but I’ll briefly review the basic steps (you can read those other posts for more details if you want).

Step one: Slather that stuff on with a brush…

Step 2: Wait until it bubbles (but not until it dries).  I actually added a second moist coat over the first because it dried so fast.

Step 3: The most satisfying step.  Scraping.  Use a plastic scraper and scrape in the direction of the wood grain to remove all that grody finish…..

Step 4: The most tedious step.   Removing all the residue by rubbing it down with mineral spirits over and over (andover).   Use a toothbrush to remove goo from the nooks and crannies.   This was a tip given to me by a reader and it is the most brilliant tip ever known to man.  Ever.

Step 5: I always end up having to do a light sanding with 220 grit sandpaper to really remove all the residue.   It doesn’t usually take long, but is wholly effective.

Which leaves a naked table…

I actually really liked the table in it’s natural state, but wanted a slightly greyer tone that would stand up to being beaten up by a 4-year-old.

Once I got to the store, I had a little dilemma, though.   I couldn’t decide whether I should use an individual stain followed by poly or a combination product.  So, I decided to buy small cans of both and do a little experiment.

Let the testing commence…

Sunbleached was my color of choice for this table.  I was pretty excited about it, too.  (Seriously, isn’t this exciting, though?  Is the suspense killing you right now?)   I applied all products to a scrap piece of wood and evaluated….

Color-wise, they were similar, though I felt that the individual stain and poly was more grey, which was my goal.   Plus, as shown in the pic below, the combo product left little raised ridges in the wood whereas the individual products left a much smoother result…

So, individual stain + poly it was.   I applied 2 coats of stain with dry time in between, which left this…

 Sunbleached gorgeousness.  Yeah, buddy.

And I loved that the top appeared weathered and mottled…

So, my next step was adding protection with poly.   I’d never used the wipe-on poly before and I have to say that I really liked it.  It goes on thinner than brush-on poly, so you have to apply more layers to equal the same protection, but I felt like it was much more foolproof.    I had more control which equalled less drips and imperfections.  Plus, since I was going for more of a weathered, hand-rubbed look anyways, it was a perfect fit.

The basic process was:

Wipe down the table with tack cloth, apply poly with a clean rag, allow to dry, sand with extra fine sandpaper, repeat.

(HEY, LOOK!   I’M WEARING GLOVES!!!!)

I ended up doing 4 coats on the base and 5 on the top.   It may have been overkill, but I know this table will take a beating, so it’s worth it.    I let the table cure in the garage for about a week and a half and then brought it inside.

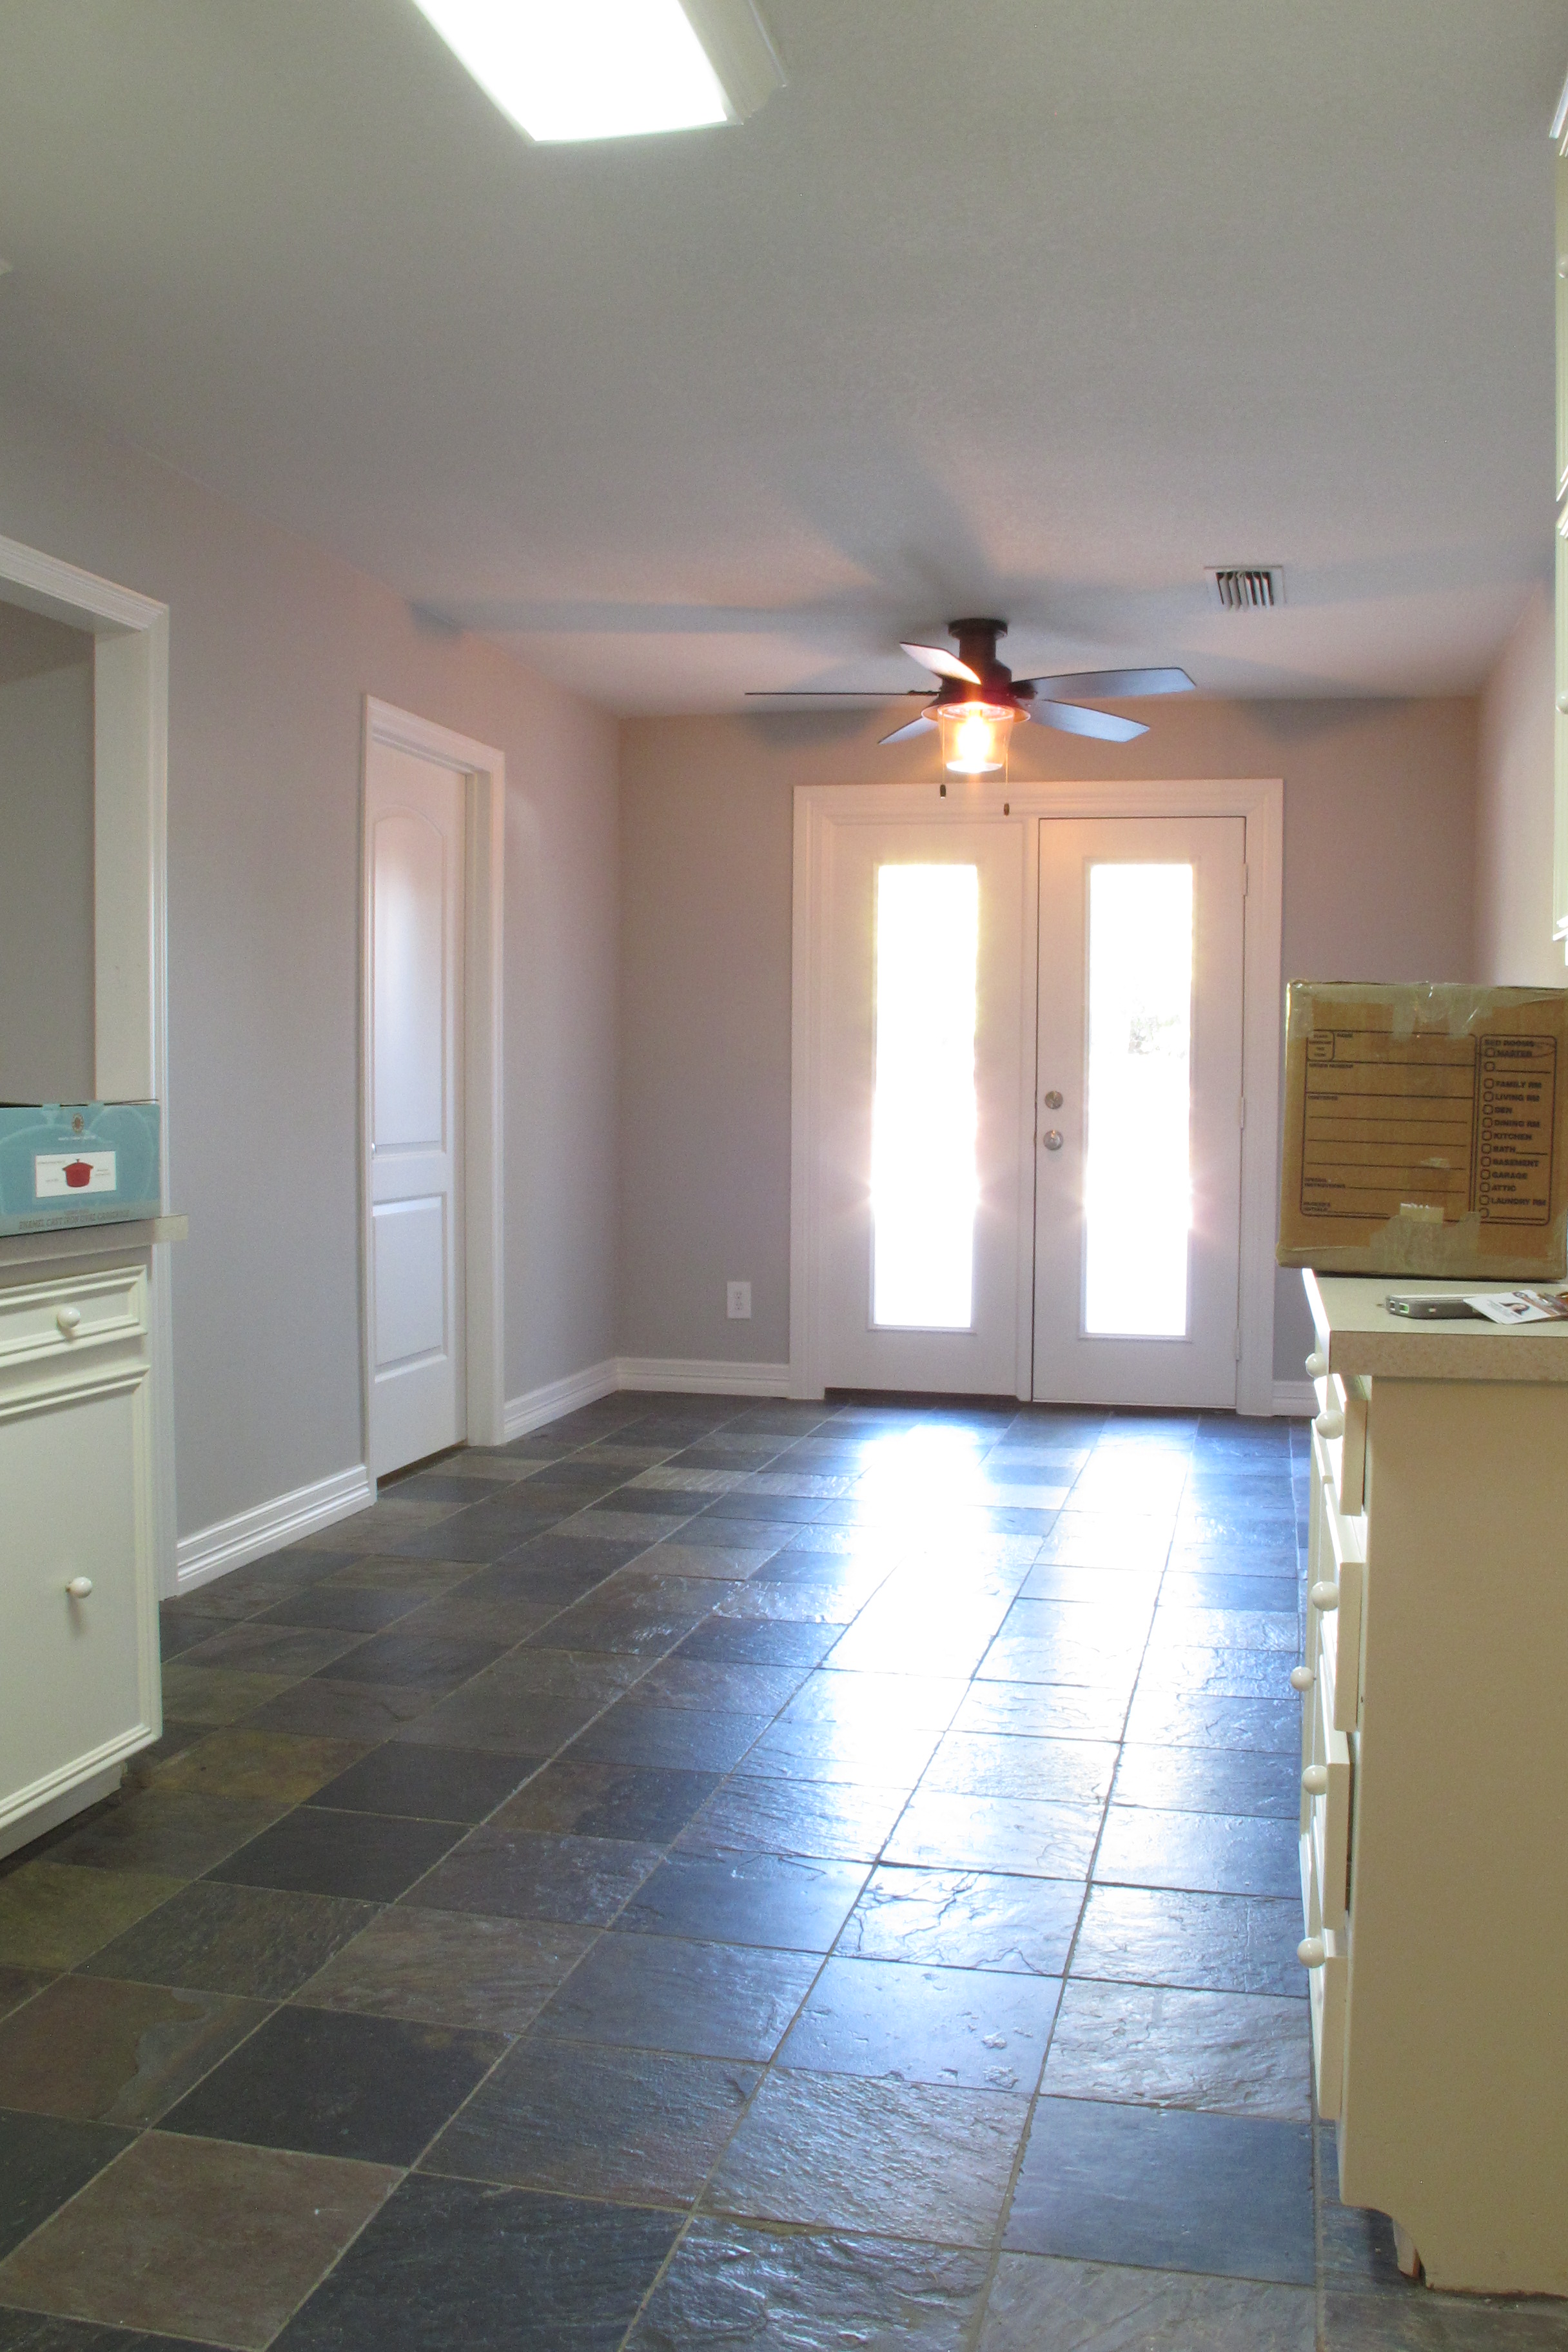
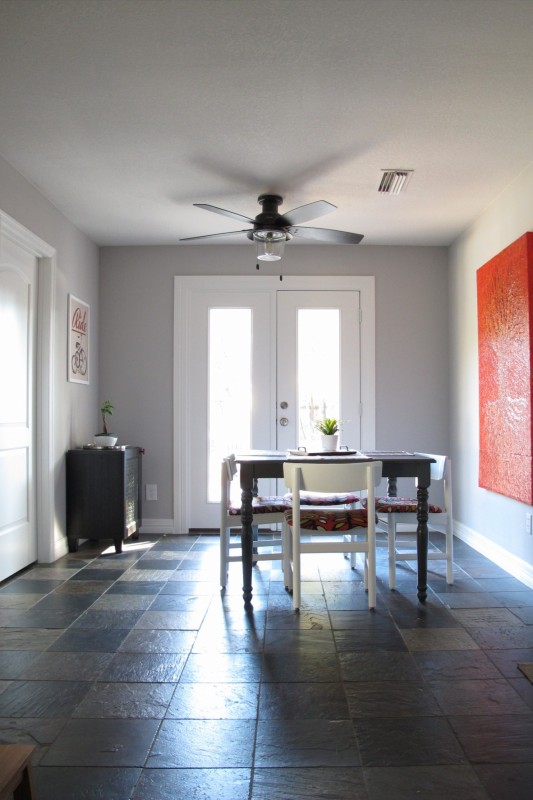
Without further adieu, I give you the next step in our breakfast nook makeover.  Oh yeah, but first…  Please, for the love of Pete, ignore the bird chairs, which (in my opinion) do NOT look great with the table.  And imagine these pretty babies instead.  They’re the next step in the makeover. Once we actually buy them anyways….

(WIPES DROOL FROM FACE)

Anyways, here’s what I got…

232323232-fp83232-uqcshlukaxroqdfv379-;-nu=3396-6-9--78-WSNRCG=363-458--9346nu0mrj

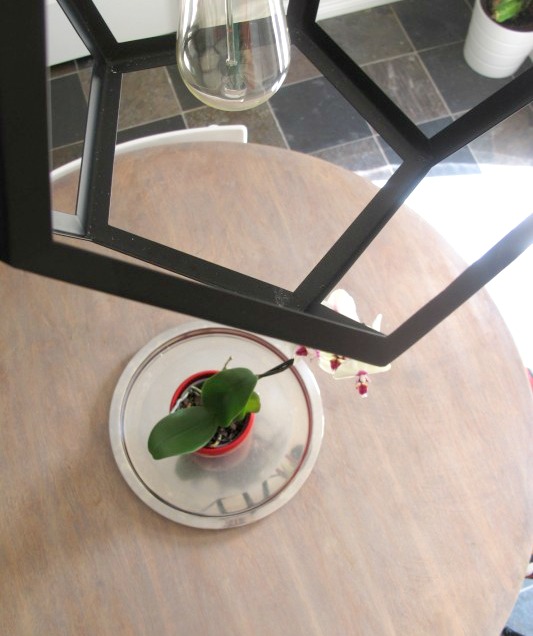
And a little glimpse of the dining space and back patio from the nook.   It’s one of my favorite views to take in as I drink my morning coffee…

232323232-fp83232-uqcshlukaxroqdfv34232-nu=3396-6-9--78-WSNRCG=363-458--6346nu0mrj

I can’t even tell you the difference the round table makes in the space.  The flow is so much better.  Plus, the table is way pretty.  The camera doesn’t really capture the texture as it is in person. I’m really happy with how it turned out.  As mentioned before, the bird chairs have got.to.go.   Like, way gone. They’re fine in general, but they just don’t compliment the finish of the table at all.  I may recover the seats with some leftover fabric that I have on hand just to tide me over until we buy my dream chairs.   We’ll see.

** Check out this post for how our breakfast nook looks now post seat-recovering and additional styling***

So, anyways, that’s our nook as of now.   How was everyone’s weekend?   Any fun stuff happening around your part of the world?

TDC Before and After

A little (breakfast) nooky

… Um, a little breakfast nook action?  Er, wait…. A delightful little post about our breakfast nook!   BAM!

So, when we moved in, the breakfast nook was one of the very few areas of our home that needed little to no work…

IMG_7218

I loved the flooring, paint color, trim, and don’t even get me started on that awesome sunlight seeping through the french doors.  You can “oooo” and “aaaah” now. I won’t stop you.  😉   Of course, we are effectively thumbing our noses at the dated countertops and nose-cabinets in the kitchen portion of the room.  They continue to taunt me with their tacky ways and unflattering schnozzes, thus are destined for eventual renovation.

After moving in, we basically just plopped down some furniture that we already owned, which left it looking like this….

232323232-fp83232-uqcshlukaxroqdfv93;3=ot-2487=7;-=;69=XROQDF-26949395;9255ot1lsi

That huge red artwork is my favorite. My mother-in-law made it and gifted it to us when we moved in.   I love the scale of it and the pop of color that it lends to the space.   It’s pretty much the definition of awesome.  The ceiling fan that we inherited in the nook was also pretty darn nice as far as ceiling fans go.  Although, from the get-go, I’d planned to move it into one of the bedrooms to replace one of the other fugly ceiling fans that we also inherited.   What I really wanted to do in this area was add a pendant light above the table.

My other dilemmas with the space included furniture + furniture arrangement.   Though they aren’t terribly offensive in pics, I was never a fan of that table and chairs in the photo above (in this space anyways).   The table was my previous craft table that I stripped and painted for our last house, and the chairs were craigslist finds that I refinished and recovered.   They both looked great in our last house, but thrown together in this house, I wasn’t jumping for joy.   First off, the space is a high traffic area.   It leads to the laundry room, which leads to the back patio and our pool bath, the french doors lead out to the pool, and the garage door (not shown) which is our main mode of entry to the house is located on the other side of the red painting.   So, a square table just wasn’t maximizing the flow of the space.   The nook was screaming for a round table, preferably a round pedestal table.

I also didn’t like the off-centered arrangement that we had going in the photo above.  It was weird.  After we moved in, it took me a while to get a feel for the flow of the space, so I experimented quite a bit with furniture placement.  And the arrangement above was one phase of said experiment.  One aspect that really threw me was the location of the ceiling fan.   It was slightly off-center and really close to the french doors, which meant that a table could never be oriented beneath it while still allowing outdoor access.  So, functionally, the table was in an okay spot, but visually, it really bothered me to not have the table beneath the fan.

After several months of playing with the space, I finally decided that the table needed to be centered in the room and that there was adequate space to be able to do that.   I found a round pedestal table on Craigslist, which I refinished (post coming soon… The table is now complete and curing in the garage looking all sexy and fresh).   I can’t wait to (1) finally get it into the space and (2) show you guys.

But, in the meantime, we’ve (waitforit) installed a different lighting fixture. And I’ll tell ya… It’s new.  And it’s specTACular.

Oh, yes.

See, my birthday was in April and although I said no gifts, Joey gave me the black metal hexagon lighting fixture from World Market

IMG_3304

I loved the shape and boldness of it, plus the price couldn’t be beat.   I’d mentioned how much I liked it a while back and Joey remembered.  Way to rack up the Husband-Points, Joe. 🙂 So anyways, after about a month of sitting in the box, we finally got it hung as shown by this lovely iPhone shot (it was only temporarily like this while we shopped for swag hooks)…

 img_3351
We left the chain long, because we wanted to swag the fixture to a better location to allow it to be centered over the table.   We plan to eventually have an electrician come out to do a bunch of electrical work, including moving the junction box to a location above the pendant, but until then, swagging was a good, cheap, easy solution.   I purchased this swag kit from Lowes for about $4, then spray painted one of the hooks oil rubbed bronze to match the fixture….

Since the fixture would be hung from drywall only, these were the components from the kit that I needed…

The kit also came with a wood screw for securing into beams.   I began by screwing the anchor into the screw-thing (technical term escaping me at present, sorry)…

Then, I threaded on the hook…

I measured my location on the ceiling (centered in both the room and on the doorway to the laundry room) and used a 1/2 ” drill bit as suggested by the instructions on the package to drill a hole in my chosen location…

Next, I folded my anchor down and slid it into my hole…

Once it was through the drywall, I heard the spring mechanism engage indicating that the anchor had reopened.   I tightened the hook by basically pulling down to apply some pressure to the anchor into the drywall and screwing it in place. Which left this…

I swagged the chain, leaving the fixture approximately 30″ above the table which is a standard height.  Initially after swagging, the fixture looked like this…

It was okay, but I felt that the chain was too long and baggy, which resulted in a messier aesthetic than I was going for.

Cue the handy husband…

232323232-fp83232-uqcshlukaxroqdfv364;5-nu=3396-6-9--78-WSNRCG=3639;;;587346nu0mrj

Joey removed some chain links using a pair of needle-nose pliers and fed the excess wire into the junction box, which left the swag much shorter and less obtrusive…

Neater too, right??  From the front you can barely even tell it’s swagged now…

232323232-fp83232-uqcshlukaxroqdfv3-457-nu=3396-6-9--78-WSNRCG=3639;;;5-3346nu0mrj

And here’s the breakfast nook as it currently stands…

232323232-fp83232-uqcshlukaxroqdfv3;-4--nu=3396-6-9--78-WSNRCG=3639;;;59;346nu0mrj

It’s amazing the difference a lighting fixture can make.  I’m reminded of this every time I change one out, and yet I always put off doing it for whatever reason.

232323232-fp83232-uqcshlukaxroqdfv345-5-nu=3396-6-9--78-WSNRCG=3639;;;55;346nu0mrj (1)

Photo bomb!

And with the light on…

232323232-fp83232-uqcshlukaxroqdfv347-7-nu=3396-6-9--78-WSNRCG=3639;;;5-7346nu0mrj

I love the design that it casts on the ceiling.   Snazzy.   Plus, it draws the attention away from the plant I’m killing in the corner.   Ha!  Score.

So, next we’re finally moving the new table into the space and I’ll post about that once I get it photographed.

**Check out the following posts for how our breakfast nook looks now after refinishing a pedestal table and recovering the chairs/adding a few antique finds***

Tell me, does anybody else credit lighting fixtures with being life-changing?  Just me?  Shall I name it?  I do that, ya know… If you’ve followed this blog for long enough, you’ve met Drex, Fri, Kivvy, plus more! Perhaps they need a new friend? 😉

TDC Before and After