Sooooooo, I finished refinishing the desktop in the new workout room and I’m RIDICULOUSLY ecstatic about it. I keep dragging poor Joey in there to gaze at it with me. No joke. Poor guy totally humors me most of the time, although I have no doubt that he finds it slightly less exciting than I do. Heehee! #luckygal
I think this is a great time for a lil’ review of this space’s journey up to this point. It’s super fun to see progress. For me anyways. 😉 So, remember when we gained possession of the house a year and a half ago??…


The room was a blank slate… gross carpeting, rickety windows, dusty. Not so great. Oh, and it was peach.
Before we officially moved in, we decided to have new carpeting installed, which was awesome…
WOOT! Clean, crisp and gorgeous.
(*coughcough*) But, not for long.
The very next day, we walked in to the house to discover that the carpet installers had knicked a pipe during installation which resulted in the flooding of our BRAND NEW carpet…..

Aaaaand we moved two spaces back.
Luckily, we got everything fixed and patched, and the carpet was reinstalled with new padding the following week. Then, the room sat for, like, months. Just acting as a storage room as we unpacked the house and got settled in.
Finally, I got around to painting the space a lovely taupey grey (Sherwin Williams Loggia), and I got started with styling…


This room was basically a mish-mosh of everything we had leftover that didn’t fit in other rooms. It was okaaaaaaaayyyy…. Then, I had an “A-Ha! Moment”, switched up the layout, and created a DIY headboard out of art, which helped the room to feel more finished…

But, it still was a mish-mosh of a room in my head. And also, it wasn’t really practical. The bed was a twin size (it was Lucas’s old bed frame), so it didn’t exactly spell out luxury to guests. Plus, we had our Friheten sofa in the other spare room that pulled out to a comfortable queen-size, so we didn’t really need an additional guest space anyways.
Then, I hurt my back.
And I got REEEEEEALLY crabby.
See, I’m pretty athletic and running is like my meditation session. It’s my time to be alone, think, jam out to music, snoop on my neighbors exterior home changes, etc. And living in a beautiful, established neighborhood with lots o’ trees made it even better. Running is one of those things that I’ve never had to force myself to do. Whenever I had free time, I’d think “Yay! I get to run!” as opposed to “I HAVE to run.”.
At the time that I hurt my back, I think I was in the best shape I’d been in since high school. I was logging about 15 miles/week along along with a bit of strength training mixed in (which I DID have to force myself to do… ugh). And I felt GOOOOOD. I had energy, my allergies were practically nonexistent, I was sleeping like a log…
Then, it all stopped cold turkey. I went from being super active, to not being able to do ANYTHING when I herniated my disc. The sudden inactivity affected everything… my sleep, my stomach, my mood, my stress level. Not to mention my wardrobe… not being able to wear heels to a 5’0 gal was like losing an appendage (I only had 2 pairs of pants short enough for flats).
So, after a few months of this, I was NOT easy to live with. But instead of feeding off of it and getting pissy with me, Joey secretly tracked down an elliptical machine on Craigslist for $50. He drove an hour to get it and set it up in the hangout room (the only room at the time which had enough space). He called me when I got home from work that day and told me to check out that room. And there it was. A MONSTROUS piece of athletic equipment….
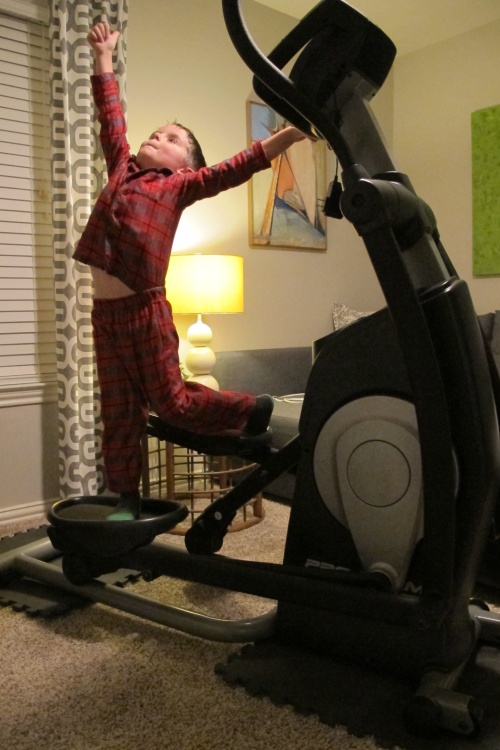
…just waiting for me to find it.
As a fellow athletic person, he totally understood my mood and why I felt the way I did. The elliptical was an exercise that was approved by my doctor, so he got it for me to help. Although, I typically DESPISE any athletic equipment that requires me to exercise in one place, I was blown away by his gesture.
But, let’s face it… the equipment was huge and REALLY needed a better space to live.
I knew that our front bedroom was in flux and not needed for it’s current function, and I also knew it would be a long time before I’d be able to run again (it’s been 3.5 months now, and I’m improved, but still nowhere near running again), so I decided to sell almost everything in the front room and transform it into a workout/rehab room.
We got everything loaded in there and this brings us to where I started in my last post. Check that out for the full story of how this project came to be, which includes a HILARIOUS conversation with Lucas regarding strippers. NOT.JOKING.
Basically, the short version is…

I got bored.
I made a mess.
I ended up stripping the desktop and refinishing it to help break up all that beige.
It looked like this….

Then, I chipped away the pathetically applied paint on the desktop, sanded, stained (which took 4 coats of 3 different colors of stain before I was satisfied – Varathane Dark Walnut was too blah brown, so I added some Varathane Early American which added some gold, but it still wasn’t quite right. So, I added 2 coats of Minwax Ebony overtop. Bingo. Perfect. Dark and rich with dimension. Mu-wah! <- kiss ), and I poly’ed that baby until it was completely awesome. I used the same method of refinishing that I used on our kitchen table (except that I didn’t need stripper thanks to the poor paint job), so for a detailed tutorial on that process, visit that post. I also painted the backs of the shelves the same color as the walls to further break up the beige.
And here she blows, all dressed up for the ball…

Up top, I’ve got all of my workout DVDs, weights, and fun decor that I enjoy (obviously, a picture of a mug of coffee made the cut. I mean, CLEARLY. Heehee!) ….
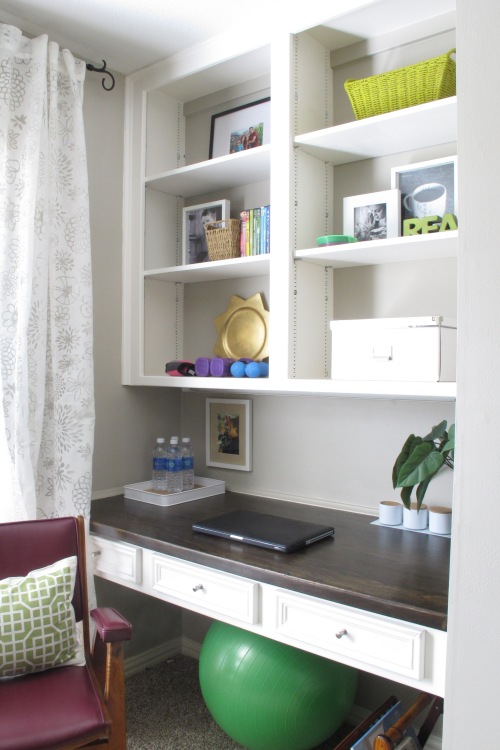
Working our way down, CHECK OUT THAT FRIGGIN’ WOOD GRAIN!!!! I almost fell out when I saw how nice it was once exposed….
I can’t believe that was hidden.
If I could arrest people for crimes against decor… 😉
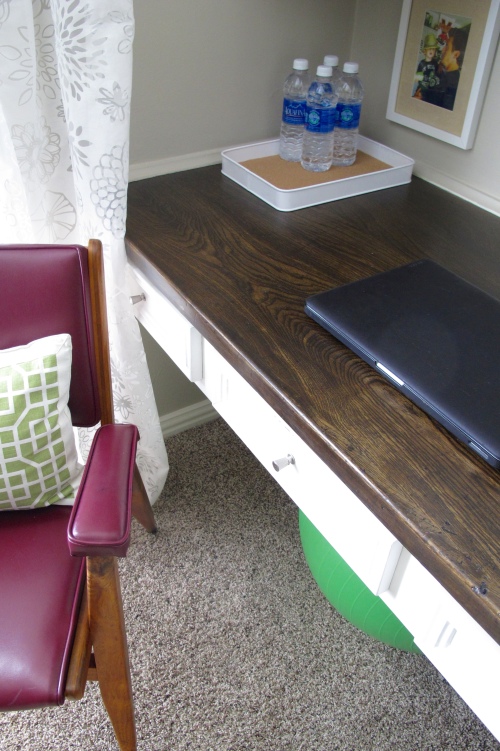
In the photo above, I decided to hang my favorite picture of my brother, Alex, here. He loved CrossFit and was EXTREMELY in shape (as Green Beret’s typically are) so it was a no-brainer that his picture should hang in our workout space. I do want to change out that frame eventually, but this was what I had so I’m workin’ it. I added bottles of water and a laptop to play my workout DVDs as needed.
Down below, I have my exercise ball and a vintage magazine rack that I found at a thrift store to hold magazines and such to look at while on the elliptical. And then there’s my beloved desk chair, of course…

The view from the doorway…

The elliptical looks so much less ginormous in this space. We’re borrowing my parents’ inversion table at the moment, but it’s about to go back to them. Although it felt great on my back, it started aggravating my knee, so it’s a no-go, unfortunately. I still want to add bamboo roman shades below the curtain rod to warm up that window.
You can see that I moved the Make The Time art created by my mother-in-law from the hang out room to here. It just made more sense in this space. The bright, motivating color plus the meaning. It was pretty much meant for a gym…

On the wall next to the built-in I have a leaning mirror…

Yes, I’m still in my PJ’s. It happens. Sometimes it’s all day. I make no apologies.
The plan here is to hang the mirror on the wall and add a barre across the middle. I love doing ballet workout videos upon occasion (well, I will again once the back heals up more). Hence, no rush. We’ll get ‘er done eventually.
And I will leave you with this pic. Gosh, I love this makeover. So simple, yet so impactful (both in looks and function)…

And I’m nothing but smiles as I put together this post!