Fence = Extended

I’m happy to report that our backyard is now larger. (jazzhands!)

Remember back in this post, I discussed how we planned to extend our fence closer to the street?   Well, thanks to Joey and his dad, the mission is complete.

So, let’s look at a few progress shots and then a few before and afters.

First off, let me just say that I really love our neighborhood.  For the very first time as homeowners we live in a place where our neighbors actually talk to one another.  It’s pretty awesome.

But, it is an adjustment.

For example, when your fence is down like this…

You must learn to not walk out into the backyard to take pics in your pajamas.   There, inevitably, will be a crowd of sweet neighbors who are inquiring to your husband about the project at hand staring back at you.   And you will awkwardly turn and flee as if you fear human contact.  Which, at that moment, you pretty much do.

So, at this point, instead of just getting it together and changing into actual clothing, you will resort to Plan B.  Taking progress pics from inside the window…

The next day, you will have learned your lesson and donned appropriate outerwear.  And you will meander out into the yard to snap pics of the two-man team.  Surprisingly, they will be not as excited as you are to stop and pose for pics mid-project.  But, you will prevail….

And you will ogle the newly gained space in wonderment…

I heart you, new fence.  You are beautiful.

(For details about moving a fence, check out this post from when Joey moved the fence in our last house)

So anyways, just so ya know, the pic above is pre-stain.   The following weekend after the fence was completed, Joey got to staining the fence.   He powerwashed the entire thing the first day, then took on the staining process the following day.   I didn’t get any progress pics, but it basically consisted of Joey spraying on the stain and then back-brushing with a large brush to ensure that it was even.   We used a semi-transparent stain in cedar, which we were pigeon-holed into using since another segment of our fence by the pool was already stained cedar.  We chose semi-transparent since we had both old and new fencing to unite.  Semi-transparent stain offers more coverage than transparent while still allowing the wood grain to show through, thereby, creating a more cohesive finish.

Now, for the fun part.  Before and afters.

Before…

After…

You may recall that the arch in the branches in the photo above is where the walkway to the shed will go.

Before…

After…

Before…

After…

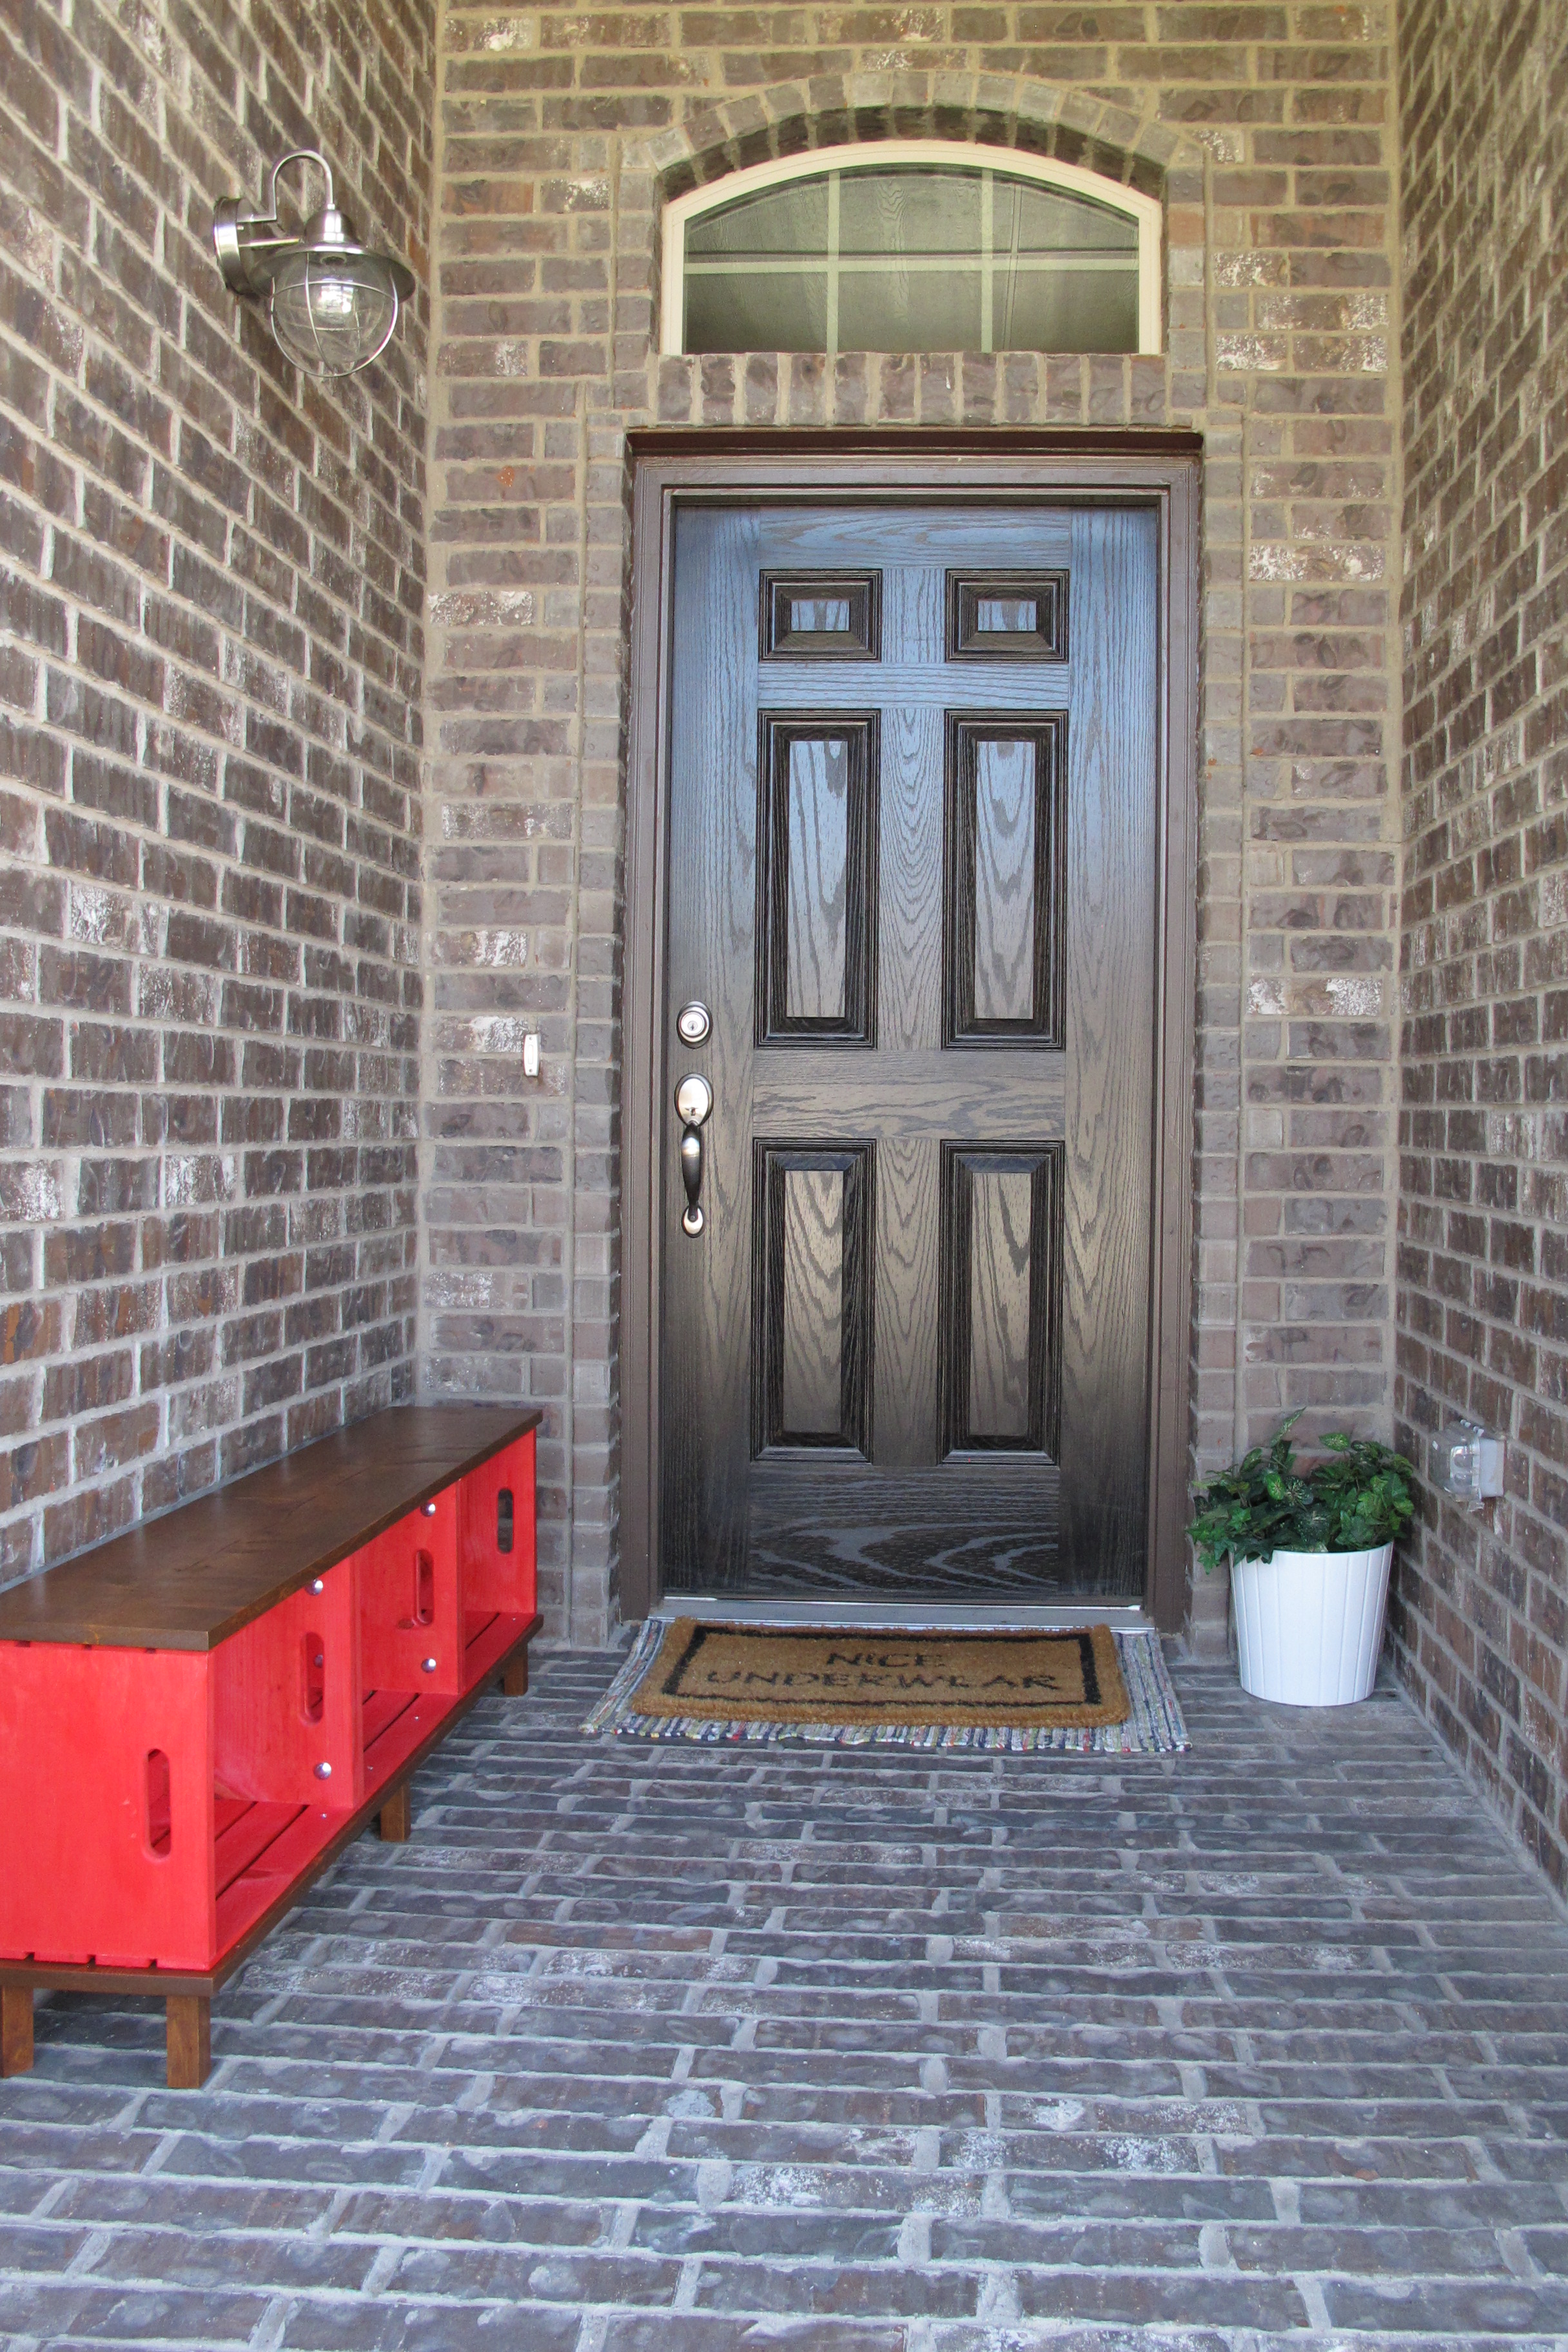
And here’s the front on that side of the house now…

Nice, right?? Joey and his dad rocked it.

And check out the freshly stained amount of yard we gained…

Heck yeah.

Now this one isn’t a total before pic.  It was taken just after we had the house painted (and after joey gussied up the landscaping and added a stone border).  It was just the only pic that I could find that really showed the side fence ….

And here’s our house now…

But since I’m a total sucker for TRUE before pics, here are a few shots of our house on the day we closed…

I haven’t looked at some of these before pics in a really long time.  I’d forgotten how ugly it was at first.   Very institutionally prison-like, in my opinion.  Those old windows.  Woof!  What was really, really encouraging was that while Joey was staining the fence, one of our neighbors whom we hadn’t met yet walked over to Joey and thanked him for helping to make the neighborhood beautiful.   And I thank him too.   Aside from painting the front door and our metal gate, I can claim no responsibility for our house’s exterior transformation.  My husband never ceases to amaze.

Sadly, with all the crazy weather we’ve been having though, there has been one casualty.  This awesomely unique evergreen went to the giant forest in the sky after all the rain we had in May…

Goodbye, my LOOOVVVE…

So, now that the fence is extended we’re gonna get going on installing the shed.   Which means our garage is gonna look might purdy.  Well, for a minute anyways (donttelljoeyisaidthat). And once the weather cools off we plan to work on landscaping both the shed and exterior fenceline to soften it all up.

So, that’s our exterior progress up to this point.  How are y’all faring in this heat?

TDC Before and After
Advertisement

The Great Crate Challenge

Howdy, Folks!   I love blogging.  I have to say.  It’s fun, rewarding, therapeutic and a great way to meet some awesome people whom I would have never met otherwise.   A while back I agreed to team up with some amazing bloggers for a project challenge.   Basically, we all had to go buy crates from Michael’s and do something with them.  Thus, The Great Crate Challenge was born….

great_crate_challenge

I thought about it for a while, and after some deliberation, decided to take my crates and make a bench for either our foyer or much-neglected front porch.

Before I began, I developed a highly technical plan…

 IMG_6920

Impressed? 😉

Then, I purchased my materials…

– 3 crates from Michael’s

– 1″ x 12″ x 12′ whitewood board (cut down to (2) 1″ x 10 1/4″ x 55″)

– Bolts, nuts, and washers to bolt the crates together

Other materials, which I already had…

– Wood screws

– Stain/paint

– Wood legs (which I found at Goodwill for practically pennies)…

IMG_6918

I was cracking up as I left Goodwill that day because the cashier made such a stink that I’d found the legs before her.   Heehee!  Sorry, lady.  Finders keepers.   Anyhoo, I’d done some research prior to making my plan, and found that 17-18″ is a good height for a bench, thus these legs were too long.  So, Joey cut them down with the miter saw to 4 inch lengths.

Once I had all of my materials together, I did a dry run in the foyer so that I could figure out how I wanted to paint/stain the bench (Lucas helped).

We placed various stained items nearby and tried to visualize which finish would look best.  Lucas was no help in deciding.  He liked everything.   But somehow, I managed to convince my lovely cousin, Kristyn, to babysit AND brainstorm with me all in one day.   It was super helpful to bounce ideas off her and I came out deciding to stain the top, bottom and legs and red-wash the crates to give the bench kind of an industrial-old-schoolhouse feel.

I sanded all of my pieces to take off any splinters or harsh edges.  Then, I used Varathane’s Early American stain, applying 2 coats with dry time between to my whitewood pieces and legs.  Once the stain had dried, I treated the stained elements with several coats of Formby’s Tung Oil as discussed in this post.

 IMG_6947

For the crates, I decided to use a red-wash technique so that the woodgrain would still show through.  I poured some of this paint…

IMG_6942

…into a cup and diluted it with equal parts water.  I simply painted it on and let it dry.  I experimented with wiping off the excess, but that caused the crates to take on a pinkish hue.  Not good.  Plus, the wood was so absorbent that simply painting it on didn’t leave drips anyways, so I just applied the paint and called it a day.

 IMG_6948

Once the components had dried, it was assembly time.  Joey did most of it with some direction from me per my plan.   We started by attaching the legs to the bottom.  This was a bit of a different process for us because of the random Goodwill legs I’d found.  The screws on top were much too long for the standard brackets sold at home improvement stores.   Luckily, Joey figured out that the metal threading that held the feet in place on the bottoms of the legs (the part that he’d cut off) fit the screws perfectly.  So, he removed them…

He drilled holes in the bottom board where the legs would go and played around with the components to determine the most secure way to attach them.  Ultimately, he found that inserting the metal screw-catch thing (technical term) to the opposite side of the board allowed the legs to be attached more securely.   (Note: If you simply purchase legs from Lowe’s or Home Depot or whatever, you can purchase metal brackets right along with them to secure the legs, easy-peasy.)

IMG_6987

You can see here how the metal threads are on the top side.  The screw catches the thread from the opposite direction holding the legs snugly to the board…

IMG_6988

Next, he bolted the crates together using a clamp to keep everything flush and lined up…

 IMG_6992

Once the crates were bolted together, he screwed the crates to the bottom using wood screws….

 IMG_6995

…and repeated the process with the top…

 IMG_6996

Once we’d completed our new baby bench, I tried it in the foyer and then on the porch.  And the porch won out.  Big time. (HEADLINE: Porch Engages in Victory Dance While Foyer Weeps Rocking In Fetal Position)…

IMG_7022

IMG_7007

IMG_7013

IMG_7021

I absolutely love it!  It turned out better than I imagined.  I feel like the industrial schoolhouse vibe was totally achieved and it adds a nice punch of color to our porch.   Plus, crates + bricks are sexy.  Forhousestuff.  Just sayin’.  I still need to treat the bench with something more inclement-weather friendly now that it’s final placement is determined.  Honestly, I really thought this guy’d end up in the foyer so I wasn’t too worried about that in the painting/treating stages.  I’ll get that done soon to keep him looking healthy.  In the meantime, I will spend my free time sitting and staring at him with a goofy smile on my face.   Crate. Mission. Accomplished.

Update: It’s been approximately 9 months since we built this bench and I’m happy to report that it’s still going strong.   It has remained in only outdoor covered areas (first our front porch, and now our covered back patio) and it has suffered no damage or weakening whatsoever and remains sturdy as can be.  I can’t speak for how it would fare if left in exposed outdoor areas, but it seems to be perfectly fine if sheltered from the sun and rain.   We still couldn’t be happier with this project. 🙂

So, that’s my contribution to The Great Crate Challenge!   Now, check out the other awesome projects created by my fabulous bloggy friends….

Linked up at: I Heart Organizing

TDC Before and After