Howdy folks! So, the last time I posted about Lucas’s Room was when we added a pair of Expedit shelves with a little pop o’ green behind them, which transformed the “play-zone” part of his room into this…

Back then, I stated something along the lines of “next will be shelves between the units”. And I’m happy to say that a whopping five months later “next” is finally here!
This is gonna be more of a “before and after” post rather than a tutorial since I was a bad blogger and didn’t take proper pictures. It all started when I found two shelves on clearance at Target for $4 a piece (marked down from $14.99). They were the perfect size and color (similar to the Ikea white of the units) for the space above Lucas’s toy trunk. So, I possessively shoved them into my cart and chauffeured them home.
I threw a few ideas around for brackets, but in the end, cheap won out. I purchased four of the brackets below from Lowe’s for just over a dollar a pop…

{source}
I spray-painted them gold with leftover spray-paint that I had from when I created my Target-inspired bench. I wanted the brackets to play off of the gold accents on Lucas’s toy trunk…

The pic above was taken about halfway through painting. After the brackets had cured, Joey hung the shelves above the toy trunk, level with the shelves on the Expedit units…


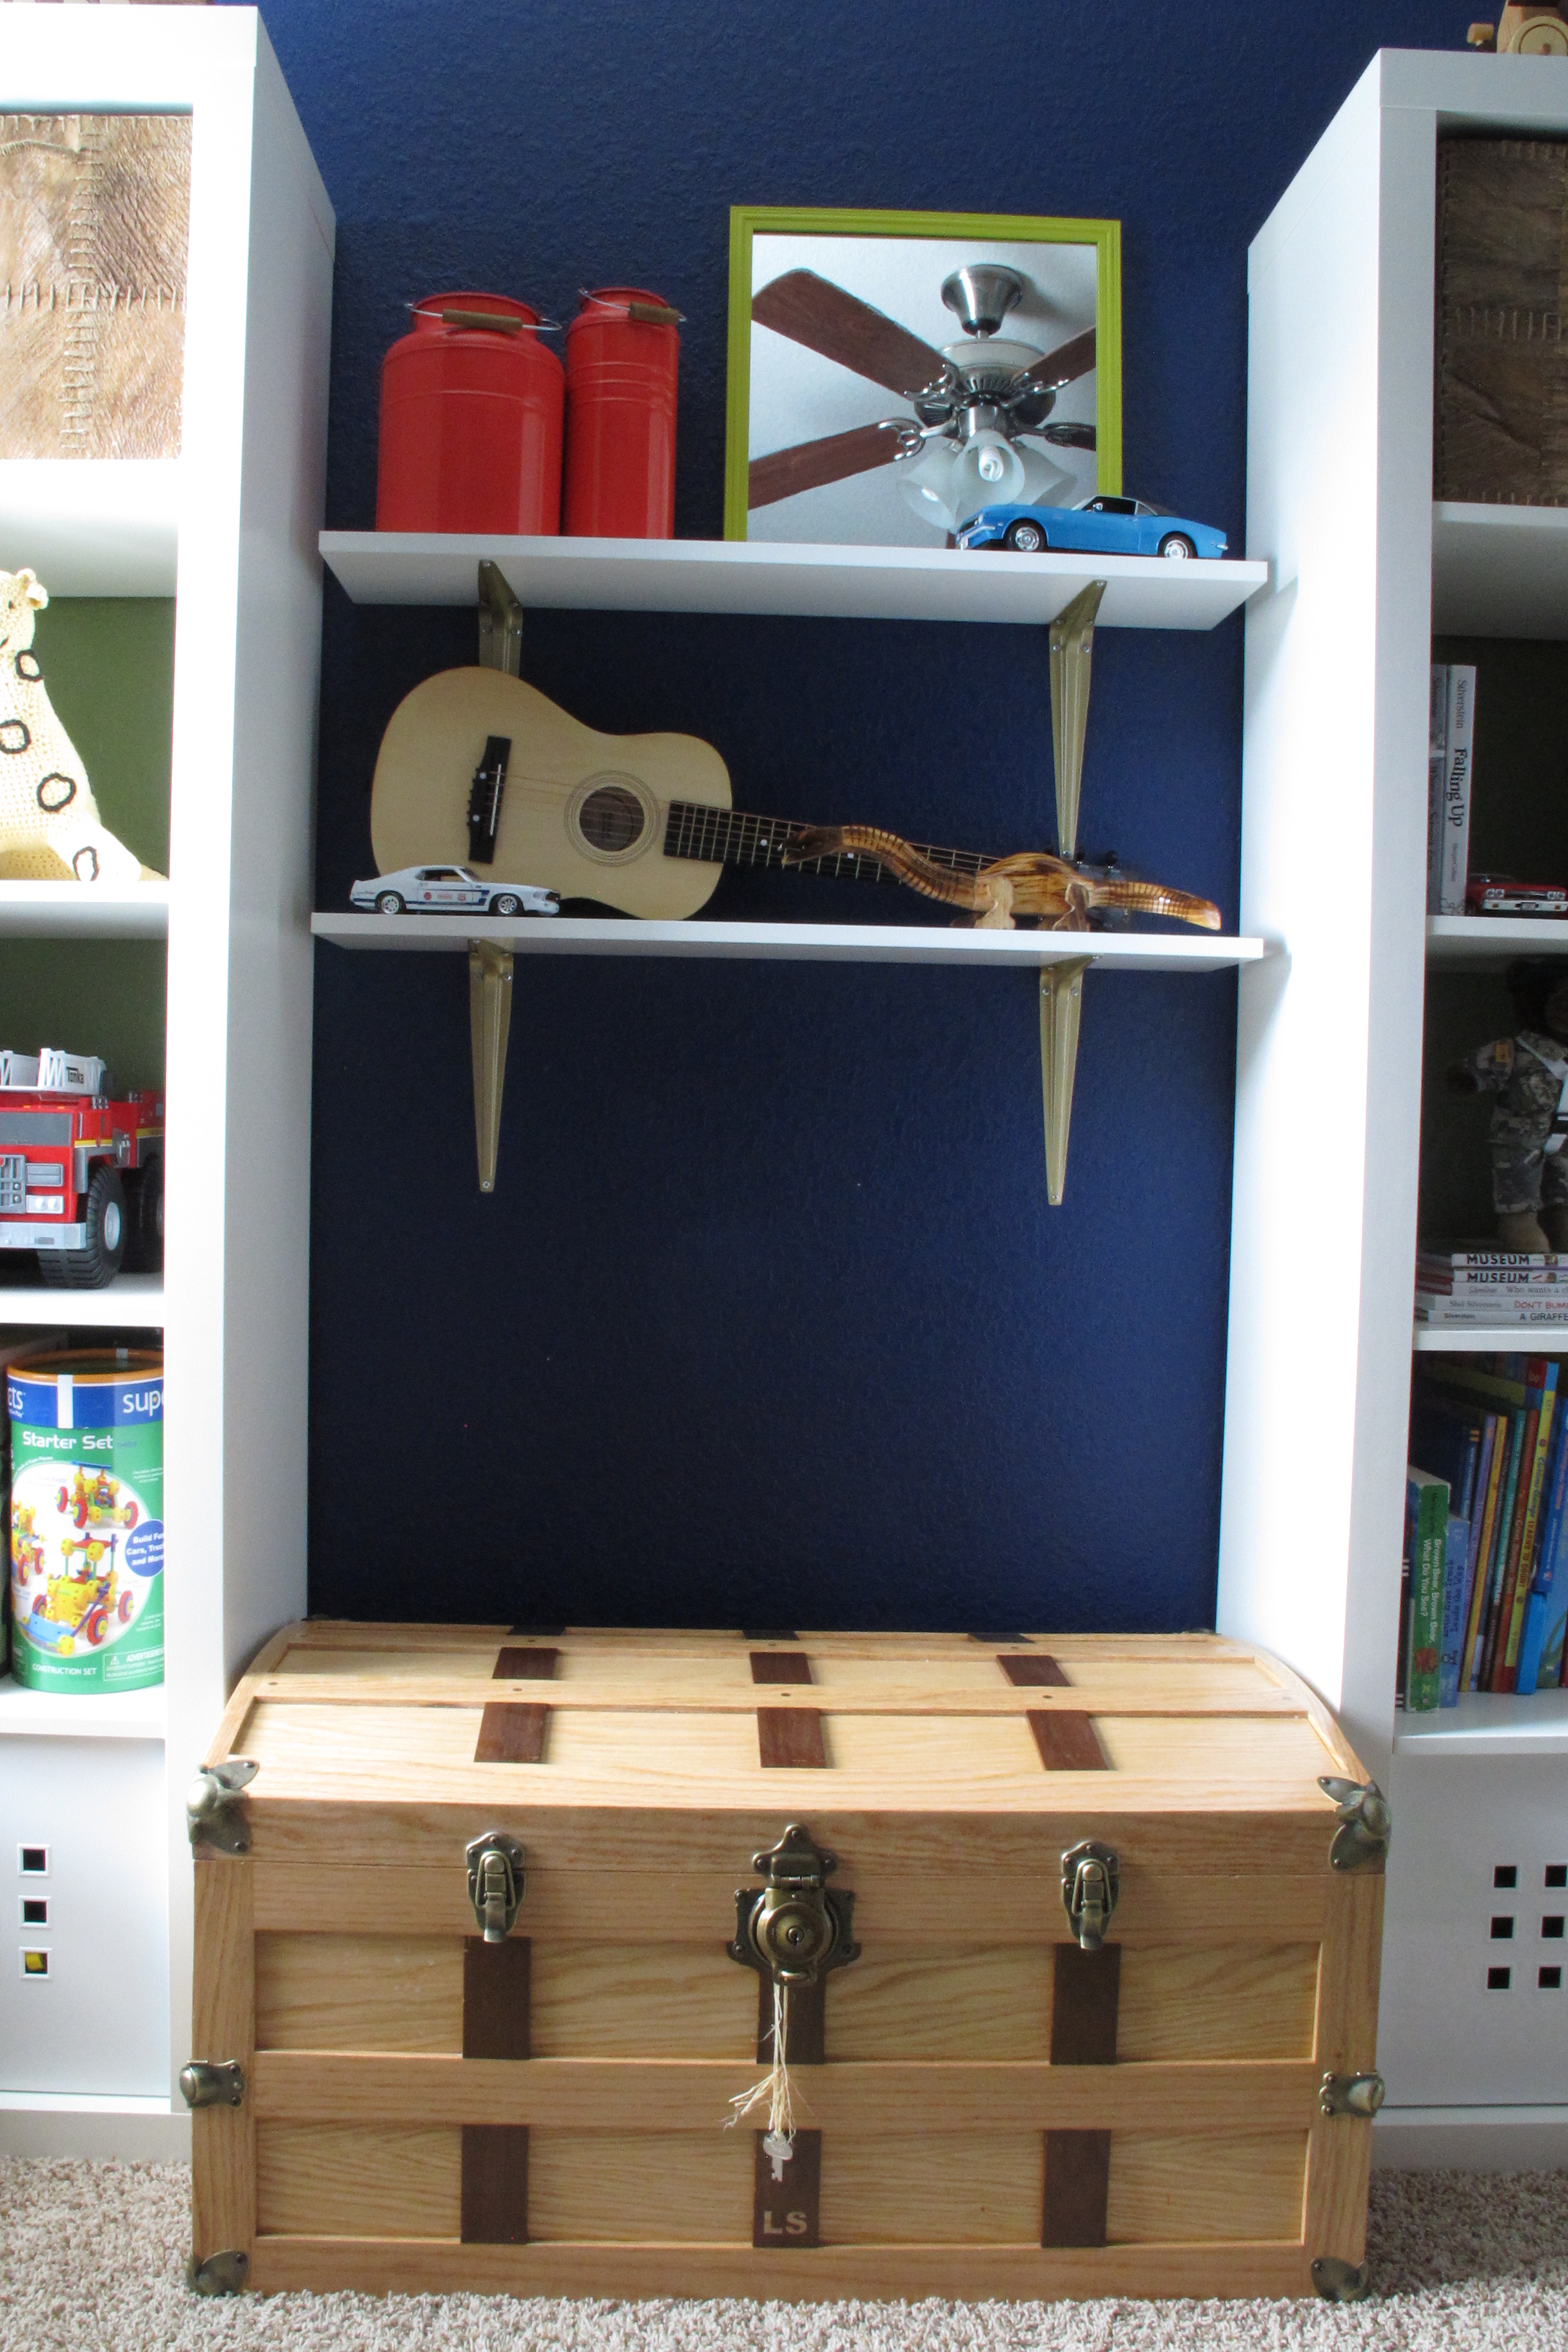
I’ve thought about dabbing the screws with a smidge of gold paint, but really… they don’t bother me that much. Once the shelves were hung, I loaded them up with a few accessories that I’ve been saving for this very occasion…

…A few jugs to play off of the other orange accents in the room, a two-dollar painted mirror from Goodwill to bounce some light around…

…his little guitar that had been precariously teetering in his closet for far too long, a wooden dinosaur that we brought back from Mexico and some model cars (of course). 🙂
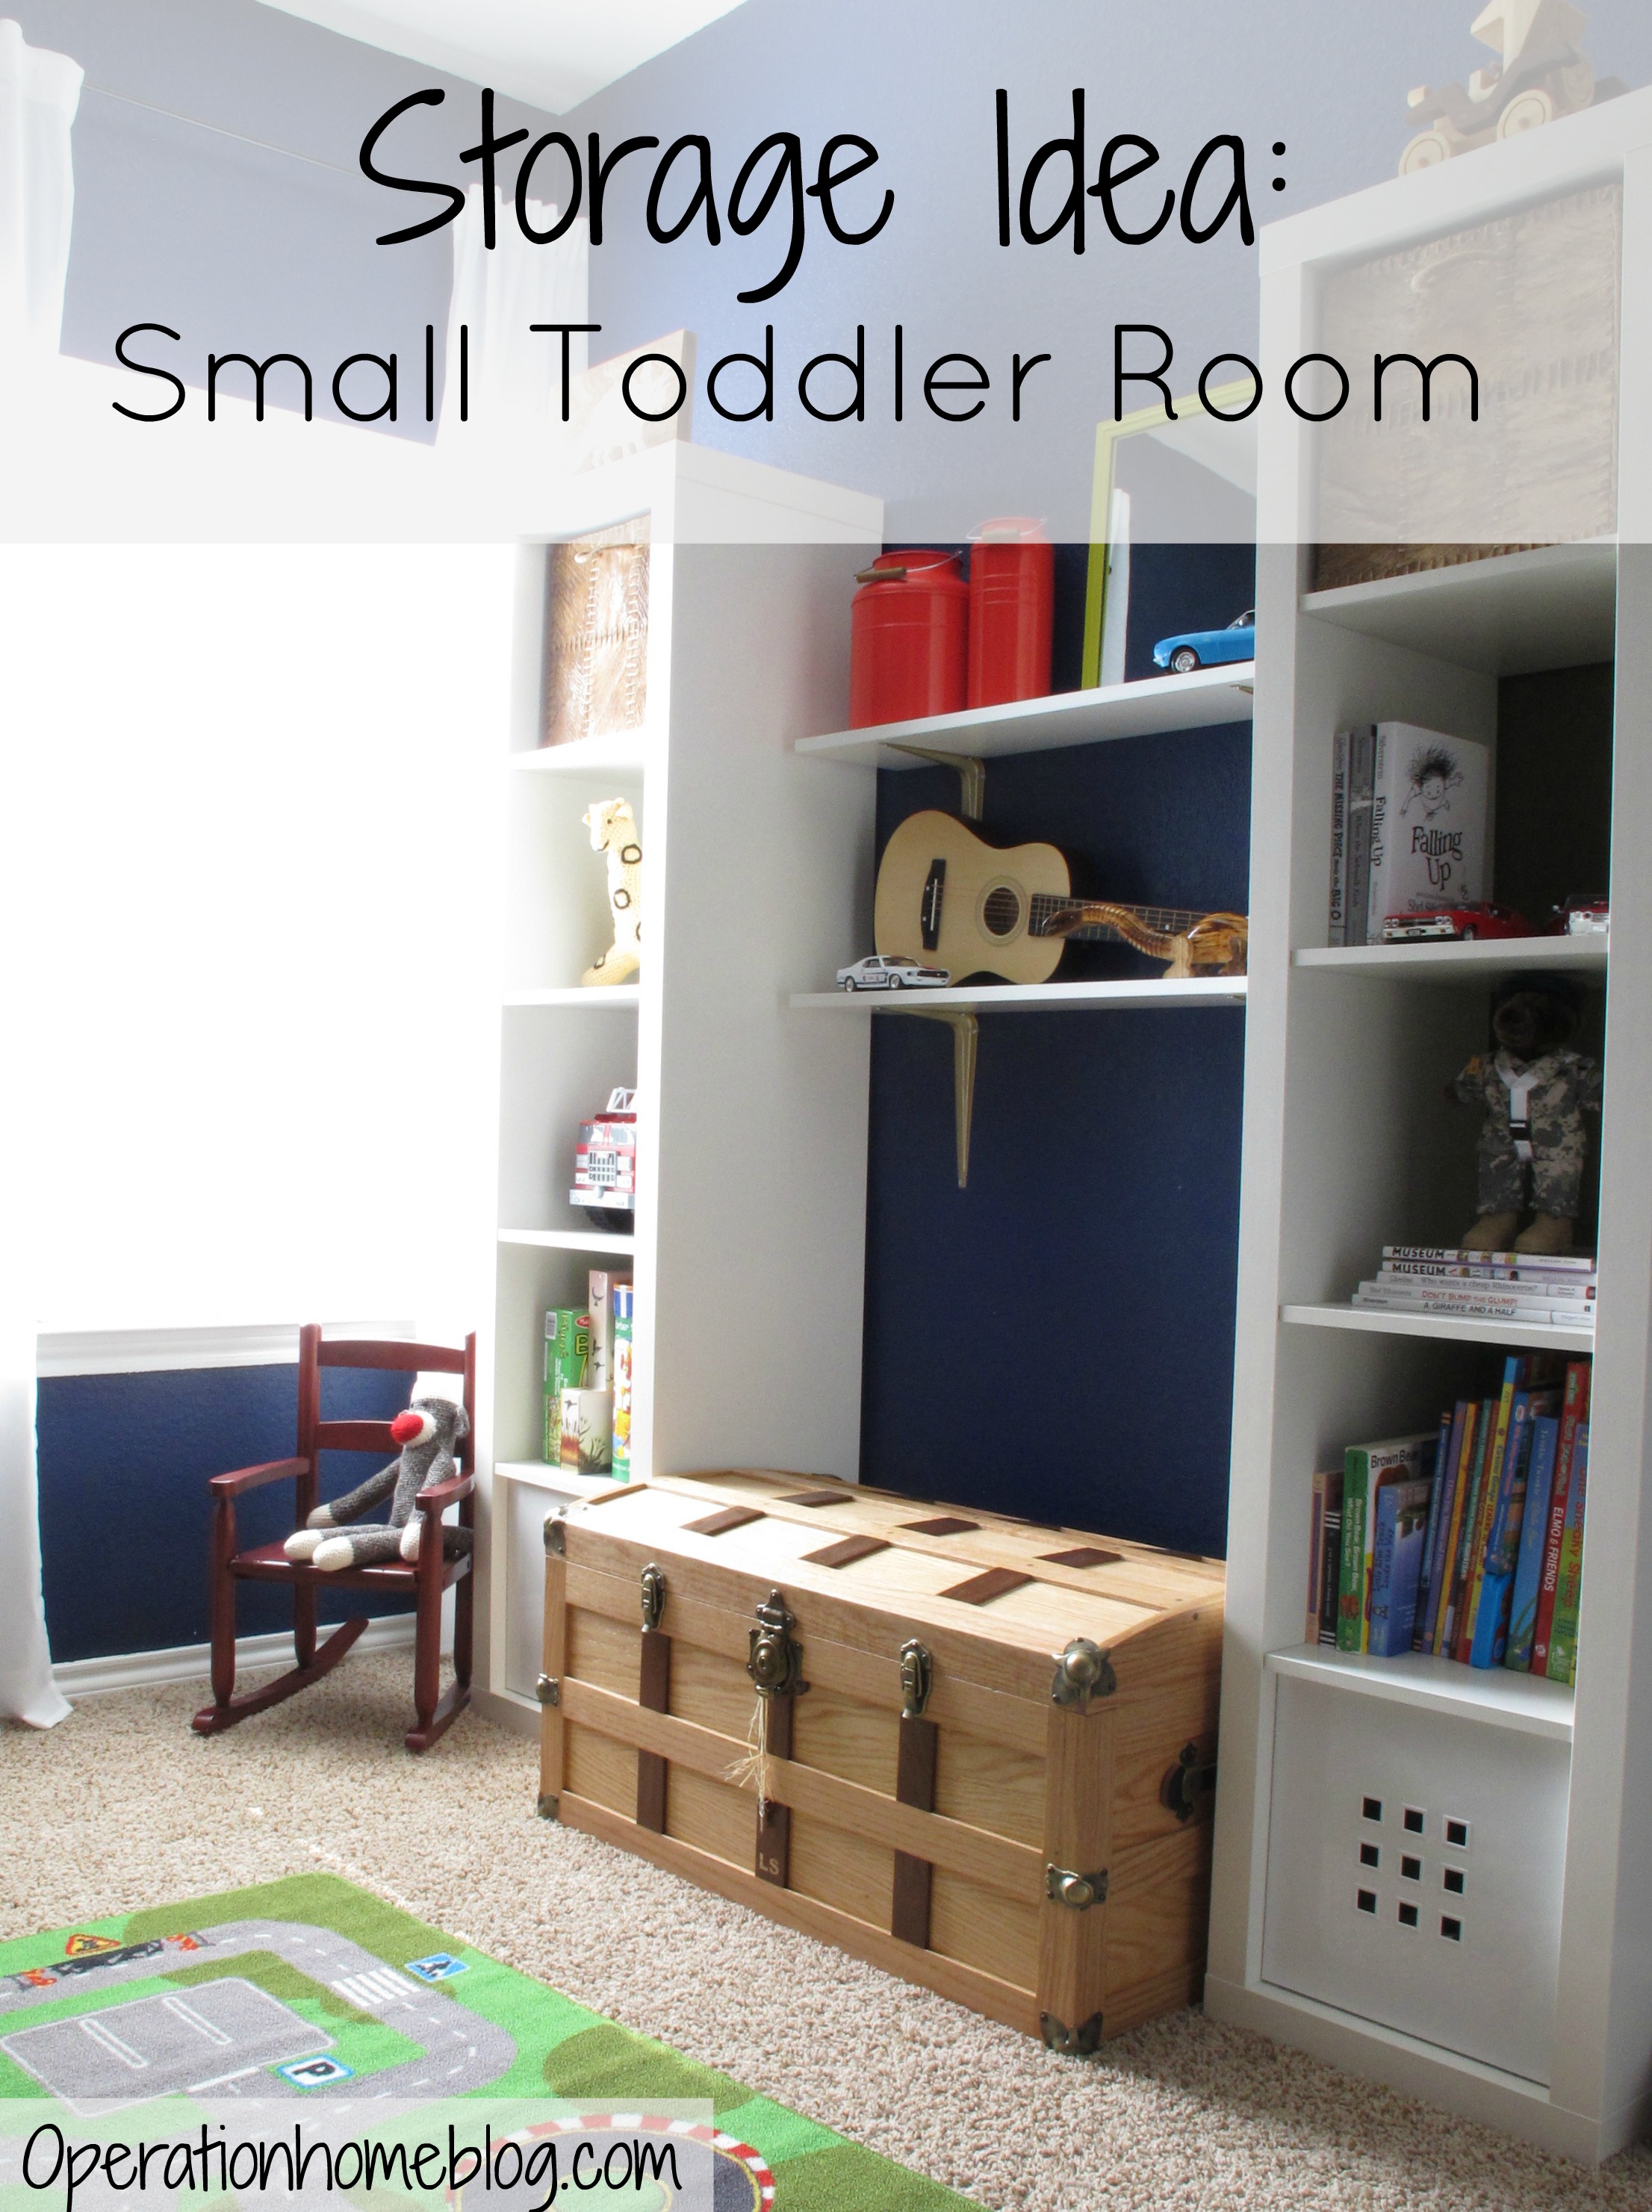
Here are a few wider shots…

And just as a reminder of where we started… a before shot taken just after we moved in…
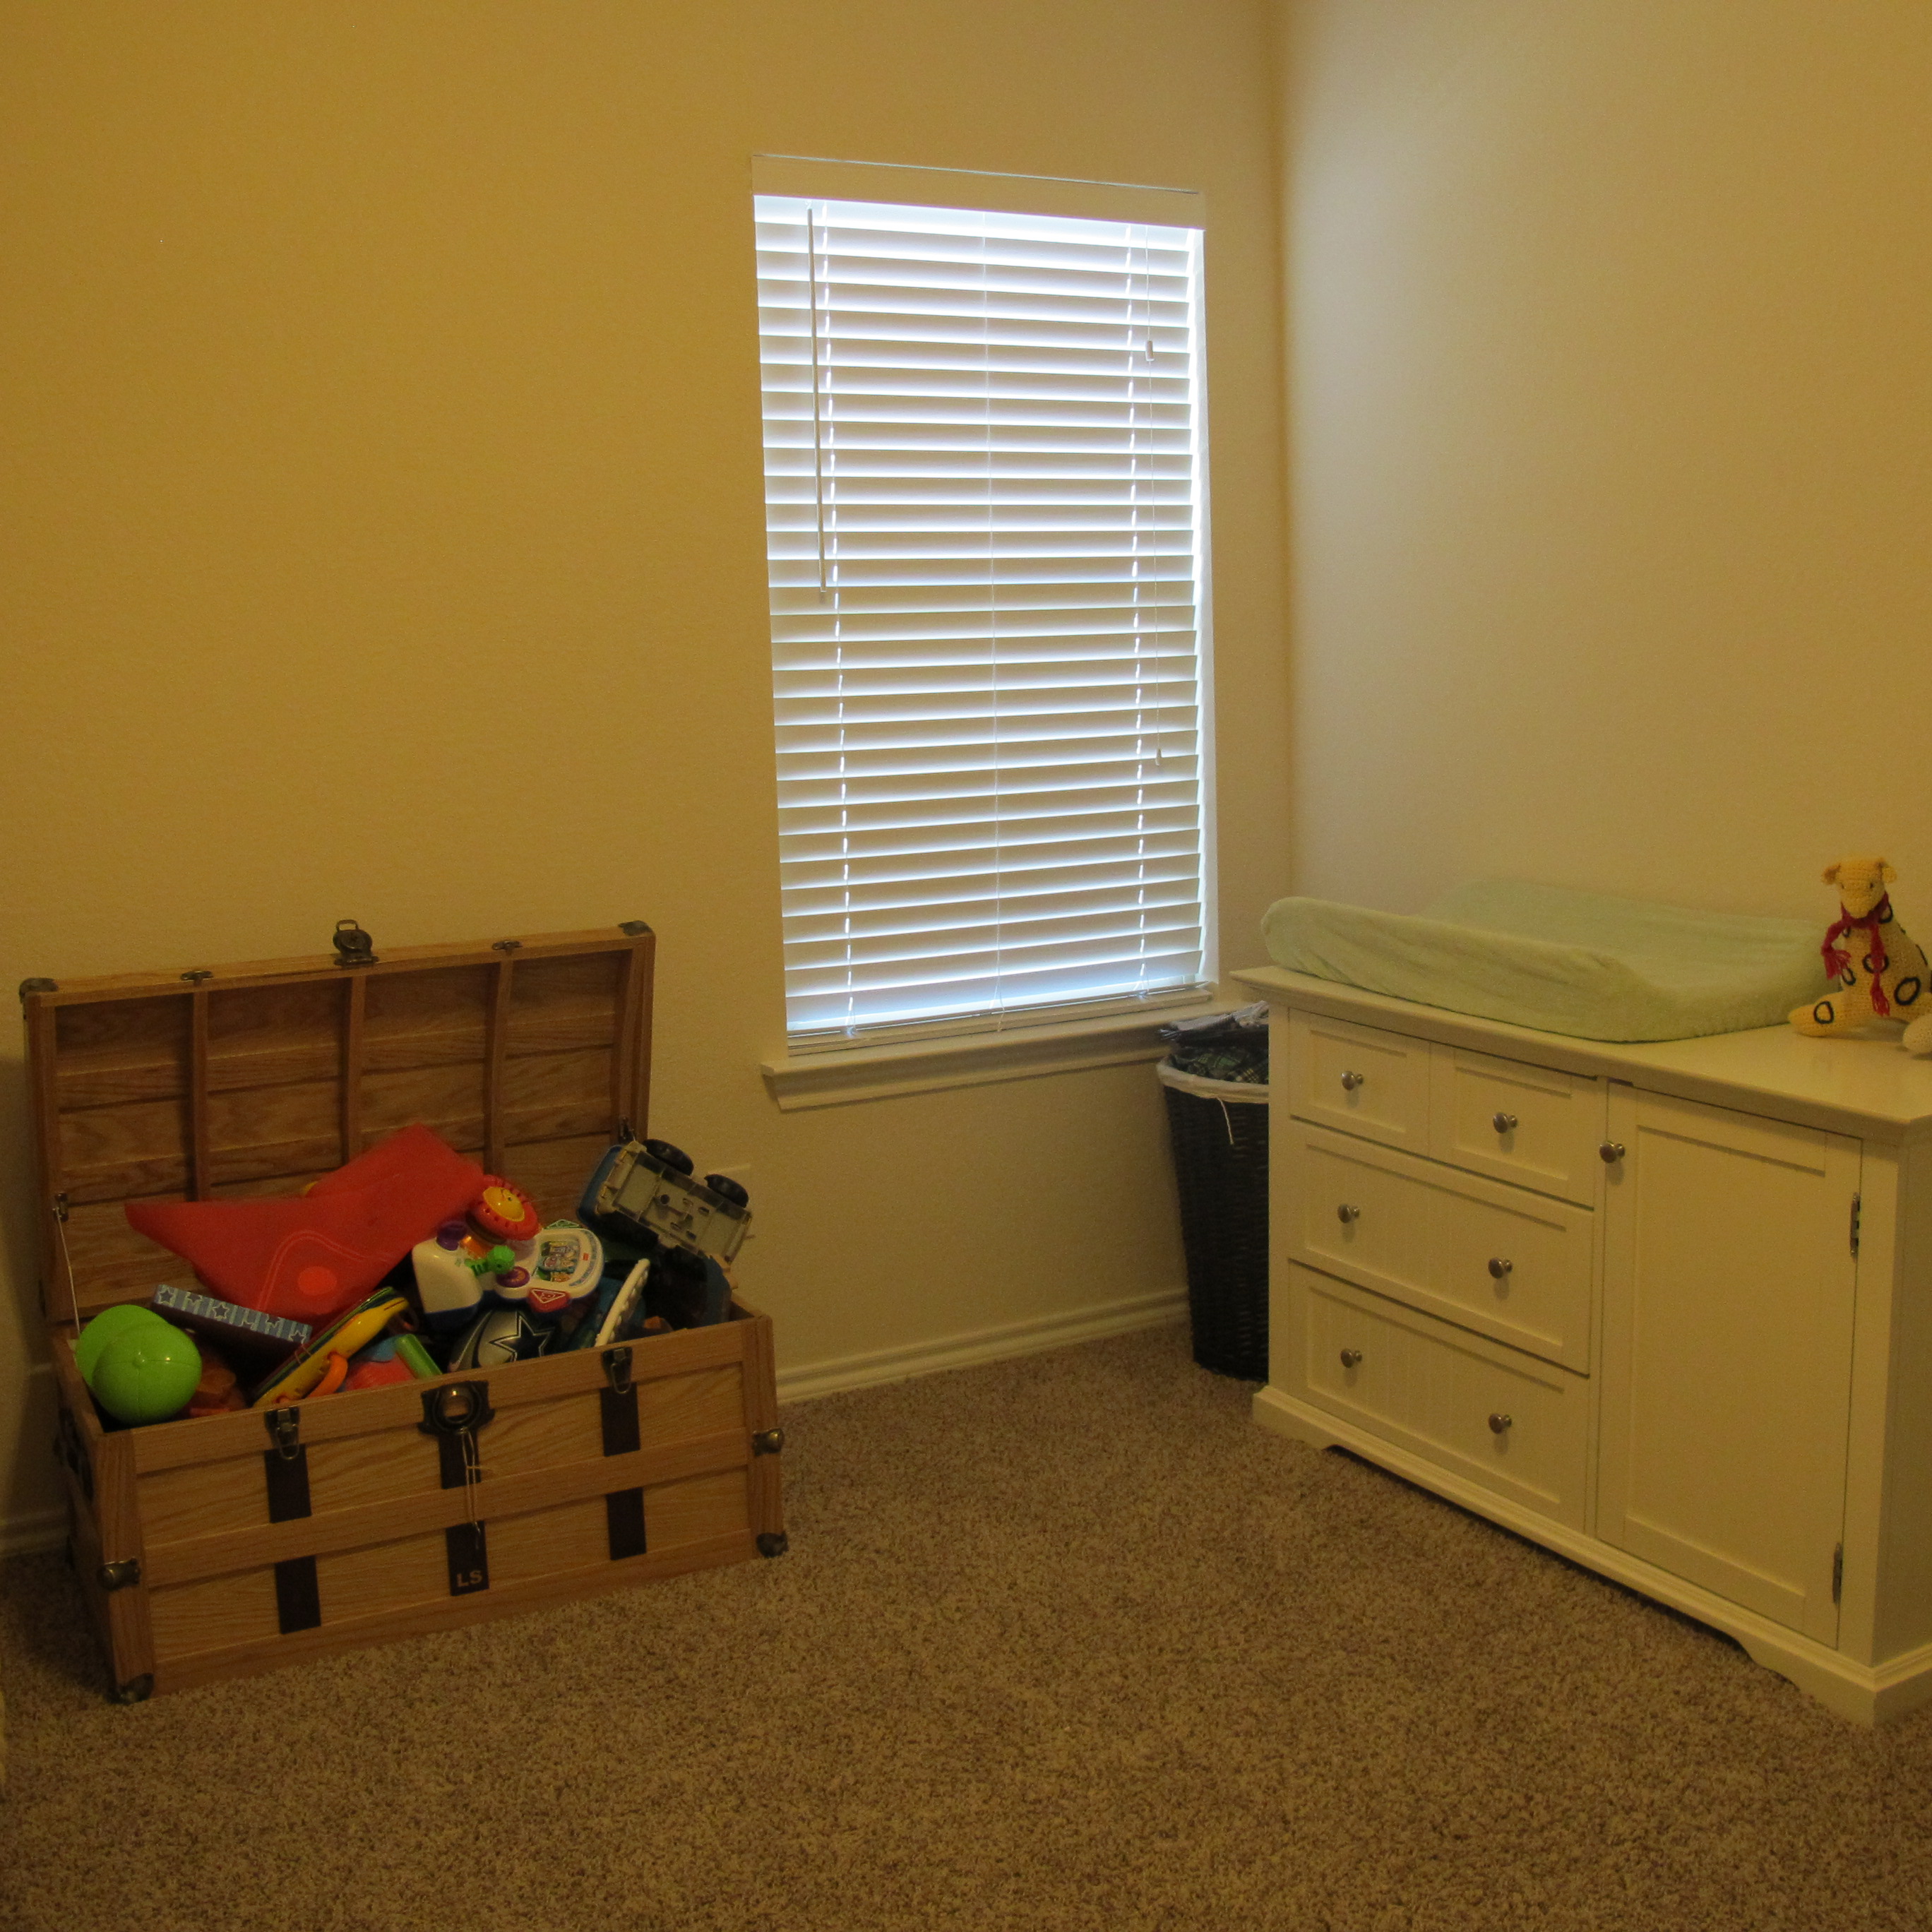
Here’s a pic with the toy chest lid open just to demonstrate our reasoning for shelf placement…

There’s plenty of space for Lucas to rummage about his toys without the shelf crowding the lid.
I’m pretty much loving it. The new shelves provide additional storage and brightness and offer a great space to display larger items that were taking up space in his closet. They also act as a visual bridge between the two Expedit units which makes it feel more cohesive. For a smaller bedroom, I really feel like we’ve made pretty good use of the space for storing Lucas’s toys in easily accessible ways, which in turn, leaves more room for concealed storage in the closet. Win-win in my eyes. Thus, I hereby dub this play-zone complete (for now). 🙂
So anyways, I hope everybody has a fantastic weekend!
Linked up at: I Heart Organizing I Heart Nap Time, Lines Across, Say Not Sweet Anne, I Should Be Mopping The Floor, Tip Junkie, Home Stories A to Z, Upcycled Treasures


That looks great! I can’t wait til you get to help me😀
Haha! Thanks, Amanda! 🙂
Love those shelves! The room is looking great 🙂
Thanks, Bre! 🙂
Looks SO great! LOVE that toy trunk!!!
Thanks, Kristi! My father-in-law actually made that trunk from scratch! He’s so talented.
Great way to add storage and a place for your son to display his favorites things. I love the trunk your father-in-law made – he’s very talented. The blue wall color against the white bookcases looks so fresh too.
Thanks so much! I really appreciate it! I really wanted to create some fun contrast and function and am so happy with how it’s turned out. 🙂
Did you anchor the expedit shelves to the wall? I’d prefer not to but the one we have doesn’t sit steady on our carpet… Curious what others do!
Hi Katie! We did anchor them. We used heavy-duty anchors (they claim to hold 150 lbs each) on all the screws except one which happened to go into the stud. Our son is basically a spider monkey so we didn’t want to take any chances. 🙂