Super easy Neapolitan cupcakes

So, a few weeks ago, Michelle over at Home For Now made these adorable ombre cupcakes for Valentine’s day. And they looked dee-licious! I literally went to the grocery store on my way home to get ingredients as I craved cupcakes so badly after reading her post.  Seriously, read it.   You won’t make it home without cake mix in tow. Trust me.

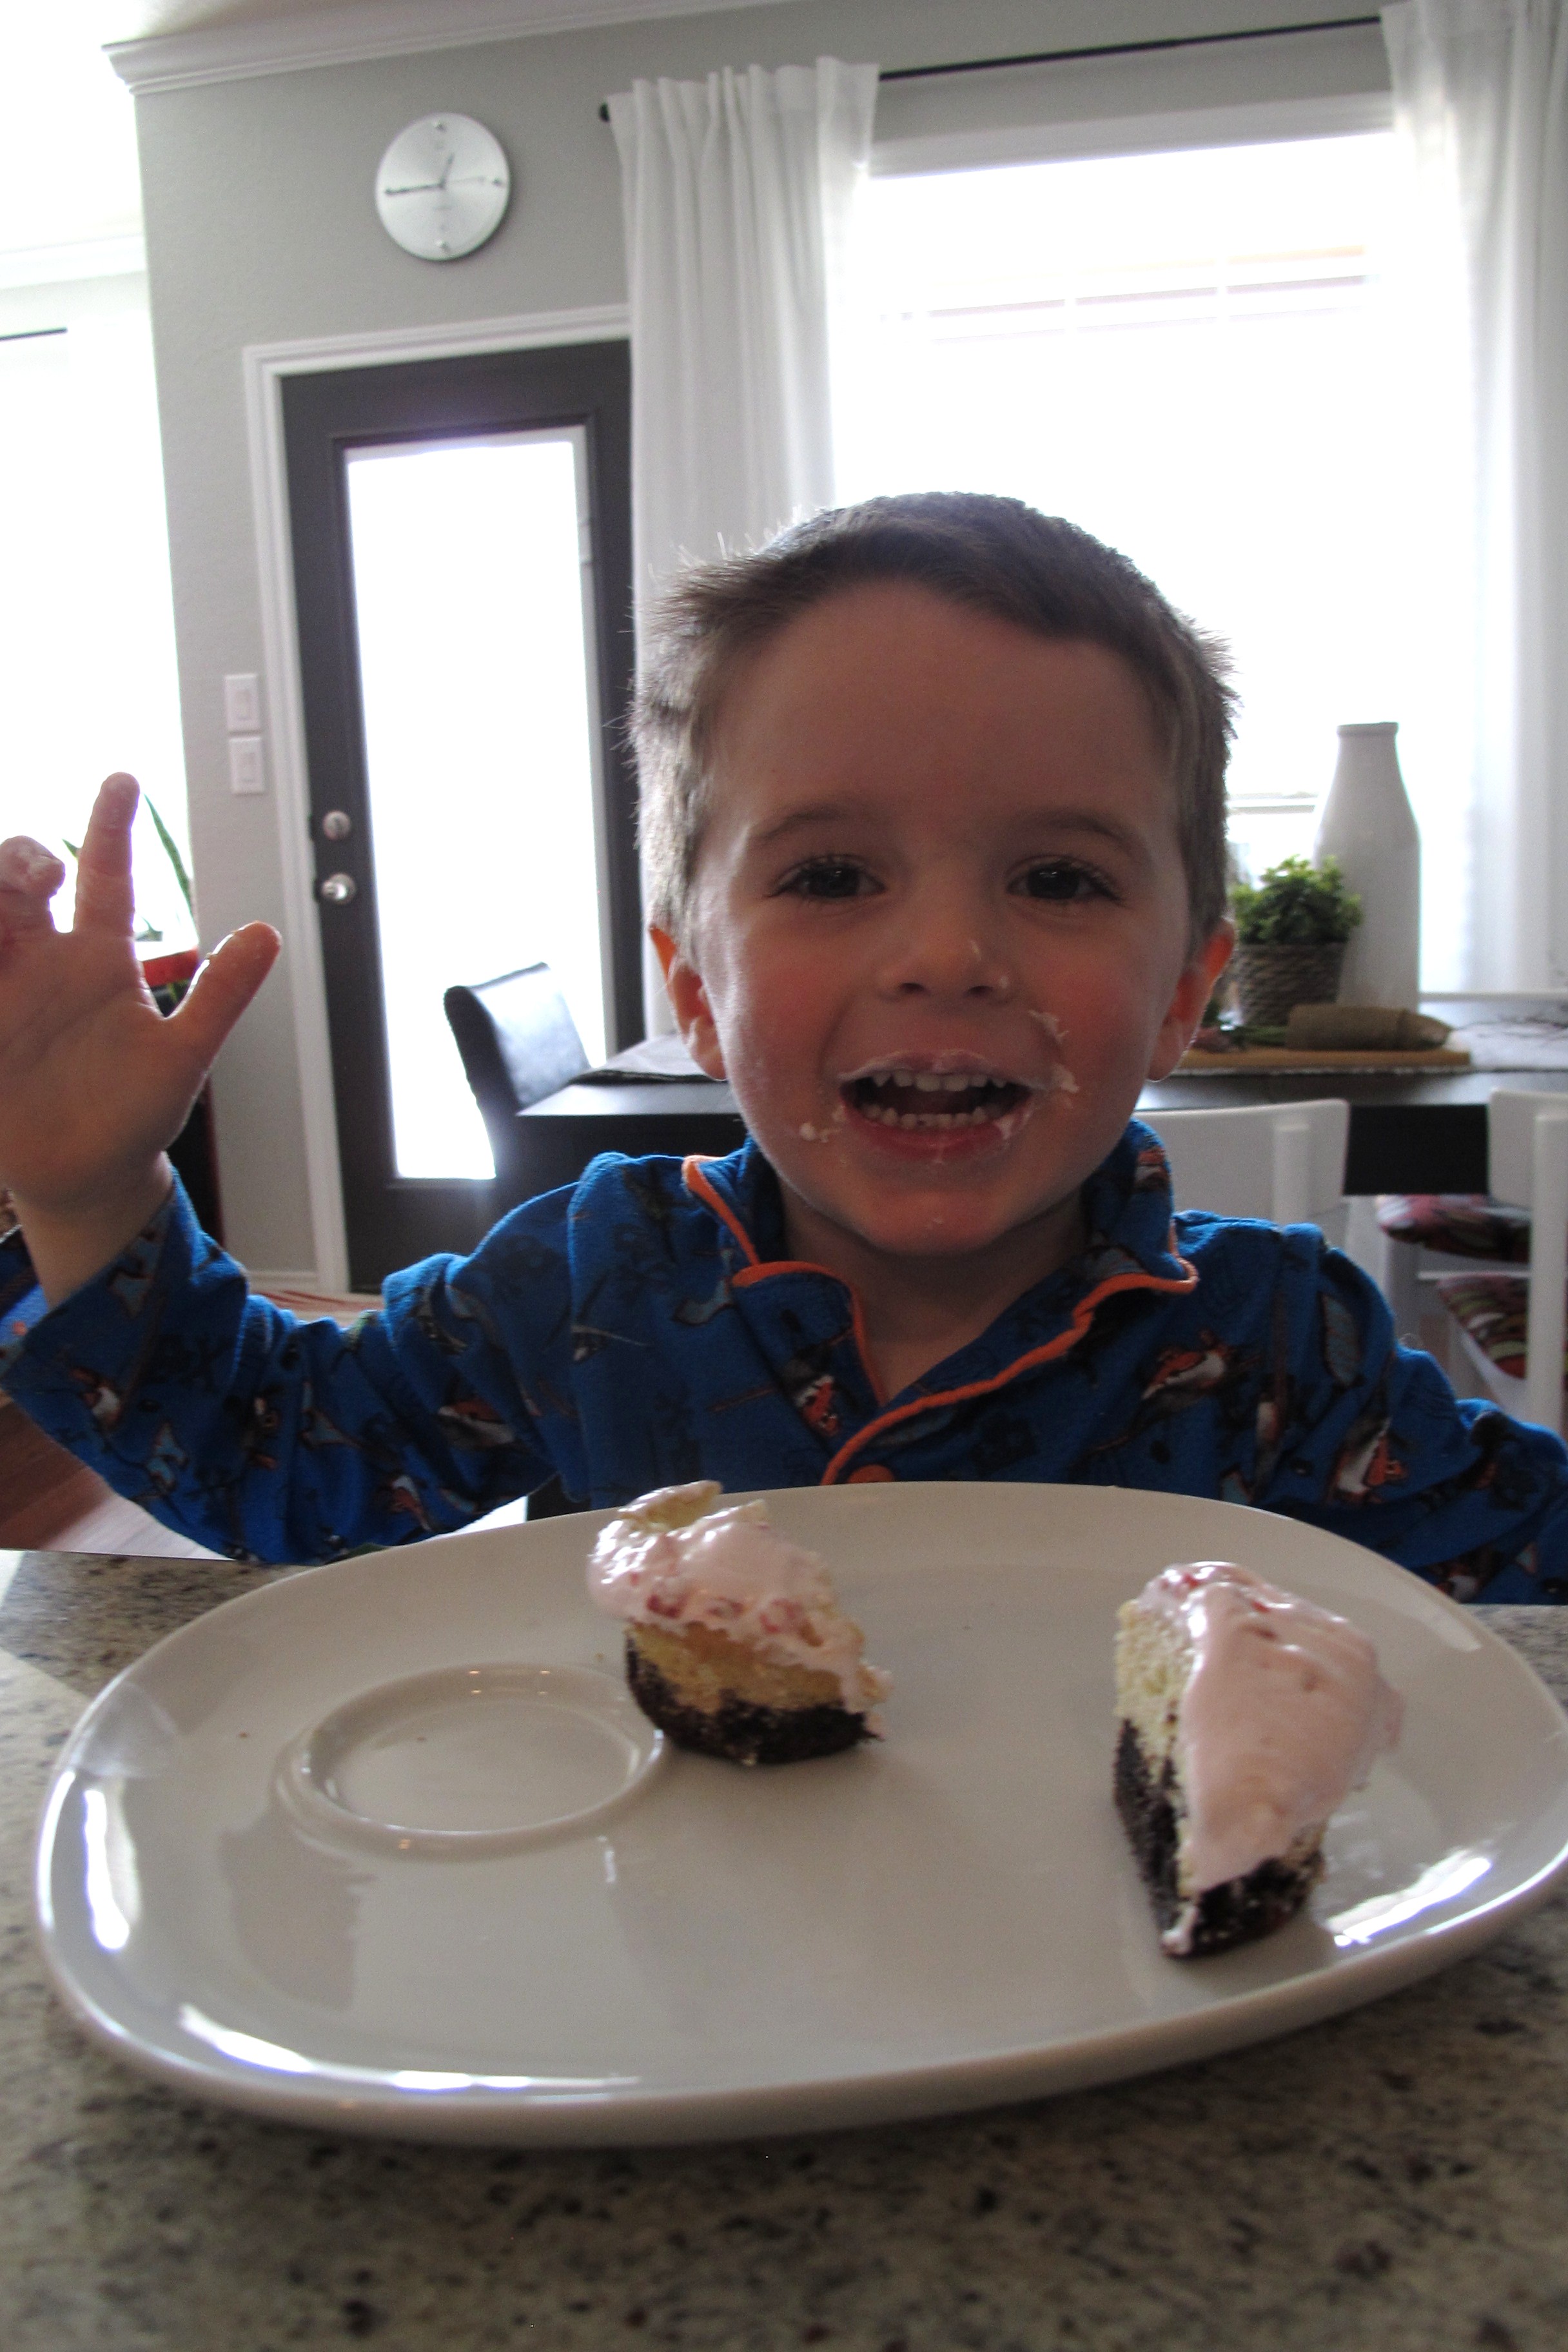
Anyways, thanks to my new-found inspiration, I thought making cupcakes would be a fun V-day activity to do with Lucas. I decided on my Neapolitan cupcakes since it’d been a while since I’d made them.   FYI… These were not my idea.  They were actually a compilation of ideas that I got from Pinterest.  I just decided to combine them Neapolitan-style. I’ve made this recipe for various occasions in the past and they’ve practically flown off the platter. They’re definitely one of those “looks way harder than they are” type of things.

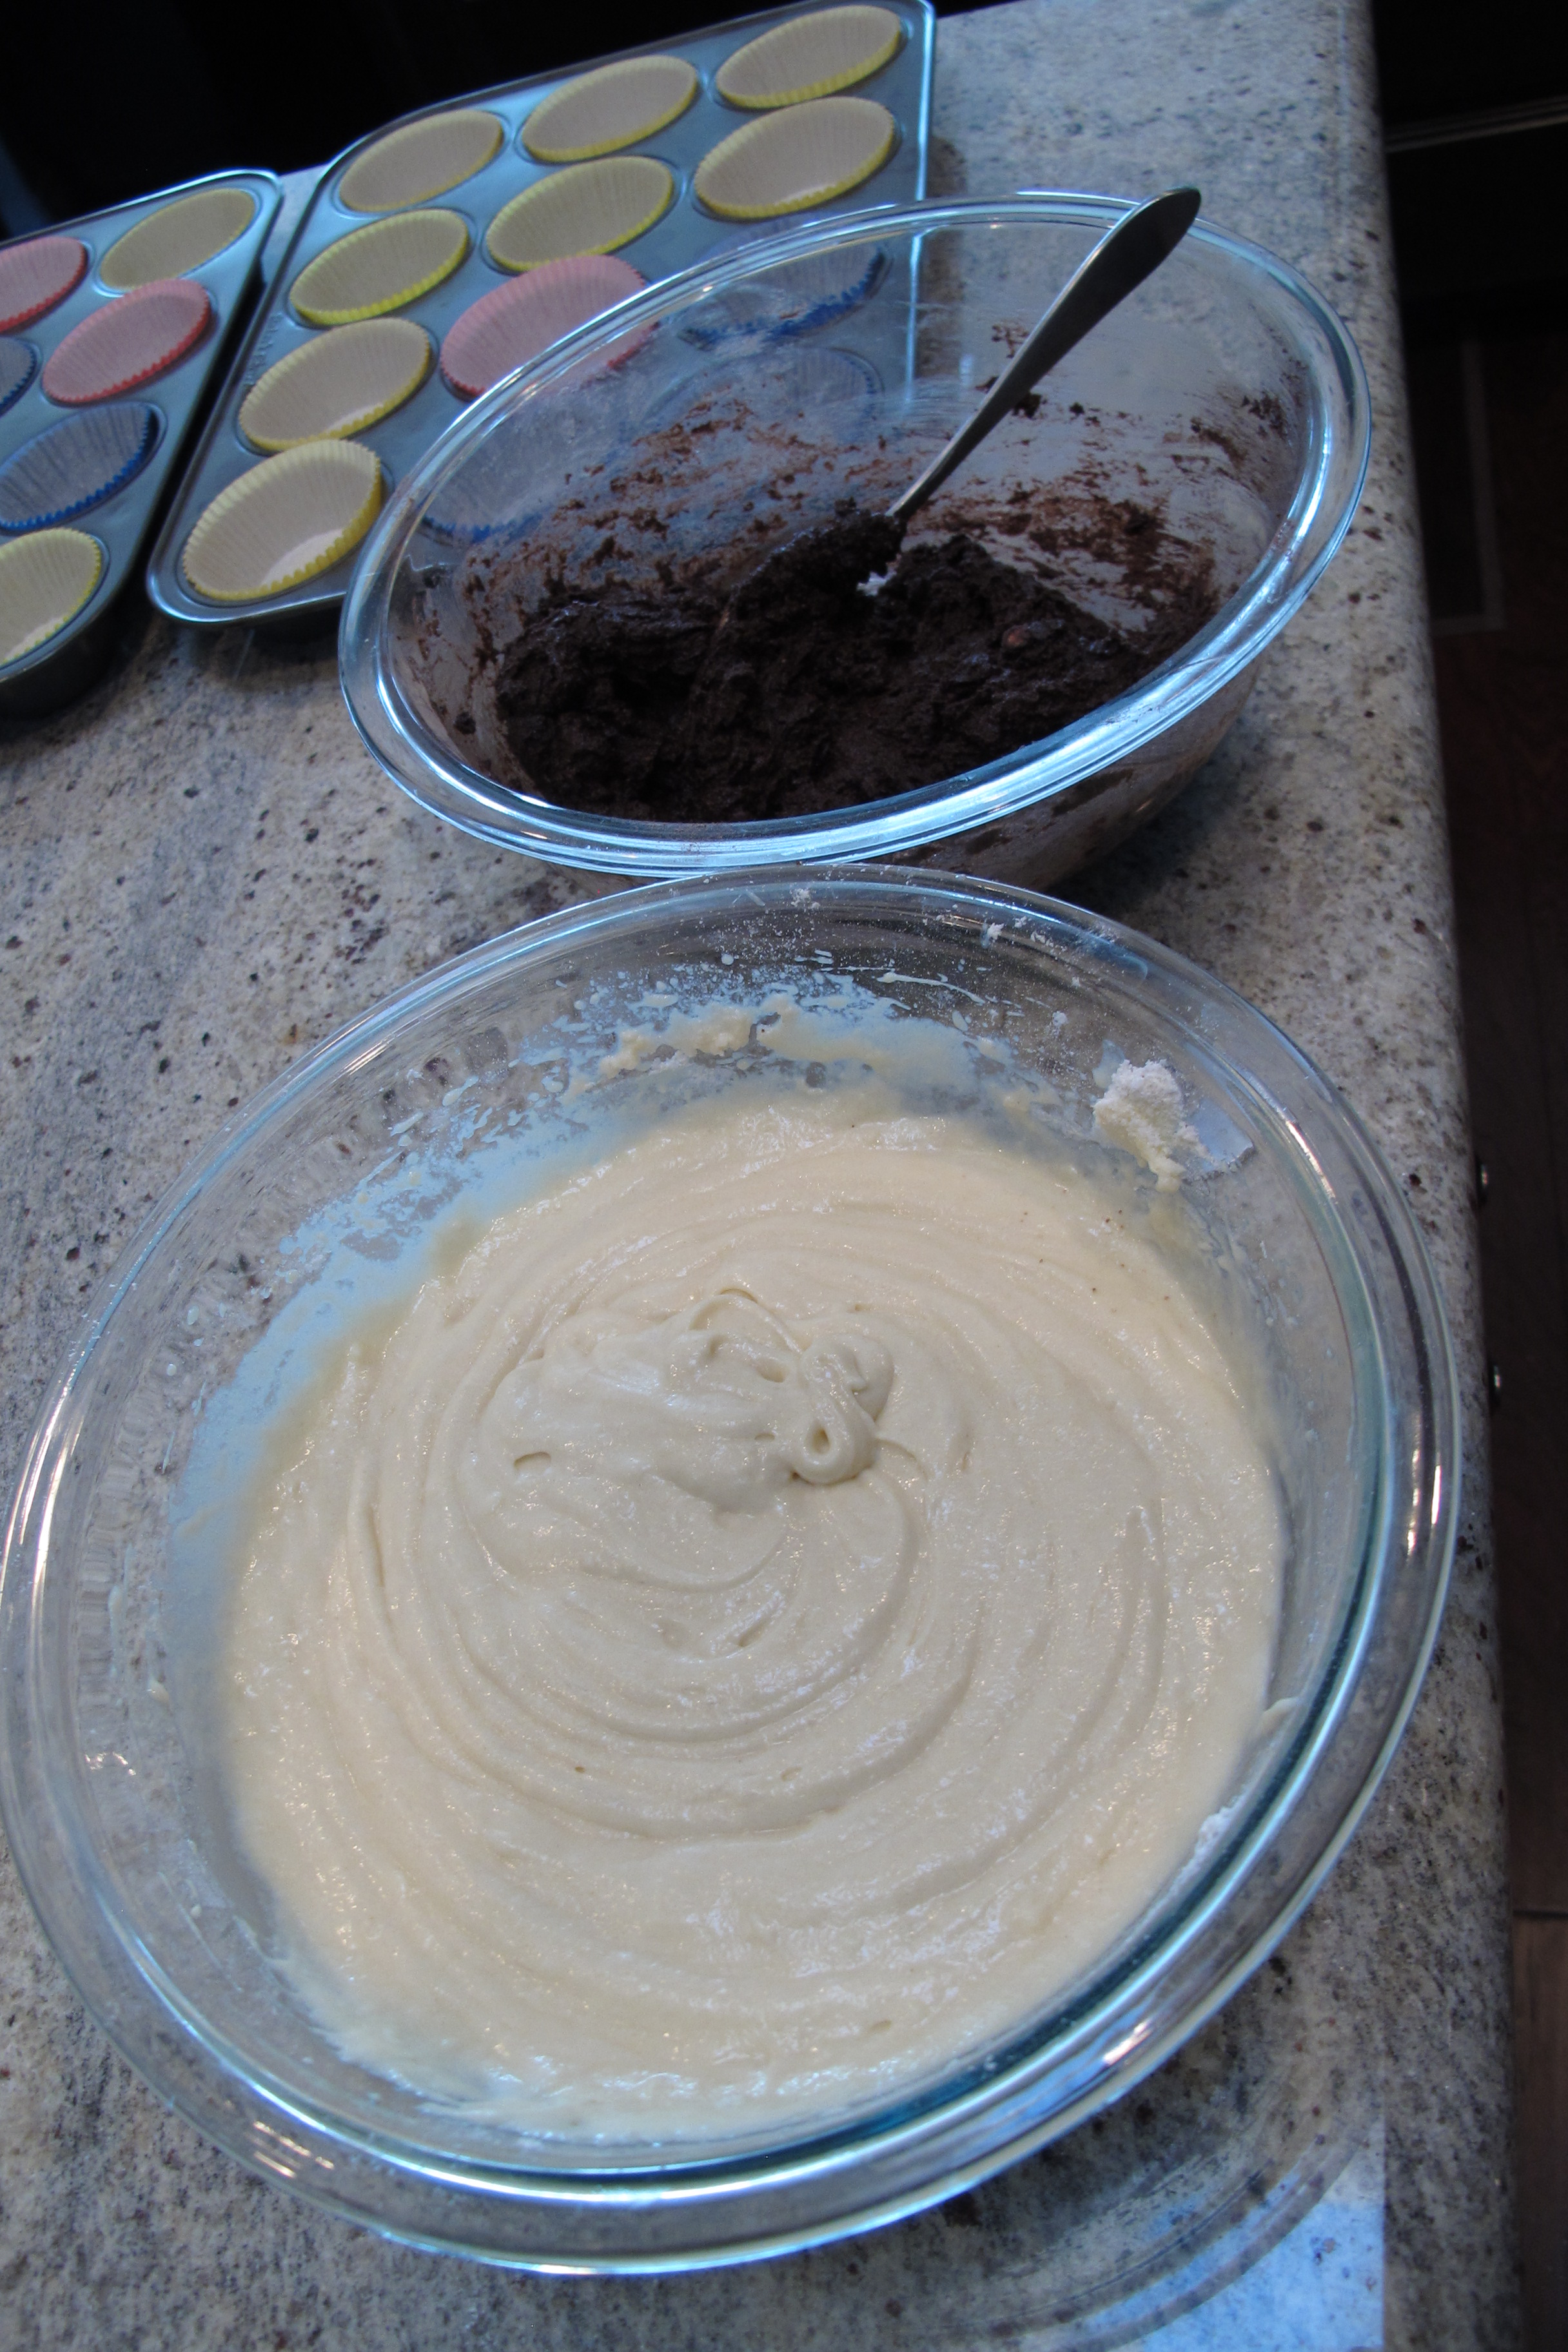
You just need vanilla cake mix and brownie mix. Since we’re gluten-free, I purchased these mixes….

IMG_4007

I prepared the mixes according to the instructions….

IMG_4011

Lucas was in charge of cupcake liners….

IMG_4006 IMG_4009

And the cutest part was that he wanted his teddy bear to sit just like him…

IMG_4010

Be still my sappy heart.

So, you add a layer of brownie mix…

IMG_4012

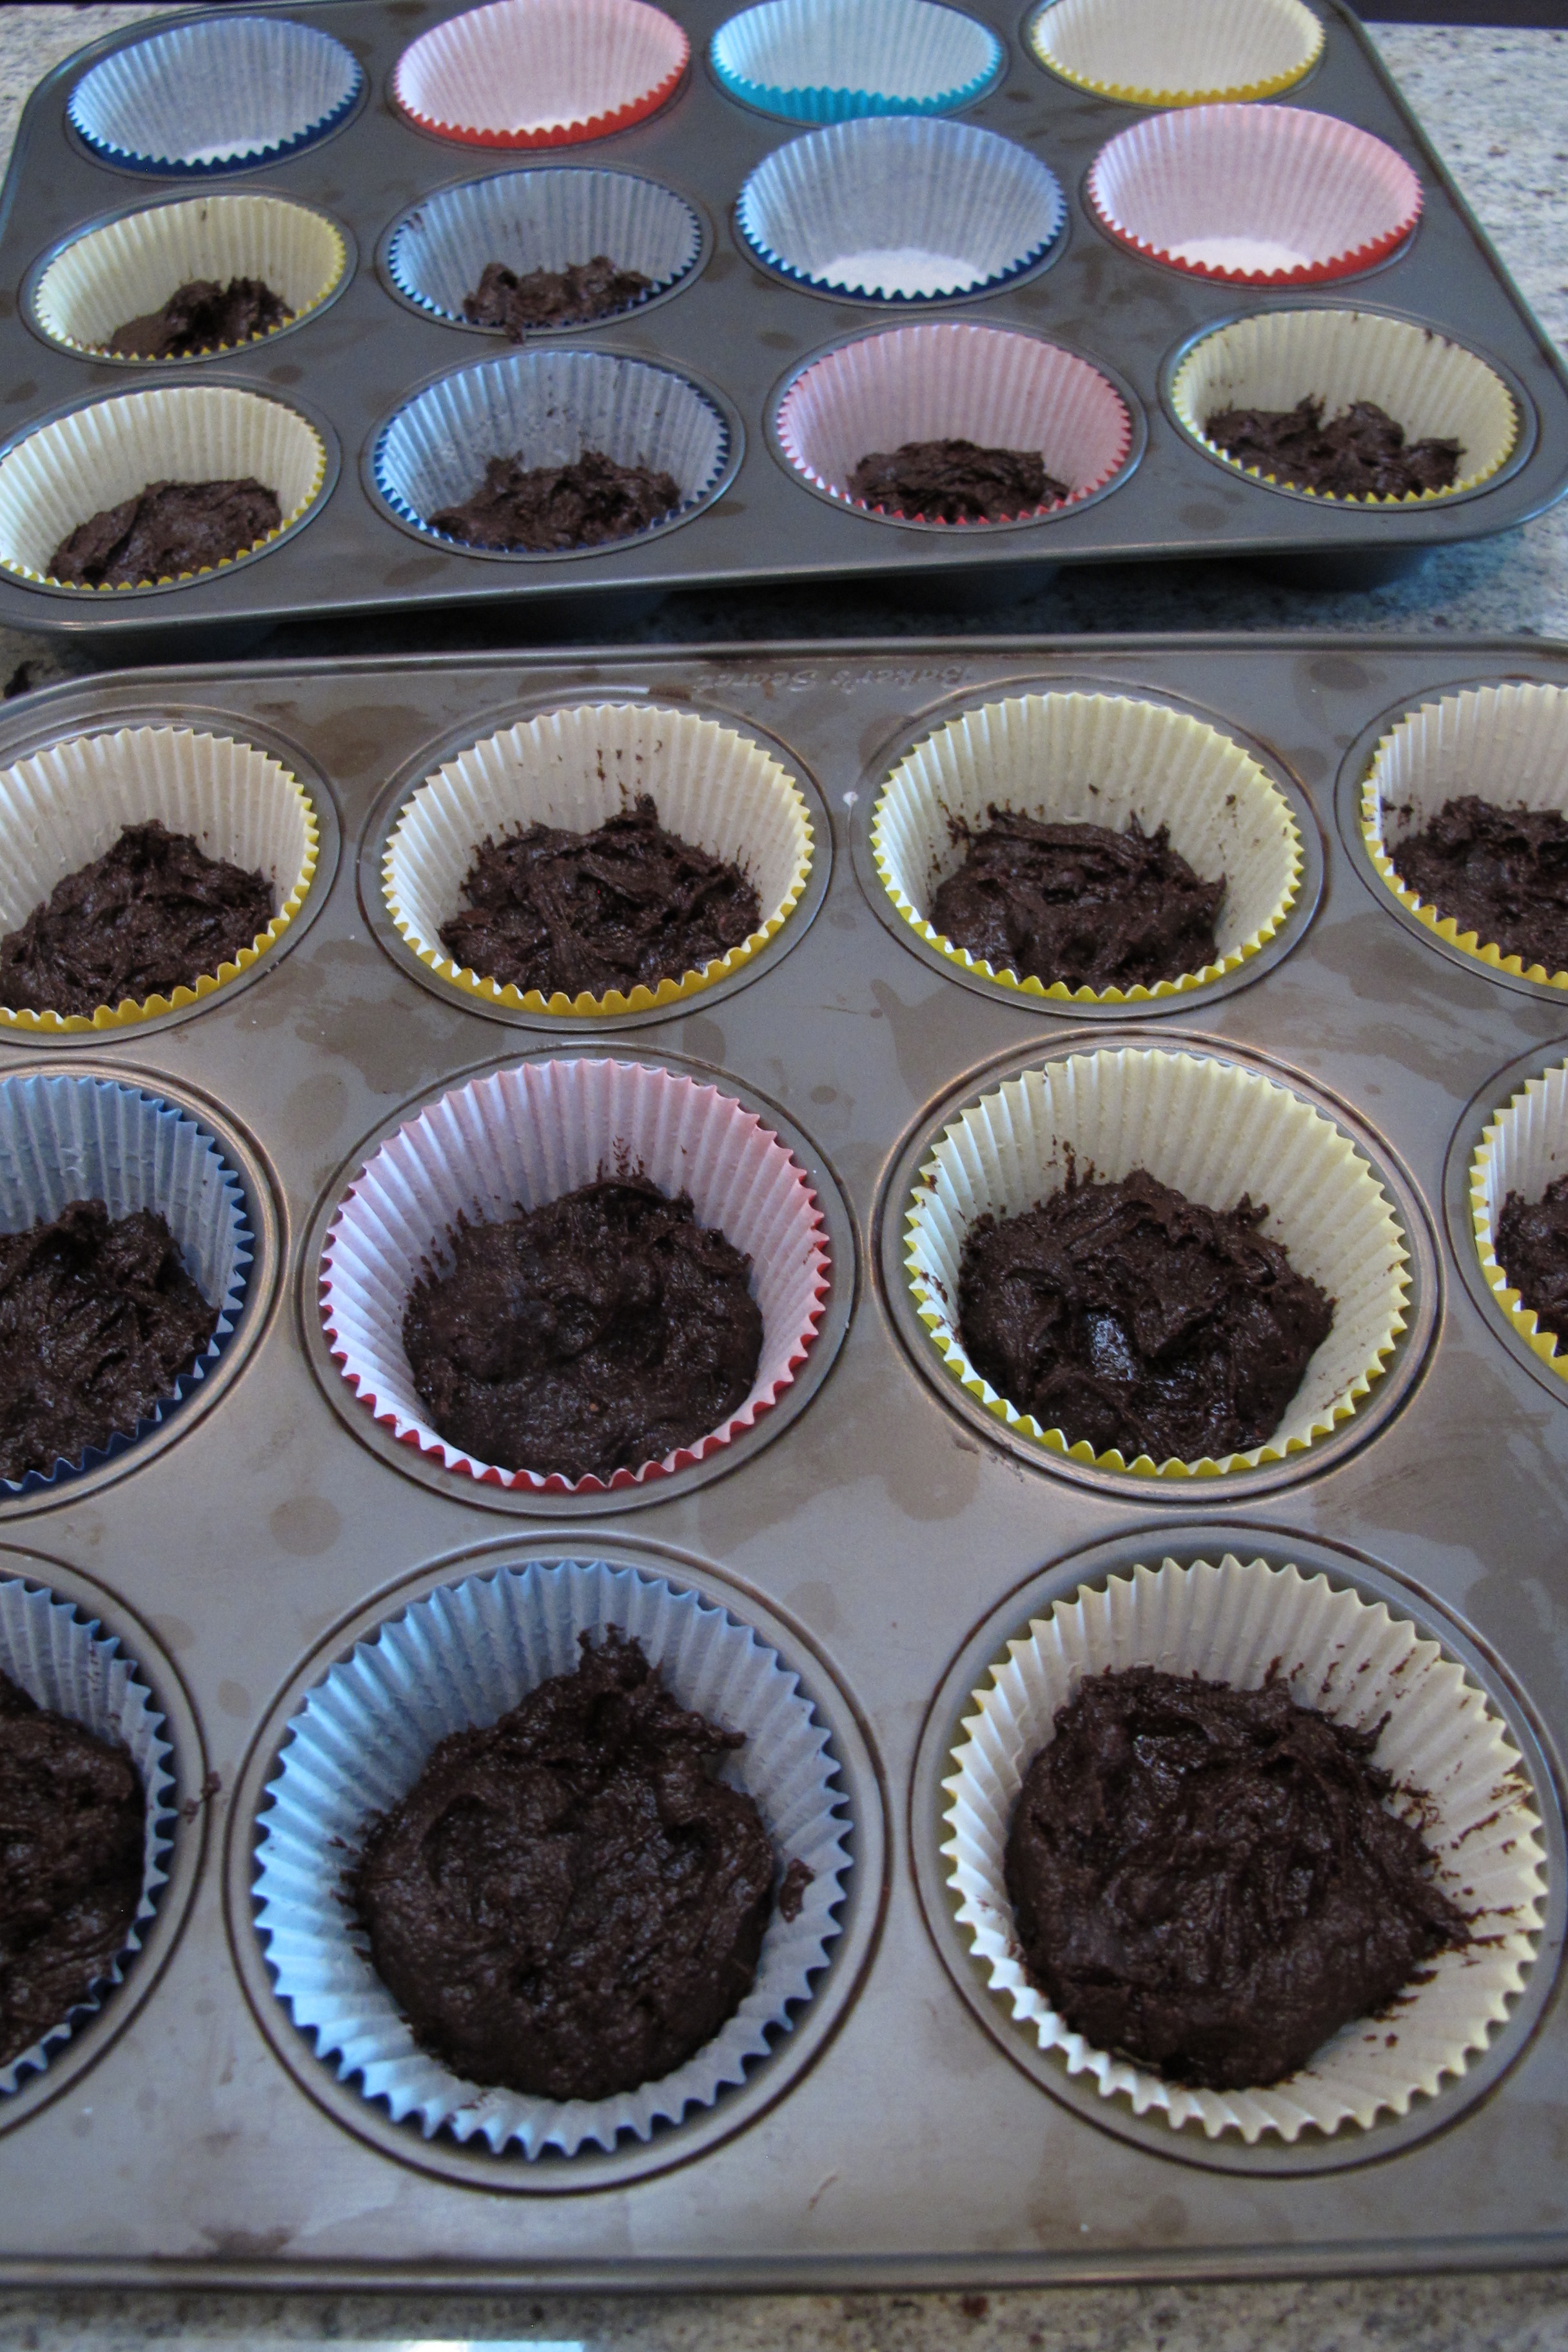
And a layer of cake mix….

IMG_4014

And bake according to the instructions. For the frosting, I simply used store-bought white frosting….

IMG_4043

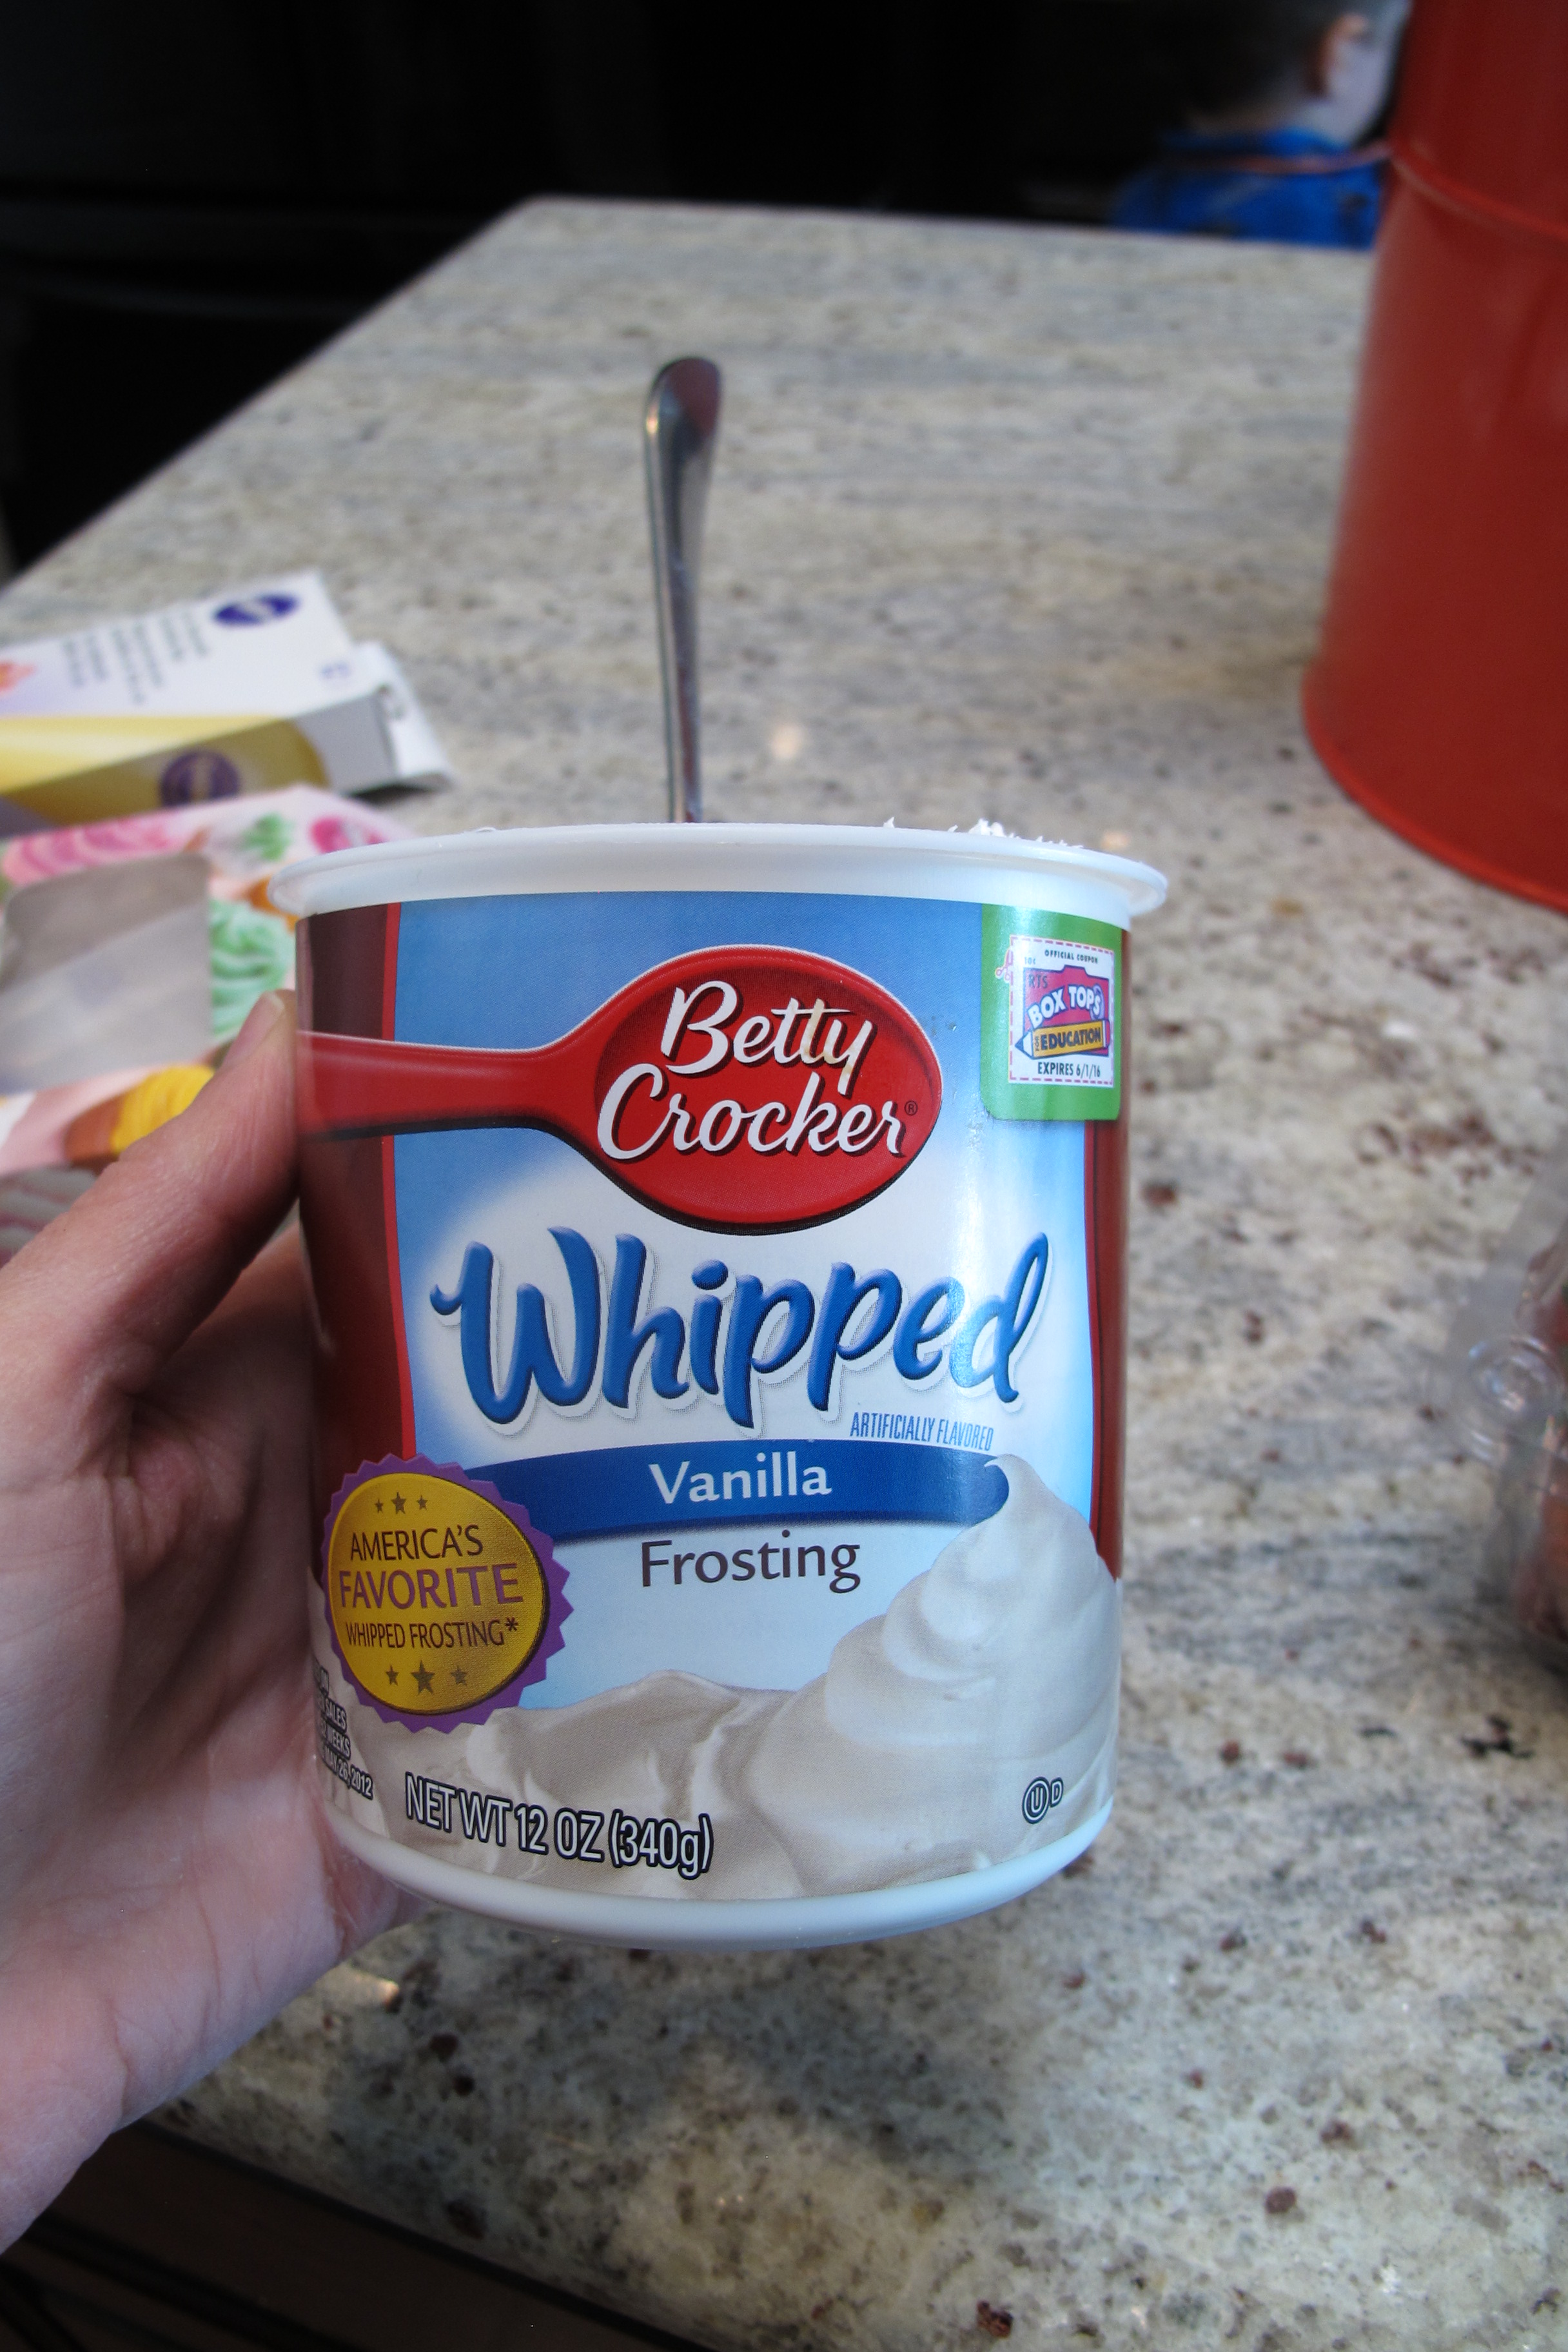
And mixed in 5 or 6 finely-chopped, ripe strawberries….

IMG_4045 IMG_4046

…which impart such a fresh, bright strawberry flavor to the frosting.   This is probably one of my favorite Pinterest tips to date.   So, tasty and simple.  I frosted the cupcakes using the same method that I described in this post. And here they are….

IMG_4049 IMG_4048 IMG_4053

Success!!!!

IMG_4074

Another (easy) Ikea hack…

So, here’s another quick Ikea hack for ya.   Oh, yeah.  Love me some hackage.  This is a project that I completed a while ago, actually.  And it’s shown up on the blog quite a few times.

The piece that I’m referring to is this guy….

IMG_3122

I get some questions about him, so I thought I’d share the deets.  The truth is, this was a super easy, cheap and changeable hack.  Come to think of it, “hack” may be overstating…   It was that easy.

It all started when we were gifted this Ikea bookcase by my sister-in-law, Jesse…

   20131225-142742.jpg

It’s the Billy bookcase from Ikea.  She no longer needed it and we were in need of storage, so we took it off her hands.   We used it as an open book shelf in our last house, but needed a bit of concealed storage for our front room once we moved into our current house.   At this point, Jesse enlightened me to the fact that Ikea sells DOORS for these exact bookshelves.   Shut the front, um, door. Yeah.

So, we checked them out.  Here were our choices…

20131225-142910.jpg

For some reason the full-length solid door that was available at our local Ikea wasn’t on their website, but here’s the shorter version just to give you an idea. This solid one was great for concealed storage, but seemed a little too “institutional” for what I was looking for.  And this one…

BILLY OLSBO Glass door IKEA Push to open; creates a clean look with no handles needed.

Was all glass.  Lovely.  But was too exposed to meet our needs.   Then, we spied this guy…

BILLY OLSBO Panel/glass door IKEA Push to open; creates a clean look with no handles needed.

Business on bottom.  Fun up top.  It was the mullet of doors.    And you know how I love a good mullet.

Before we even laid down our credit card to adopt these puppies, I decided that I wanted to frost the glass for a little more concealment and style.  So, we brought our mullets home and I took a trip to our good ole’  local HD where I picked up a can of this….

I laid my doors on top of a few cardboard boxes for a more comfortable work height, taped around the windows with painters tape and shielded the wood with spare pieces of cardboard.  Then, I applied several thin, even coats of frosting spray to the glass (leaving dry time in between).     Once the doors had cured, we attached the them to our bookshelf leaving this….

IMG_0600

It was okay.   The frosting didn’t camouflage the contents as much as I’d hoped and I realized that we needed a bit more concealed storage space than previously thought.  Enter this guy…

IMG_3287

Why, it’s a roll of wrapping paper that I found at the One Spot at Target for a buck.  I simply attached it to the back of the doors with Scotch tape.

IMG_3123

I also added some stainless steel knobs that we had leftover from the kitchen.   I’d love to change them out for those more colorful ceramic Hobby Lobby knobs for a bit more interest some day (when I remember to buy them, anyways).

Which brings us to today…

IMG_3752  IMG_3868IMG_3867

And in case you’re like me, and you enjoy snooping around in other people’s stuff, here’s what we store in there…

IMG_3075

Our extra decor items that aren’t currently in use.  My cabinet of misfit toys, if you will.   This is where I shop in my house for free. We also store some old textbooks and larger cookbooks in here. I love the storage that this unit provides and the fact that if I ever get tired of the current wrapping paper I could always change it for something more colorful for a completely different vibe.

So, has anyone else done quick Ikea hacks that they’d like to share?  I love hearing new ideas!