Okay, so it’s no secret that I’m a Pinterest Fan-atic (remember that show on MTV?). Seriously, if I could meet Pinterest in human form, I’m sure I’d freak the heck out and morph into a screechy, swooning, mother-of-all groupies. And ask for an autograph. Which I would then craft into some DIY Pinterest artwork that would be hung on the ceiling of my bedroom. Or maybe in the hallway. The ceiling would be weird.
So, anyways, I try out stuff that I’ve pinned all the time. Mainly to see if it actually works or is just sheer baloney. So, I thought I would start sharing my experiences in a segment called (dah-dah-dah-DAH!): Pinterest Review.
So, my most recent pinterest experience isn’t home-related. But it could be if washable linens were affected. So here I go. It all began here:
Meet pants…

Meet butter…
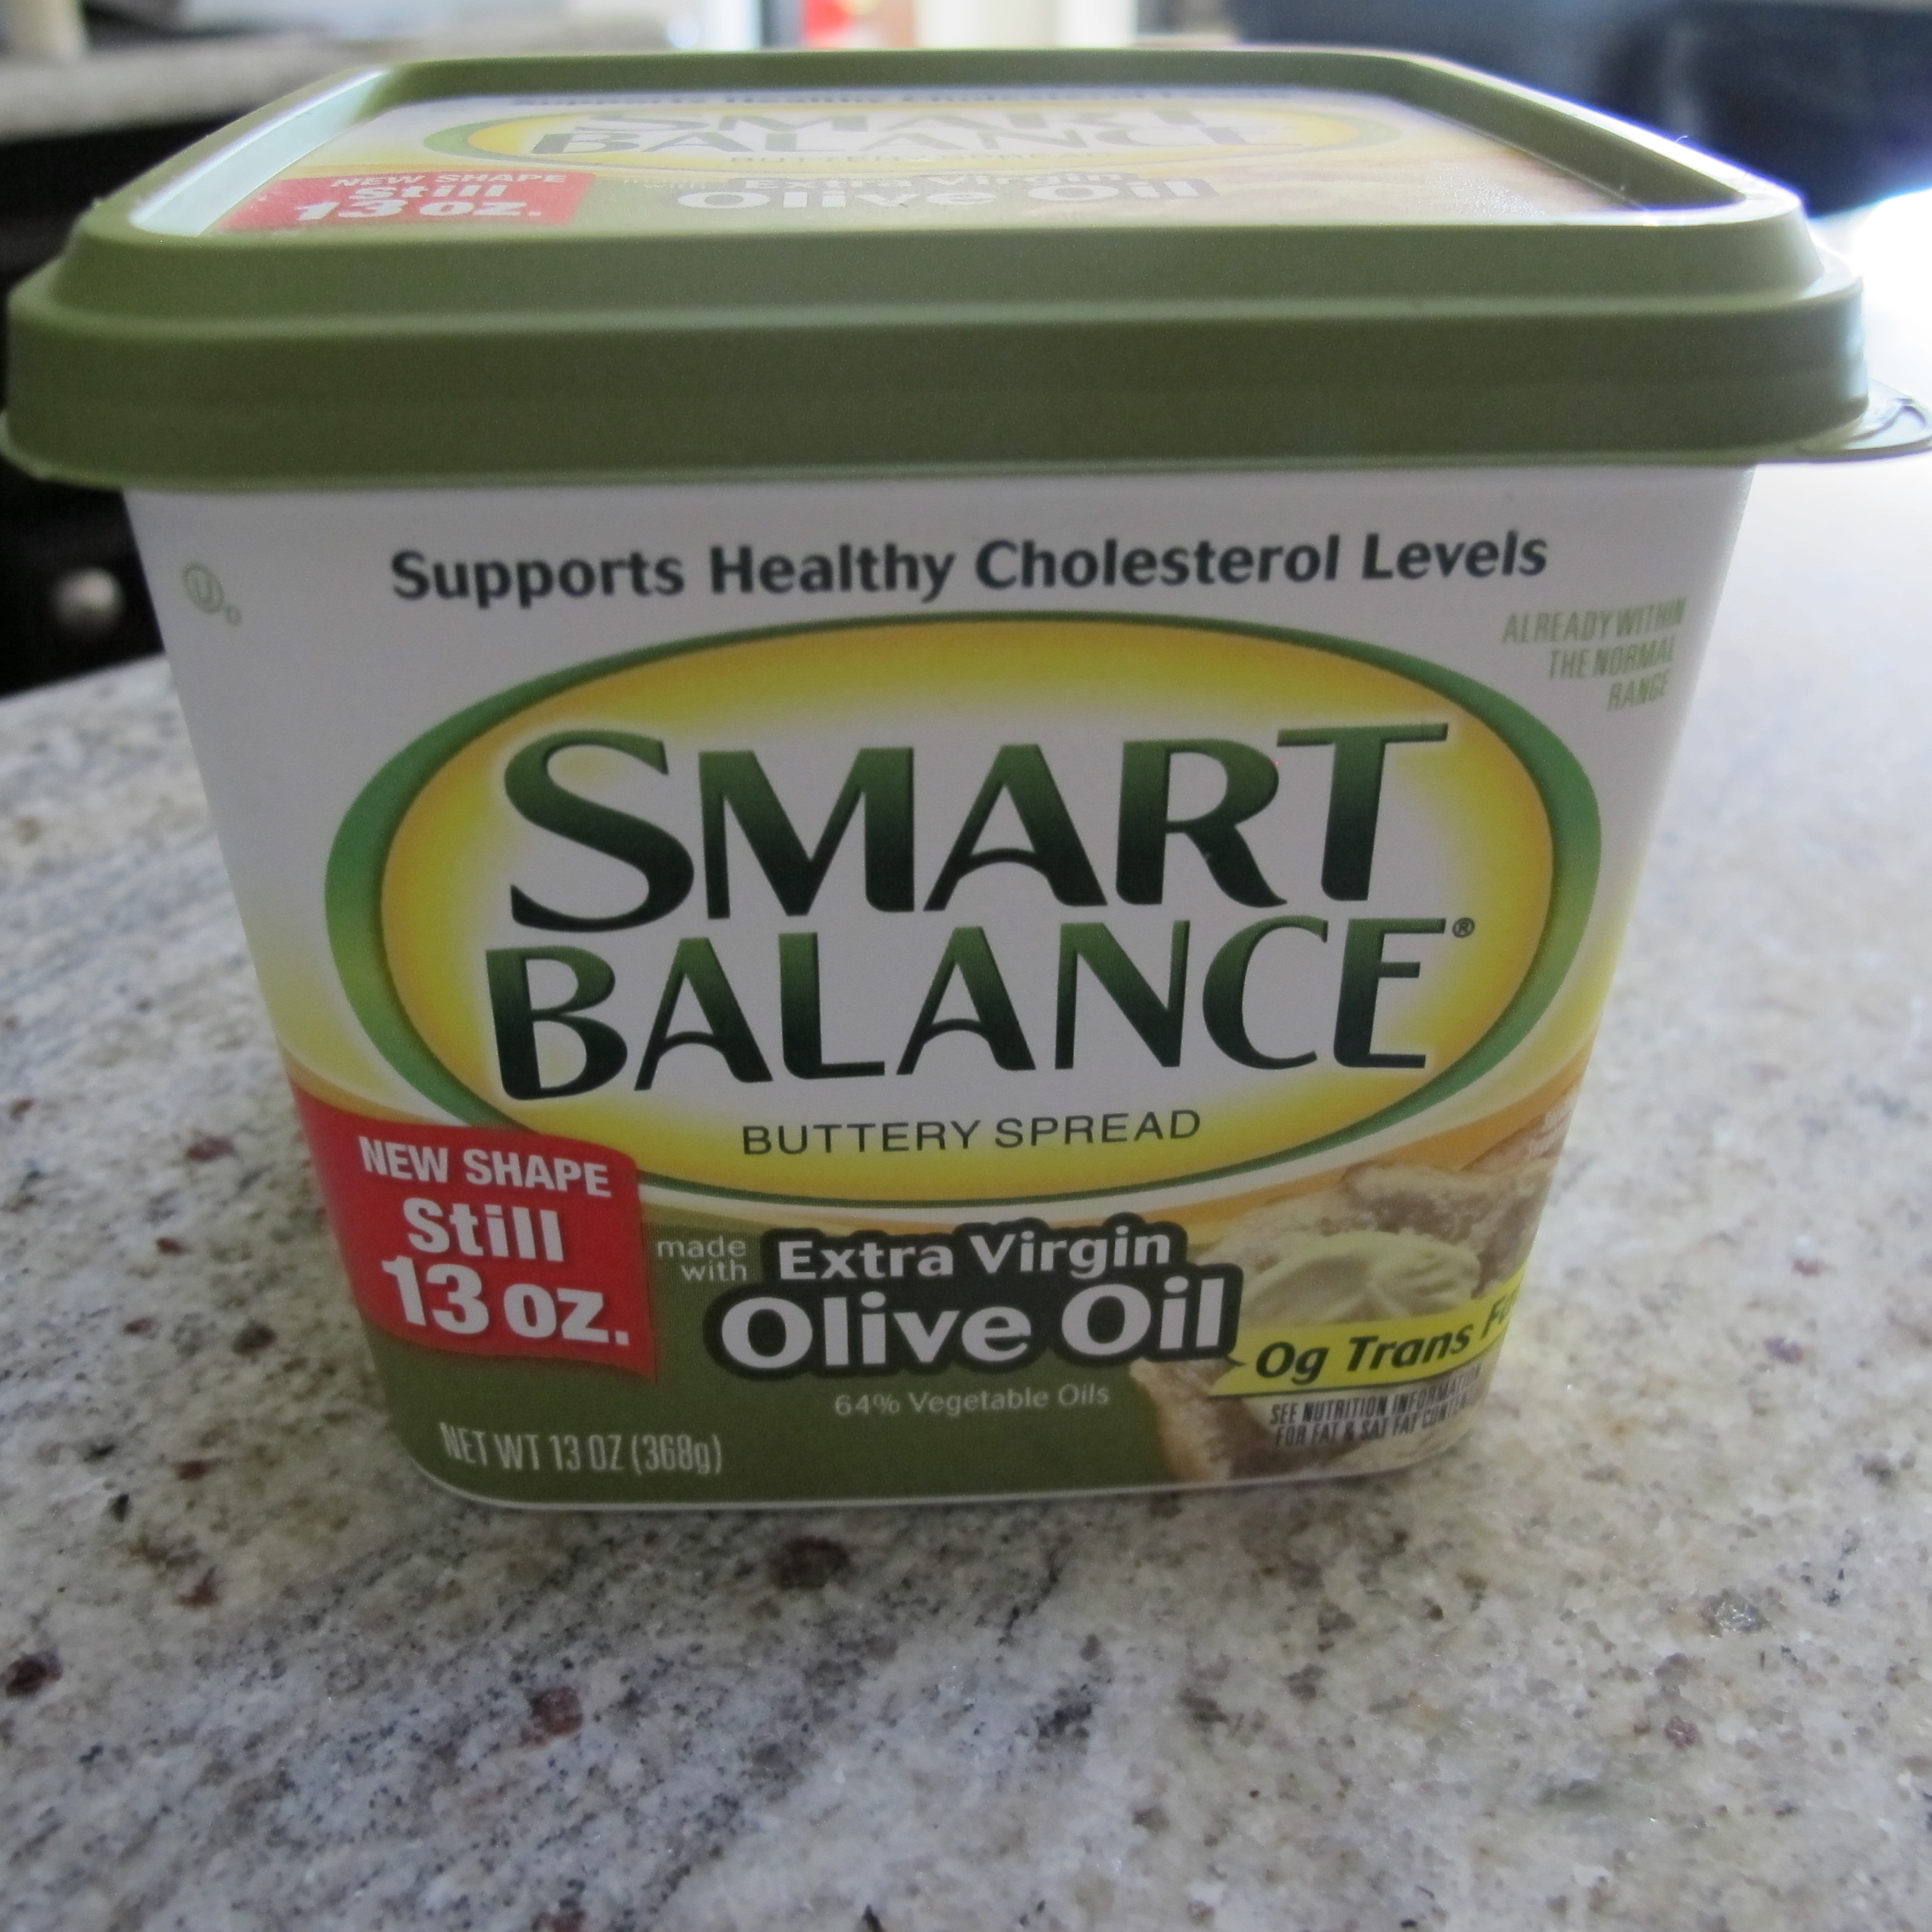
A few days ago, while I was innocently retrieving an item from our fridge, Miss Butter over here decided to make a run for it. She flung herself from her chilly abode, and apparently decided to go all “spring break” on the way down, tossing her top off for all the world to see. And she landed face-down. Right on my pants. Ugh. Just pathetic.
I was in a rush at the time, so I simply dabbed at the area with a damp rag and went about my business. Once I finally slowed down enough to get my head on straight, I looked down and realized that Miss Butter had left quite the impression…
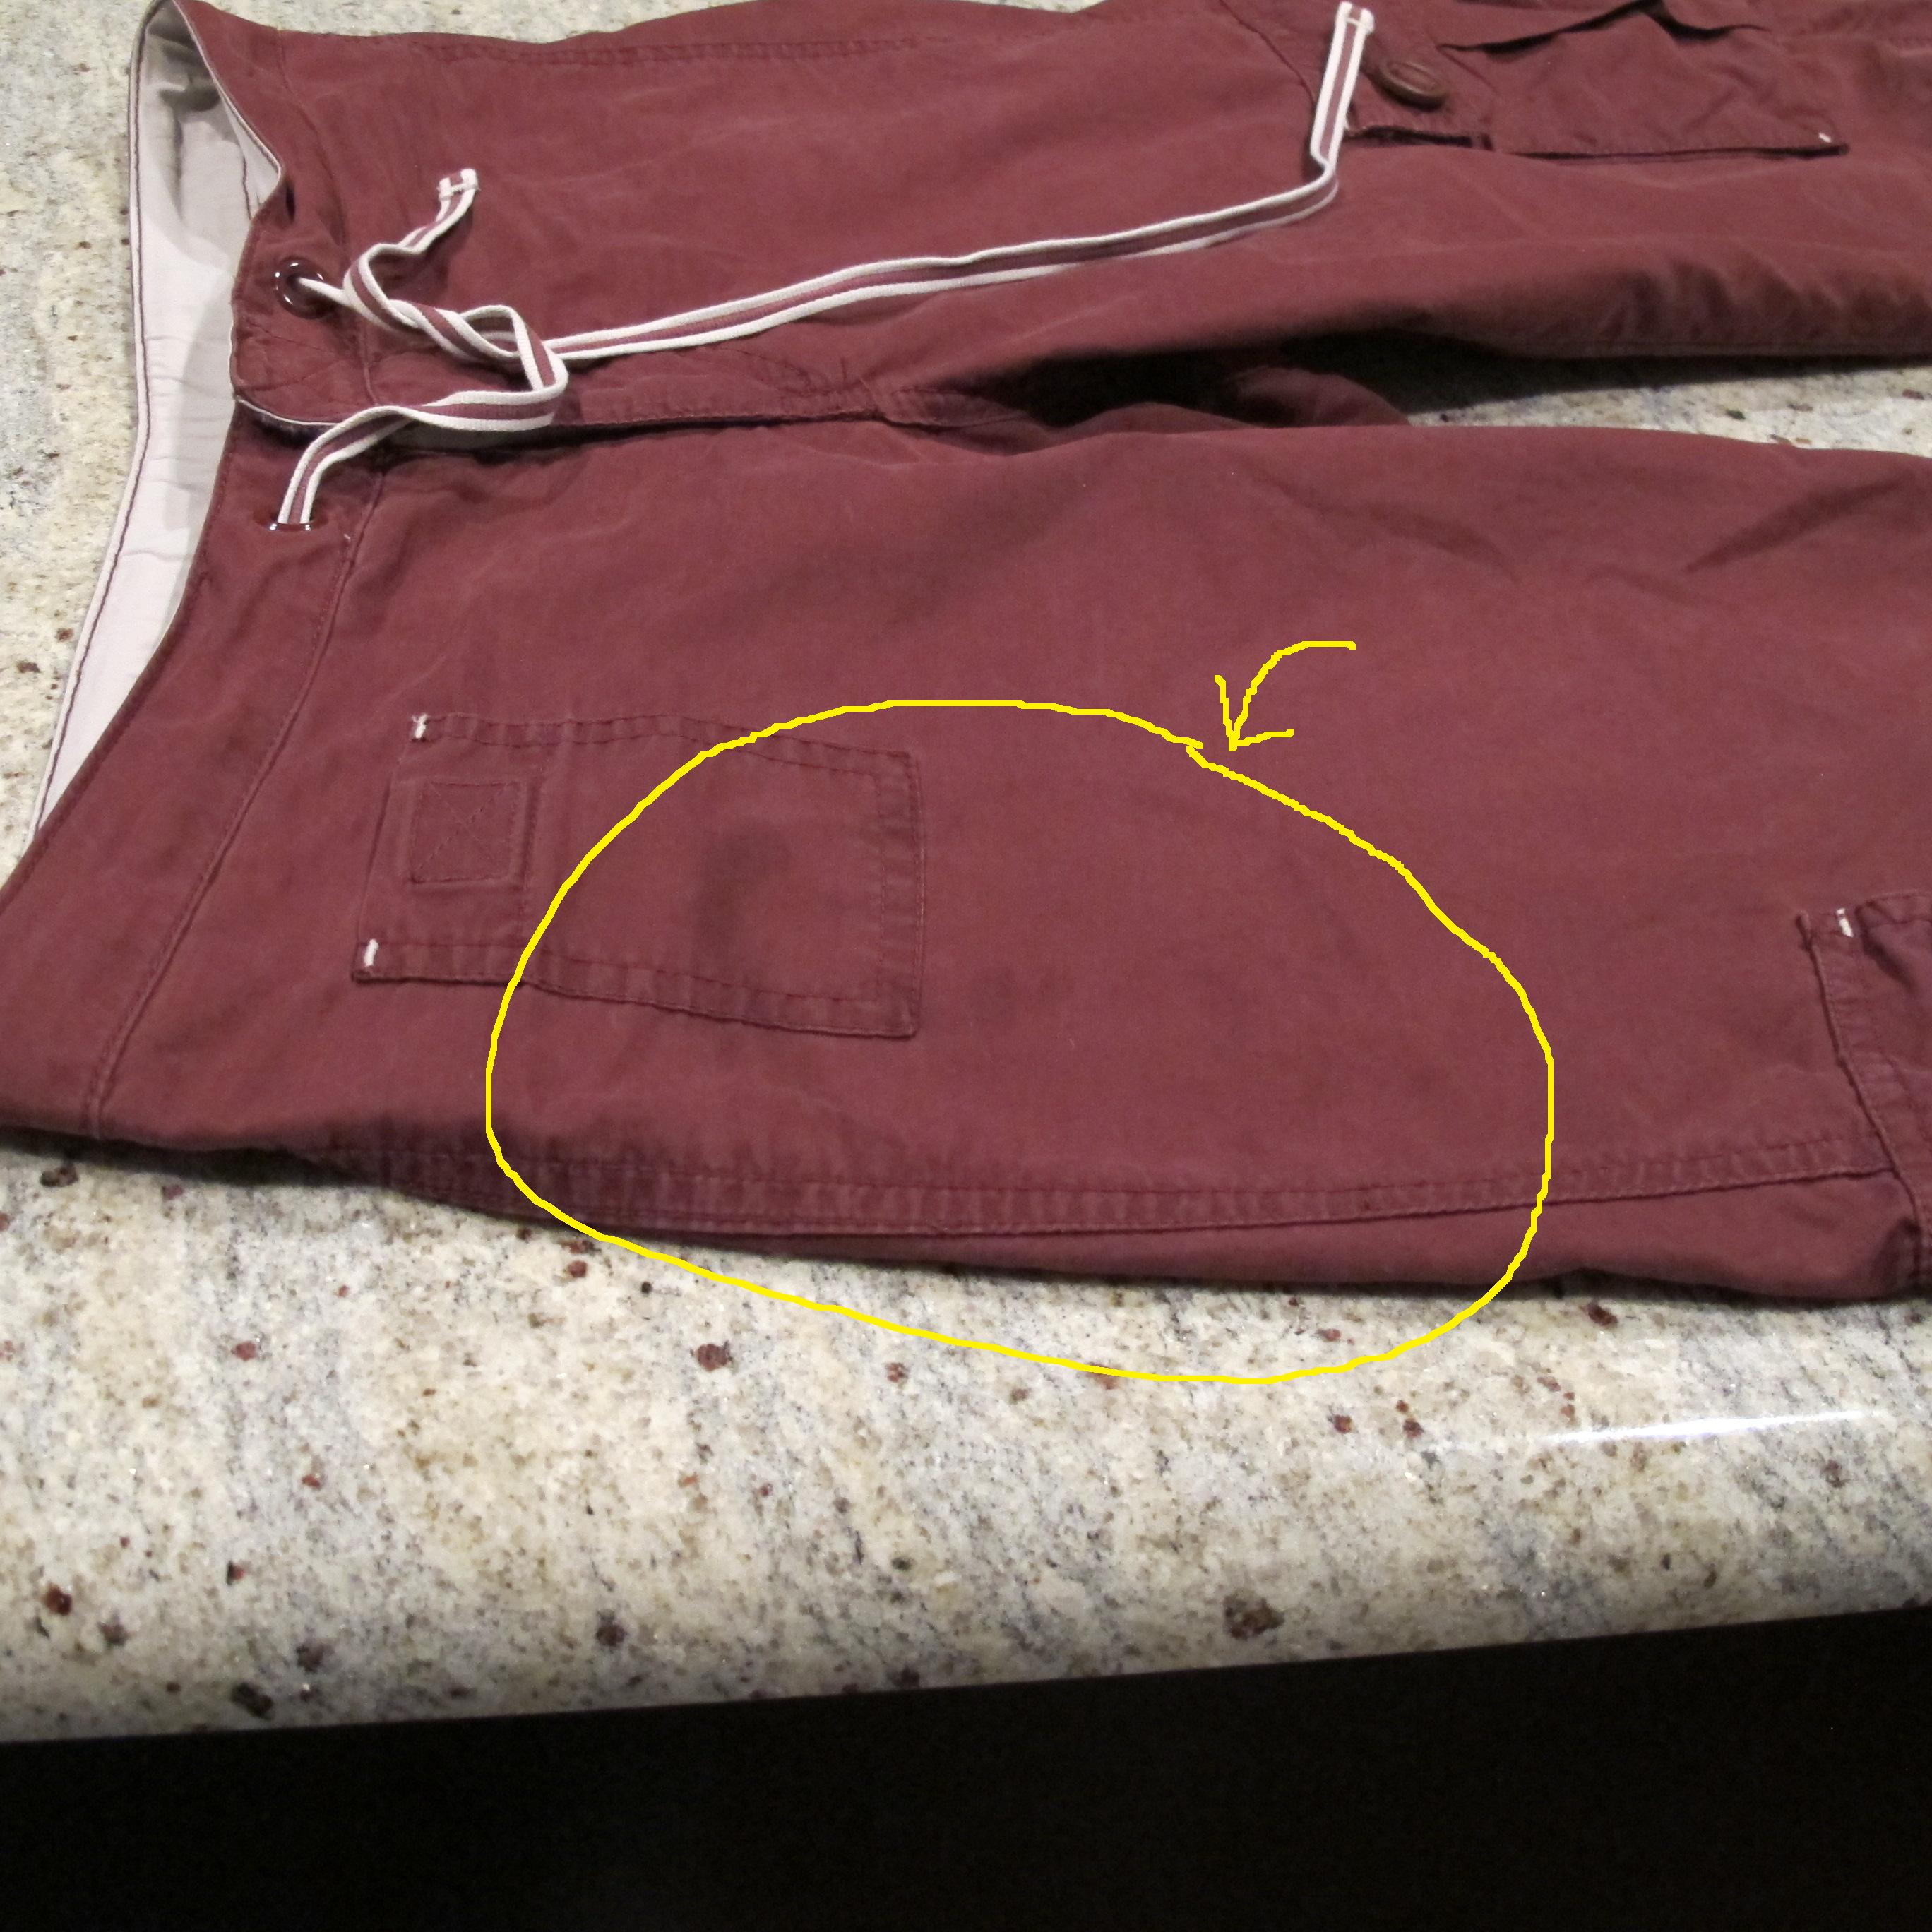
Oil stain. No, SET oil stain. Bummer. Then, I remembered that I’d pinned something about using white chalk to remove oil stains from fabric. So, I checked my board and realized that not only had I pinned it, but I’d pinned the exact same pin TWICE. Whoops! I wish they’d come up with a filter for that. Anyways, the original source stated that chalk mainly works to absorb the oil on fresh stains, not set stains. Bummer again. But, since I had nothing to lose, I decided to try it anyways.
I simply rubbed the chalk over the entire stain…

Which left this…

I know. It’s kind of boob-like. I blame Miss Butter and her topless ways. Anyways, after chalking-it-up, I washed the pants in cold water with an extra rinse, then allowed the pants to air-dry. Which left this…

Better. But still there. So, I gave it another go. This time, I really rubbed the chalk firmly into the fabric. Really embedded it in there. Which left this…

Thankfully, my “art” was a bit more G-rated this time. I pictured more of this…

Or this…

I decided to let the pants sit overnight with the chalk to see if it would absorb any additional oil. The next day, I washed them again. Cold water. Extra rinse. Air-dry.
And guess what??

It worked. Well, mostly….
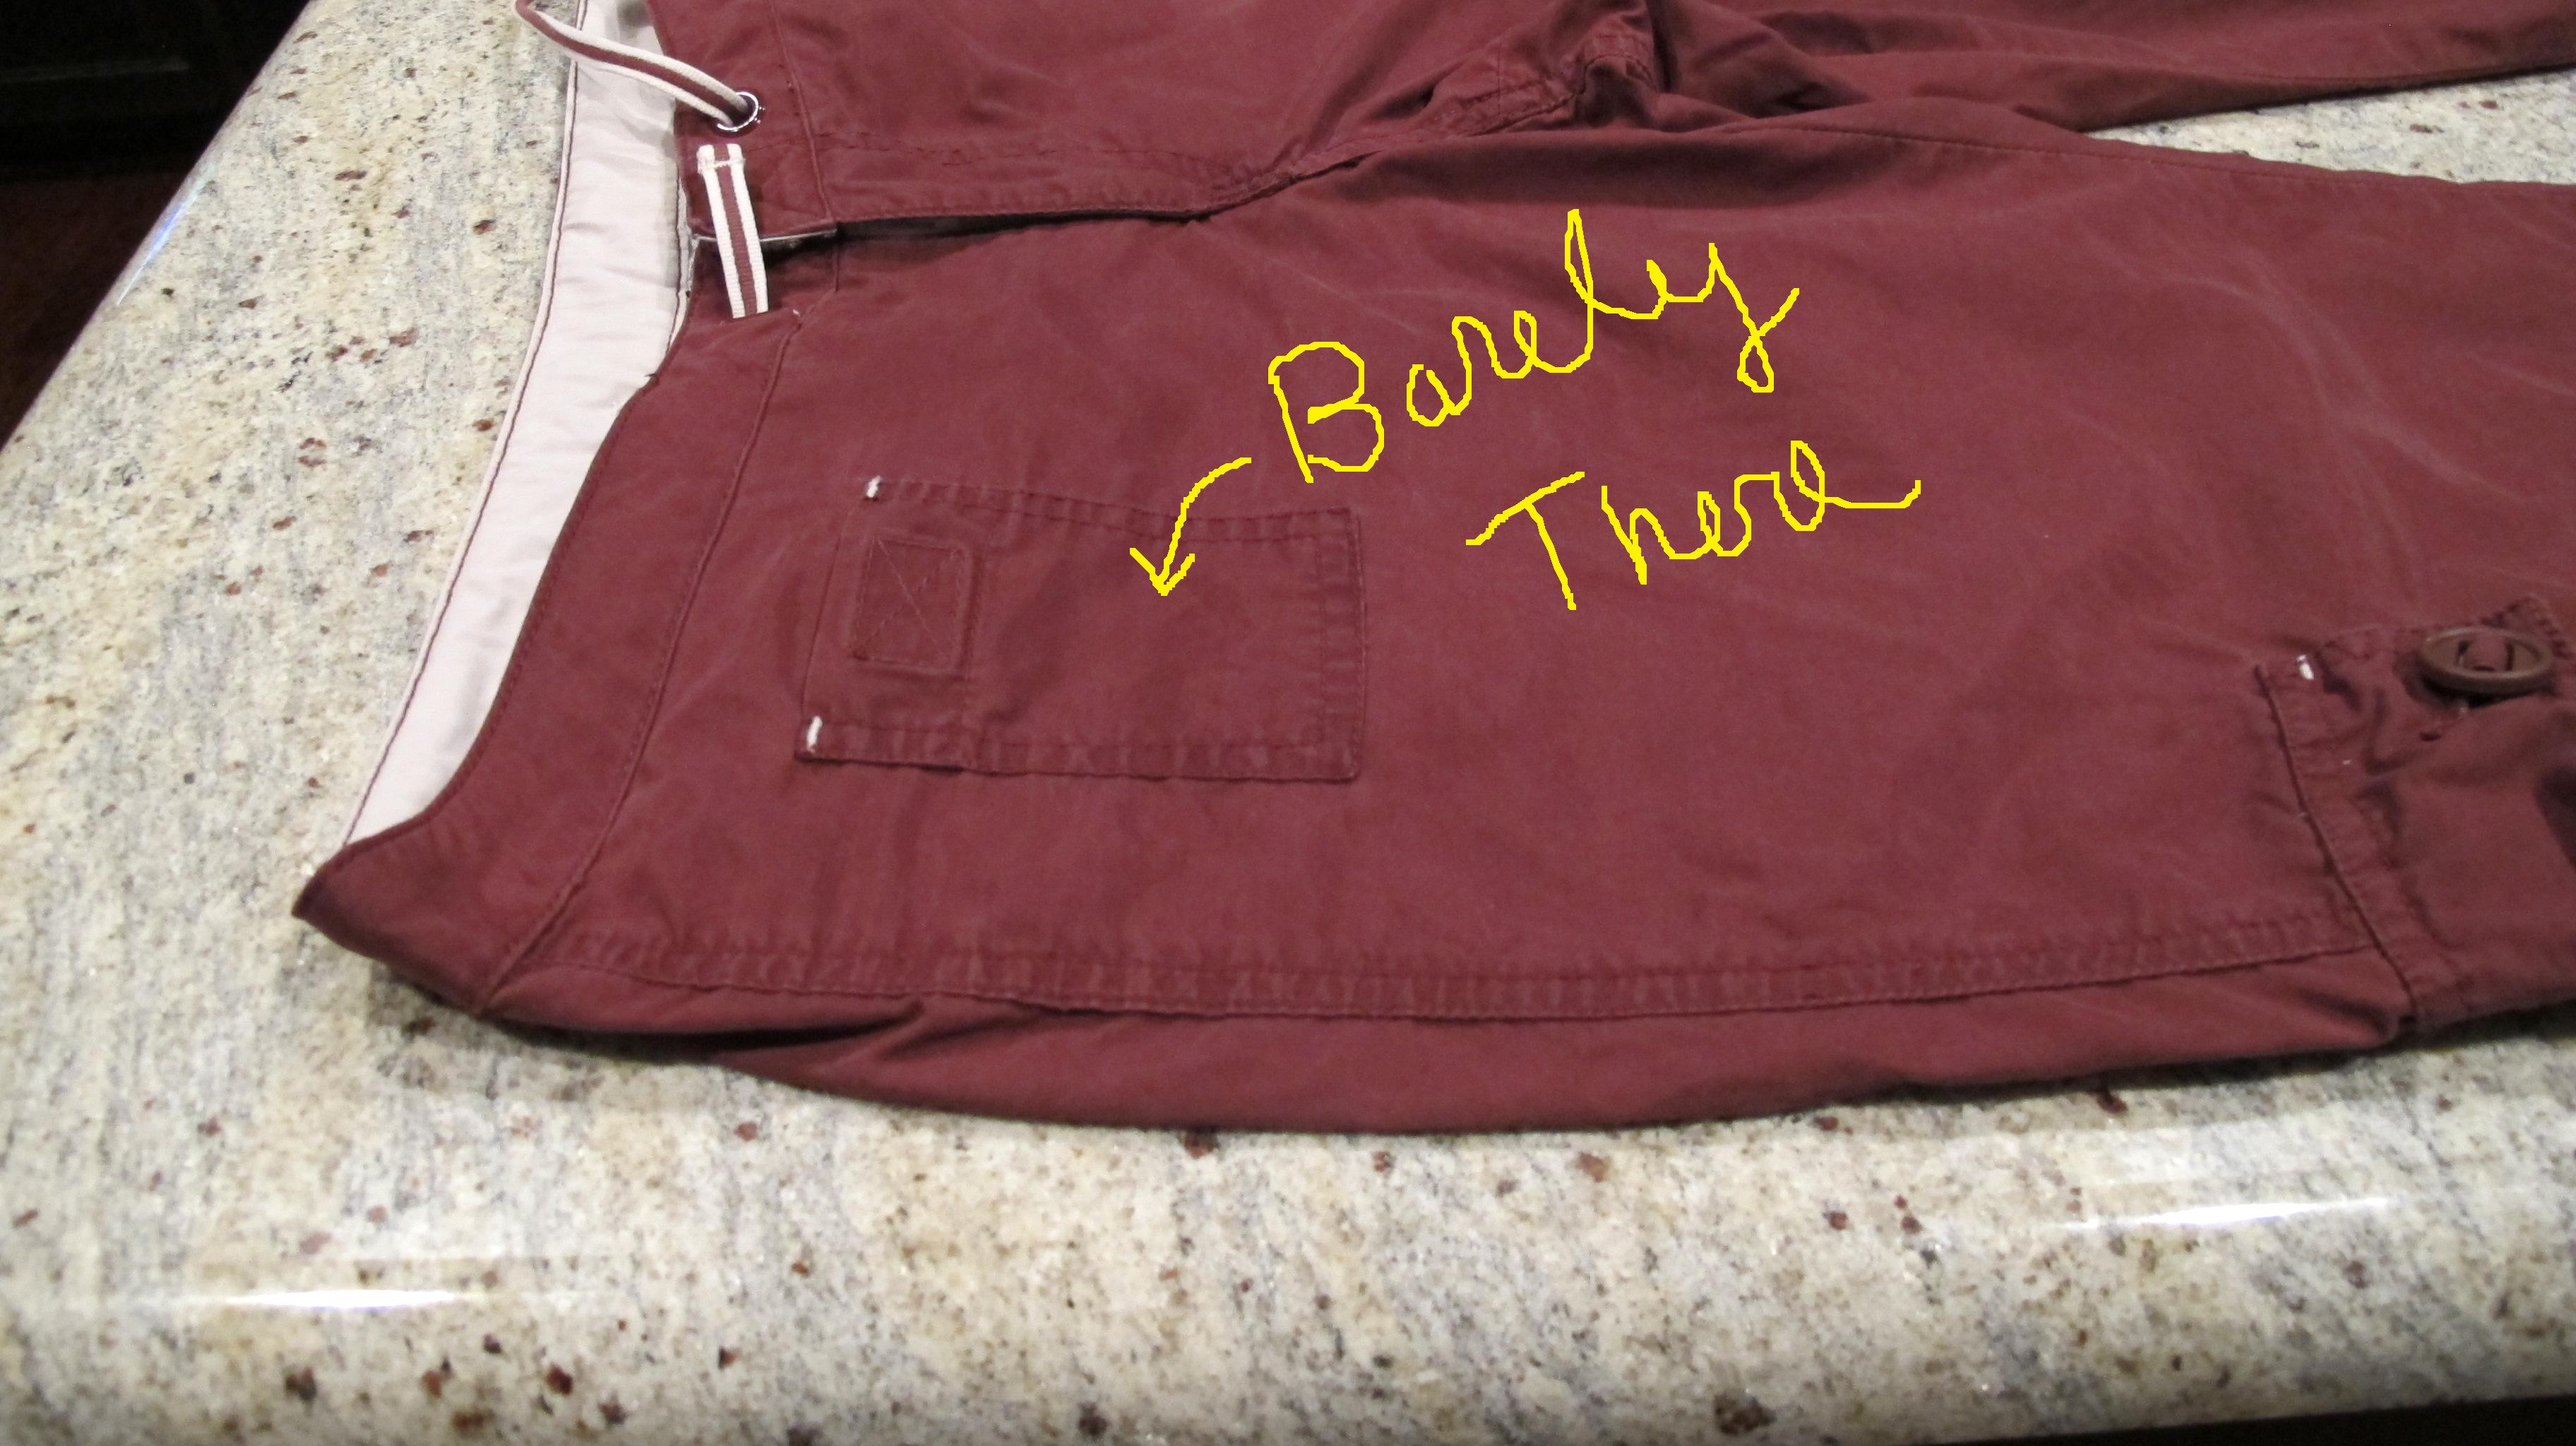
There’s still a faint oil spot on the pocket. I had to search for it, though, so it’s definitely not plainly obvious. And it was the worst part of the stain. All-in-all, I have to say I’m impressed. This was a SET grease stain. And the chalk helped remove most of it.
So, my thoughts are… If this worked this well on a set grease stain, then it must be great for fresh, still-wet stains. So, I unloaded all of my remaining white chalk and placed it here…

In a shot glass in our kitchen cabinet. Easily accessible. Because stains happen. Daily, for me almost. And the next time, I want to be prepared to give the chalk a go in a fresher setting.
So, I’m rating this Pinterest Review: Chalk vs. Grease Stains as a win for the chalk!!
Have any of you guys ever tried this? Any other tips? I’ve heard that cornstarch or baking soda can be used on fresh stains as well? Anybody tried these before? I’d love to hear your experiences.