Any of you guys ever suffer from writer’s block? I have to say that I’ve been pretty blessed since starting Operation Home in that it hasn’t happened often… though it definitely has happened. And when it has, I’ve found myself at a loss for how to solve it. I’m such a DIY-obsessed person that the wheels are constantly turning with ideas for projects to take on and things to do. But sometimes, just… nothing. Empty brain. Nada.
And it’s an inner battle for me because I’m definitely a textbook Type A personality. I like schedules. I like reliability. I like trying to stay with a somewhat predictable posting schedule so that all you lovely folks will know what to expect from my little outlet here. But sometimes, life gets in the way… or, of course, the dreaded writer’s block. And I’m faced with the question… Do I find something to post for the sake of posting?? Or submit to the continued silence emitted from my little slice of internet??
Long ago, I decided that posting for the sake of posting wasn’t really my bag. It never really interested me. I felt like I wouldn’t be nearly as sincere or passionate in writing those posts and that ya’ll would see right through it. I also didn’t want to complete projects that wouldn’t really work for us simply because I needed something to post about. That just seemed like a waste of time and resources. So, I’ve never justified doing that either.
During these timeframes of utter brain blankness, I’ve asked myself “Self, how on earth do I find inspiration for useful projects that would benefit our family and home in the face of writer’s block?” Obviously, in the context of this blog, writer’s block also = project block.
So, I started to brainstorm ideas that might help get the wheels turning again. And, I thought I’d share what ended up working for me…
1. I started a running list. Every time I’d think of a project that I wanted/needed to happen, I’d write it down. It didn’t matter if I had writer’s block or not. Just any time something came to me, I’d add it to the list. I actually created a draft post called “project ideas” so that it’s right here for easy reference. Whenever I felt a loss of inspiration, I referred to the list to see if there was something I wanted to knock off. That way, I constantly had a useful list of projects that were applicable to us and our home. Upon occasion, the list ran short… Or only contained projects that didn’t suit our budget or schedule at the time. In those cases, I continued with the following steps…
2. I trolled Pinterest. Both my current boards and pins yet to be seen. I looked at my inspiration rooms that I’d pinned. Examined what I liked about them and didn’t. Different elements that caught my eye and aspects that would be practical for us and our lifestyle. I looked at my “Craftiness” board for potential projects, since I’d pinned those guys for a reason. I searched for new inspirations, DIY crafts as well as art inspiration ideas, etc. It’s during one of these searches that my alphabet art came to be…

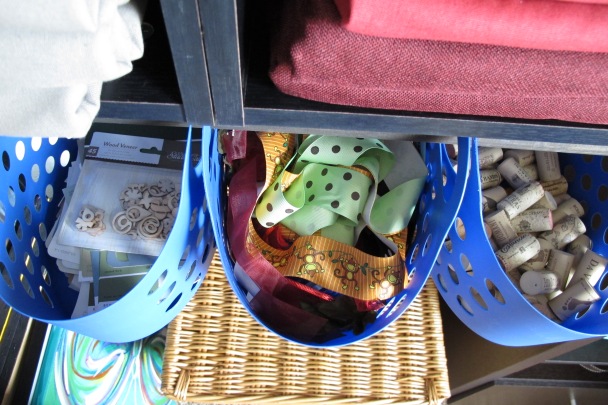
2. I went through all of our junk. First of all, adding a little organization never hurt anyone. Plus, it also gave me a clear idea of the items I already had, ones I wanted to tweak, etc. Inspiration City, especially when you had a veritable Monica Gellar Closet to contend with. This process is how Lucas’s Lack Map side table was born…

3. I visited thrift stores. You never know what diamonds-in-the-rough may present themselves and throw project ideas your way. I can’t even tell you how many projects I’ve encountered simply by visiting a thrift store. My spray-painted trays for one…

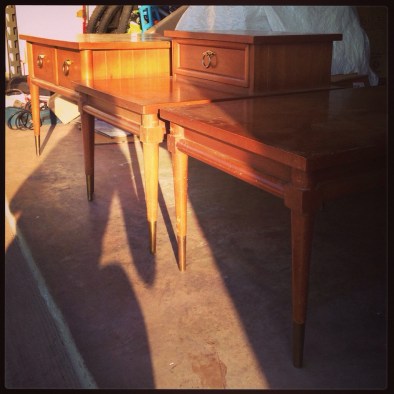
My mid-century tables for another…
4. I visited my favorite “pretty” stores. Pottery Barn, Crate and Barrel, Anthropologie, and the less-expensive-but-still-totally-droolworthy Target. When I saw this bench on display, it churned in my mind for several weeks…

I couldn’t stop thinking about it. And it was during a period of writers/project block that I remembered the bench that we had in the attic and realized that I could transform it into my own version…

So, visiting the store gave me the initial inspiration, but really, the reason why this project presented itself at the time that it did was…
#5. I RELAXED. I decided to just forget about it. To stop trying to think up something brilliant. To just BE OKAY with the fact that I deviated from my posting schedule. To just be. Enjoy our house. Chill with my men. Do nothing. And BAM!!! DIY Bench was made. And I have to say, it was a project that improved our space. It prettied up the view into the bedroom. Provided seating. Was cost-effective (under $8!). And was an overall useful improvement in our home. And it happened because I didn’t force it. I think this was the hardest lesson to accept, but one of the most important.
After a bit of soul-searching, I realized that (for me) quality beats quantity any day. I thought of some of my favorite blogs, and realized that schedules don’t really matter. Some post daily, some 2-4x/per week, some once per week, some every few weeks. In every single case, I look forward to getting that email notification of a new post, regardless of what their schedule may be. A DIY diary is a DIY diary. Sometimes projects get done in quick succession, sometimes activity slows. Such is the case with inspiration. We can’t all be geniuses all the time (at least I can’t). All I can do is be true to myself and do what I can.
So anyways, these are some the techniques that have helped me find inspiration. I know everyone is different and what works for one may not work for everyone, but I figured this was worth putting out there. Just in cases (name that movie!).
Before I sign off for today, there’s one more thing I’d like to know… After 11 months of blogging, I realized that I’ve never really asked ya’ll your opinions… What do YOU want to read about?? What topics interest you the most? Project posts? Simpler decor ideas? Personal stuff? Any questions you have for me? Also, what helps you battle the all-consuming writer’s block? Leave me a comment and let me know your take on things. I’d sure love to hear read it. 🙂

Linked up at: Tatertots and Jello, Lines Across, I Should Be Mopping the Floor, Anything & Everything Turn It Up Tuesday


