Our backyard… Holy Moly (inagoodway).

I am a lucky woman.

First, I get to stare at this all the time…

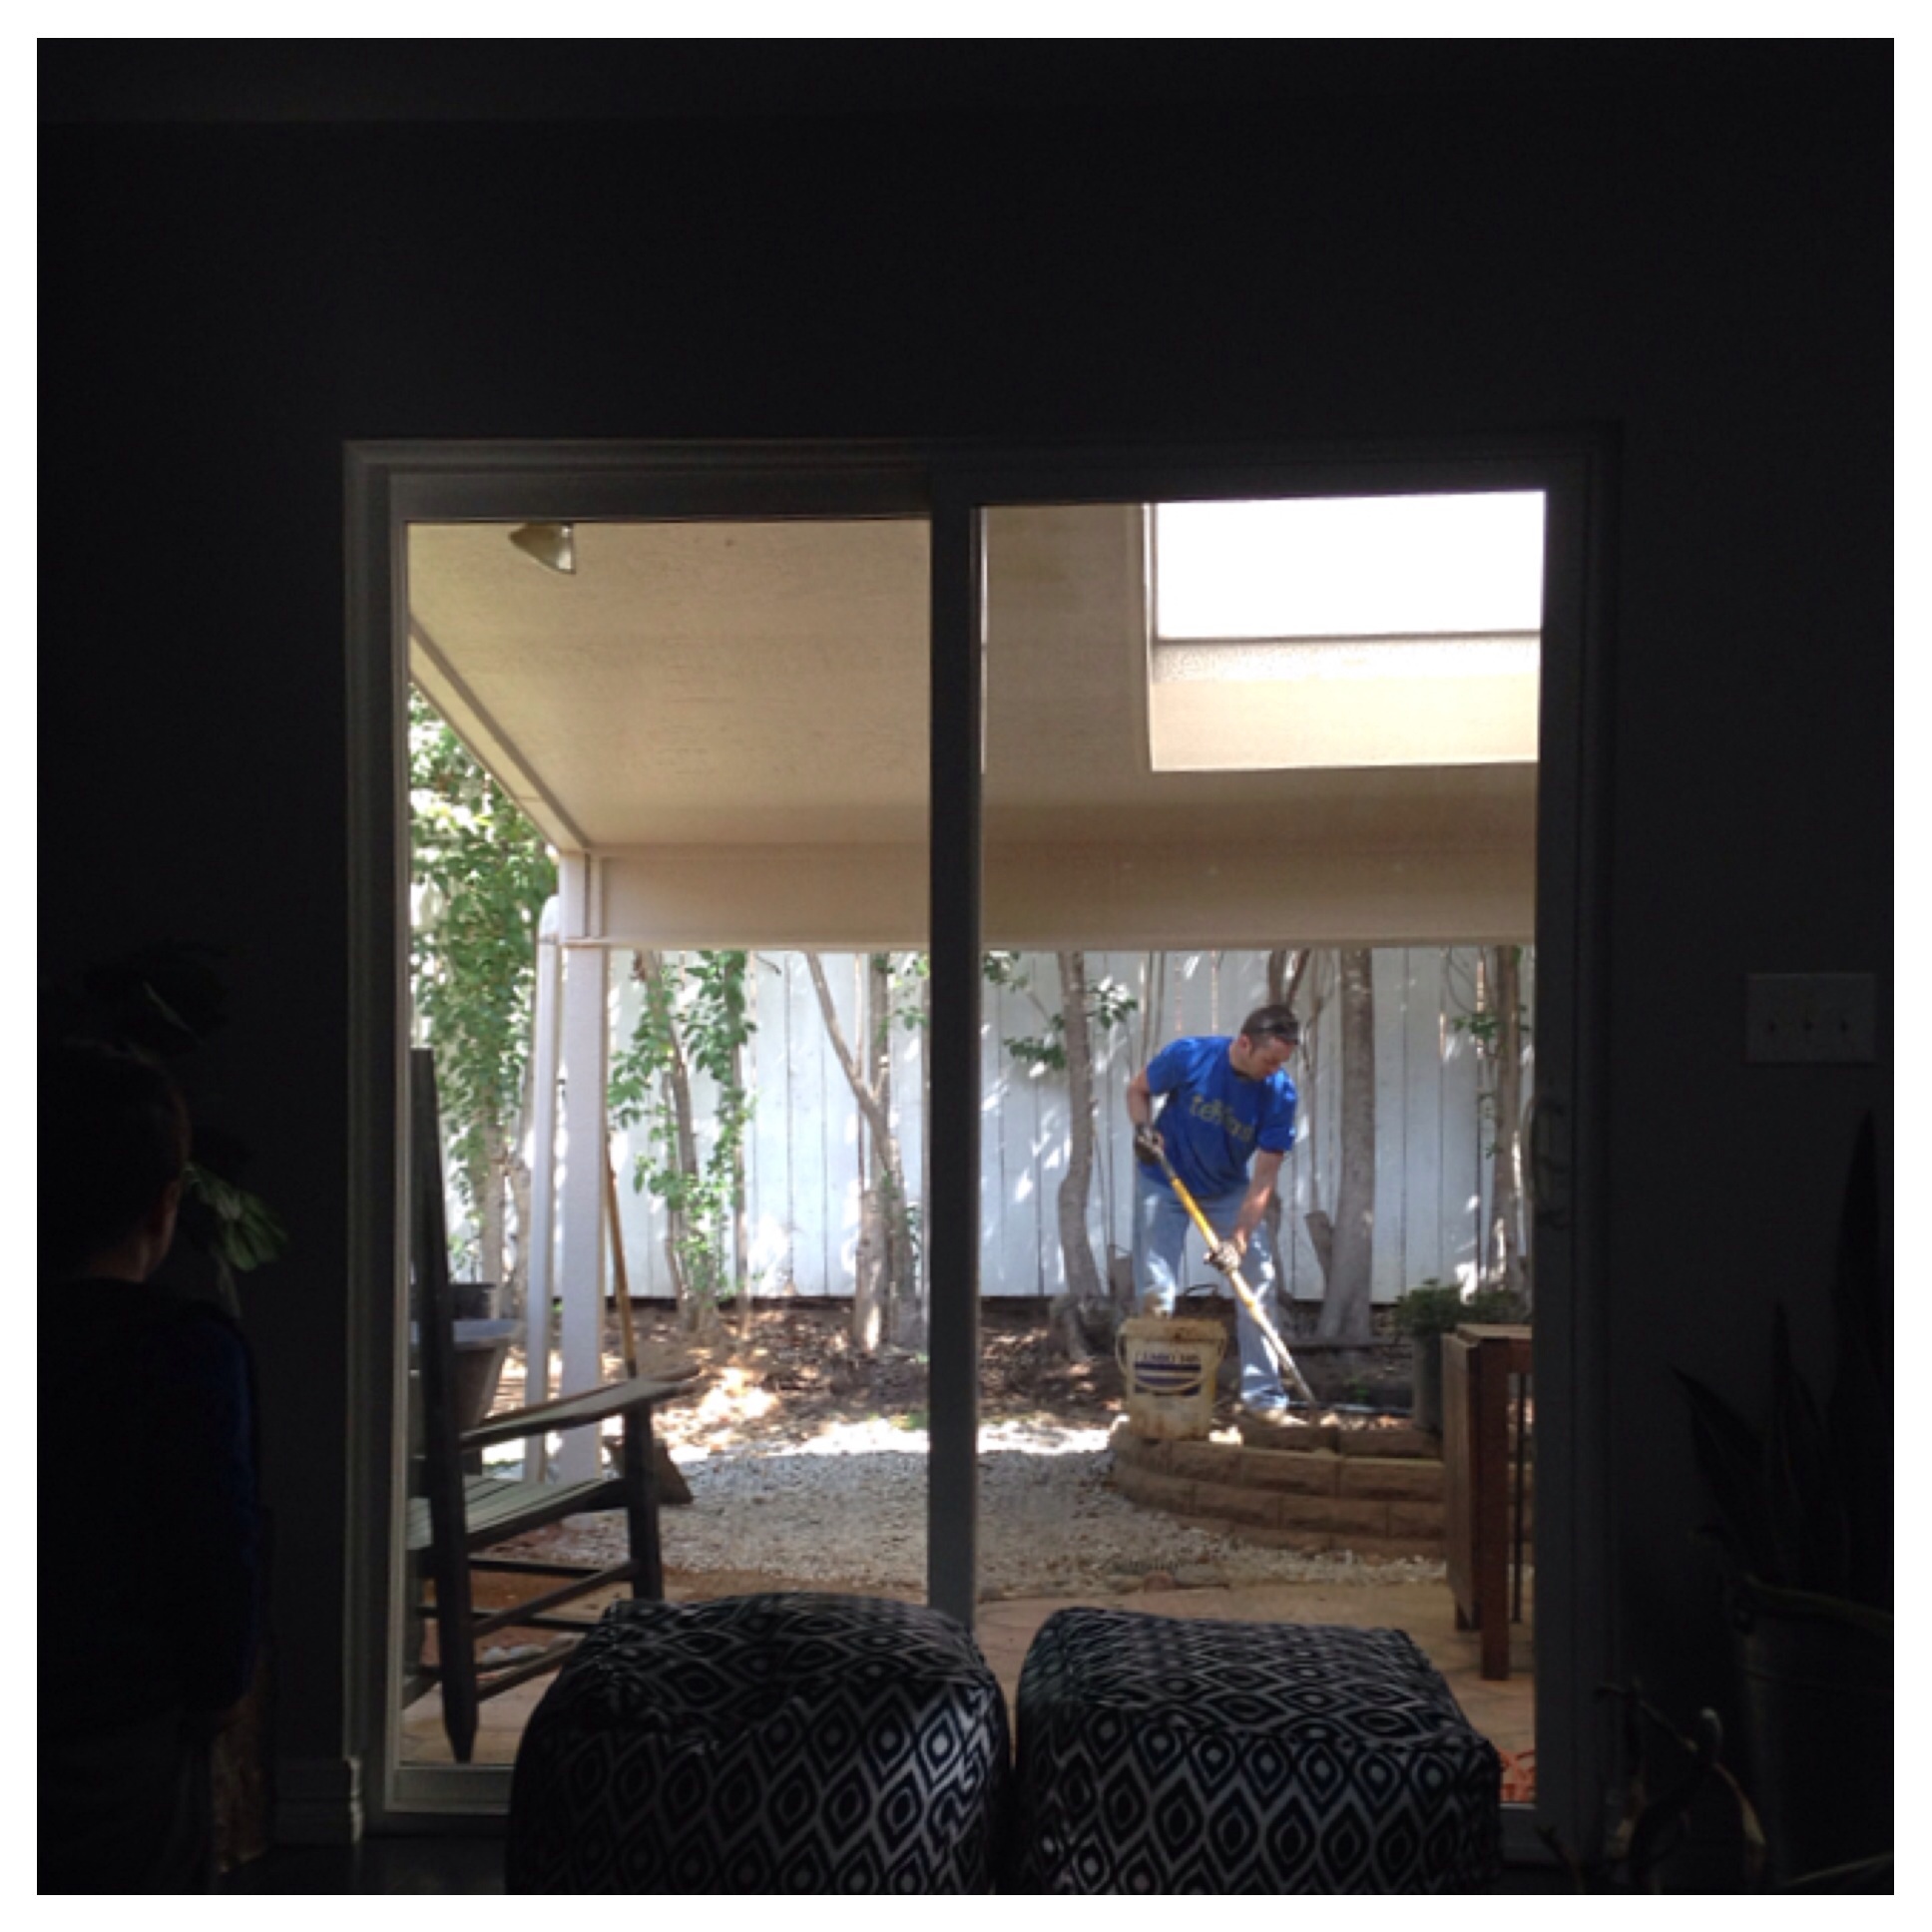
Relaxing on the sofa (I was sick that day) while a hot man performs manual labor in plain sight is pretty much living the dream (especially if you’re married to pictured hot man).  Am I right, ladies??  Answer: Yes. Yes, I’m right.   😉

And now, thanks to all that manual labor, I also get to stare at our newly beautiful back yard as well.   Before and after pics are totally my favorite things.  Guilty pleasures, if you will.   So, that’s what this post is gonna be.   Before and afters of our yard.  Now, keep in mind that “after” isn’t really a legit term since nothing is completely done yet. So, consider them “current”.  And then give Joey a virtual pat on the back because he did this all himself.   I had very little to do with it aside from taking pictures of him working.  I’m nothing if not helpful.

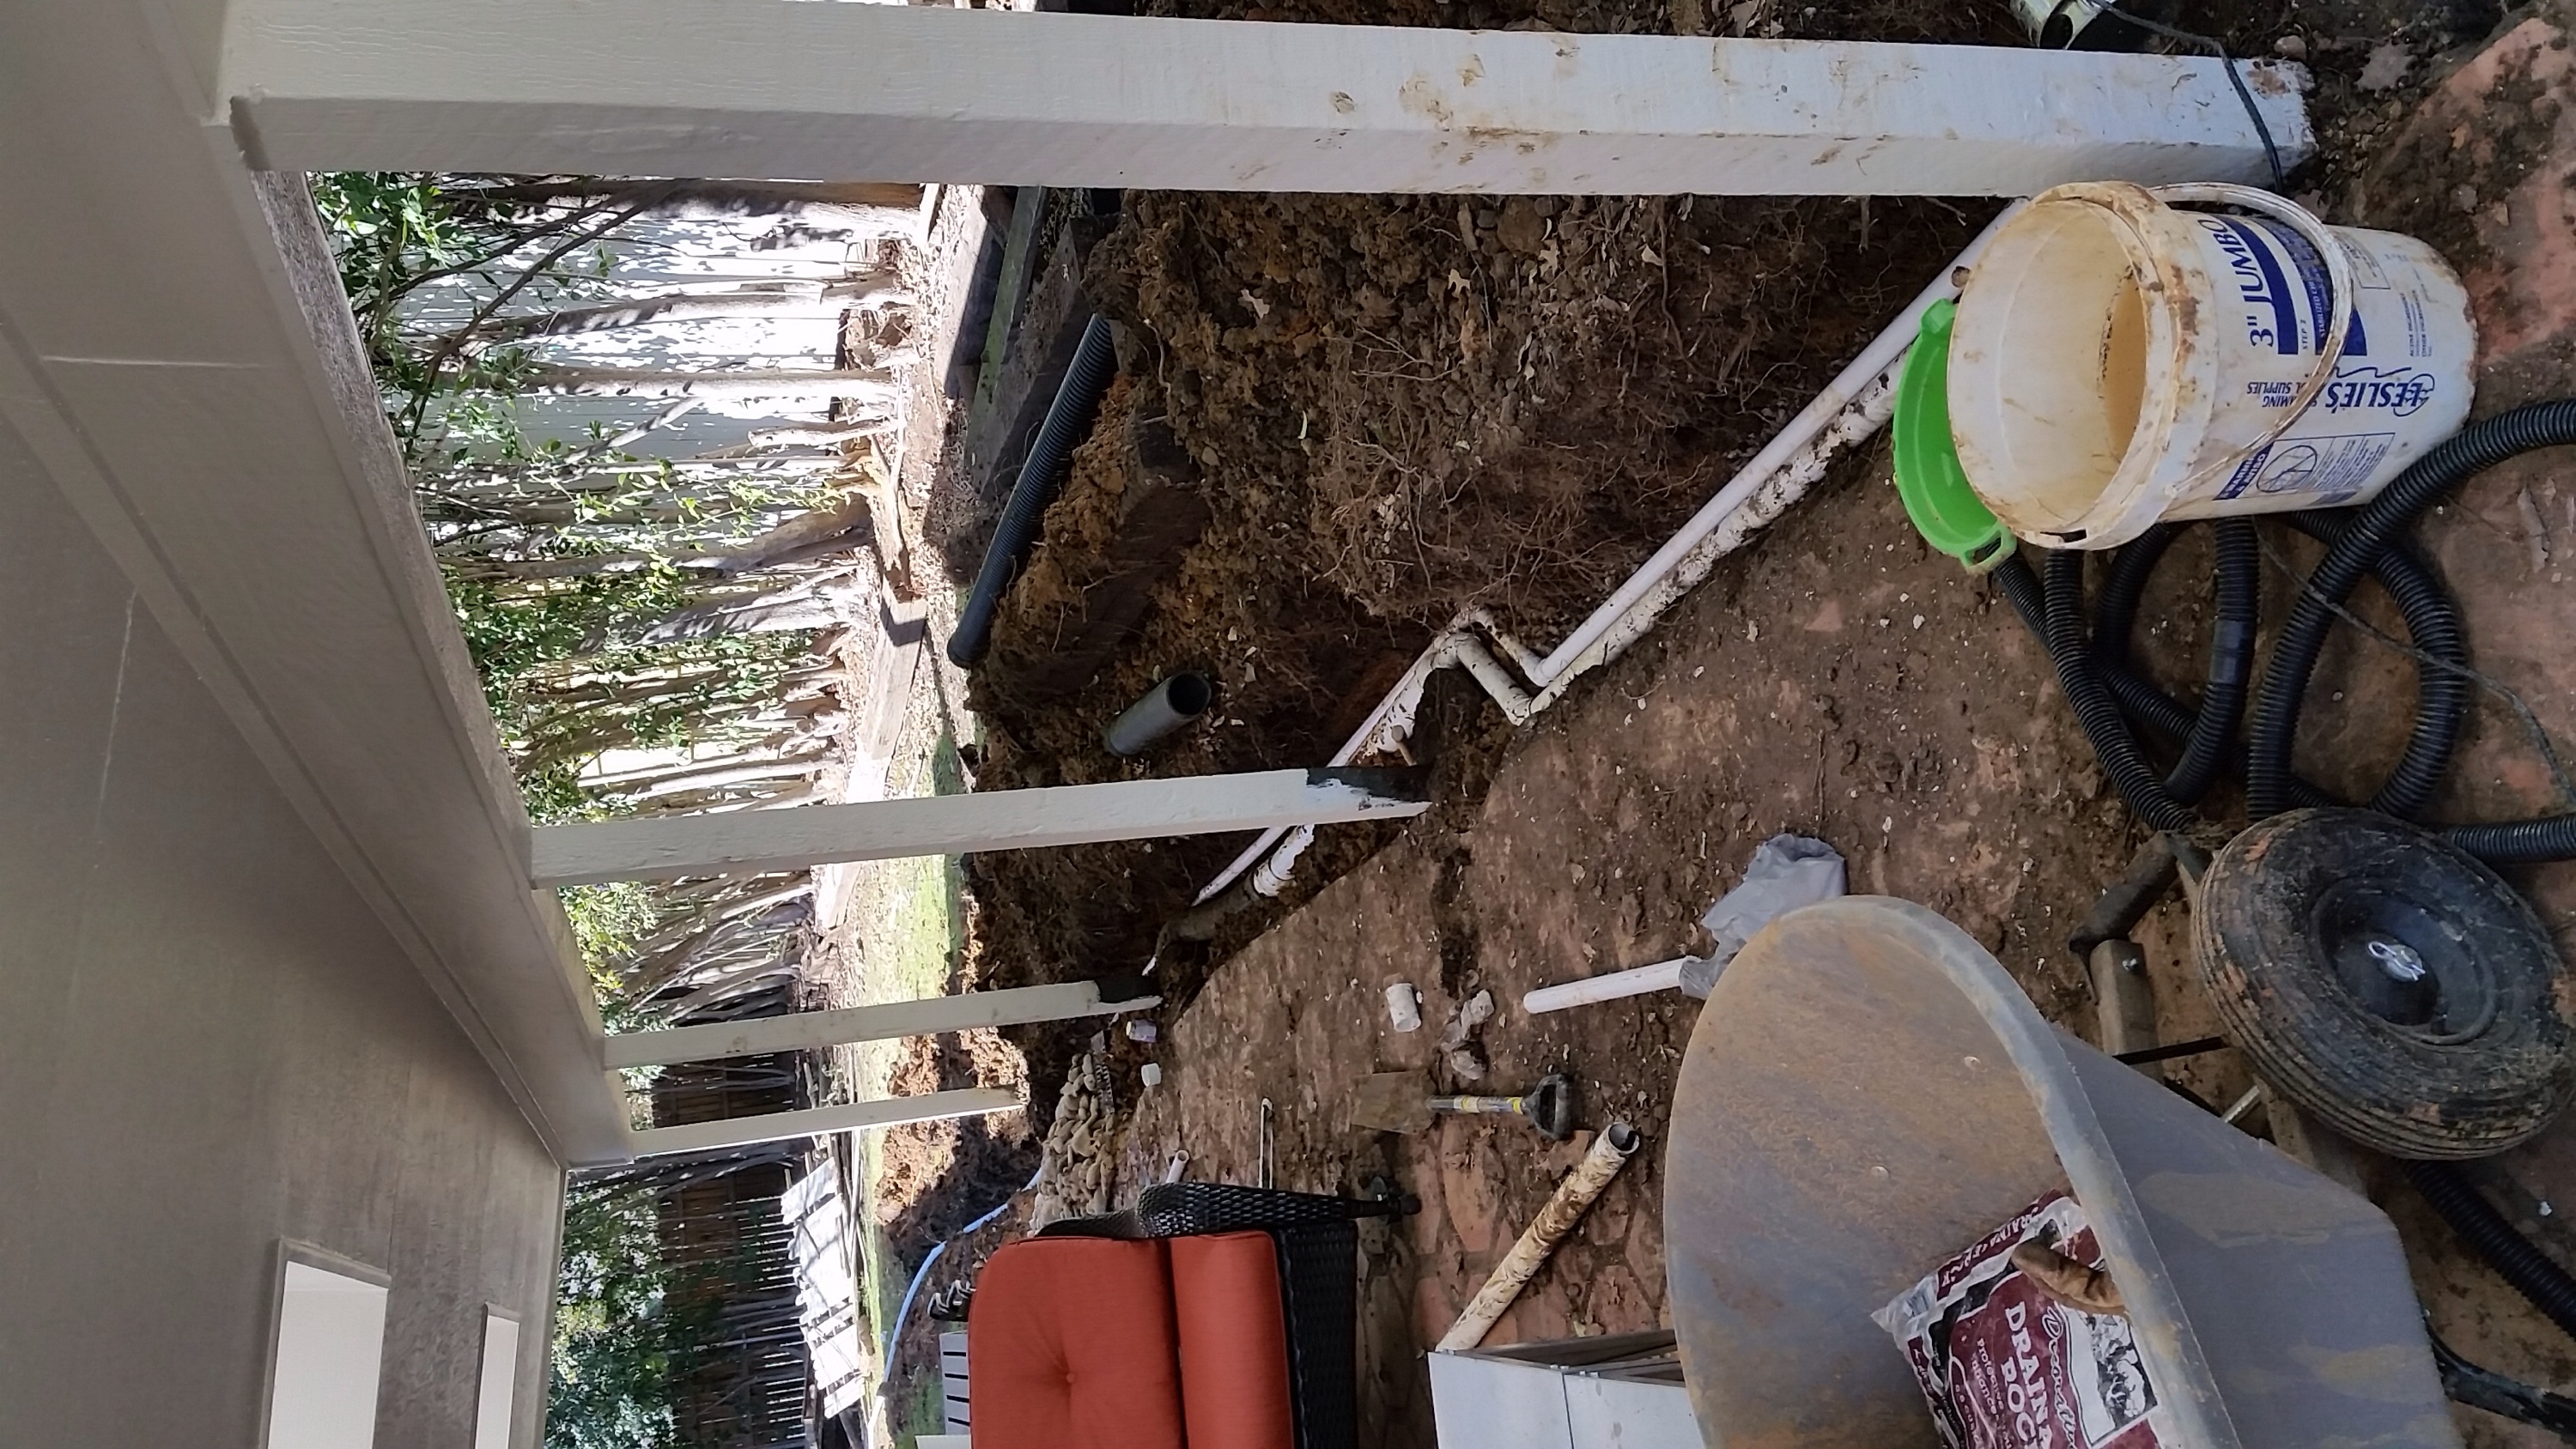
First, let’s take a look at our covered patio shortly after moving in…

IMG_7296

It was dirty, with spots of mold on the ceiling, and a decrepit railroad tie retaining wall which did nothing more than collect moisture and insects.   We started by cleaning up the porch, and I sealed and enriched the terracotta floor, Joey replaced the moldy boards overhead, we had the exterior of the house painted, and Joey installed a new stone retaining wall (along with better drainage and many plants).  He also built a stained wood surround for our HVAC unit (the inspiration for which I found on Pinterest).

Now, our patio looks like this….

232323232-fp83232-uqcshlukaxroqdfv33;37-nu=3396-6-9--78-WSNRCG=3634-29757346nu0mrj

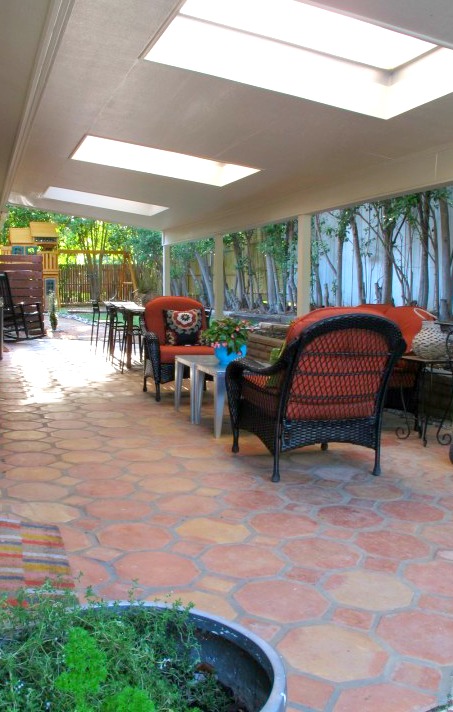
And here’s the other view…

IMG_7299

And now…

IMG_9072

Detail shot!!

IMG_9052


Isn’t the new retaining wall swell??   All the heart eyes.  Right.  Here.   It’s so cozy out there now.   We love just chilling out here with a glass of wine (or coffee  — I remain convinced that coffee and wine can solve the world’s problems) while Lucas plays on this…

IMG_9059

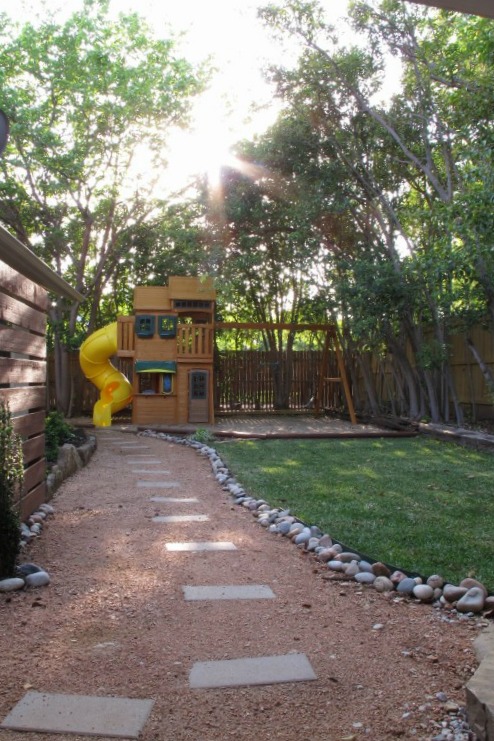
Oh, no.  This is no swing set.   We jokingly refer to this giant child-haven as the “Clarington Resort” (insert hoighty-toity accent and French-sounding “huh-huh!“).   That’s the actual name of the playset, which we found at Costco. This monstrosity should have it’s own zip code if you ask me, thus the term “playset” does not suffice.   The “Clarington Resort” (Huh-huh!) was purchased with our tax refund, and despite it’s massive size (it’s nearly 22-feet long including the slide), it’s actually quite charming with all the trees, all nestled up into the corner of our yard.   When we saw it initially, set up on this high platform at Costco, I was all “No way.  That thing is huge.” and Joey was all “Yes way.  That thing is awesome.”.   It took some serious convincing on Joey’s part to get me to agree to it.  He measured it out for me and showed me how it would work in the yard, and then he gave me that look.  You know the one.  The you’re-totally-raining-on-my-parade-and-killing-all-of-my-dreams look, which is sometimes confused with the stop-being-bossy-and-just-trust-me-for-the-love-of-Pete look.   And I caved.  And now that all’s said and done, I’m kind of enamored of this little area.   Like I said before…. it’s charming. And Lucas really seems to love it.  Having our friends over just got way more fun for the kiddos, that’s for sure.

Joey boxed in the playground with landscaping timbers and used rebar to secure it to the ground (he drilled the holes for the rebar a size smaller and then pounded them in for a nice, tight fit).  Then, he filled it with pea gravel which he found most inexpensively at a local place called Living Earth.   It was $25 for an entire truckload (and this area took 4 truckloads or about 2 yards).   He used concrete pavers for the walkway, and dug them in, surrounding them with decomposed granite (also found at Living Earth).   He bordered the walkway with metal border and river rock.  Then, he added sod (we needed a total of 1 palette which equaled about 150 squares for all areas of the yard).

Here’s a before shot of that area….

IMG_7186

And Now:

232323232-fp83232-uqcshlukaxroqdfv38965-nu=3396-6-9--78-WSNRCG=3634-29767346nu0mrj

And the other direction…

IMG_7297

And now:

IMG_9063

You can see that the HVAC screen is “L” shaped to still allow access to the unit, while making it more attractive from the porch.   Here’s another view of it…

IMG_9062

He also added a plant bed beneath our bedroom window for both drainage purposes and aesthetics…

img_9061.jpeg

Ignore that satellite dish… it’ll be gone soon.   On the other side of the porch we have this area, which looked like this before…

IMG_7402

And now looks like this…

IMG_9077

One of my favorite new additions was Beyonce…

232323232-fp83232-uqcshlukaxroqdfv35632-nu=3396-6-9--78-WSNRCG=3634-29784346nu0mrj

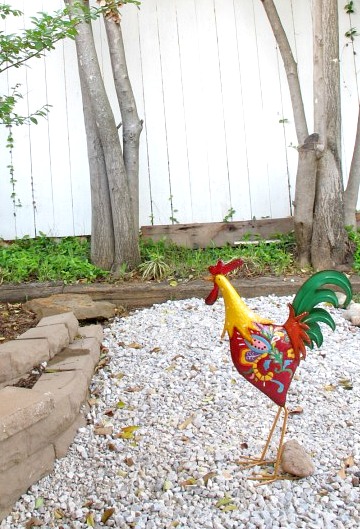
This lovely metal chicken was a housewarming gift from one of my best friends and is a total reference to this hysterical blog post.   Beyonce makes our yard happy.  And me.  And I love her.

Here’s another seating area on the other side of the pool (I still owe y’all a completed pool post so ignore the pool for the time being)…

IMG_9085

We still need to replace the fence.   All in good time.  This area around the pool mainly just needed some love.  Joey pulled out all the weeds, trimmed the trees, added mulch, river rocks and liriope plants.  We plan to also add more lighting around the pool eventually.

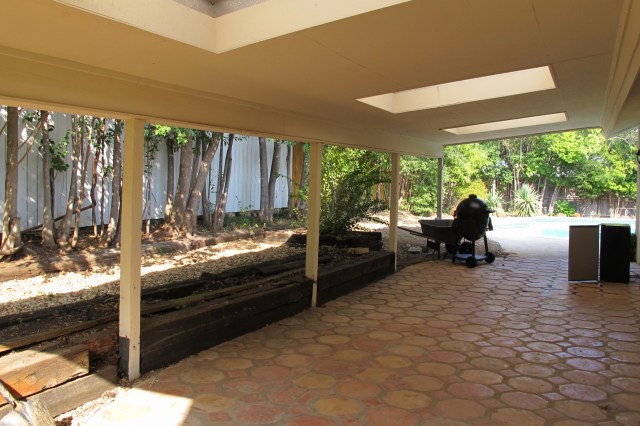
And finally, our view of the porch from the dining area inside.   Here’s the before…

IMG_7237

And now…

img_9089.jpeg


Seriously though, did Joey kick bootie out there or what?

I can’t wait to get out there and really enjoy it.   Things still on the agenda include updating the decking around the pool, removing and replacing the remaining railroad ties along the perimeter of the yard, Making the fence look better, attacking the part of the yard on the side of our house next to the “Clarington Resort” (huh-huh!), painting the ugly brick surround for the pool filter (which I’ve tactfully cropped out of these pictures. You’re welcome.), boxing in the columns on the covered porch to give them a wood look, plus more.    But seriously, I never thought that our backyard would look like this just 6 months after moving in.   I’m fully in awe.

So, that’s where our back yard is currently.  And we couldn’t be happier with it.   Anybody else have yard projects going on right now?

TDC Before and After
Advertisement

The porch project

It’s been a while since I’ve discussed our backyard.   Last we spoke about it, I had just sealed and enhanced our terracotta patio…

Well, let me tell ya…. A LOT has gone down since then.   A. LOT. (<-said like Loyd of Dumb & Dumber)  And I had absolutely nothing to do with it.  It was ALL Joey.  Thus, this post is more of a progress report than a how-to since I didn’t actually participate.  I just watched with admiration through the window.  It’s a tough job, but someone’s gotta do it.  😉

Basically, the changes all began with a drainage problem on our back porch.   Starting a few months ago, whenever it would rain, the water would approach the house, sometimes coming within a foot of it.  No bueno.  Joey tried to declog our existing french drains with pretty much every method he researched, but to no avail.

So, around Christmas, he spent days digging a trench and installing a drain at the west end of our porch (Ahem!  A 200-foot trench in 20 degree weather), which resulted in this nicely graveled-in drain…

That helped the flooding on that side of the porch, but as we came to find out several weeks later when it rained again, the other side continued to flood.   So, he spent many, many more days out there removing the crazy-heavy railroad ties, and installing another drain, along with a sump pump (a pump that forces the water through the drain and out to the street).

So, picture this.  He’s just spent all this time.  WEEKS working on this. Our back yard is all torn apart as you can see here…

IMG_2836

He’s exhausted and sore, but had FINALLY finished and was starting to put the yard back together again.   I get home from work and Joey meets me out on the driveway. He has a look on his face that I could only describe as “livid shock”.

Joey: “So, guess what?”

Me: “What? Are you okay?”

Joey: “No.  You’re never gonna believe this.”

Me: “What?”

Joey: “Ya know that weird electrical box on the porch post that we thought had something to do with the pool?”

Me: “Yeah, what about it?”

Joey: “Well, after I finished clearing things up back there, I took another look at it.  There was a GFI plug that had been tripped and needed to be reset, so I pushed the button to reset it.  And I heard humming coming from underground.  So, I started digging.  (pause)……..Turns out, we already have a sump pump.  And it works.  It works great.  It was just off.  Which explains the flooding.  ….I did ALL THAT WORK for NOTHING.”

O.M.G. Never have I wanted to cry for another person more.  Poor (handsome, handsome) man.

Basically, the sump pump had been buried underground about two feet which is why we never knew about it.   The existing drains weren’t clogged, the sump pump had simply turned off when the GFI plug had tripped, which explained the recent floods we’d been having (our porch hadn’t flooded for the first few months after we moved in).  Since we didn’t know we had a sump pump or that this electrical box controlled it…

(we were told by our inspector that the plug likely had something to do with the pool pump), we didn’t think to check the switch.  So, when Joey attempted to connect power to the new sump pump via that switch, he discovered it. UGH.  Painful, right??  I guess that’s what you get with old houses, though.  You just never know what’s been done before you.

So, now that we knew that the drainage problem was taken care of, we had the issue of the missing retaining wall next to the porch to contend with.   Joey was NOT going to put those nasty rotting railroad ties back, so we ended up getting stackable retaining wall stones from Lowes for about 1.78 a pop.

Joey did the whole wall himself, and I have to say that he did a fabulous job.   He said that the most difficult part was ensuring the bottom row was level in every direction.  He used sand beneath the bottom row to act as a bed for the stones and placed them down, moving them around until they were level and straight.  Then, he used more sand to back-fill each row behind the stones. To ensure that he had a straight line, he tied some rope between the columns of the patio as a guide…

IMG_2807-0

We still have to get a topper for the wall (the cement pavers are just placeholders… They’re destined for another part of our yard), but here’s where he ended up with the wall…

IMG_2835

The above shot was taken before he added a second level to the left side, which can be seen here…

He’s going to add a few more stones (once we buy them… we ran out) to even it up with the right side…

Then, we’ll be planting bushes and ground covering beyond the retaining wall to make it feel cozy and lush.

Here’s the before pictures just for reference…

I’m so impressed with him. Seriously. Other updates that he’s taken on include this screen that he built to camouflage our HVAC unit…

We based this screen on a picture that I found on Pinterest.   It’s L-shaped to still allow access to the unit, but makes it much less of an eyesore from the porch. We still have to touch up some of the stain on the corners and add one more plank to the bottom.  Then, we’ll landscape around it with bushes and gravel.   It’s sweet already, but it’ll be awesome when it’s done.    You’ll also note a start to the path we’re creating beside the screen (that’s where those rectangular pavers on top of the retaining wall will come in).  This path will go all the way around the house and will be bordered in and filled with gravel around the pavers.

That pile of decrepit wood that you see in the back of the shot is a portion of our old fence (which’ll be taken to the dump soon).   Every part of our fence has been replaced at some point in time except for this one.  It literally had 2 foot gaps in it.  It was original to the house and was rotting, and completely falling apart.  Joey replaced it recently for both aesthetic and security reasons. You can see the new fence here…

Once the menagerie of half-done projects are finished, we’ll be boxing in the columns on the porch and staining them the same color as the HVAC screen to emulate stained wood posts. Eventually all of the railroad ties along the fence will be replaced as well. I’m getting really excited about everything. And more impressed by Joey by the day.

Our porch is still in disarray as I type this, thus I have no pretty “after” shots this time.   Our pool is getting drained today in preparation for resurfacing (I’ll write another post about that) and we anticipate a bunch of dust in the process, so we’re waiting until that’s done to clean and get everything situated.   The coping needs to be replaced around the pool (ugh) and the most cost-effective option is flagstone.  The reason why I’m mentioning this now is that our plan for the retaining wall topper is to use coordinating flagstone to tie the two elements together.   Once the coping is in, we can choose our topper and get that hammered out.   And once that’s done, we can actually start to use our porch again.   (And celebration, complete with jumping and giggles (from me) will ensue)

So, anyways, y’all have a great Monday.  I have much in store for you in the posts ahead.  I’ve had a busy weekend (Heeheeheehee!)… 😉

TDC Before and After