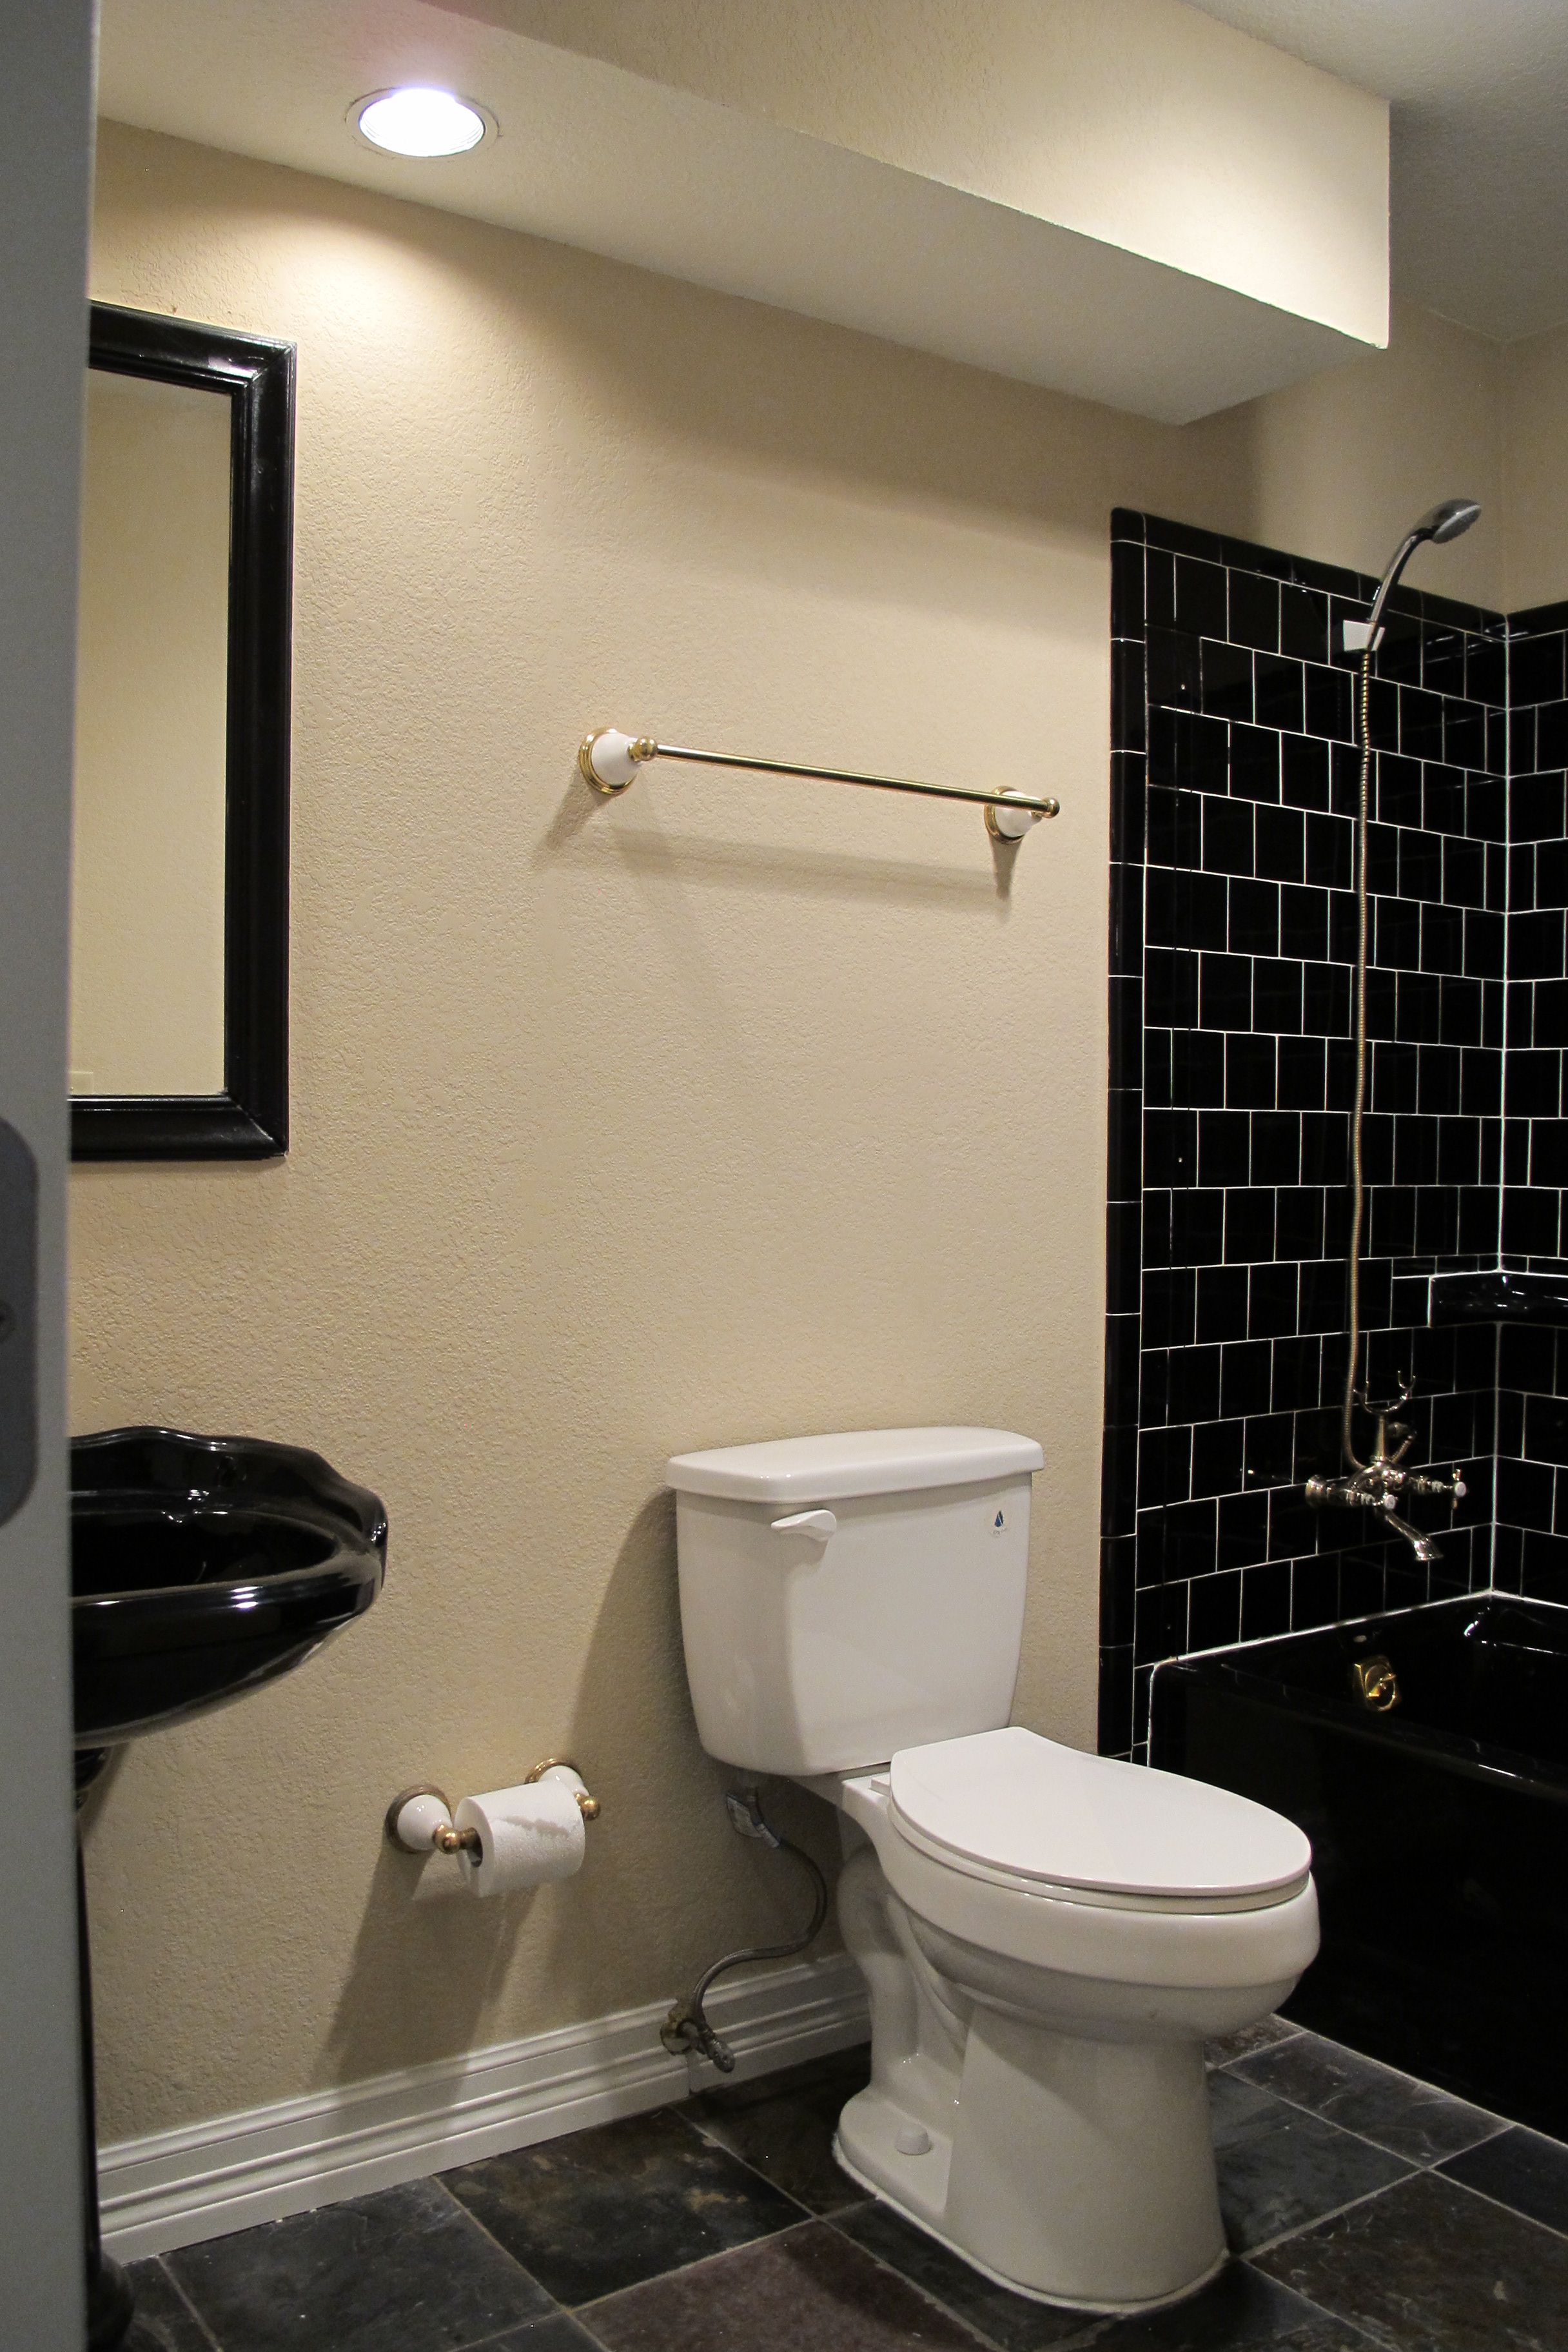
Remember this guy?? Our guest bath???
He now looks like this…

Kind of the same. Just accessorized. But, in my opinion, also kinda charming. Even I was surprised by this fact. I became super giddy as I saw the room coming together, and realized that I actually liked what I saw (forthemostpart).
This room, along with our master coffin bath, will be getting full-on renovations down the line (If you’d like to see what I mean by “coffin” check out the master bath pics in our house tour. Then, you’ll know.). I’m not quite sure what the responsible party was thinking when they installed a black tub, sink and tile in this room. I mean it’s IMPOSSIBLE to keep clean. Watermarks galore. It’s like one of those ghost shows… I clean the spots, smile at my newly sparkling sink/tub, turn my head, look back and they’ve reappeared. Out of NOWHERE. This room may very well defy the laws of physics. Or perhaps it’s like Room 1408. Plotting to drive me insane. Spoiler Alert: It’s working.
Aside from the color, we’re just not fans of the black pedestal sink in general….

Like at all. It’s a little too ornate for our taste and provides ZERO storage. Whatsoever. We’ve been scoping out other options for vanities with storage and plan to replace the sink at some point. This bathroom also came equipped with brass fixtures, which I actually kind of like. They’re sort of vintage-y, which I totally dig.

But, unfortunately, they’re gonna have to go. Remember WAY back in this post, I alluded to the fact that we found lead in the house?? Well, we found it in the brass fixtures and corresponding brass pipes that extend to the wall where it meets the copper piping….

For anyone purchasing a house that was built before 1978, it’s recommended that you get the house tested for lead. We didn’t know this until after we moved in, so I purchased this lead tester kit from Home Depot for 9 bucks.

Basically you just pinch the spots on the sticks marked “A” and “B” until you hear them pop, then squeeze/shake until yellow liquid appears in the tip. Then, you simply rub the end of the stick into any areas of cracked paint, window frames, pipes, whatever. Anywhere that may pose a lead risk. You can use the same stick repeatedly unless you get a positive result, which is when the tip turns red….

This was taken after I tested the brass pipes in the guest bath. I’ve been told that the tip will turn bright red when there’s sufficient lead present, so the fact that it only turned slightly red was better than it could’ve been. But that didn’t make me feel much better, to be honest.
Of course, I immediately took to the internet to figure out what to do. Ultimately, we need to replace the pipes and fixtures. But I’ll admit… I was at a bit of a loss as to what to do when I discovered this guy in the shower….

It has just two plumbing accesses for hot and cold water and NO plumbing for the tub spigot (the water-flow stems off of the hot and cold knobs)…

And there’s also NO plumbing for the mis-matched shower head….

That would be a hand-held showerhead that is also connected to the main tub unit. It’s simply mounted to the wall on a bracket. All water stems from the main tub unit.
After a bit of research I found this potential replacement…

It’s totally not my style, but it’s lead-free and will fit our current plumbing situation, so I sent this photo to Joey via text. He responded that he’d “better demo the bathroom soon” (so we wouldn’t need to buy this fixture). He actually thought I was joking when I first suggested it because it’s so far off from our usual style.
So, needless to say, we haven’t pulled the trigger yet. I’m hoping to find a more modern fixture that still suits the style of the house and isn’t over $400. That’s the problem… any modern fixture with similar plumbing accesses is super expensive. So, the hunt is on. Down the line when we tear this puppy apart (ie: buh-bye black tile), we’ll replumb for a standard tub/shower set which will open up many more possibilities.
I’m also still on the lookout for a sink faucet, but I want whatever we choose to coordinate with the tub fixture, so we have to get that decision hammered out first. Because we’ll also have to replace the pipes beneath the sink at the same time as the faucet, we’d like to swap out the pedestal sink for a vanity with storage at the same time, to be sure that the pipes align correctly. See how that happens??? A simple faucet swap turns into a reno. Just.Like.That.
In the meantime, since the brass is still present, we’ve educated ourselves on the precautions to take to limit our lead exposure…
1. Let the tap water run before using it until a temperature change is noted. This indicates that any water sitting in the pipes has been flushed out.
2. Wash Lucas’s hands in another sink and use fresh, filtered water (not tap) to brush his teeth.
The remaining tips don’t really apply to the bathroom, but since we found lead in the house, we’ve been extra cautious in the kitchen as well. So, when it comes to cooking…
3. We never use hot tap water for cooking, boiling, etc. Supposedly, the heat can cause more lead to detach from the pipes (if there is lead in the pipes — our pipes are copper, so they should be fine, though better safe than sorry.).
4. After performing research, we’ve been testing out different water filters. We tried a Zerowater filtration pitcher, which is certified to remove lead from drinking water. We let the tap water run until there was a temperature change, then filtered our water. We used this water for cooking and drinking…. well, that is until the filter crapped out. We only used it for about a month and the water started tasting NASTY. The filter comes with a water tester so that you can see how clean your water is and the “filtered water” came out dirtier than the tap. So, needless to say, I’m not sold on this filter.
Joey then installed an under-the-sink filter that’s certified for lead removal. And he installed both a filter in the pipe behind the fridge and a heavier-duty filter inside the fridge for double filtration. Hopefully, these actions will keep our lead exposure to a minimum.
So, with that covered, I’m gonna jump back to bathroom decor…
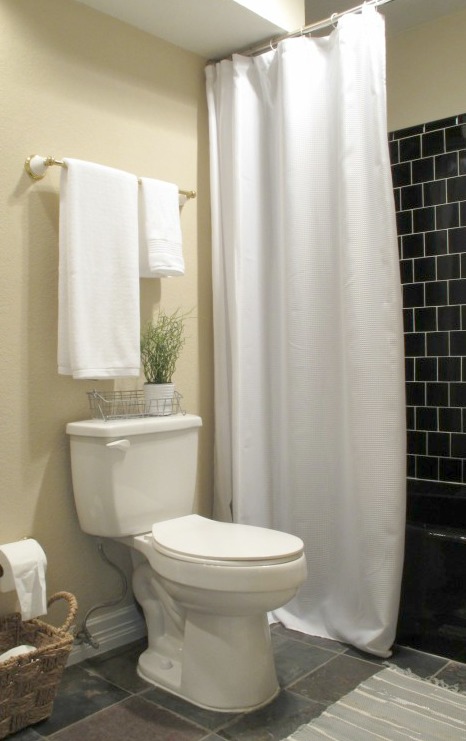
I ordered a long (84″) shower curtain from Amazon. I wish I could raise the curtain higher, but that blasted soffit limits that, unfortunately. I cant wait to tear that sucker outta there. I added some simple white towels, a wire basket with a faux plant, a small rug, and a stool which comes in extra handy when bathing Lucas.

I still need to add artwork to the wall with the stool, but I’m marinating on what to hang. I’d also like to change the wall color. The current paint is a flat finish (never good for a bathroom), and the walls are quite dirty in spots. I have to say, though… despite the room’s obvious maladies, I’m okay with it for now. I mean, sure, I’d never CHOOSE a black tub or sink. #leastpracticalever, but it’s definitely a conversation piece and it looks semi-cute with the white shower curtain and slate tile (whenitsclean). It’ll definitely be fun to start planning the reno, though, once some of the other more pressing issues with the house are taken care of. And we plan to come up with a solution for those faucets soon, to get them outta there.
Next up, I’ll finally be working on my post for our new mid-century dresser turned media stand. Aaaaaand this weekend, I painted our 1970’s built-in!! Our living room is still all crazy since everything needs to cure before I reattach the doors and such, but y’all… it looks SO good so far. Way better than that badly shellacked 70’s wood tone. I can’t wait to share.
So, do any of you guys have any other tips for dealing with lead? I’m all ears eyes…