Woot!
I’m totally back!
And happy to be here!
We got a brand spankin’ new laptop last week and I couldn’t be more stoked to be typing, uploading, and saving at a normal, nay, dare I say… rapid rate thanks to this fine piece of machinery.
It’s been so long since I’ve blogged that I’m almost overwhelmed as to where to start to catch you guys up. If you’ve been following me on Instagram, you probably have a good general idea of what’s been happening decor-wise, but for the sake of continuity, I decided to take some (waitforit) non-grainy shots with my trusty ole’ camera. You have no idea how long I’ve waited to type those words. Wait. Yes you do. Two months. That’s how long since I’ve been able to UPLOAD PICTURES. All caps really says it all regarding my excitement level here.
So, in organizing my thoughts here, I’ve decided to basically brain-dump all the decor stuff that’s gone on over here lately over the next few posts. I’m gonna start with a project that I recently finished in the living room. After that, in no particular order, I’ll be showing y’all some dining/foyer updates as well as our nearly finished breakfast nook. I just took all the pictures I need and am SUPER excited to show you guys everything. GIDDY, even.
So, let’s get started, shall we??
It actually took me quite a while to get to this project even though it wasn’t super difficult. You may remember from my last post that I herniated a disk in my back a few months back, which was a huge reason for my recent break. For a while, even the easiest of tasks felt insurmountable, but after a few months of physical therapy, I’ve had a pretty decent improvement. I’m still not running or anything, and I occasionally have exacerbations if I’m not conscious of my movements, but for the most part I’m feeling WAY better. So, you can say that getting started on this project was like a breath of fresh air (aka. normalcy).
Remember this blank wall over the TV??

Well this wall stumped me for the longest time. I had no idea what I wanted to do with it.
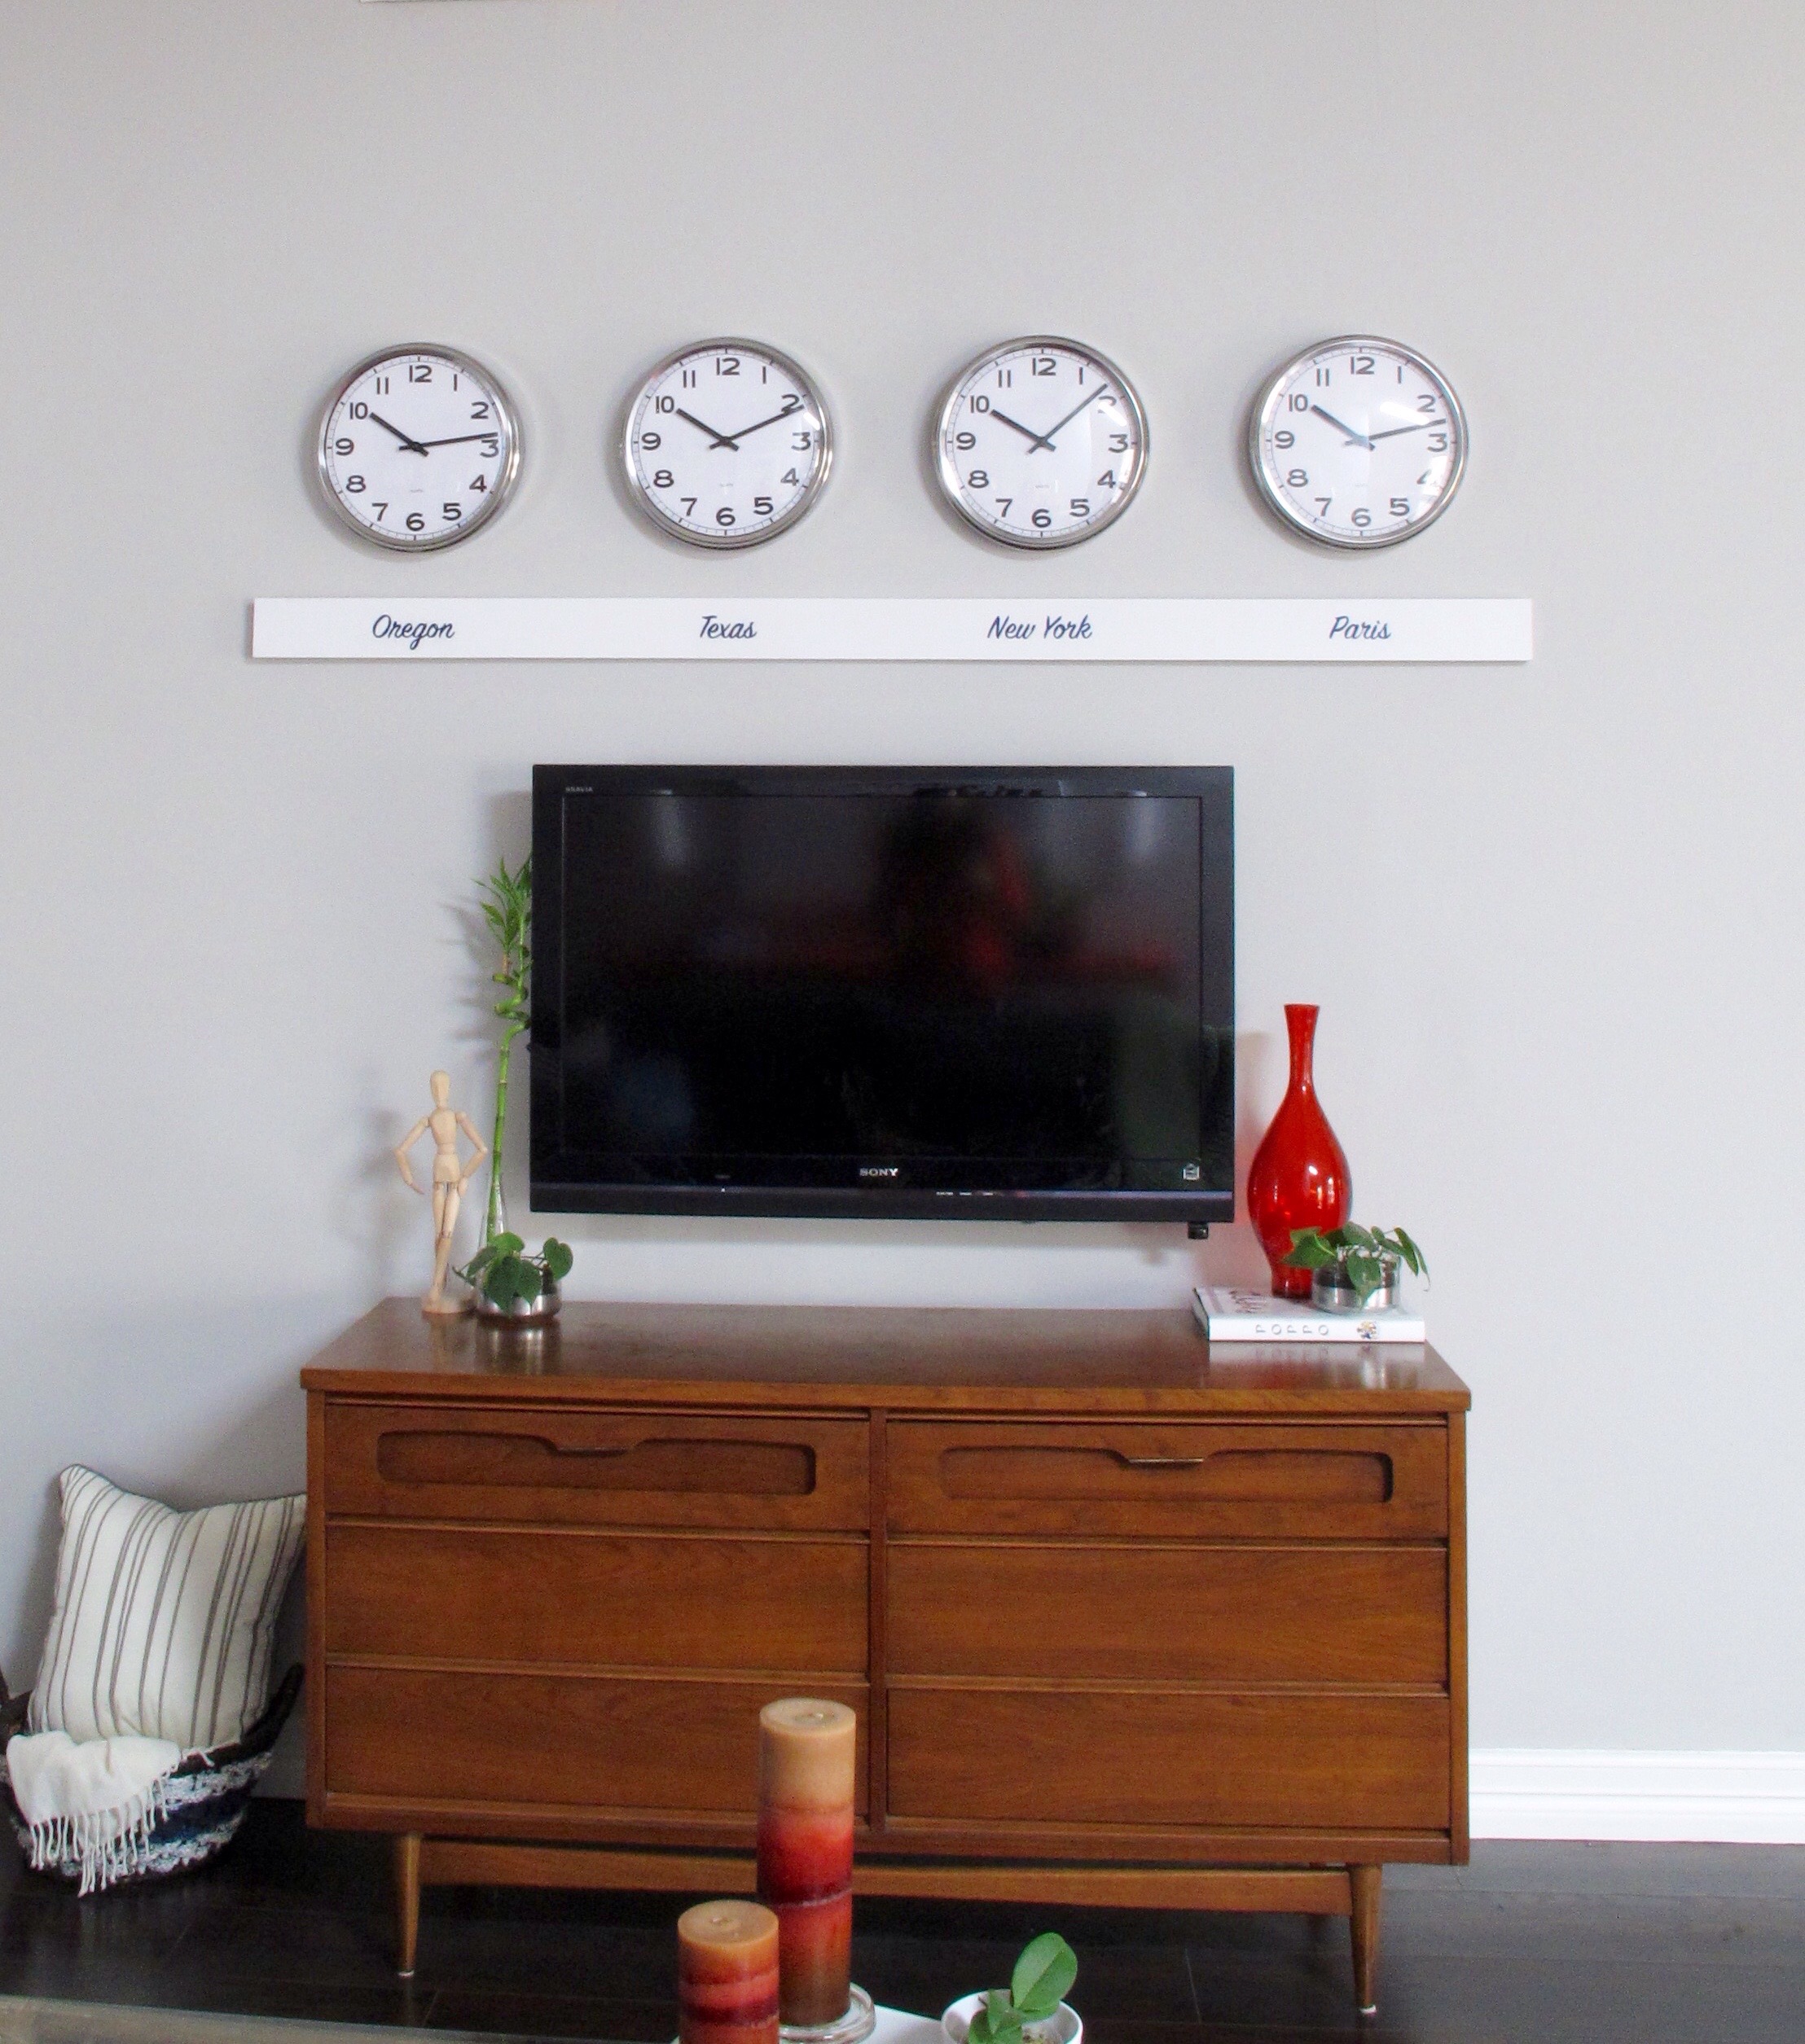
Then, one fateful day at Ikea, I spotted the Pugg wall clocks, and it was all over.
I had a plan. I purchased my clocks and went on my merry way. See, what I wanted was to hang four clocks to designate each of the time zones that mean something to us. Oregon (where Joey’s from), Texas (where we live), New York (where I’m from), and Paris (one of the coolest trips we’ve taken).
Now, please excuse the next few progress shots. They were taken in a rush (and many at dusk) with my phone.
Anyways, once I got started, the key was getting them lined up perfectly. And I’m proud to say that I managed to do it without punching a single excess hole in the wall. And here’s how…
First, I traced the clocks on wrapping paper, cut them out, and used these templates to determine roughly where I wanted them above the TV…

Then, I used a laser level and a yard stick to measure the exact center (at the location where the hanging holes in the clocks were). This is where I would punch my holes. It turns out that my holes were exactly 18″ apart from each other, so I simply measured and marked along the laser level line every 18″ and marked them on my templates…
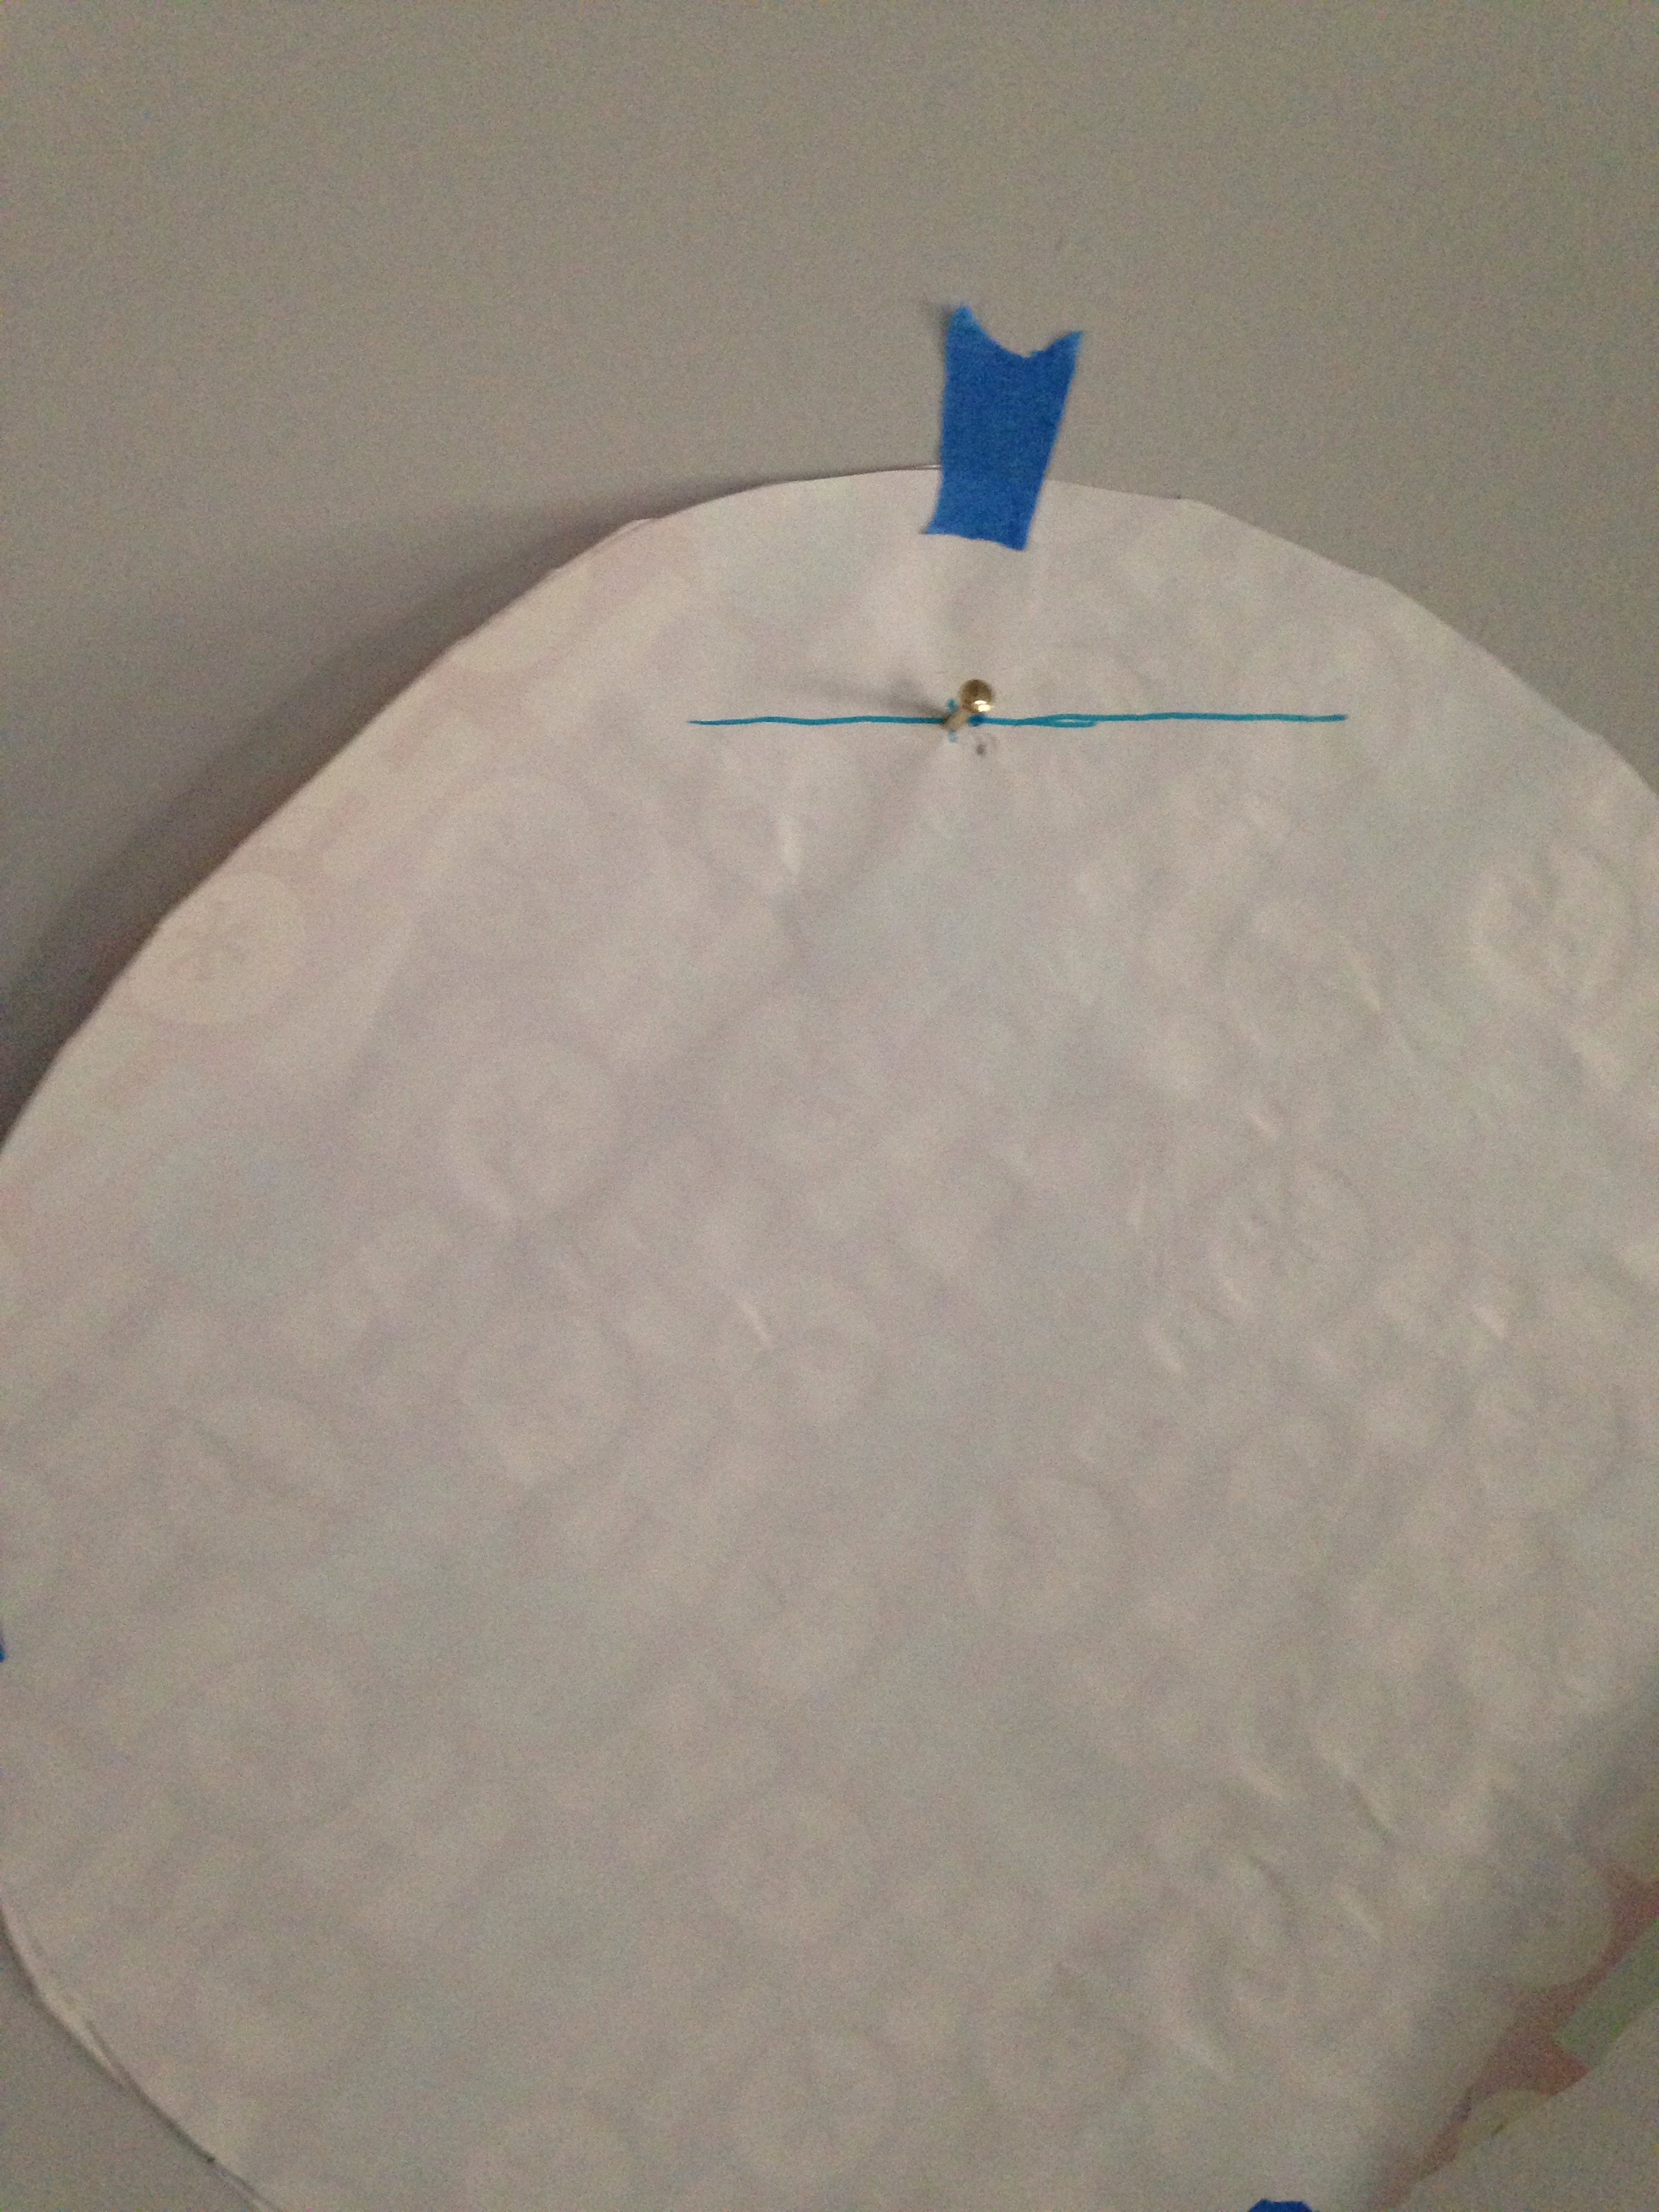
Then, I hammered my nail in through the paper. I tore off the paper and hung my clocks…

They turned out perfectly aligned and straight. I couldn’t believe I’d actually succeeded in this the first time around. That almost never happens. See that blue painter’s tape in the pic above? This would be the next part of my project. And this was the part that I had to wait FOREVER to get to because of my back. It was literally up there for about 6 weeks. And weirdly enough, it started to grow on me. Heehee! So strange.
Anyways, once I felt well enough to go for it, I went to Home Depot and had a 1″ x 4″ cut to the length of my painter’s tape (73.5″). I sanded it with 220 grit sandpaper to smooth it out, then gave it 2 coats of white paint. I mounted the wood to the wall using 2 claw hangers. Then, I waited.
Because this was the point where I needed to print, but we hadn’t replaced our computer yet. Oy. So many blogging barriers that I’m happy to have busted through lately.
So, basically that blank piece of white wood hung in place of the painters tape in a state of limbo for another 2 weeks.
But then, BAM….
And it was on. I’ve seen this technique on many blogs before, and have always wanted to try it, so…
I chose a font that I liked ON MY NEW COMPUTER (:D) and printed my labels on plain computer paper in my preferred color, cut them out, then scribbled lead on the back using a pencil…

I perfected placement of them on my wood with scotch tape, and chose the color of oil-based paint pen that I wanted (as seen in the scribbles above the wood)…

I removed the wood from the wall, then traced the outline of my font with a ball-point pen, giving decent pressure…

Which left this…

Then, I used this navy blue paint pen to fill it in…

And cleaned up the excess lead with a gummy eraser. Once this was done, I rehung my wood, which left this…

And as per usual, I can’t NOT put a before shot from when we gained possession…
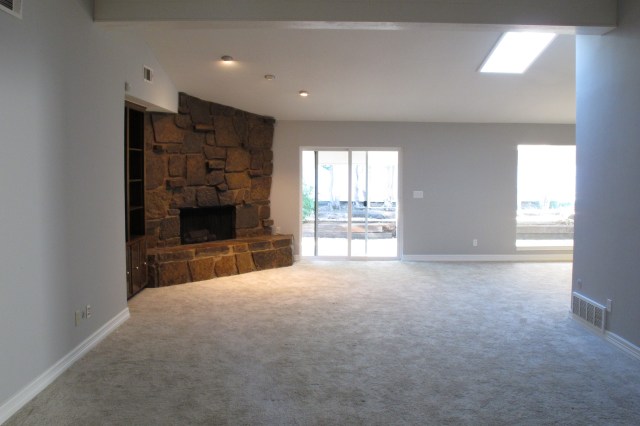
Gosh, I’m a fool for before and afters. And here’s the other direction…

You can see that I replaced the Fort Worth print above the chair with a vintage painting that I found for $7 at a thrift store. It’s PERFECT there and helps tie in the hanging planters on the other side of the doorway. Plus, I love that the vintage style contrasts with the more modern clocks.
A view of that entire side of the room….

And a before…

And a few closer-up shots of that newly revamped corner…


I scored that plaid pouf at Target in clearance for $14.98. That was a happy day for me. #andcheaposrejoice
Here are some more close-ups of the new clock wall….

I LOVE that technique for transferring font. Now, I want to monogram everything in my possession.


Now, I just need to actually put batteries in the clocks and set the times. Joey keeps joking that for a room with so many clocks, we never seem to know what time it is. Haha!
Anyways, I am super thrilled with how this turned out. It’s exactly what I wanted. Something a little different that suits us and is actually meaningful to us. I think finally deciding on this project as our wall decor was well worth the year long decision-making process. Yes. It took a YEAR. And many, many ideas until this one came about and stole the show.
Oh! And just to update y’all on the last issue from my last post… The roof patch worked!!!!!! (fingers crossed that it continues) AND we had a new drain system with industrial-strength sump pump installed in the backyard, which meant ZERO flash flooding with the last storms we experienced. So, although our roof is old and will eventually need to be replaced, we’re now hoping that we can hold off for a while (please) and get to some other fun projects instead. So, it’s good news all around!!!
So, anyways, I hope y’all have had a fabulous holiday weekend! And thanks for not giving up on me. 🙂


