Balsa wood canvas frame – Monthly DIY Challenge

Whatup, yall!   It’s time again for our DIY Monthly Challenge!  (Applause!!!)

This is a challenge where my bloggy friends and I are assigned an item and must simply make something with it!

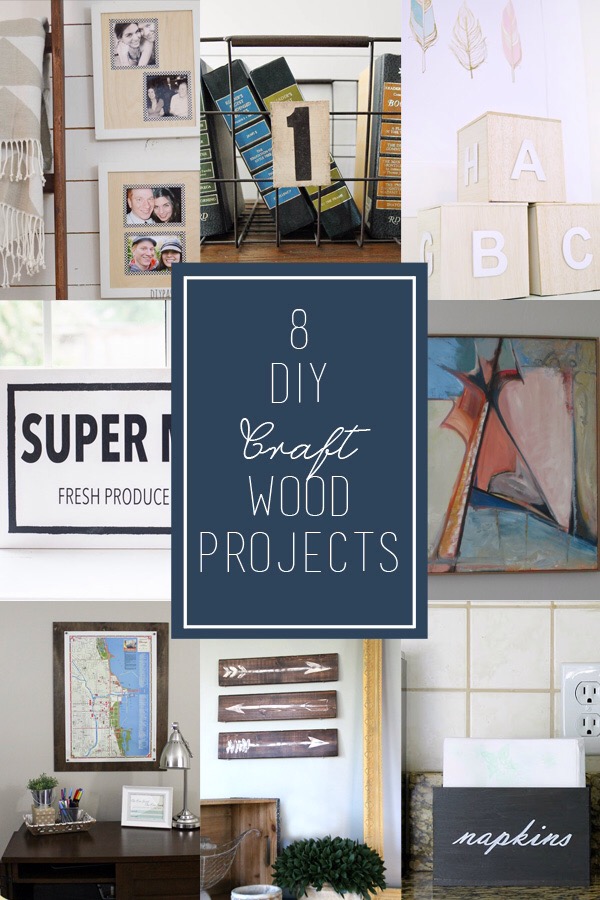
This month, our item of choice was craft wood.

And I chose balsa simply for ease of use.  For those who don’t know, balsa wood is very soft, so you can cut it with an X-acto knife or scissors.   Totally my type of material.

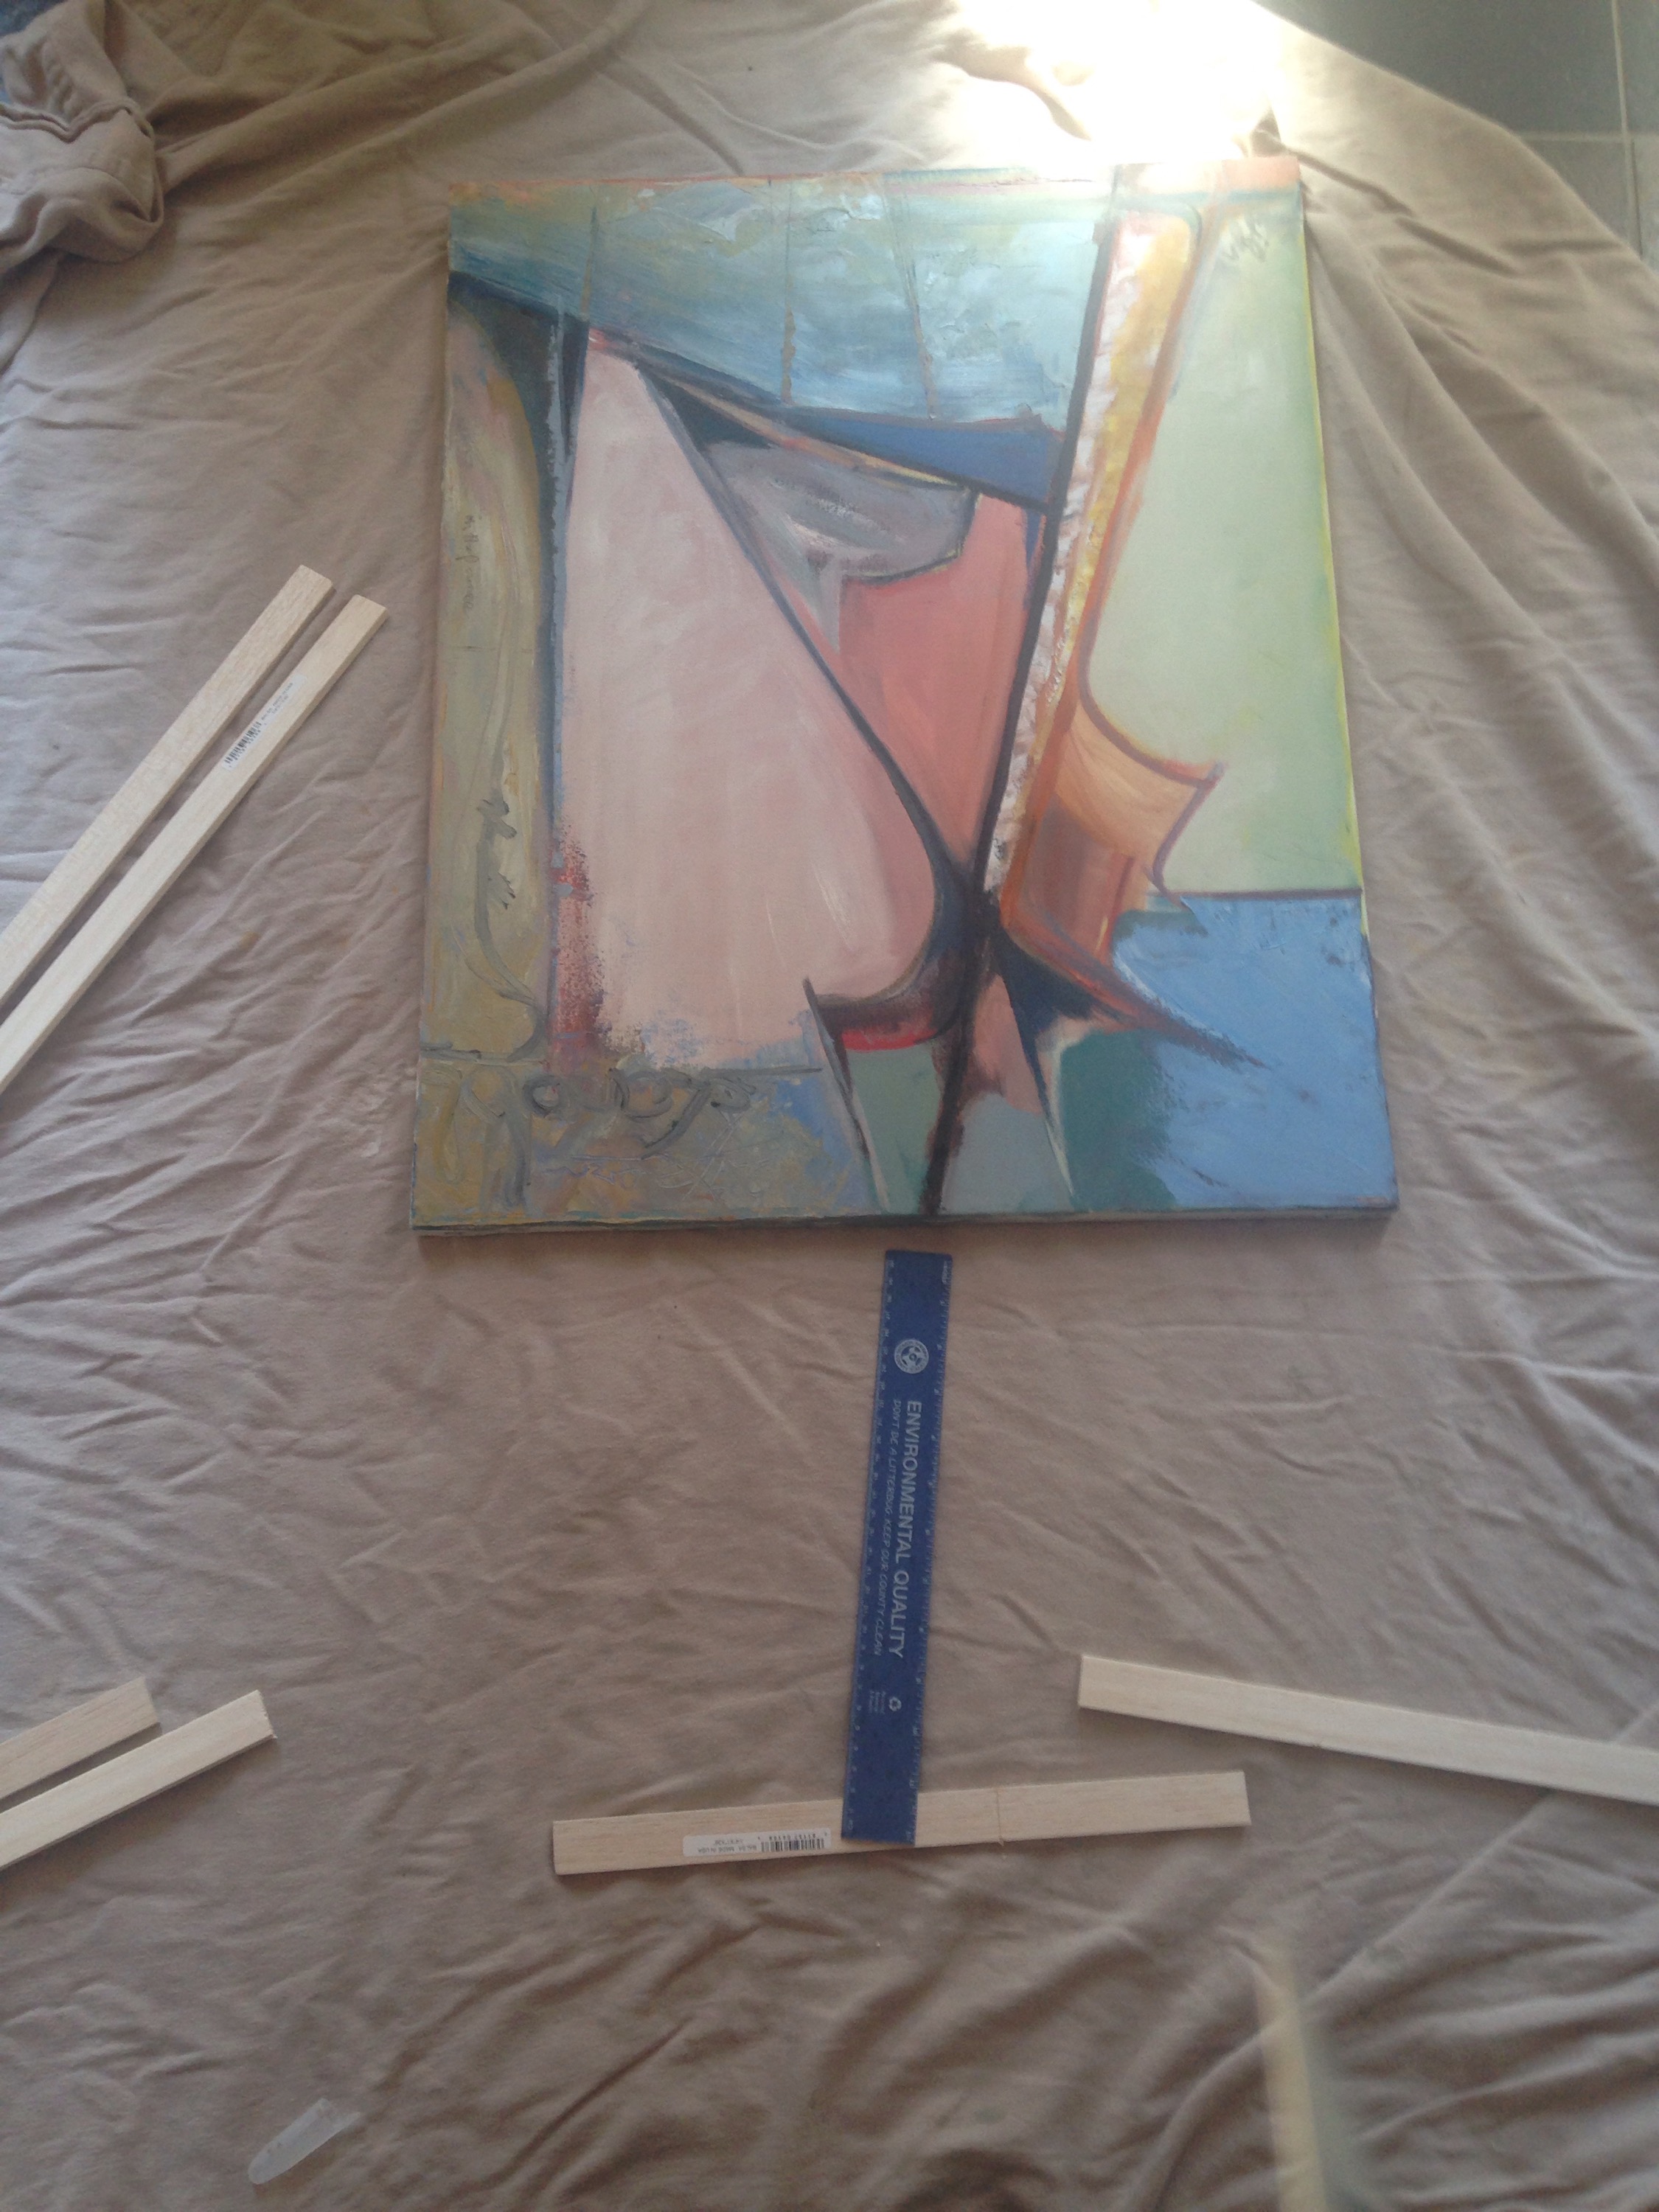
I have to say that this month’s theme couldn’t have come at a better time.  See, I recently found this canvas art at a thrift store for $6.  And was completely enamored….

I loved the colors and the contrast.  It immediately caught my eye (as did the price tag), so I adopted it and we held hands as we walked off into the sunset I took that badboy home.

The only downside was that it was an unfinished canvas with staples on the sides.  I wanted to make it appear more finished, thus, I decided to use balsa wood to create a frame.   This was SUPER easy to do, but I wanna caution… because balsa wood is so soft, you mainly wanna use it on lightweight items or items that you know wont be bumped around much as it can dent and become misshapen easily (at least mine did).   I learned this pretty quickly as I constructed my frame.  My canvas was borderline too heavy so I had to be careful that I didn’t set it down on our unevenly textured slate floors too firmly.

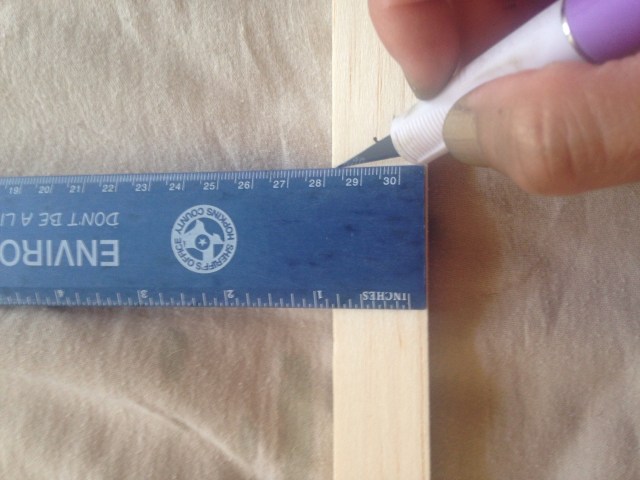
Anyways, I chose to use four pieces of 1″ x 1/4″ x 36″ balsa wood, which I purchased from Joanne’s.  Then, I simply measured my canvas and cut my balsa wood to size using the straight edge of my ruler as a guide.   I made multiple passes of the knife until I cut entirely through the wood…

IMG_4752

Next, I spray painted my balsa with my new fave, Valspar’s metallic spray paint in gold.  Once it was dry,  I simply hot glued it to the canvas…

That’s all it took!   And here’s what I was left with…

IMG_0194.jpg1

Purdy, no?  I just love this art.   Seriously.  I think it was just a homemade piece that somebody created then donated, but it’s genius.

I decided to hang it in the hangout room for now…

232323232-fp83232-uqcshlukaxroqdfv38;39-nu=3396-6-9--78-WSNRCG=364;4669-4346nu0mrj

I’m not sure if this will be it’s permanent home, as I’d like to add shelving or a picture ledge to this wall eventually, but for now I’m sort of loving it…

Here’s the view from the doorway…

232323232-fp83232-uqcshlukaxroqdfv35674-nu=3396-6-9--78-WSNRCG=364;466995346nu0mrj

I’d like to change out the grey patterned pillow cover because I feel like it’s a competing a bit with the curtains, but all in all I’m happy with the direction this room is going.  So anyways, this was a really simple and quick project that really packed an impact!   I really couldn’t be happier with how my frame turned out!

Now, check out what my bloggy friends came up with for their awesome projects… 

Advertisement

Burlap and copper pipe wall art – Monthly DIY Challenge

You guys.

It’s Monthly DIY Challenge time and, boy, do I have an easy project that packs a punch in the impact department.  And it’s cheap.  Can you tell I’m enamored?   Swooning?   In LUVVV??  I haven’t spelled “love” with a U since grade school.   That says something.  Right there.

Anyways, first of all, for anyone new to our Monthly DIY Challenge, this is a challenge that I participate in with some of my bloggy friends.  Basically, we’re assigned an item or theme and must make something with it.  Period.  Super simple and the sky’s the limit.  My personal goal in these challenges is to also keep my projects pertinent to our home.  Stuff that we need, or that can improve on form or function.   Sometimes it takes a little creativity, but it always keeps the wheels turning which is a very awesome thing.

This month, our challenge item was fabric.

fabric

I had a few ideas for this month’s challenge and after several failed attempts at other fabric-oriented projects, I ended up with a super simple tapestry wall hanging of sorts out of burlap.   See, I’d found some old burlap sacks at a thrift store a while back and I took them home with the intention of doing SOMETHING with them.   And then finally, ONE day before our pics were due for this month’s challenge, I had a lightbulb moment that put an idea to the notorious “something”.

A while back, I’d picked up the following stuff from Home Depot…

Copper pipe, brackets, and a pipe cutter.

My original plan with these items was to hang three burlap sacks side by side on one pipe, but I couldn’t find an appropriate place in our house to hang a piece that large without it making the space feel super dark (I’d initially wanted this for our hallway, but yeah, WAY dark).  So, the project kind of died.  I had this stuff on hand, just never used it.   The funny part about it was that I’d purchased a 10 foot piece of copper pipe for this very purpose.  I’m barely over 5′ tall, so here I was steering my way around HD with a pipe that was literally double my size.  You all should be proud of me.  I did not impale a single person, nor did I destroy any displays.   I did, however, collect a crowd of well-meaning passersby in the parking lot where I got many tips about how to fit the pipe into my car (through the car diagonally and out the front window for the win).  So, when I finally realized that I could still make the project happen, just with one sack instead of three, I slapped my forehead as I realized that my Home-Depot-Lancelot-Adventure was all for naught.  I totally could’ve purchased the shorter length of pipe.  Or maybe not… now I have plenty of pipe left for another project.  And another story to tell.   Glass half full, ya’ll. 😉

So, anyways, I hung my burlap sack with thumb tacks to figure out where I preferred it.   And it ended up being here…

In our guest room.   As you can see, I once again switched around the space and relocated my $7 Target-inspired bench to this wall.   It works much better here than the previous arrangement that I discussed in this post. Same story for my small dresser that was subsequently moved to the adjacent wall (ie: back to where it started).

I measured my burlap sack, which was 28″ wide.  So, I decided to cut my pipe 34″ to allow 3 inches of overhang on each side of the sack…

But, like any of my projects, there are always teeny hiccups.  Like when I went to open my pipe cutter package with a knife and apparently was feeling a little stabby…

PSA: Don’t play with knives.  I’m now on my 6th band-aid and it’s nearly bled through as I type this.   #justusescissors

Anyways, to cut my pipe, I used a hand-held pipe cutter.   You simply clamp it down on your pipe by tightening the little knob…

And twist it around the pipe a bunch of times…

As you spin the cutter around the pipe, it will begin to spin easier.  At this point, you’ll wanna tighten the knob more.  And repeat…  twist, tighten, twist, tighten, etc. until the pipe comes apart in two clean pieces…

Gaw-gee-ous. (triple-syllable Fran Drescher “gorgeous” = goodness around these parts)

Now, to deal with my burlap….

The back of my burlap sack had been cut open when the sack was emptied of its coffee bean contents, so I simply hand-stitched it up loosely with tan thread so that it wouldn’t sag once hung.

Then, I sewed the sack to my pipe with large stitches about an inch apart…

And I hung it on the wall with brackets and a few drywall anchors…

Which left this…

232323232-fp83232-uqcshlukaxroqdfv3;;62-nu=3396-6-9--78-WSNRCG=3648565954346nu0mrj

I thought about steaming the burlap to rid it of its wrinkles or possibly depositing a bit of pipe inside the sack to weigh it down and allow it to hang flat and smooth against the wall, but I decided against both options.  I love how wrinkled it is.  Everything else in the room right now is so smooth and neat that it’s a nice contrast to have something that looks a bit aged and imperfect.   I especially love it against the bold, bright fabric of the bench.  Me-Ow.   And now I’m one step closer to a finished room.   Or is it really EVER finished??  THAT is the question… 😉

So, anyways, that’s one more Monthly DIY Challenge in the sack bag!!    Now, check out the projects that my awesome buddies came up with…

TDC Before and After