Painting textured walls is definitely something that I’ve gotten accustomed to over the past 5 years of home-ownership. Along the way, I’ve made many mistakes and learned a lot. So, I thought I’d share some of my learned-the-hard ways tips and tricks.
General stuff
1. When shopping for painting materials, pick up a few of the puffy roller covers meant for heavily textured walls. They hold more paint and their poofier texture helps distribute paint within the many recesses of the walls more easily than a thinner roller.
2. I do NOT recommend using flat finish paint on any wall that may get dirty (for me that is all walls). We painted the majority of our last house with flat paint and soon learned that cleaning it was impossible. Even just dabbing it with a damp rag would leave dark spots behind. I ended up having to bust out the touch-up paint to cover blemishes, which…Holy Crow… got old fast. Perhaps there are tricks to cleaning flat paint, but I never quite figured them out. Now, I use eggshell finish on all our walls and I love it. It has a slight gloss to it, so it’s easier to clean but has the closest look to flat paint.
Edging
After painting almost two complete houses, I’ve pretty much gotten to the point where I edge walls freehand without tape. I much prefer this method as I absolutely despise taping. It just takes forever. And I’m impatient. And to be honest, I’ve never had much luck with it. Despite this, I used tape quite a bit at the beginning, so I have a few tips that I know for sure are winners, plus some freehand tips as well.
Taping
3. Unless you have crown molding, do NOT tape off textured ceilings. You will be disappointed. Trust me. This was the very first mistake I made in the very first room I ever painted. I taped off our ceiling and painted (mistake number one), waited for the paint to dry (mistake number two), then removed the tape. What I was left with was either bleeds on the ceiling along the recesses in texture that the tape didn’t grip or paint that was peeled off the wall because I’d allowed the paint to dry too long before removing the tape. So, this is a twofer… Don’t tape off textured ceilings and always remove tape immediately after painting while your paint is still damp.
4. When taping baseboards, make sure they’re clean and free from dust. Dust and dirt prevent the tape from adhering which can lead to bleed-through.
Freehand
5. For edging textured walls, I’ve found that a good quality 2 1/2″ angled brush works best. Mine is a Wooster and I’ve had it since we moved into our current house. I’ve painted every room with it, plus Lisa’s guest room and it’s still going strong. I’ve tried other angled brushes, and while smaller ones may work better for hard-to-reach places, I’ve found that the fullness of the 2 1/2″ allows it to hold more paint, which helps when it comes to filling all the nooks and crannies along the edge of our walls. Plus, the angled shape of the brush helps to create a crisper line.
6. This guy…


Is my favorite edging tool beside my brush. It’s the Handy Paint Cup. The handle comfortably hangs over your hand and the cup holds a good amount of paint. My favorite part is that if you need to set your brush down, there’s a magnet inside on the back edge of the cup for just this purpose. It holds your brush erect over your paint so it doesn’t get completely submerged. My cup has obviously seen better days. I bought it when I got my Wooster after we moved into our house. But he’s been so good to me that I haven’t had the heart to part with him. They’re only about 3 bucks at Lowes or Home Depot and totally worth it.
7. When edging along textured ceilings, load your brush well. NOT to where it’s dripping, though. Start at the ceiling and SLOWLY drag the brush along the ceiling line. Slow is key as it allows the paint to creep into all the crevices as you move along.
8. When edging baseboards, the opposite is true. Do NOT overload your brush. I usually start 2-3 inches above my baseboard and work my way down, so that there’s less paint on the brush by the time I get to the baseboard. The first time I painted a baseboard freehand, I was so impressed with myself for painting a straight, crisp line. Then, five minutes later it was a drippy mess. Turns out, I’d applied too much paint and gravity had taken over. Total bummer.
Painting ceilings
9. When painting ceilings, do not over-saturate your roller, apply several light coats and roll slowly to minimize splatter. If you roll it on too thick, paint will drip in your hair. And you will forget to tell your hairstylist at your appointment the following day. And she will make peculiar faces during hair-washing. Then, you will recognize your egregious error of omission and practically shout “It’sjustpaint,Iswear! Itwouldn’tcomeoutwhenIwashedmyhair!!”. Then, an awkward silence will commence as your stylist realizes she’s been caught red-handed making nasty faces at your head. True story. So, save some all-around embarrassment and paint your ceilings with light, slow coats.
Touch ups
10. Truth be told, I rarely ever do two full coats on our walls. I definitely roll over an area again if it’s obvious that the missed spots were due to inadequate paint on the roller to begin with. But, I’ve found that often, if a roller misses spots the first time on a textured wall they will miss them again. The reason that I’m confident about this is that when I roll, I roll over an area well… several times in different directions to ensure that I’m getting paint into the wall divots to the best of my ability (and yes, I hear “divot” like Ross says “PivOTT!”). In the cases that I’m thinking of, the missed spots were due to a more heavily textured area of the wall that the roller had trouble reaching. This came to light after we painted our last house’s living room. There was one area that I rolled and rolled and rolled and there were STILL little missed specks. For this reason, I always wait until the paint is dry so I can clearly spot places I’ve missed, then I go around and touch them up with a brush.
Break-time
11. If I’m taking a break or waiting to finish a room until the following day, I don’t wash my stuff…. I wrap it. I wrap my brushes with a few layers of tightly-wrapped plastic wrap, like so (…”wrap” three times in one sentence… nailed it.)…
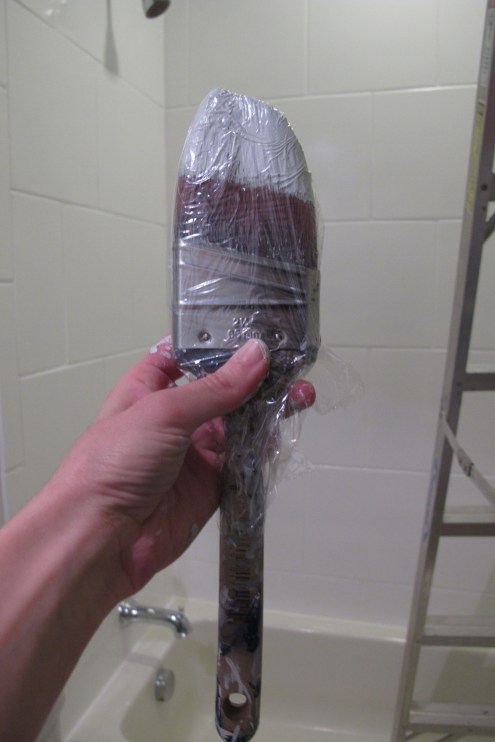
Tight is key. You want zero air getting through. I cover my paint tray and roller with a nice layer of plastic wrap and then stick them inside a few Walmart bags…
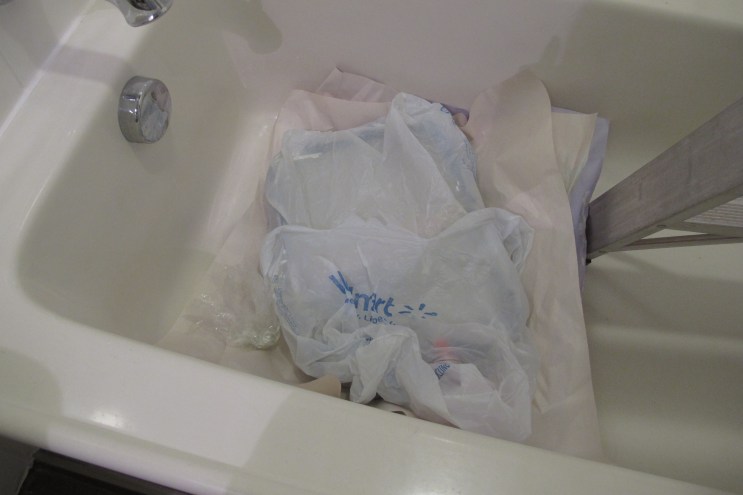
I’ve left stuff like this for several days before and it’s kept everything moist and usable until I was ready for it again. Also, I once read that paint can change viscosity if uncovered and untouched for as little as ten minutes, so I go ahead and throw a sheet of plastic over my tray if I know I won’t be rolling for a bit.
So, ladies and gents, that’s all I’ve got for now.
Does anybody else have any tips for painting textured walls to add?
32.884475
-97.405355
Like what you see? Please share!!