Alright, guys. I’ve gotta warn you. This is a whopper of a post. Like, consider yourself in for the long haul. Grab some coffee, cozy up in a comfortable position, and let’s do this.
I’d originally wanted to publish several progress posts during the course of our kitchen renovation, but somehow that never happened. If you follow me on Instagram, you’ve seen some of the progress as it’s happened and a few of those shots have made it into this post as well. Ultimately, I decided to just wait until completion and give it to y’all in one go, with instant gratification, in the form of before and after pics.
So, with that said, ya ready??
LET’S DO THIS.
If there was one room that impeded our flow of daily life from the time we moved in, it was our kitchen.

Many, many reasons are responsible for our constant kitchen begrudgement, but the most pressing???
This stupid, partially working stove…
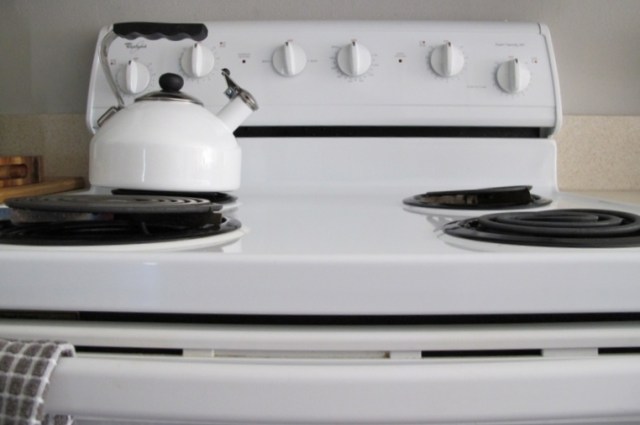
Please note the exceptionally wonky burners.
On more than one occasion, they sent pots of boiling water sliding to the middle of the stove. JUST from the vibration of the water. Dangerous, you ask?? Why yes, I say. I’m just grateful that the pots stayed on the stove and didn’t maim one of us in the process. The front burners (which were the only ones that worked… and “worked” is a term used extremely loosely here) would intermittently stop heating in the middle of cooking. Like, I’d be cooking eggs and halfway through… nothing. No heat. Dead burner. I’d have to bang them around to get them to heat up again (which apparently was highly entertaining for guests).
I tried replacing the burners, but the openings in our stovetop were slightly irregular making replacement burners too large, which only made the problem worse. The oven was no gem either…. The temperature was off, so food either was either under or over-cooked when we baked. Which was rare, because… well… Ugh.
Now, as awful as our range was, it shouldn’t totally steal the show here. It’s worth mentioning that our microwave would randomly pop open by itself, which was a little frightening. The dishwasher (operative word being “wash”, which it didn’t) leaked upon occasion. And while our fridge was newer and worked just fine, it was black, which didn’t match. And it was GINORMOUS. Which did not for pretty make in our kitchen. It was sort of like a giant black hole, visually.
So, you get the point here. Appliances. Problems. The whole lot of ‘em.
But, ESPECIALLY the range.
I would’ve been content with simply purchasing new appliances and waiting a while to tackle a full renovation. But the problem was this…

Whoever installed the chipping formica countertops, made them about ½ inch too long into the range opening (1/4″ on each side). Thus, a standard range wouldn’t fit into the opening without the countertops being removed first. You can see in the pic above how our smaller-than-average range was STILL squished in there (it measured about 1/4″ narrower than the ranges on the market today and it BARELY fit). I searched and searched and couldn’t find a smaller range that would work. We talked about shaving down the current counters, but not only would that look terrible, we’d have to remove the VERY glued-down counters to do so, which just wasn’t worth the effort. We discussed using inexpensive Ikea butcher block as an interim solution, but ultimately, I didn’t think that butcher block was the right choice for our style of home and we didn’t want to spend $500 on something that we weren’t keeping.
So, with our range on its final last leg, we decided to just do it.
{{GULP!!}}
The original plan was to simply change out the countertops and paint/modify the “Nose-Cabinets” (aptly named (by me) thanks to the weird placement of the knobs). Observe…
Warning: Amateur reenactment:

Feel like you’re being watched, do ya?? 😉
But, Joey was a huge advocate for new cabinetry and replacing everything.
Now, our cabinets weren’t in stellar shape – they were poorly painted, chipped, nasty, with sticking drawers, etc.-, but I didn’t want to go through the expense and effort of replacing them. Plus, the thought of being sans kitchen for months on end terrified me. But, to humor him, I decided to plan out our “dream” kitchen using the Ikea Kitchen Planner just to see how costly new cabinets would be. I’d heard great things about the quality of their cabinetry… the soft-close hinges, durable finishes, etc. So, I figured… We’ll see.
In my head, I thought it would be an easy $10K, which was a no-go for us. No, thank you. We’ll just keep our “Nose-Cabinets” and enjoy life.
But, I was stunned to see that an entire kitchen of brand new cabinetry, would cost less than half that from Ikea. I was seriously shocked. While that’s still a large chunk of change, it was much more affordable than I could’ve imagined. And really, it was now or never, because once we changed out the countertops, that was it. We wouldn’t go back.
So, I reluctantly agreed.
And I humorously witnessed the profound relief on the majority of our family and friend’s faces when we broke the news.
And then the truth started pouring out…
“Oh, I’m so glad you’re replacing those!” “That’s the best decision ever!” “I’ve always hated those cabinets!”
Turns out, everyone was rooting for new cabinetry but me (and I was only pro-keep-the-cabinets out of renovation fear, really). It was like telling them that I’d broken up with the worst boyfriend ever, whom they actually hated, but never shared their opinion of. Finally. After years of dealing with him, I’d finally seen the light and cut ties. And now they could tell me how they really felt. Poor little misfit Nose-Cabinets. 😉
We decided to keep our current layout because after a year and a half of living with it, we had no complaints. When we first moved in, we’d thought that we’d open up the walls in this space, but believe it or not, we actually like having a closed floor plan. It’s nice having a space just for cooking/eating. Plus, when we have people over, the kitchen can be a total disaster, but the rest of the house still feels clean which was NOT the case with our previous open-floorpans. So, the walls would stay intact. And everything would remain in it’s place.
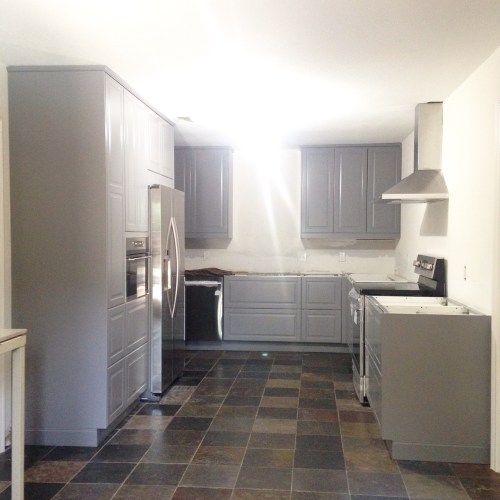
After a few weeks of playing with the kitchen planner, here’s what we ultimately came up with as far as cabinetry…

We chose the Bodbyn Grey cabinet line, which is a nice, medium grey color. It had a touch of traditional style which coordinated with the built-ins in the rest of the house, but would still mesh well with the modern-vintage style that I ultimately wanted for this space.
The two main changes that we made from our previous kitchen in terms of function/aesthetics were…
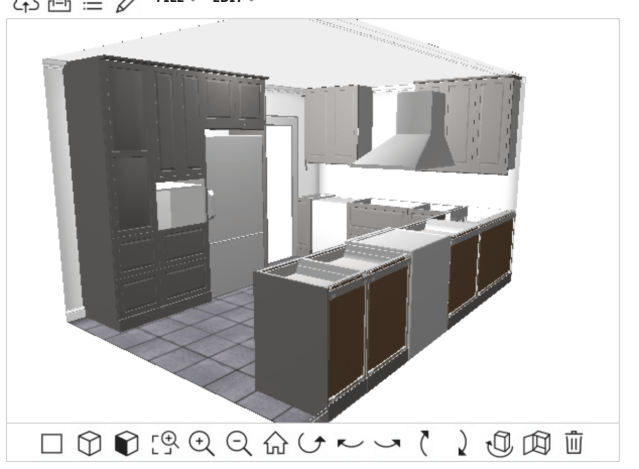
- We added a built-in pantry around the refrigerator. Our existing pantry was in the laundry room by the back of the house. And while it wasn’t the end of the world to have it there, it would definitely have been more convenient to have ingredients closer to the prep area rather than having to run to an adjoining room if I suddenly needed something.

2. We added a vent hood and eliminated the upper cabinetry on the wall below in favor of open-shelving. This would open up the room and add some texture and variety (not to mention warmth to the space).
We finalized our plan, then headed to Ikea once their annual kitchen sale started.
We’d expected the purchasing process to take hours based on what I’d read, but it was actually super fast for us. Probably a function of going on a rainy Thursday morning. We got there at opening and an hour and a half later, we were loading our new kitchen into our trucks (and by “we”, I mean Joey and my father-in-law. Clearly.) ;)…

….And yes, those ARE 128 BOXES!!! 128!!! And there were still 4 more that I had to pick later as they were out of stock.
(Note to anyone buying a built-in microwave through Ikea: They DO NOT stock them according to the kitchen specialist who helped us. And they will charge a $99 shipping fee to send it to your house. There’s no getting around this unless you’re lucky enough to have a distribution warehouse near you. We did, fortunately, so we picked ours up there at no charge, but be sure to account for this extra cost if you don’t.)
Now, for the (more) fun stuff…
(I must warn that the majority of my progress pics were taken on my crappy phone… I’ve since gotten a new one (or, ya know, stopped being lazy and used my camera), but in the meantime, sorry for grainy pictures)
So, ONWARD… Unfortunately, I wasn’t able to help out with the first parts of the renovation thanks to my back injury, so most of it was on Joey. But seriously y’all, he killed it. And he didn’t complain once. He was awesome. He demoed everything in the kitchen over the course of a few days…

We lived in various stages of ugly for some time (Luckily, Lucas’s cuteness helped balance the scales)…

Aaaaand this next pic was the point where I walked in, and was like “FOR THE LOVE OF PETE I HOPE WE KNOW WHAT WE’RE DOING.”…

…then we hired a drywall guy to come out and patch and retexture the walls to match the rest of the room. Joey painted the ceiling a crisp, bright white…

….and, cabinet installation began. Joey and my father-in-law, Keith, were the main players, but my dad, and our neighbor also chipped in and helped with cabinet assembly…


We decided to leave a “time capsule” for our house’s future owners by writing a note on top of our refrigerator cabinet for them to find when they renovate our “outdated” kitchen in 60 years…

I told Joey to write something heartfelt.

He went with “YEA IKEA!!”.
Completing all the cabinetry installation took about 3 weeks (in between work and life), but we finally got to a point where we could order our countertops.
We ended up going through Lowe’s. I wanted sleek white countertops, which would contrast with vintagey gold hardware in keeping with the modern/vintage feel that I was seeking. Here’s a shot of the hardware that I shared on Instagram (it’s from the Martha Stewart line at Home Depot)…

After weighing our options, we ultimately went with quartz for it’s durability and stain-resistance. It seemed worth the investment since there would be no color variations to hide scratches or stains in our white countertops. Our final choice was Silestone quartz in White Zeus Extreme.
So, we ordered the countertops.
And we waited.
And waited.
Aaaand waited. This was the longest amount of waiting time throughout the entire reno. From the time we ordered until installation of the counters, was approximately five weeks. Surprisingly, we made it without eating out a whole lot, which was mainly due to frozen meals and bumming off of family. (“Why yes, leftovers ARE accepted. THANK you.”) 😉
At this point, Joey donned his “electrician cap” (notanelectrician. justworethecap) and installed 6 recessed lights to replace the outdated fluorescent fixture that had previously resided there.

I painted the room a light greigey color (Silverbirch by Glidden)…

THEN, Lowe’s FINALLY installed the countertops. But, (wompwomp!) two of the three slabs were wrong (one had the wrong edge and the other was an inch too short), so we ended up with just one little bit of teaser countertop for a few days…

Fortunately, they fixed the problems and reinstalled the countertops two days later. As annoying as it was, we were pretty impressed with their efforts to correct the problem.
After that, we decided to spoil ourselves and hire out the backsplash installation. #bestdecisionever We’d gotten a great deal on materials through Floor & Decor, and found a guy who quoted us a great price for installation, so we figured, why not.

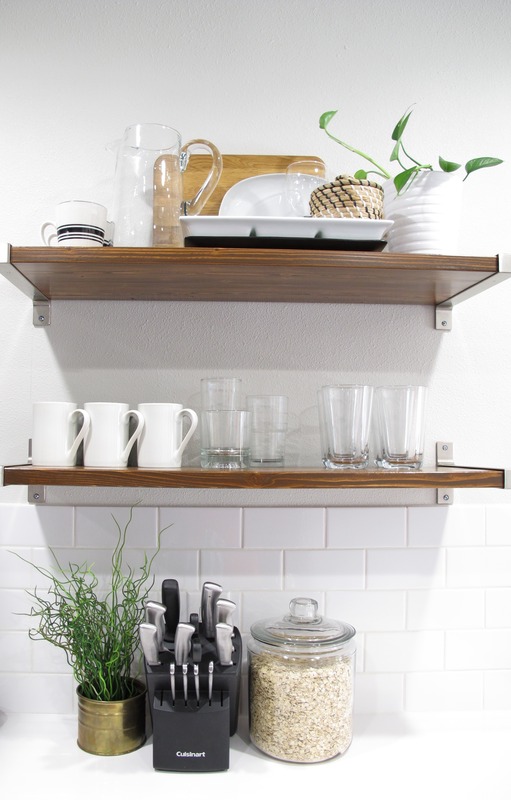
Once the backsplash was complete, we hung shelves, and I went to town accessorizing… which brings us to today.
So, for real…. are you guys ready for some before and afters?? I know I am. (Insert jazzhands + permasmile) I’ve been waiting for this for over three months!!!
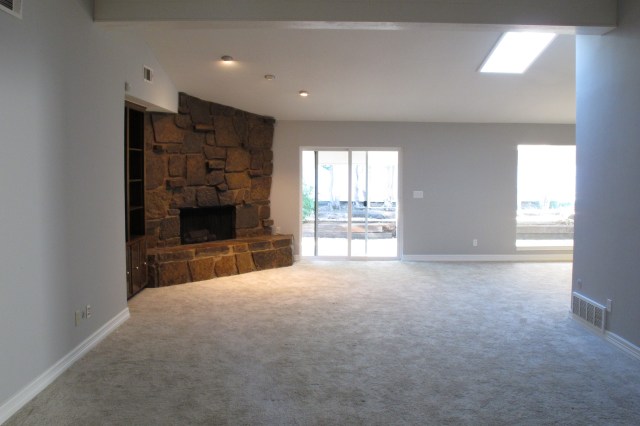
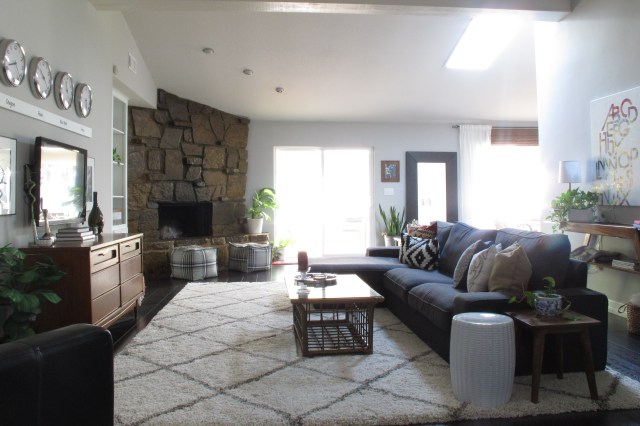
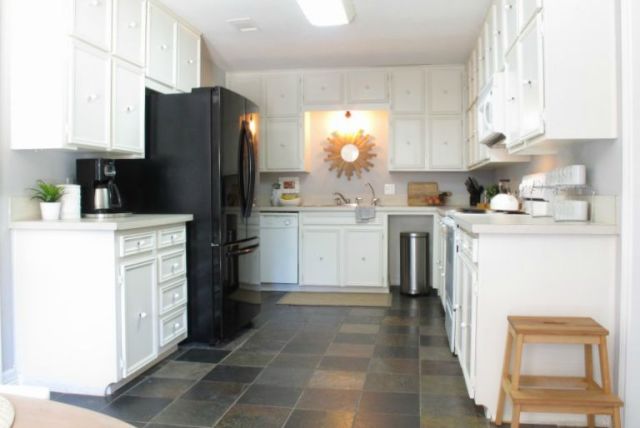
So, here’s the “lovely” before shot from above so you don’t have to scroll up….
And here’s where we are now…


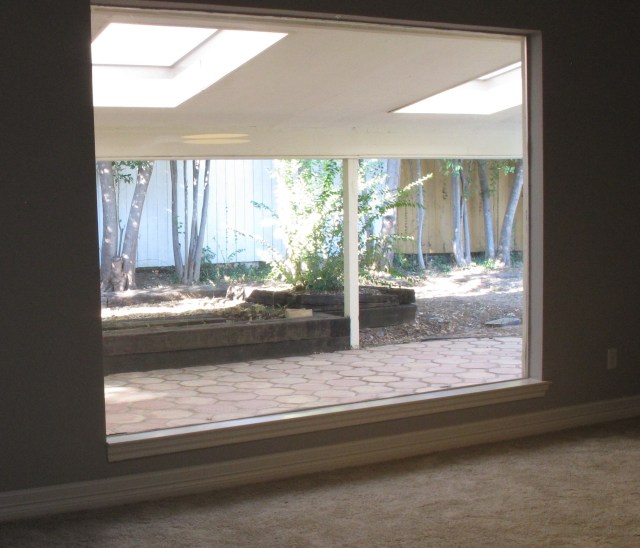
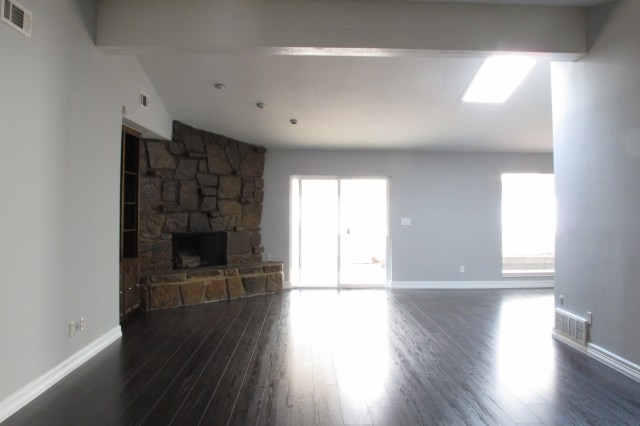
Here’s another before angle…

And now….

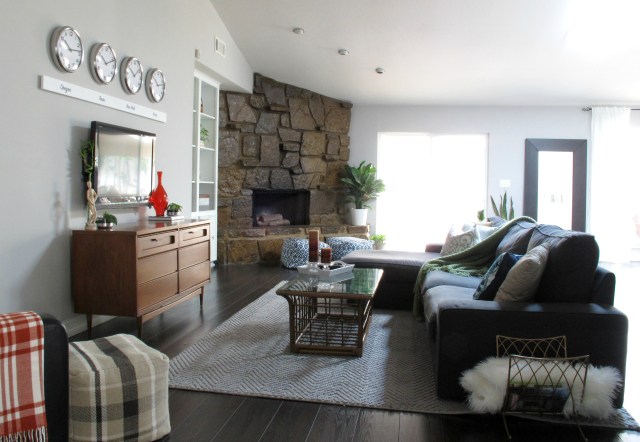
And since that before shot showed a glimpse into the dining room when we moved in, here’s a glimpse now…

Gah, before and afters are fun. You have no idea how much I’m geeking out right now. #playingitcoolcardrevoked
So, let’s pretend you arrived at our front door and entered the kitchen from the foyer. I’m sorry to say that this was the view that slapped you in the face…

But, now you see this…

Having used the kitchen for several weeks now, I have to say that the built-in pantry below was a total game-changer in how our kitchen functions. This was the best, most awesome, actually-makes-me-wanna-cook-again idea we’ve had throughout this entire reno…. (Yes, I’m looking at you, floor-to-ceiling-pantry. Smooches.)

Get this. All of our food is now IN THE KITCHEN. (fist pump!)
Funny story: Anyone who purchases an Ikea built-in microwave, be prepared. If you use it for over 3 minutes or more than once in 10 minutes it automatically enters a “cooling cycle” that looks and sounds no different than when it’s cooking. I had no idea, so the first time the microwave did that, and didn’t shut down when I opened the door to retrieve my food, I was convinced that it would kill us all and my arm would rot and fall off for having reached in there. #itdidnt Then, I learned about the cooling cycle and was all “Haha! <-(fake) Aaaaaaaannnnnyyyywaaaaays…”. And Joey commenced in overly-dramatic eye-rolling.
Here’s a view towards the breakfast nook…

And a different view, just to show off my mother-in-law’s artwork…

I have to admit that this part of our kitchen (below) was inspired by one of my favorite blogger’s kitchens (Dana at House*Tweaking). I love how her backsplash goes up to the vent hood and her Ikea brackets with wooden shelves that flank either side, so I did the most obvious thing and copied that gold…

I chose the stain color (which appears yellower in this pic than in real life for some reason) to coordinate with our mid-century Drexel, which sits just inside the dining room (it’s Early American by Varathane for anyone wondering)….

Here’s a shot of the sink area with the pendant light turned off so you can see better what it looks like (it’s the globe pendant from West Elm… also inspired by Dana’s kitchen)…

That painting was thrifted and I refinished the original frame.
And one more shot, because, well, you’ve made it this far…

This renovation was by far the most extensive we’ve ever completed. And with the exception of drywall retexturing and backsplash installation we did it all ourselves. We are so proud and RELIEVED to have a kitchen again. One with a FUNCTIONING RANGE. Ha! I have to say that I’ve baked more in the past few weeks than I had in the entire year and a half that we lived with our crappy, old kitchen. It. Feels. Glorious.
And now we’re thinking about our next project. (YESSSS!!!)
So, anyways, thanks for sticking with me!!!! Have a good one!
(Psssst… wanna see how our kitchen looks now, after a year of tweaking?? Click here.)
Like what you see? Please share!!