Trial and error is a HUGE part of making a house a home. I have no training and or expertise when it comes to DIY home stuff. What I do have is ‘try it’, ‘live with it’ ‘change it’, and ‘repeat as necessary’. Just basically jumping in, learning from my mistakes, and determining what I like (and don’t) by living with stuff and changing it if need be. Our photo wall is a perfect example of this. It’s come about via a LOT of trial and error over many months (and many, many holes in the wall. Heehee! Whoops.) So, in good ole’ Linda Richman fashion, lets “discuss”…
The wall was originally started as an attempt to get as many frames off the floor and onto the wall as possible to clear out some space. I had seen frame collages on Pinterest and various design blogs and thought they were neat, so I figured “Why not? I can always patch the holes if I hate it.”.
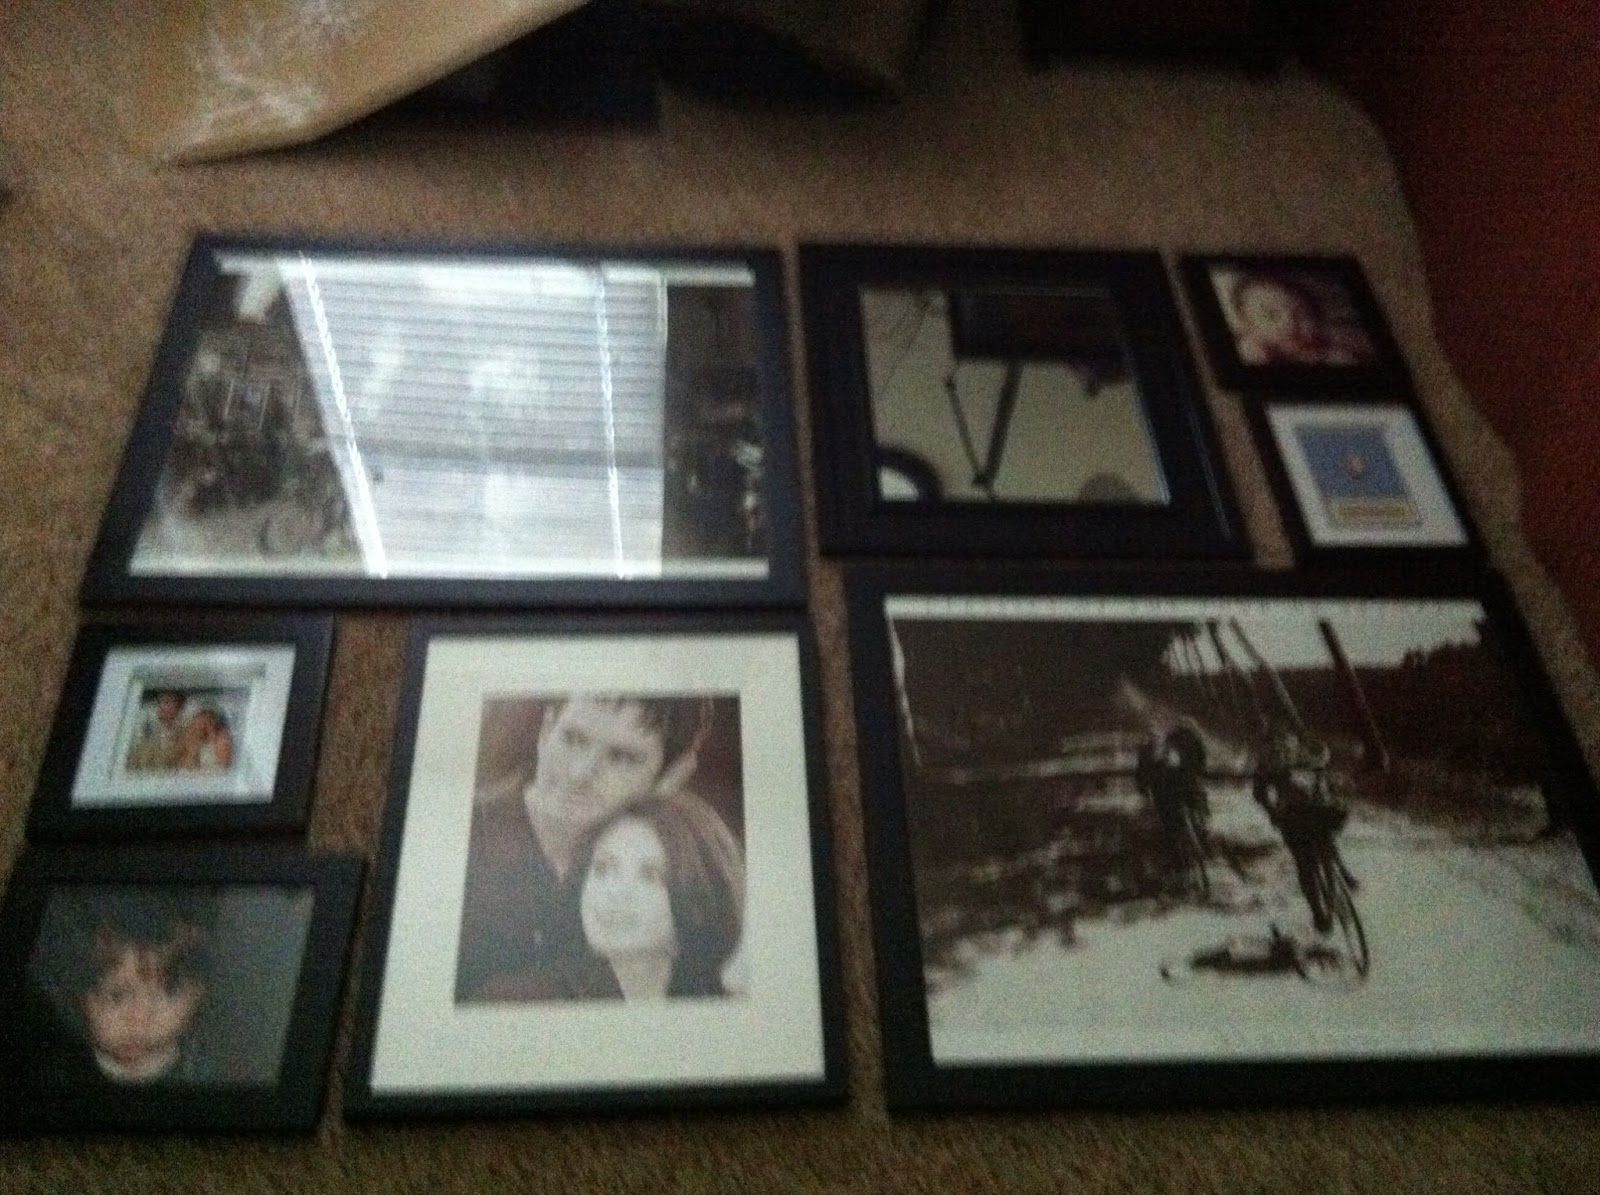
I started by laying out the frames on the floor and playing with them until I was happy with the arrangement.
Like this…. (sorry for the picture quality)
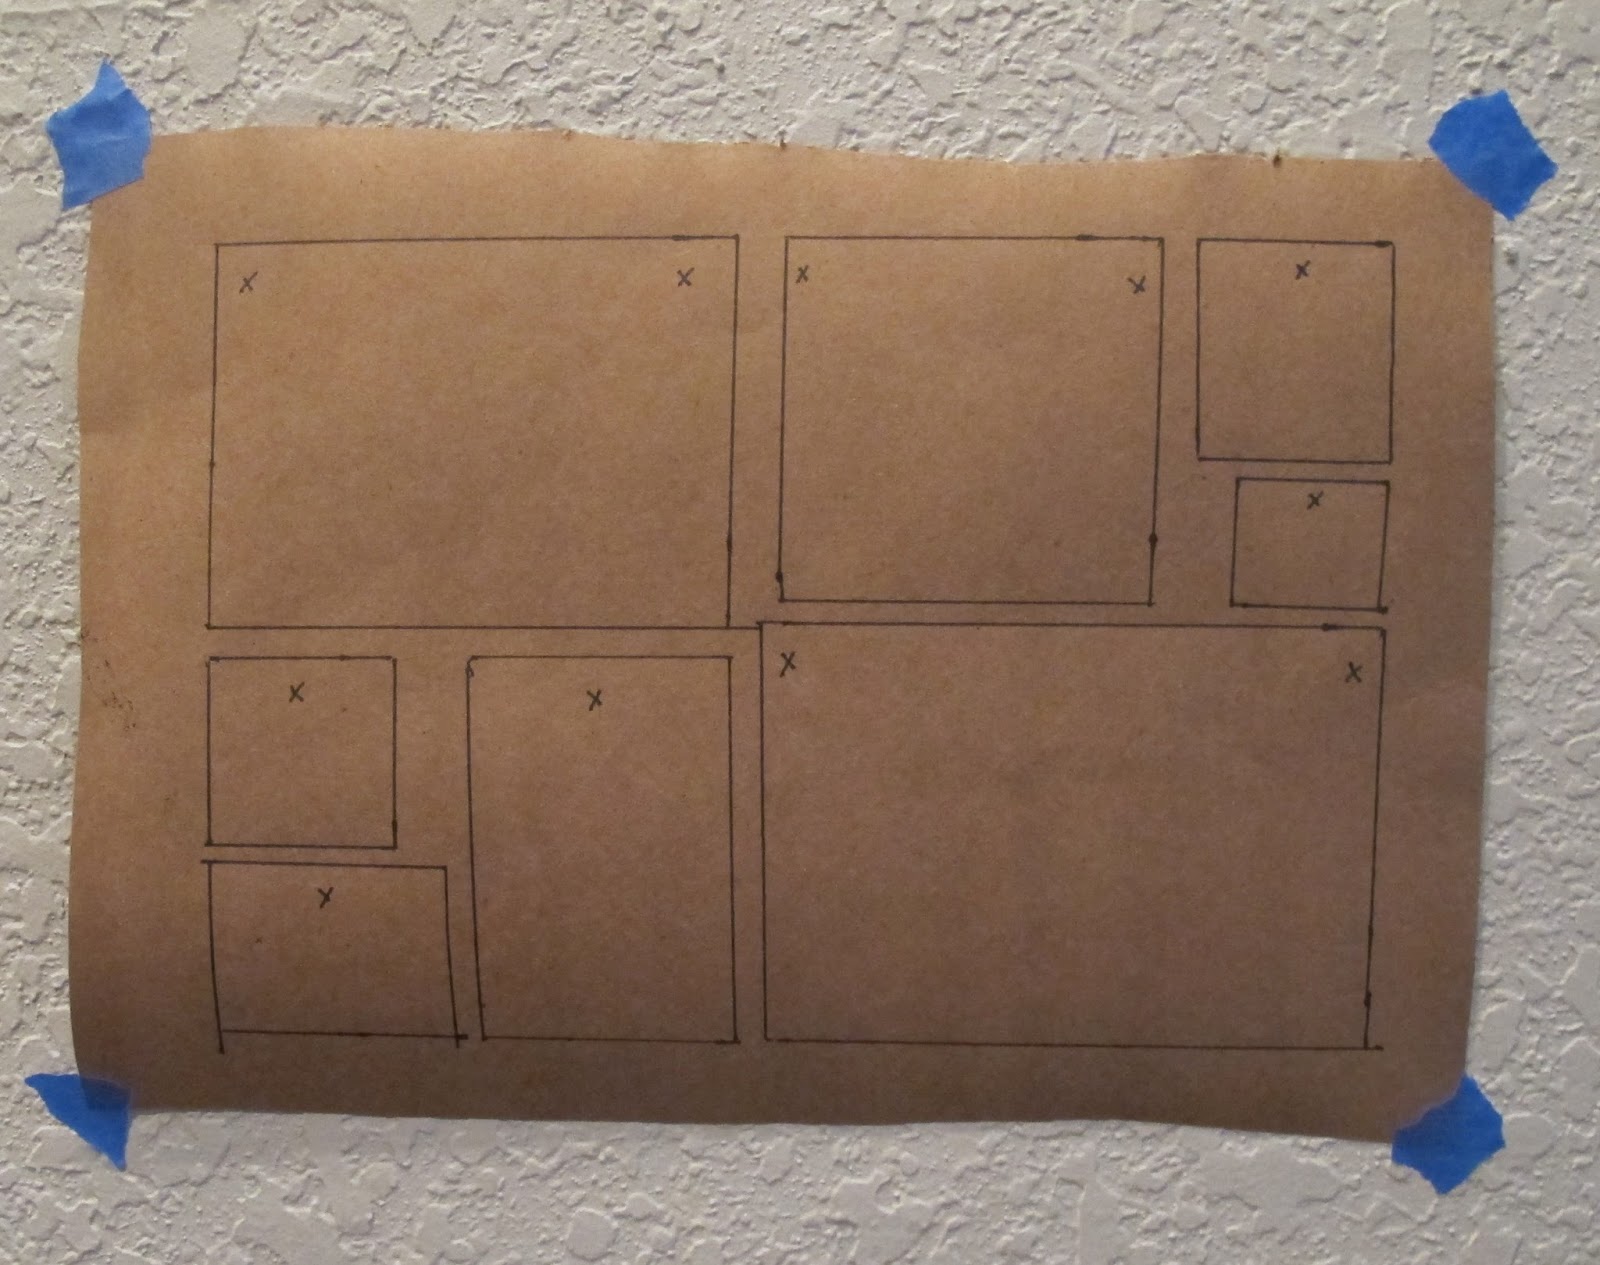
Then, I decided that I needed a template to assist in hanging them. I found this tutorial on Young House Love and followed their lead. To start, I unrolled some brown paper onto the floor and laid the frames on it in my preferred arrangement (In hindsight news, if you’re planning a project like this yourself, put the paper under the frames first. Not sure why I didn’t think of that myself.). Anyhoo… Next, I traced the outline of each frame onto the paper with a pen. I measured where the hooks were located on the back of each frame and marked them with “x”s in their corresponding boxes on the brown paper. Then, I hung the brown paper on the wall with painters tape and moved it around until I was satisfied with the placement. It looked a little like this….
Then, I simply hammered nails (and inserted screws with anchors for the mirror) straight through the “x”s on my paper. Once they were all placed, I tore off the paper and hung my frames.
And this is what I was left with….

Repeat after me… Meh. Although I liked the arrangement, it was too much black once I got it up there between its neighboring mirror, chair, and end table. (Also, feast your eyes on the original living room decor.) So, I decided to remove the frames to spray-paint them white. At this point, I realized that I had accidentally purchased flat finish spray paint. Dang. But being the impatient girl I am, I said, [the less classy version of] “Oh well!” and painted them anyways. Luckily, I ended up liking them better with a flat finish. So, happy accident there.
Here’s an “in progress” shot for ya…. Eventually only the mirror was black.

After living with it for a while, I decided there was too much “square” going on, so I added a few more frames, like this…..

Then, a few months later, a good friend commented that it would look better if the photos were all black and white. I had thought about that previously, but honestly, was just too lazy to get the pics reprinted again. Her tactfully put and appreciated comment got the wheels turning. I printed the B&W pics on plain old computer paper first to make sure I’d like them (I printed some of them in larger sizes as well to do away with some of the matting). ….and I LOVED them, so I got them reprinted in higher quality photos (as in, higher quality than computer paper), and I was left with this….

….Which I liked, but thought was too much black again! Jeepers. I also thought that the photo collage felt unbalanced next to the height of our new Ikea shelves and accessories. So, I decided to spray paint the mirror red and add a few more frames up top to give some much needed height. Which leads us to today….


FINALLY! It took a small journey of change, but seriously, stick a fork in her. She’s done. I’m loving the asymmetrical arrangement and the little pop of red. It feels like bling to me. Like a good pair of red pumps with a neutral outfit. Thus, she will remain in her happy place for a while… at least until Christmas when I plan to jazz her up a bit. Oh. Yeah.

Excellent instruction. You are a good teacher!
Thanks, Mac! 🙂
Where’s Larry the Table Guy??? I like what you’ve done. It looks great and i like the red framed mirror. Nice job!
Im happy to say that Larry the Table guy is alive and well and living happily with his burlap hydrangea. Thanks! 🙂
I’ve met Larry! He’s a good-looking guy but doesn’t say much! Great make-over!
Hahahahaaaa!!!! Larry’s pretty mysterious.