Art for Alex

As some of you may already know, my brother Alex lost his life in Afghanistan in November.  And I have to say that I’ve never been so grateful for this little blog as I was during that awful time.  This outlet of mine gave me a place to write about him and honor him in the only way I knew how.  And I’m convinced that this was the most therapeutic action I could’ve taken.  I wrote the majority of Alex’s Post the night we found out and I go back and read it periodically, along with the very sweet comments that people were kind enough to leave.  It helps somehow.  It makes me feel closer to him every time I read it.

I think I’ve been in some sort of avoidance/denial mode for the majority of the last few months (and probably still am to some extent). But, I’ve finally gotten to a point where I’ve been able to handle going through my stuff and the things given to me in his honor to figure out what to display.

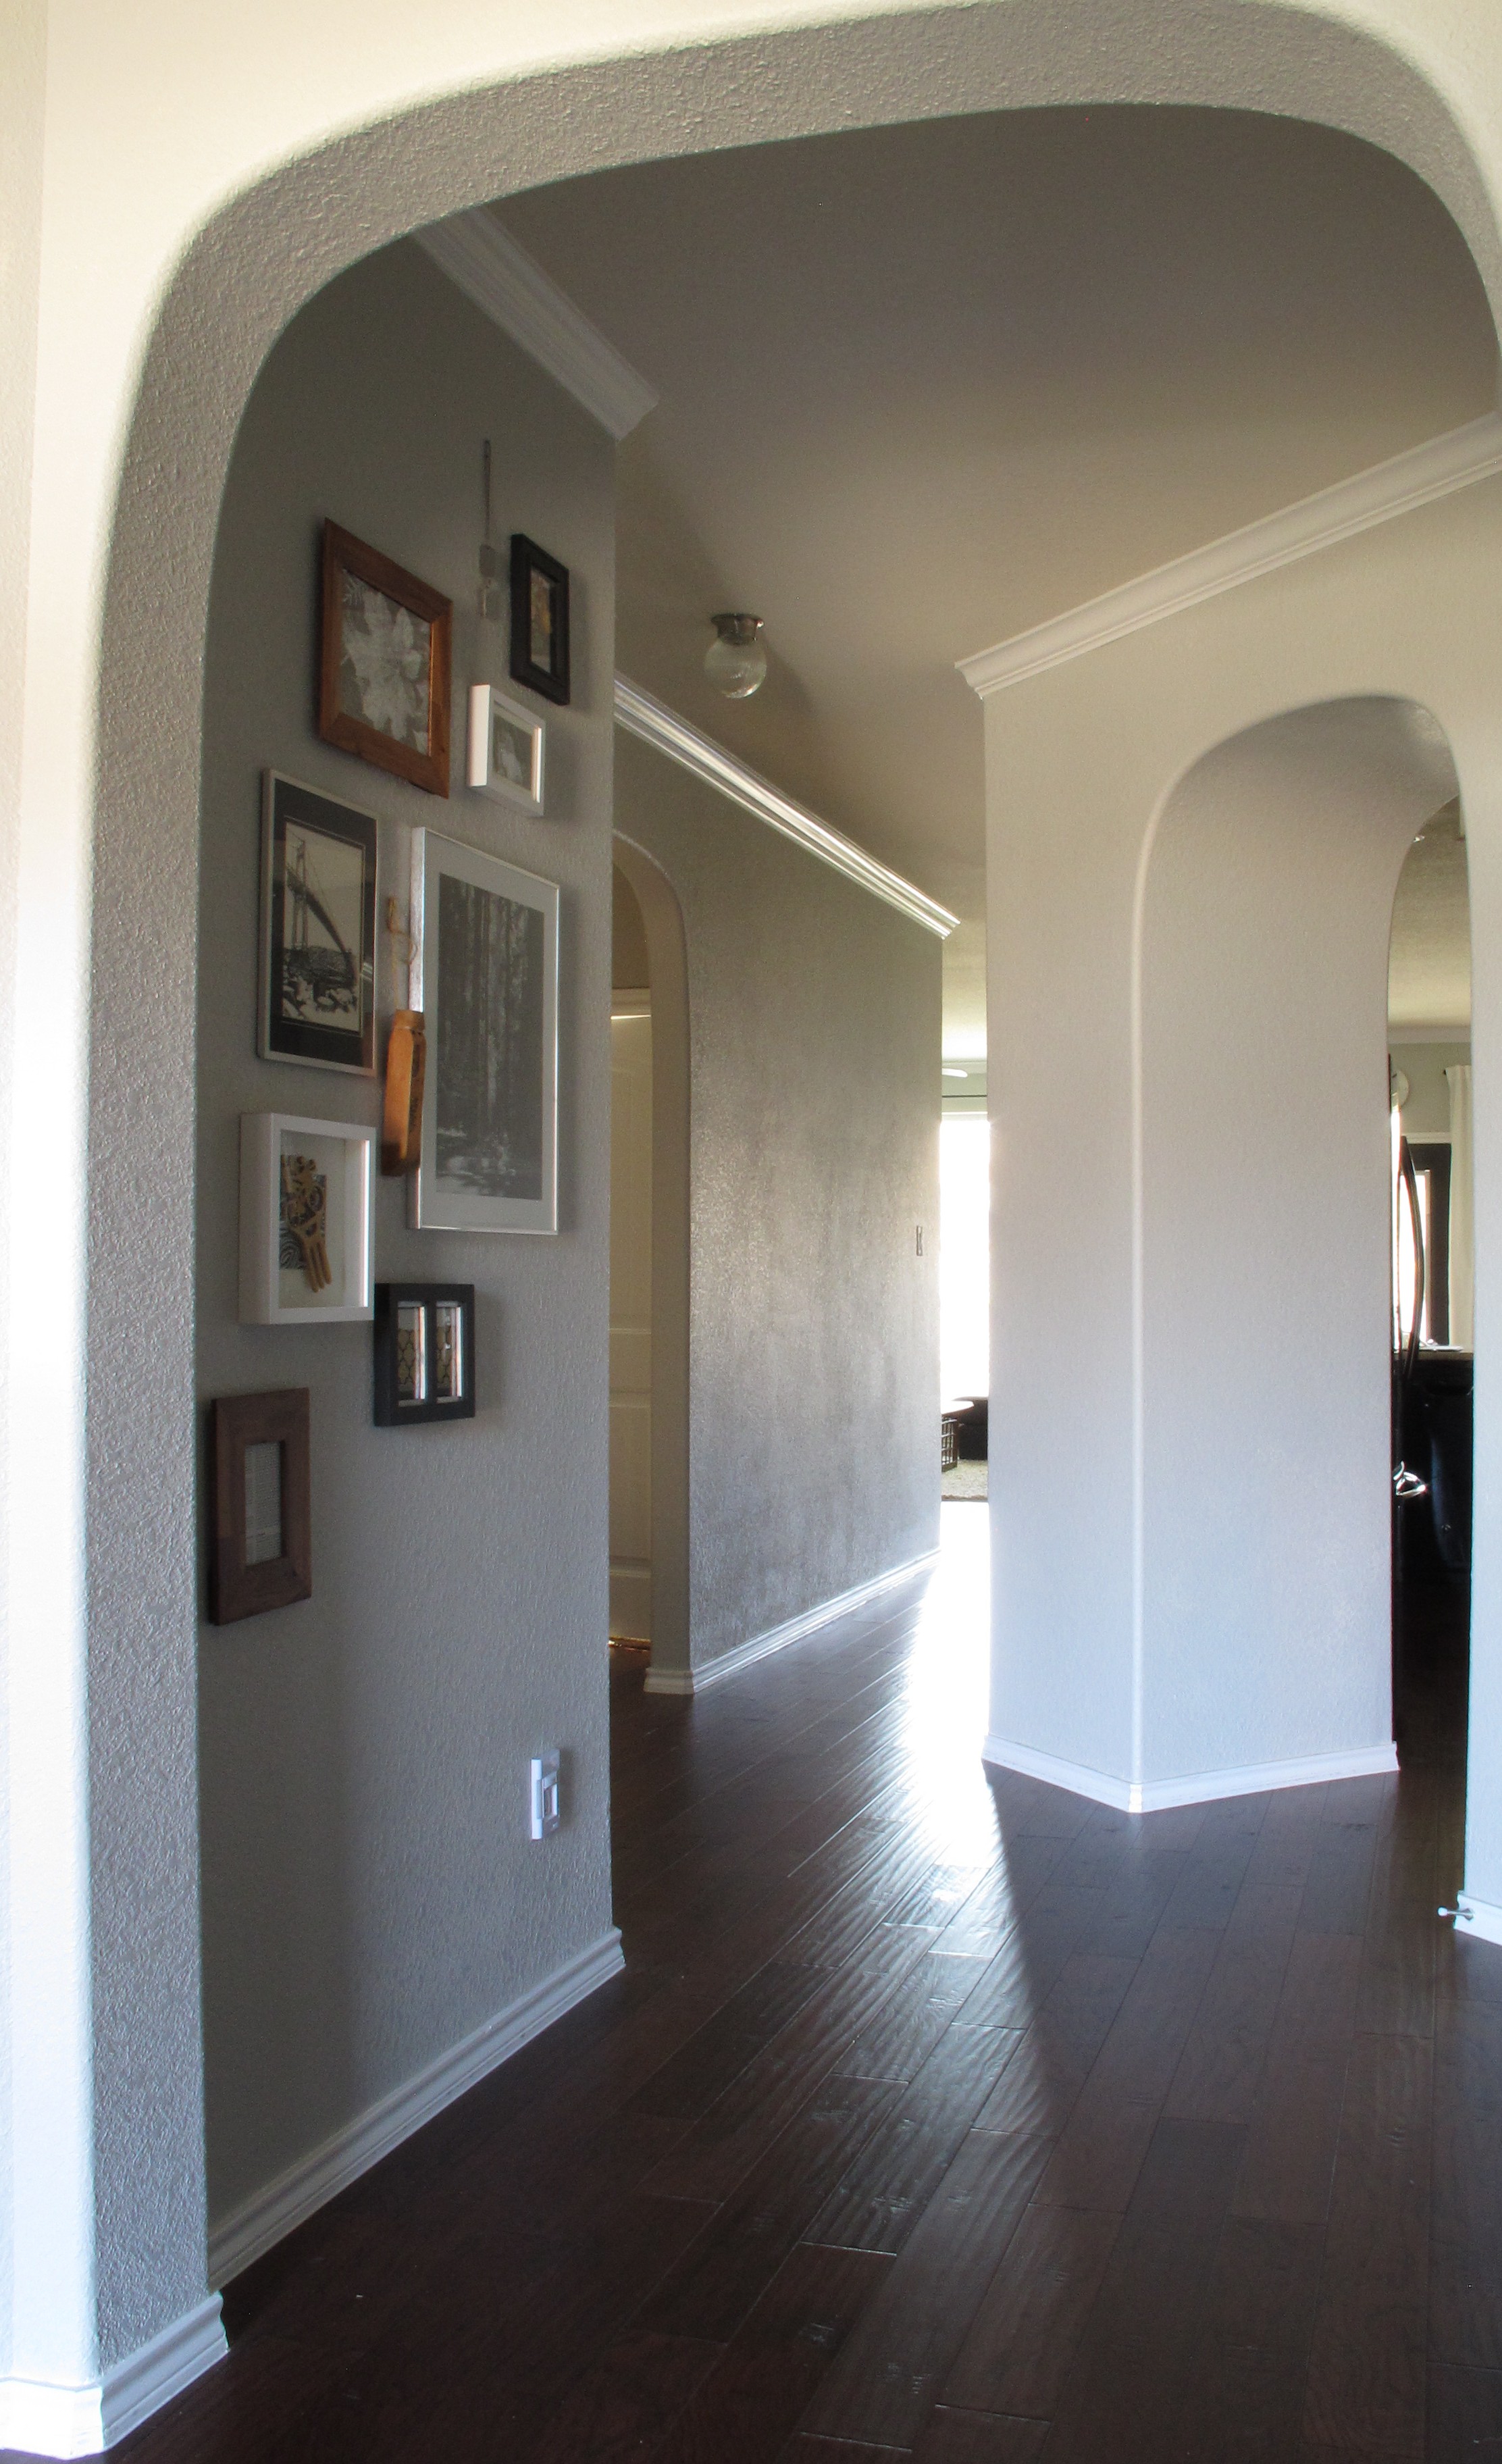
I’m not sure if anybody has noticed, but I’ve never been one to cover our home in family photos. We have our living room photo collage, and a random wedding picture as part of our hallway collage, but that’s pretty much it. I’m one of those people who has a few select favorite personal photos that I cherish and then aside from that, I like to display things with meaning associated with them that may not be blatantly obvious to the general public. Things given to us or purchased at memorable events. Things handed down, or that remind us of someone special, etc.

I remember the first time Alex visited our house. His response was “Where’s me??”. I just laughed and told him to not take offense.  I pointed out that we barely have pictures of US displayed (meaning Joey and I). Most are of Lucas, of course. But we did have a Green Beret bear displayed for him in Lucas’s room.

The funny thing is, I would’ve loved to have displayed a shot of him somewhere.  I just never got around to getting one printed and framed (which in hindsight, is pretty sad).  I mean, it’s not like I had to grind the wood pulp to produce the photo paper or anything to make that happen.

Anyways, as I began to go through stuff over the past weeks to decide what to use, I also had to decide how I wanted to display them.  I immediately ruled out hanging everything in one place. I’m not sure I could handle that.  Emotional overload, if you ask me.  So, I decided to start with three items to display in a few subtle places.  So that we can see them often and think of him, but not have them be totally smack-you-in-your-face, tear-up-every-time-I-see-them out there.

The first item I chose, was this picture…

IMG_4937

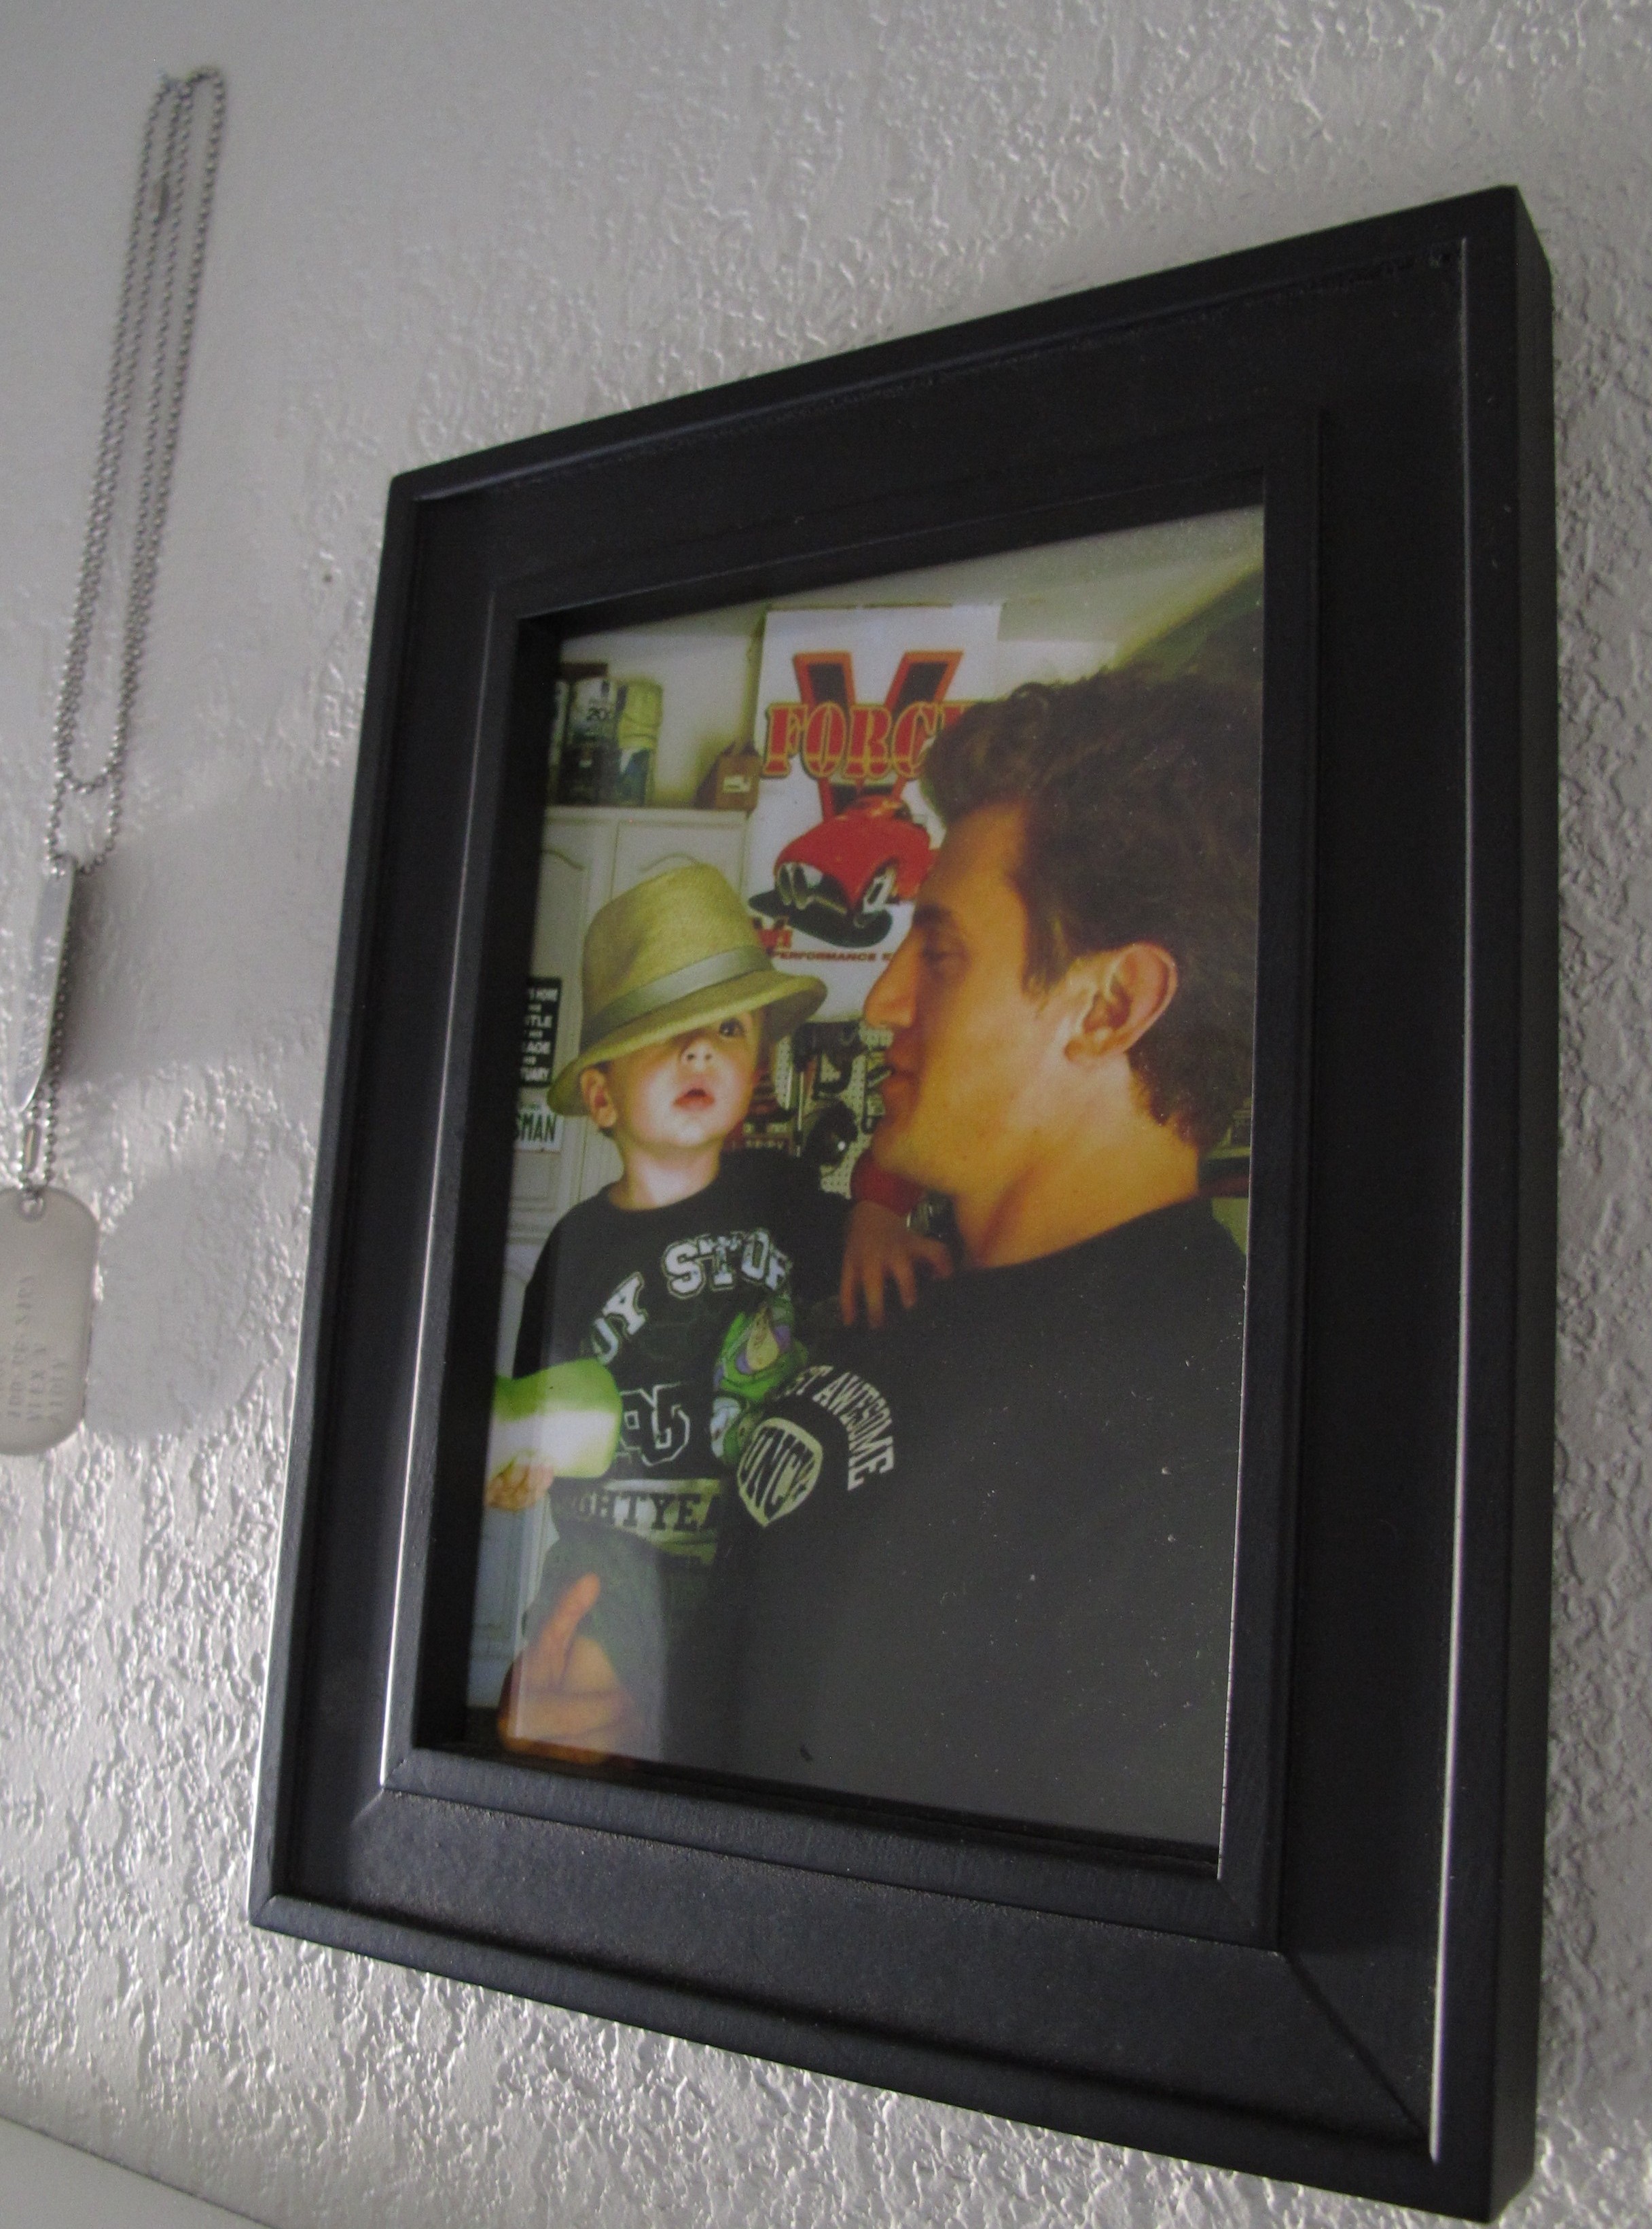
I took it in my parents garage in the summer of 2012. It’s my favorite picture of the two of them.  It’s the exact copy that I framed and gave to Alex for Christmas that year. It was returned to us after we lost him. I couldn’t bear to change the frame for this reason.  So, I took it as is and hung it on our hallway collage wall…

IMG_4935

I also hung his dog tags next to his photo….

IMG_4942

I thought about framing them as well, but simply hanging them on a nail seemed more him. More casual.  For the man who used Tupperware as furniture.  🙂

So, our frame wall looks like this now…

IMG_4931

IMG_4930

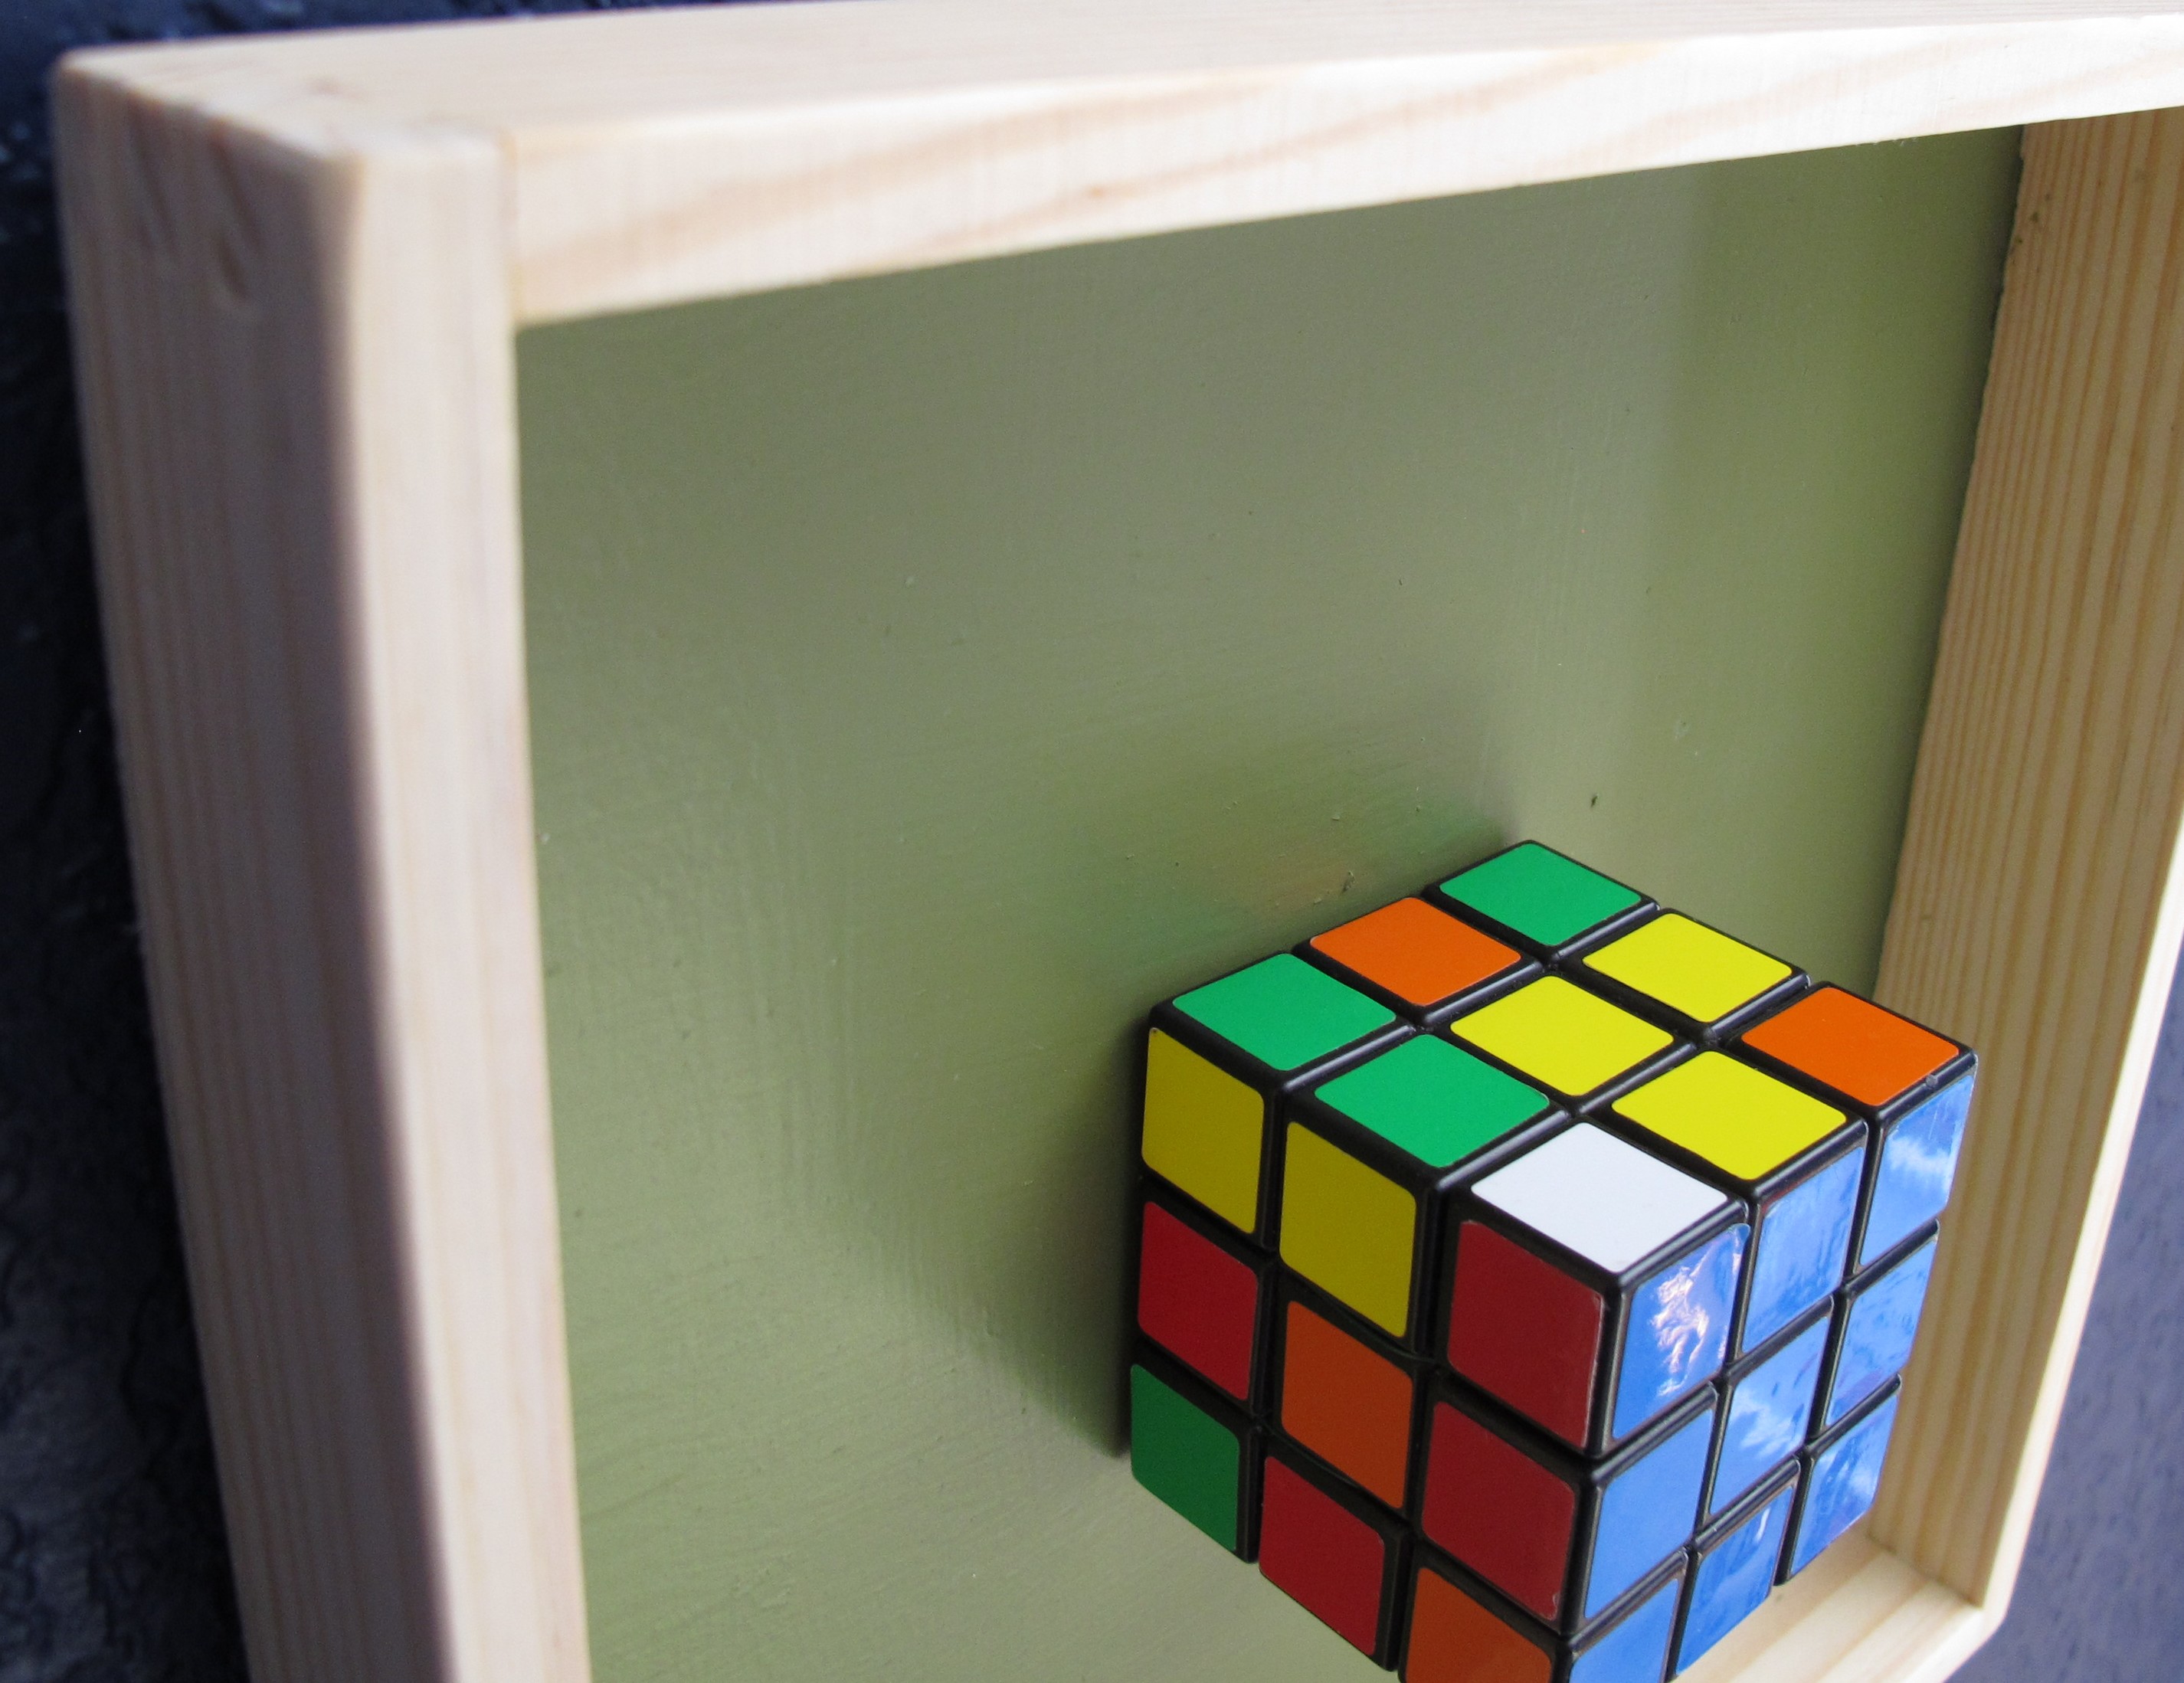
Lastly, I chose his rubiks cube.  It came back with him from Afghanistan. His teammate told us that Alex had found it in his barrack (is that the right term? I always get the language confused) when he first arrived in Kandahar and he played with it constantly after that. It’s the way he left it. I love it because it’s random. Just like Alex.

So, I decided to mount it in a display box of some sort.   I found this tray from a Melissa and Doug modeling clay set in Lucas’s room and decided that it was perfect…

IMG_4831

I painted the back of the tray the same Jungle Thicket green that I painted behind Lucas’s Expedit shelves.   Then, I drilled four holes through the middle of the tray and threaded some floral wire through the rubiks cube and through the tray…

IMG_4890IMG_4891

I didn’t want to glue it or do anything that might ruin the rubiks cube in case I ever wanted to change it.   I figured that Alex would be proud of the blue side that he’d completed, so I kept that side in front.  And I hung it in Lucas’s room…

IMG_4892

IMG_4896

IMG_4903

IMG_4911

IMG_4914

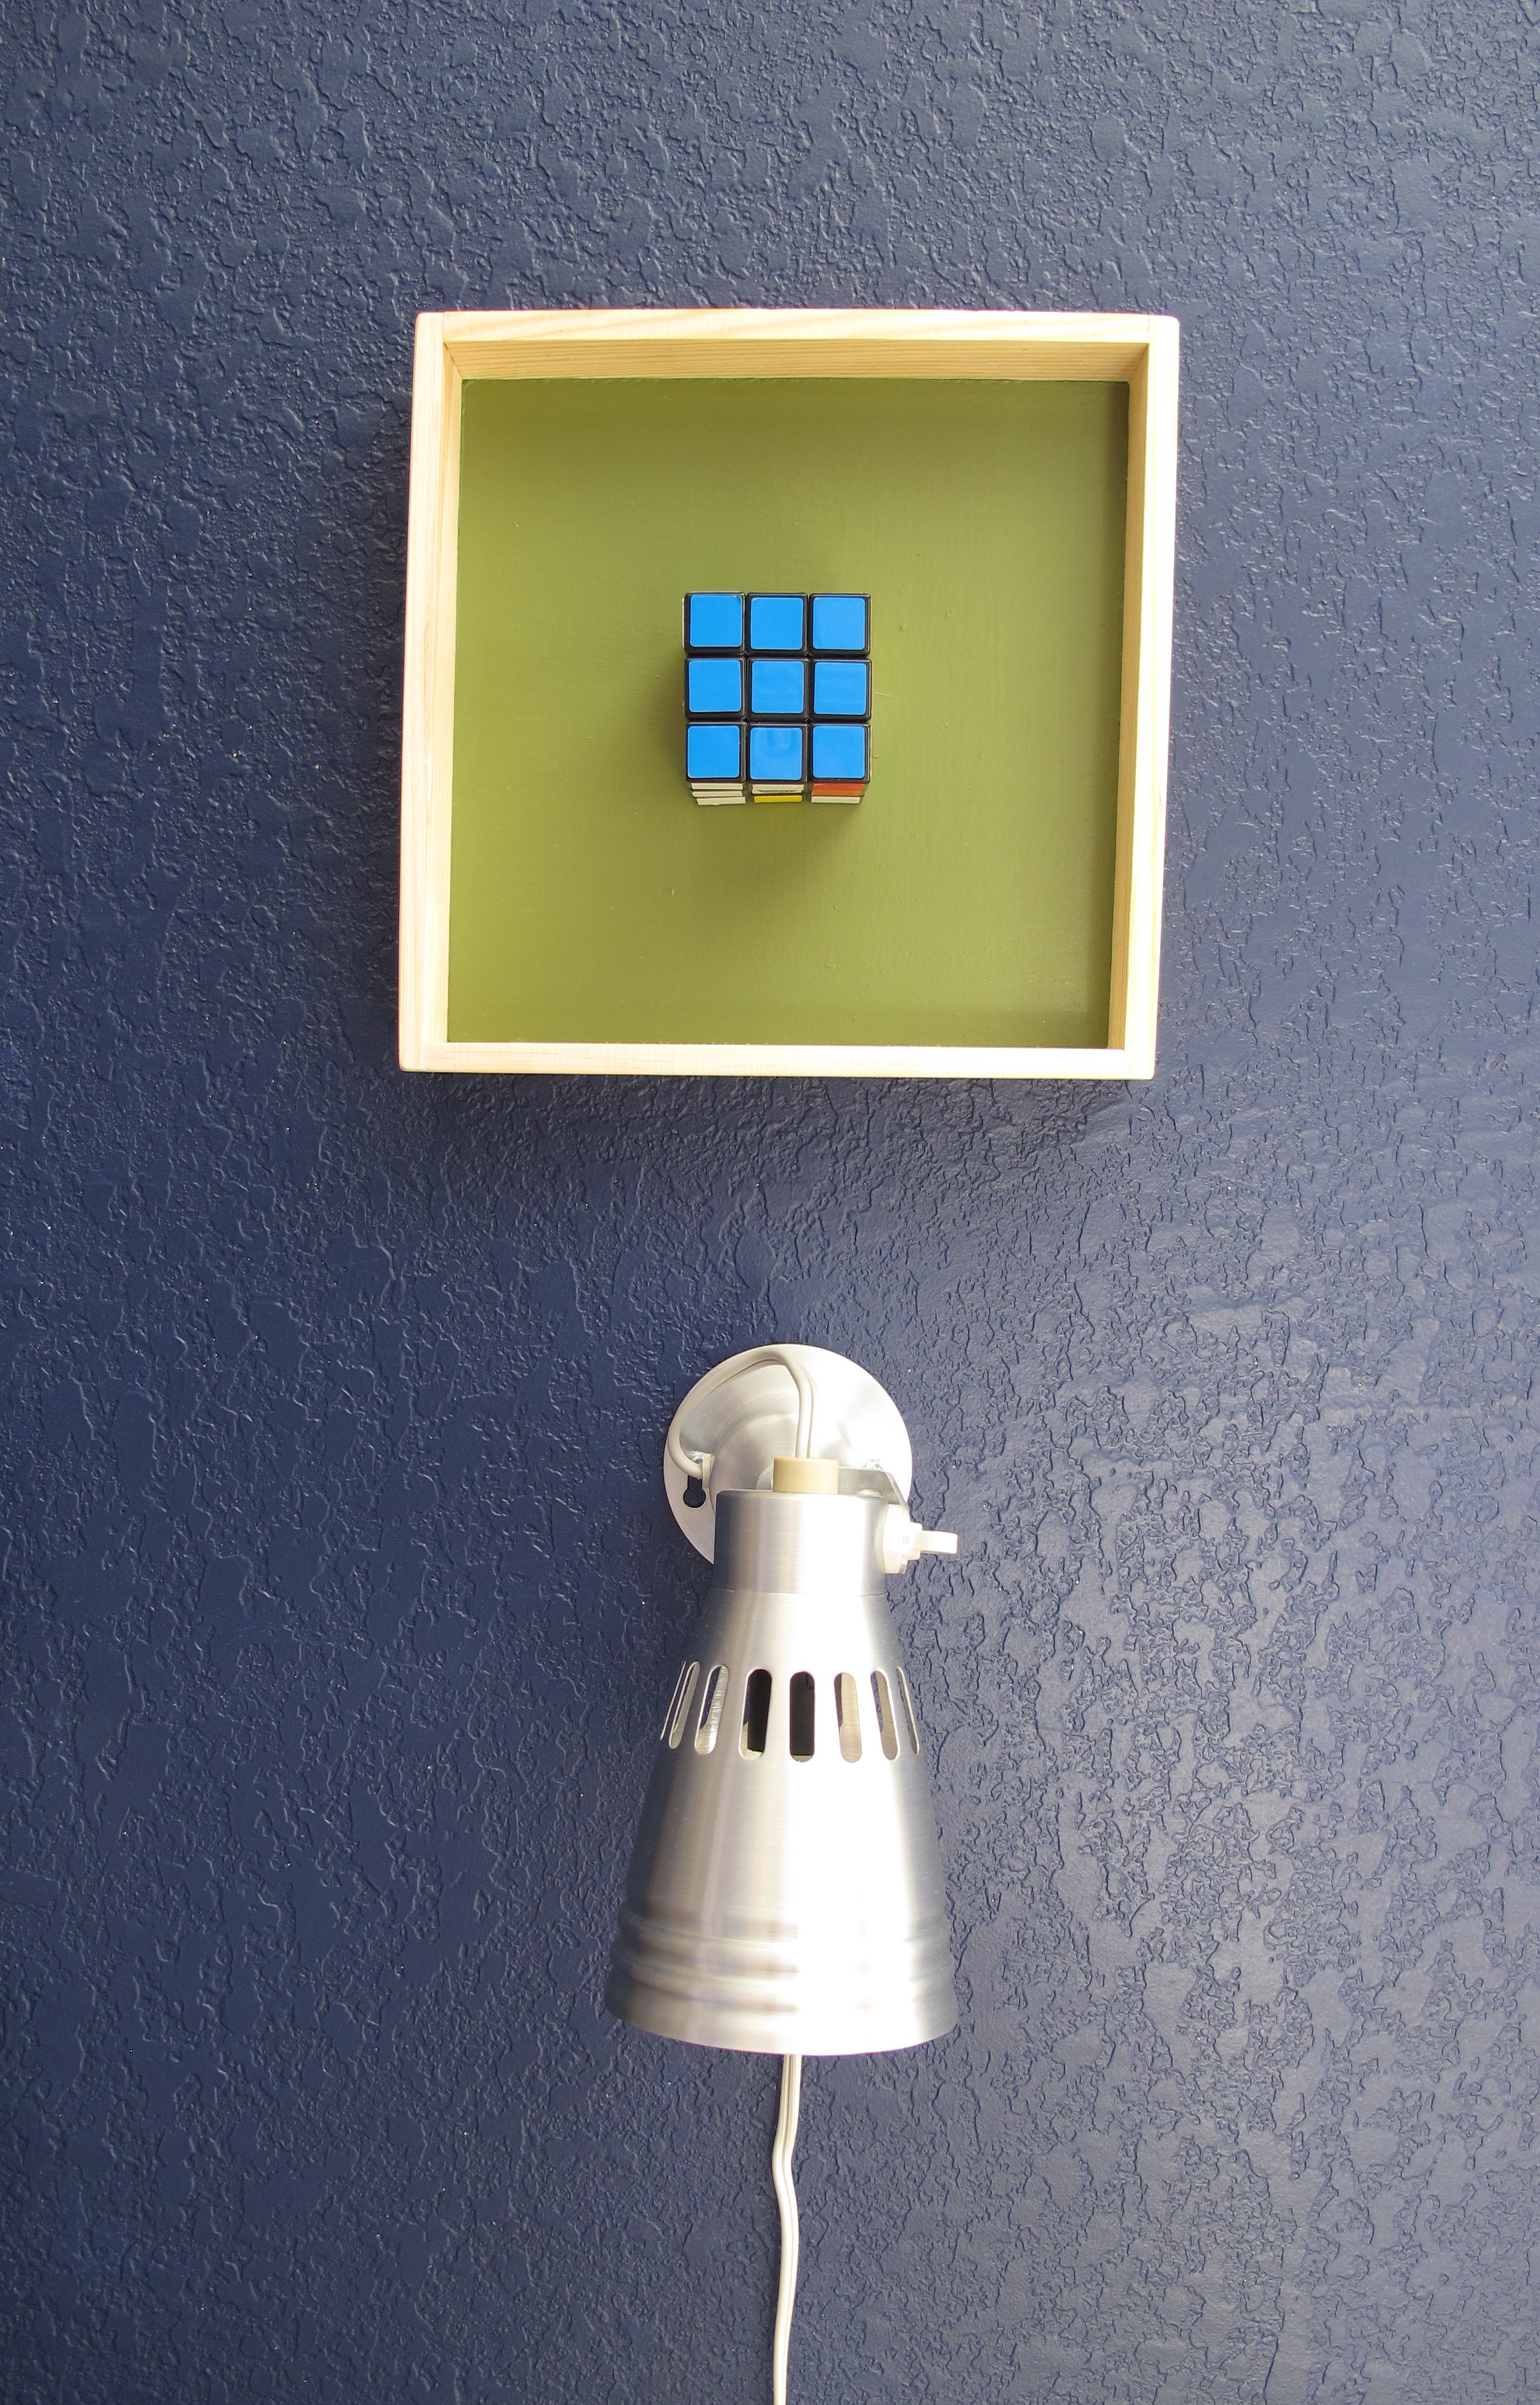
For some reason, I felt like Lucas’s bedside was the best place for it. Like added protection for the little man or something. Plus, it represents Alex’s playful nature… And he sure loved playing with Lucas.

IMG_4925

I think the rubiks cube art affects me more than even his picture does (hence the exorbitant number of pics).  I’m not sure why it has this effect.  It just reminds me of my brother so much. So anyways, I’m not promising that this will be the last art for Alex, but it’s definitely a good start.   And I hope that wherever he is, he can see it and approves.


Brightey Whiteys

Get it??  Kinda like tightey whiteys??  Heehee!  No matter how old I get, underwear jokes continue to be funny.  So, I’m rolling with it.

Anyhoo, last we discussed our foyer makeover, we had purchased a round jute rug.   And now, I’ve refinished our cabinet units a crisp white.

Here they were before…

They felt kind of heavy for the space and didn’t properly convey the tone of the rest of our house.  These cabinets used to be the end units for our old entertainment center, which was a hand-me-down from my sister-in-law.   They began as a light blonde wood color and I painted them this rusty hue about five years ago to help it coordinate better with our last house.  But, they were in dire need a a refresher to say the least.

For this project, I have to admit that I did something pretty uncharacteristic.  I purchased a pricier paint from Sherwin Williams.   It’s the Proclassic paint in Extra White semi-gloss.   My main reason for going this route was that I wanted the units to match our trim paint (which was Sherwin Williams) and we were running low on what our builder had left us.   After painting our eight dollar chairs with leftover trim paint, I was so impressed with the finish that I thought it’d be worth it.   Unfortunately, the location that I visited didn’t carry the exact paint I needed, but they recommended the Proclassic, as they claimed it was very similar.

I used a 30% off coupon, but it still came to fifty bucks for one gallon of paint.   I felt like I was punched in the gut when she told me the total, but I swallowed deeply and handed over my credit card.  The Proclassic claims to have a special formula that is self-leveling which results in no brush or roller marks and better coverage, so I figured that it would be worth it since I’d use less paint and get a better finish.

Now, let me tell ya, these units were the very first pieces of furniture that I’d ever painted.  EVER.   And they had a LOT of paint on them.  If I remember correctly, two coats of primer, three coats of paint and three coats of poly.   So, yeah.  A lot.   And the fact that I’d never painted furniture before was pretty obvious when you looked up close…


So, my goal in sanding them wasn’t to completely strip them clean.  It was simply to smooth out the texture to give me a nice base to work off of.   I started by removing all the doors and hardware and labeling them, so I’d know where they went once I was done…

I left the rice paper film on to keep the paint off of the glass and there was more film on the backside as well, so I didn’t need to tape off anything.  Then, I used our hand sander with 80 grit sandpaper to remove that rough texture and moved on to 220 grit sandpaper for a smooth finish (they don’t look smooth here but definitely felt it)…
IMG_4753

Sanding is one of those tasks that, for some reason, I look forward to.   Then, I begin the process.  And remember how long it takes.   And I decide that it’s no fun.   It took me about 4 cumulative hours over two days with our hand sander to get these babies to where I wanted them.

Once I’d finished sanding, I cleaned the units thoroughly.  First, with a swiffer rag to remove the dust, then a damp cloth…

Then, to be on the safe side, I also wiped everything down with a piece of tack cloth.  I really, truly thought that the tack cloth was overkill, but after wiping down only one unit….

Not overkill.

Thank goodness.  That reddish dust mixed with white paint would not have been pretty (…or maybe pretty in pink.  Harhar!).

Next, I gave everything a coat of shellac primer in the garage since it’s pretty stinky stuff…


And moved everything inside once it was dry, so I could keep an eye on Lucas while I painted.  I applied three, thin and even coats of paint leaving at least 4 hours of dry time in between as recommended on the label…

I used a brush for the crevices and corners and a foam roller for the larger planes.   I painted inside and out and was careful to watch for drips.   I had hoped that the “better coverage” claim meant that I would only need to apply two coats, but it didn’t.   This is after 2 coats, and as you can see, not doing a third wasn’t really an option…

Any time I’ve ever painted an item white, it’s always taken a primer coat plus 3 coats of paint, so I didn’t notice much of a difference there with the more expensive paint.

As for the “no brush or roller marks” claim, although the finish is better than it was before, I still see the stippled texture from the foam roller.   It never “leveled” as I thought it would.   I tried a different type of roller at one point to see if it would help, but it was worse, so I ended up switching back to foam.   I also tried lightly sanding between coats with fine grit sandpaper, which helped, but didn’t completely eliminate the stippling.  With this being said, I’m not sure that I’ll use this type of paint again.  I’m not thoroughly convinced that it’s worth double the money of other paints.  And I was disappointed that it didn’t perform like the trim paint left by our builder. Maybe it’ll end up being more durable in the end, though, so we’ll see.

Anyways, with everything painted, I cleaned up around the glass…

I had to be very careful with the razor (and resorted to using my fingernail in some spots) as I soon realized that the windows were actually plexiglass, which scratches easily   I did end up scratching it in a few places, but it’s not terribly bad.

I reattached the doors and added some new hardware (which I adore to no end) using the same method for installation which I detailed in my last post.  I found absolutely drool-worthy handles at Target and was immediately enamored to the point where (gasp!)  I paid full price.   Seriously, refinishing these units has exposed another side of me.   I’m never this willing to pay more for anything.  I just loved them that much.  I forgot to snap a pic during this part, but you’ll see them soon.  I know, I’m a meanie.  😉

Next, I worked on the fabric backing for the glass.   I basically just used the same method that was in place from when my sister-in-law owned the units.  She’d backed the windows with a teal fabric by squeezing it to the glass using another sheet of plexi-glass that was cut down to size.  I just used the leftover fabric from our shower curtains, which I still love just as much as I did before.  Observe…

IMG_4801

I simply cut the fabric about a half inch larger than the plexi-glass on all sides. I double-checked to be sure that the pattern was centered and straight in the glass.

IMG_4802

Then, I cut out three more squares using the first as a template to make sure that the pattern matched exactly.

IMG_4803

And I inserted the fabric by pressing the plexi-glass into the window of the door.   The fit was snug enough that I didn’t need to secure it with anything.

And here’s the final result…

IMG_4811  IMG_4806  IMG_4819 IMG_4808 IMG_4818

And, my favorite part… the before and after:

image IMG_4817

The difference in lighting between the shots is simply the weather.  It was sunny when I took the before and it’s cloudy today (and I was too impatient to wait for a sunny day).   That being said, I’m so excited with this makeover.  I can’t even tell you.   We absolutely love them.  The handles and fabric added so much needed personality, and now, the units suit our house to a T.  Next, I’ll be working on styling and some bright, cheerful artwork for the all above the units.  I’m happy to say that our foyer is definitely on its way to feeling much more like us.  Hooray!  🙂

Everybody have a great weekend!

Like this post?? Share it or follow me on Facebook or Instagram! 🙂

Linked up to: Tatortots and Jello, Home Stories A to Z