Wipe your chins. No need to drool. But, I know, right?? 🙂
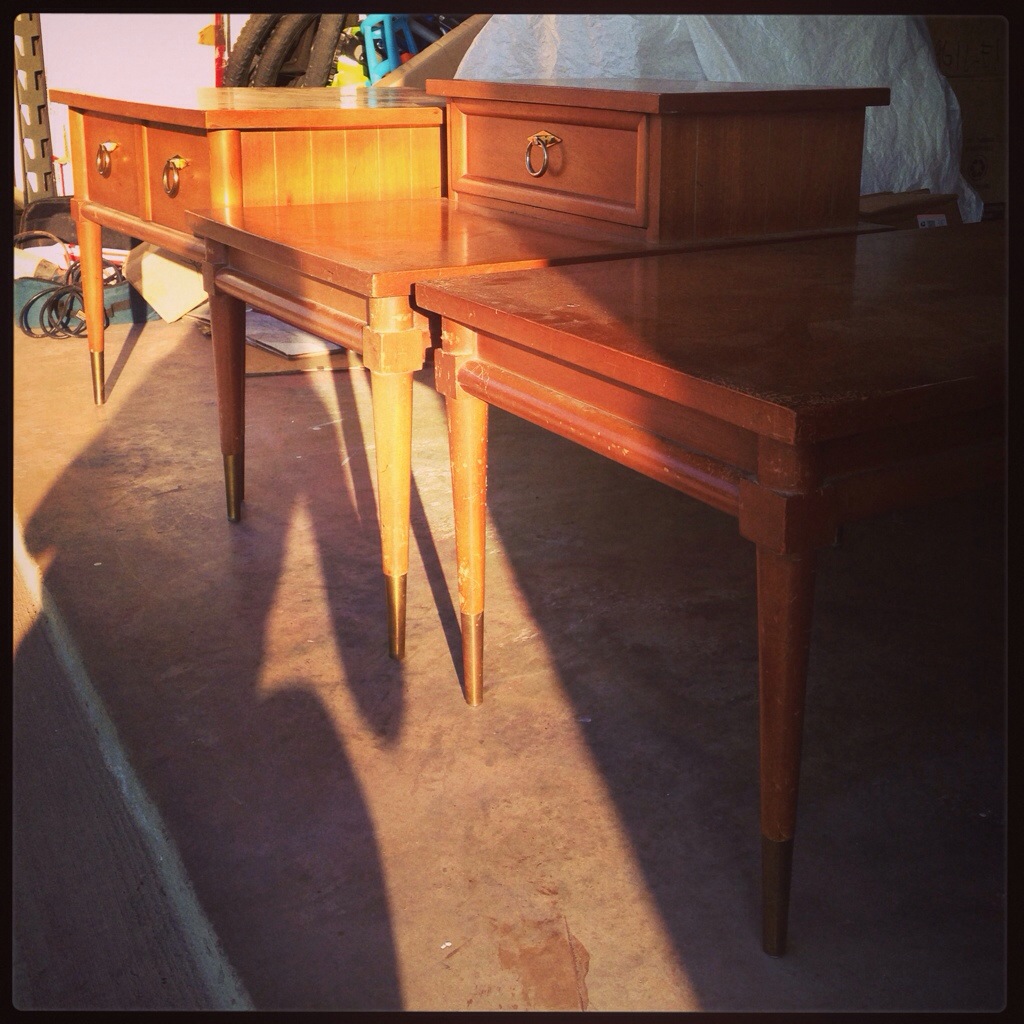
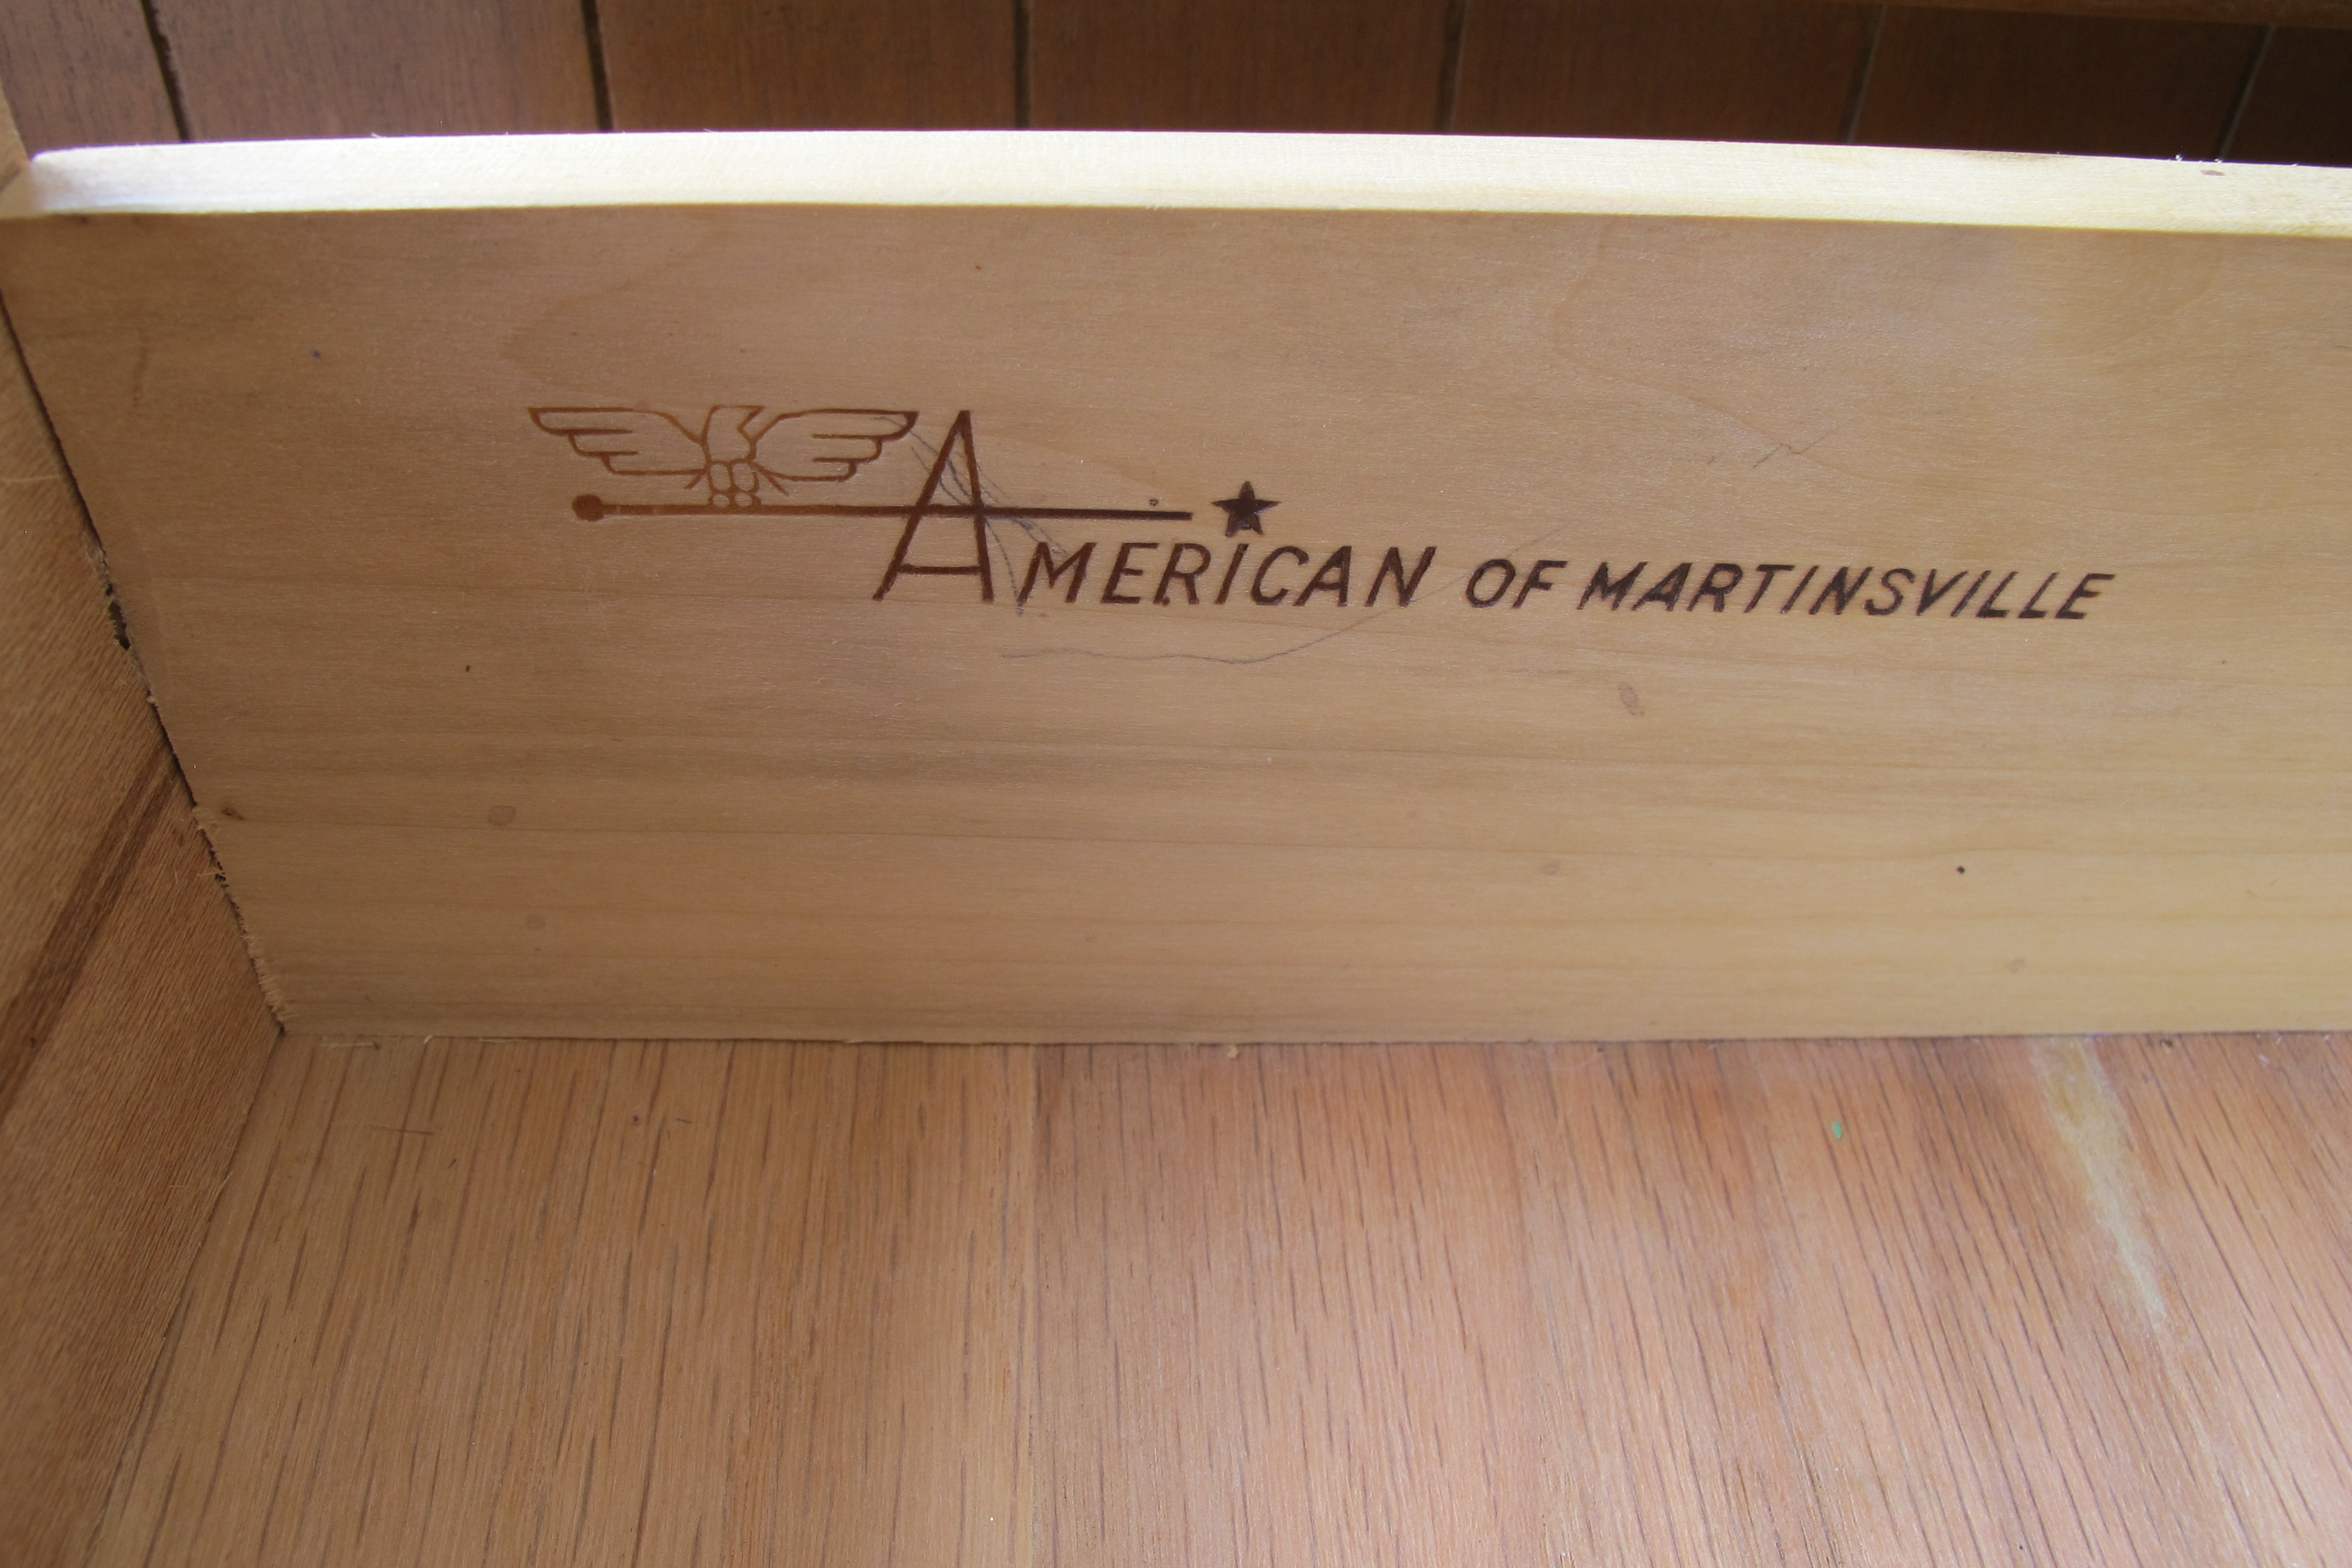
These are the tables that I found at Goodwill recently. I saw their mid-century lines from afar and practically trampled people ran up to inspect. Upon opening their sturdy, dove-tail-jointed drawers I discovered this…
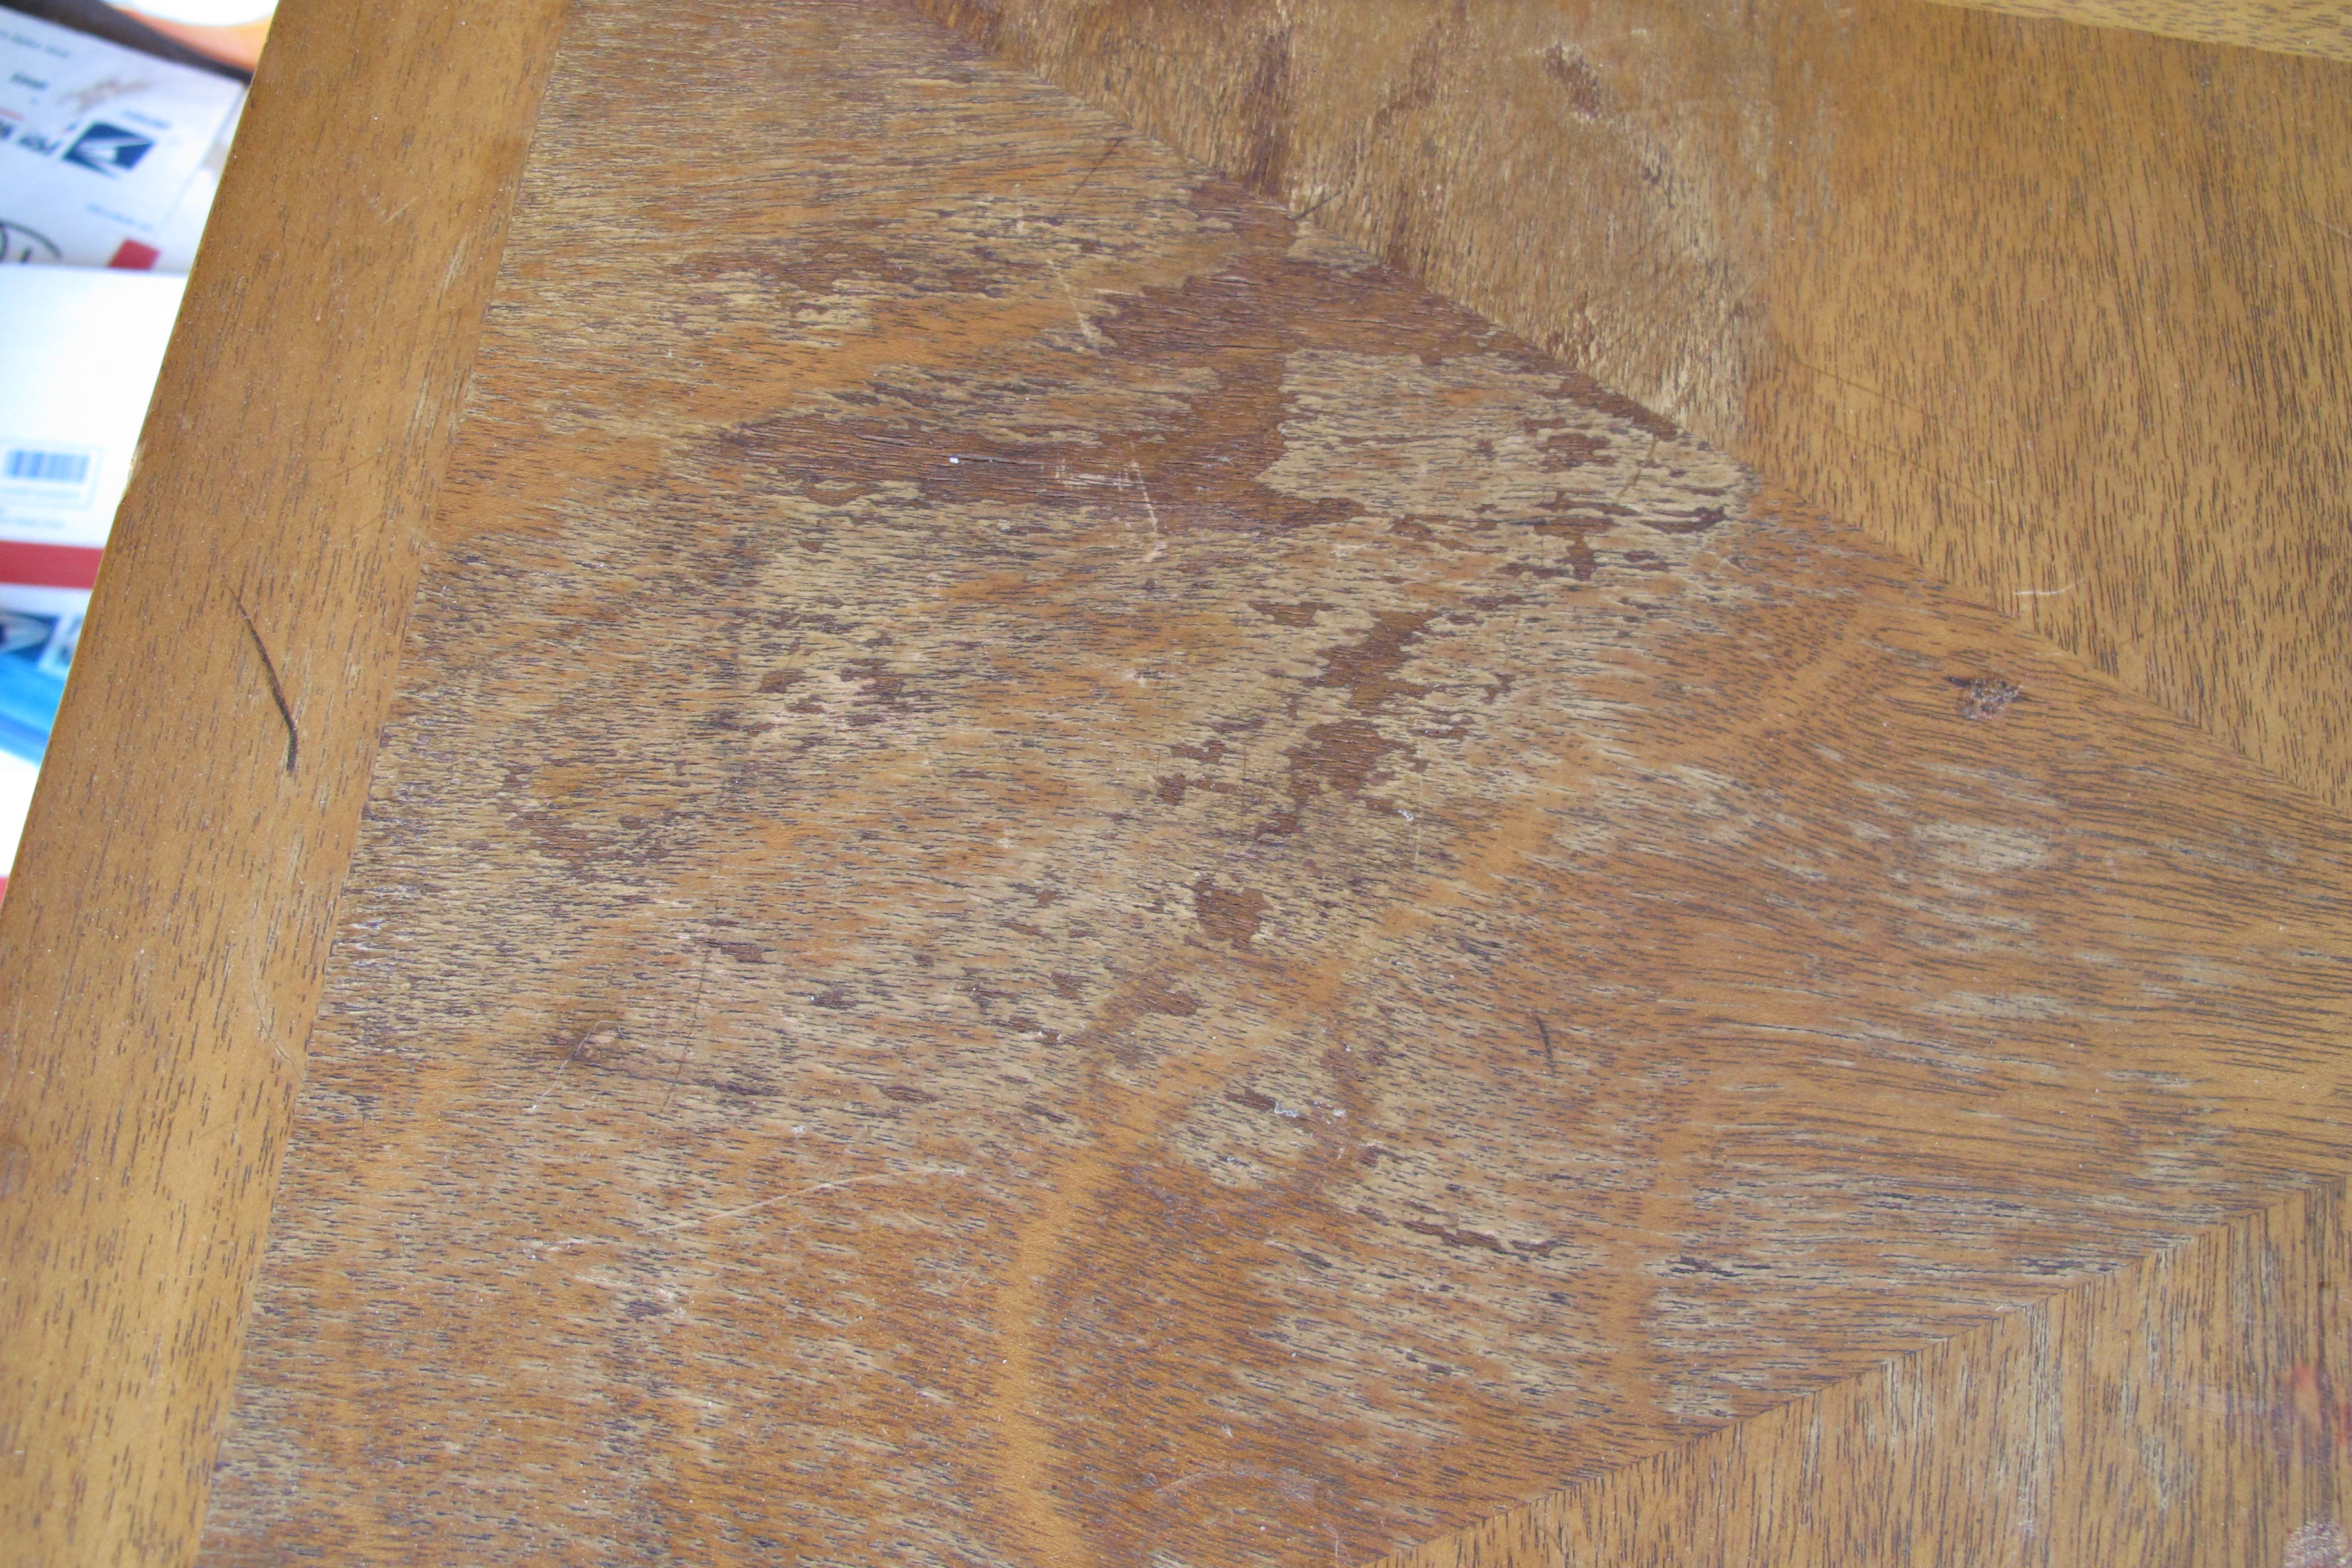
Which I googled on my phone only to realize that these are bona fide antiques, and that similar tables in great condition go for pretty decent amounts. Now, to clarify… these were NOT in stellar condition, so I had no illusion of grand fortune. I mean, there were scratches….

And issues in the finish…

But, for ~$25 bucks a piece, I decided to take them home even though we really didn’t have the space for them. I figured, at the very least, I could fix them up and sell them if I couldn’t find them a home with us. Even if I made little profit, I still felt it was my duty to give them a little TLC. Because their midcentury lines are killer. Those brass accents rock my socks. And I love them. And I do crazy things for love.
Once I got them home, I had no game plan whatsoever since I had no idea how bad the finishes really were. The tables were filthy. So, gameplan = CLEAN them. I used a damp dishrag with water only, and began to wipe down the top of the coffee table. This white mottling started happening immediately…

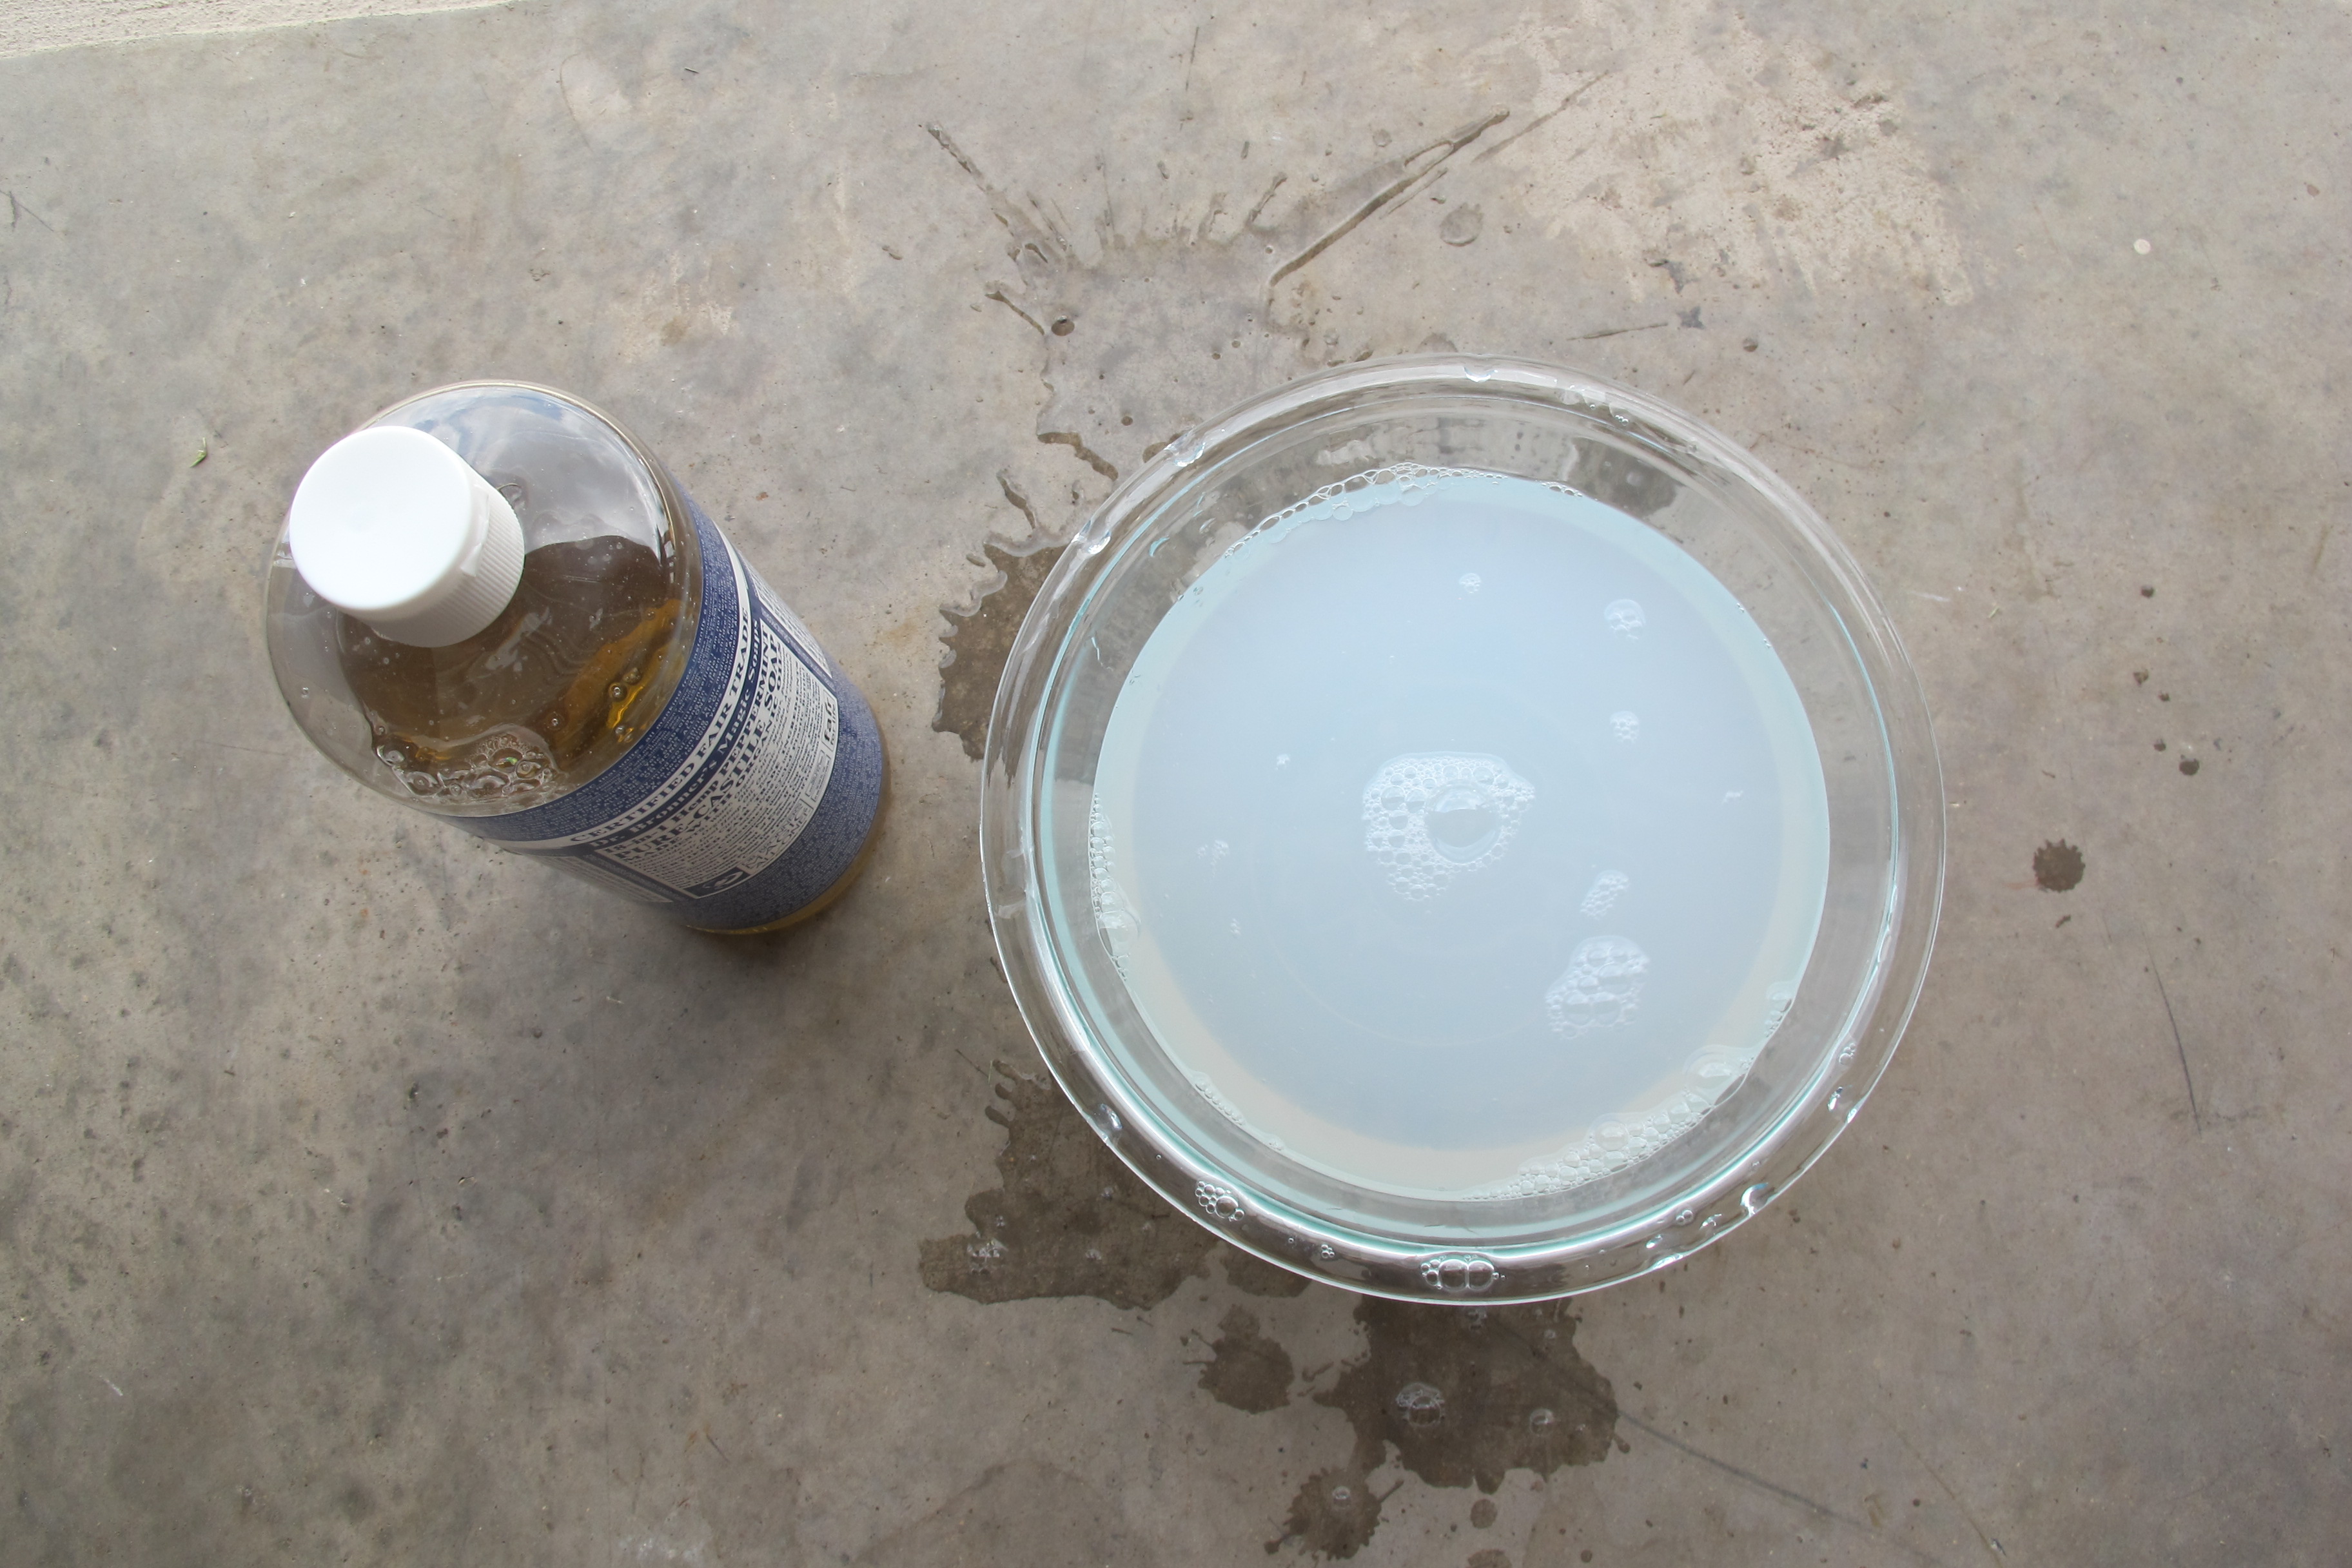
Which made me think that waxy polishes must’ve been used on the table in the past. I gently scrubbed with the damp dishrag and then went to a VERY mild mixture of water with a few drops of castile soap….
And discovered that this alone was removing the glossy(ish) finish. Wow. Once I got the tabletop clean, I realized that the finish was still pretty bad (I hadn’t touched the legs yet in the photo below)…

Just to see it if would work, I gently wiped the top down with a magic eraser to remove any leftover waxy build-up and applied some Restore-A-Finish (which you can read about here or here). Unfortunately, the Restore-A-Finish was no match for the tabletop’s damage. It still looked like this once I was done….

My guess is that the household that previously housed this furniture had either cats or very small dogs. The scratches are numerous and very thin and deep and I question what caused the black spot in the photo above (as well as a similar spot on the larger side table) as the finish was actually eaten away rather than simply having colored marks in the finish.
So, this is where I left off for now. I’m still deciding how to proceed. I’m thinking of lightly sanding the top to neutralize some of the scratches (VERY lightly as the table has a thin wood veneer as seen here)…

….But, I question exactly HOW to sand the top as each inlay has the wood-grain facing a different direction. I thought about using Polyshades to give them a deeper stained look (and dubbing the deeper scratches “character”) but I suspect those dark patches will still show through. Or possibly filling the deeper holes and then priming and painting the tables and leaving the beautiful brass accents intact. I do think these would look stunning in a crisp white, although I’d hate to cover the beautiful details on top.
So, I pose this question to you beautiful people… Has anybody worked with similar pieces?? What did you do? Do any of ya’ll have any advice or thoughts regarding the fate of these tables?? I’m open to any and all suggestions. Please. Help me. 🙂

First of all these are all gorgeous! Awesome find. I definitely agree that if you can keep the tops you should. I have a piece I’m just about finished with that had a design in the wood that faced all different directions. I used my orbital sander and found that it really didn’t affect the pattern at all. It was a bit of a pain to get down to the bare wood, probably took about 20-30 minutes and it’s a small table, but the pattern stayed in tact and then I just recoated it with some fresh stain. I think these would look cool with a stained top and white painted legs. Just my opinion! Hope it helps 🙂
Thanks, Bre! I really need to get an orbital sander. We just have one of the vibrating ones (I don’t even know the name to be honest). I’m just nervous because the veneer is so thin. I’m afraid that I’ll over-sand or that the stains go so deep that sanding won’t matter. I’ll still probably try it though, since worse comes to worse I can still paint them later. Thanks for the feedback! I really appreciate it! 🙂
have you ever tried Annie Sloan Chalk Paint? I hear such great things about it. You could mimic the pattern with a gloss/matte paint finish treatment to keep the same feel but cover up the damage…
Thanks, Grace! That’s a great idea! I’ll keep that in mind if the finish isn’t salvageable.
Hi Christina, I’ve inherited a lovely Asian-style American of Martinsville dresser and I’m wondering about lead paint. The dresser is stamped 1930 on the back. Did you test for lead paint on these pieces and if so, do you happen to know the year they were made? I’m hoping for the best as the furniture is so beautiful & solid. Thank you!
Hi Tammy! I didn’t test them for lead because I’ve read that lead is mainly in paint, not varnishes. If in doubt, you can purchase lead testing kits for about 9 bucks from Home Depot. They’re just simple swabs that tell you instantly if lead is present… I actually have a post about them coming up soon. Good Luck with the dresser! It sounds amazing! 🙂