…Yes, that’s right. And in that order, too.
So, when we purchased this house, we knew immediately that we wanted to put new flooring in the living/dining space.

The beige carpet looked like a recipe for disaster as far as we were concerned. Not only did we see a fair amount of thru-traffic to the back patio, but light-colored carpeting in a dining space (with a 3 year old) just seemed like a bad idea.
When we lived in our first house, we’d changed out flooring and knew what a headache it was getting it done while living there. So, we decided to take advantage of the overlap between when we gained possession of the new place and closed on our current house to try to get it done.
The original plan was to have the carpet in the bedrooms cleaned and simply replace the flooring in the living/dining space. But then the sellers moved out and we discovered many stains that had been camouflaged by their furniture. The pictures don’t do them justice, really.


The sellers had disclosed that there were stains on the bedroom carpets, but we’d just assumed that they were referring to the few stains in the main traffic areas of each room. In reality, there were many stains in every bedroom and the commonly-used walkways were much more grey than we’d thought. We knew from experience (firsthouse) that even with a good deep-cleaning, many of these areas would return. So, while the house was still empty, we decided that (if we could get a decent price) we’d try to also replace the carpets. Because we’d been house-hunting for older homes (and fixer-uppers at that), we knew we’d likely have to replace flooring prior to move-in, so fortunately, we’d planned ahead, saved, and budgeted for this very purpose.
We got several estimates, and the winner ended up being Empire Today. We’d used them in our first house and were very satisfied. Plus, they came in WAY cheaper than the other estimates and could install the flooring the very NEXT DAY. Kick butt. We’d considered installing the flooring in the living/dining space ourselves, but since we still had an entire house to move, and work to attend, and Lucas, we knew that we probably wouldn’t be able to get it all done before we needed to be out of our current house.
The following day, four installers showed up. They were on time and polite. And were done with the install in about 7 hours. Totally worth it.
The process of carpet removal was interesting, to say the least. We discovered some really, um, different stuff….

Yes. That is asphalt. In the middle bedroom next to the master. Somebody poured ASPHALT. In the BEDROOM. On top of the SLAB. WTH??!!! The room is in the middle of the other bedrooms, so it wasn’t a porch conversion or anything. So. Weird. I’ll never understand people. The installers weren’t equipped to remove the asphalt (nor would we want all that dust in the house from that process), so now, we have a layer of asphalt beneath our carpet. Ya jealous?? 😉
I did some research regarding the safety-factor of asphalt being in our home and learned some interesting things. From what I could gather, the harmful part of asphalt is the coal-tar sealant that coats the asphalt to make it that smooth, black color. Our asphalt was clearly not sealed with anything. It didn’t smell of tar and the many rocks and pebbles were highly evident. Plus, the asphalt had a greyish tone rather than that bold, black color of a sealed surface….

Also, I learned that most of the danger with asphalt occurs when it’s being poured and the few years afterwards due to off-gassing. This asphalt seems to have been here for years… we know that the sellers lived here for 2.5 years and hadn’t been the ones to pour it. So, we hoped that the off-gassing period had passed. Lastly, I learned that sealed asphalt becomes dangerous again when it breaks down due to weather conditions and the dust is breathed in. Since our asphalt is unsealed, this doesn’t really apply, but it made me feel better that our room is temperature-controlled and that we’d purchased carpet padding with a plastic lining which would hopefully seal in any dust to keep it out of our air-supply. If any of ya’ll have any additional information that we need to know about this, please leave me a comment. This is definitely an unexpected finding and one that we’re not really sure what to do with.
Aside from the completely random asphalt, we also found a vintage floor safe….
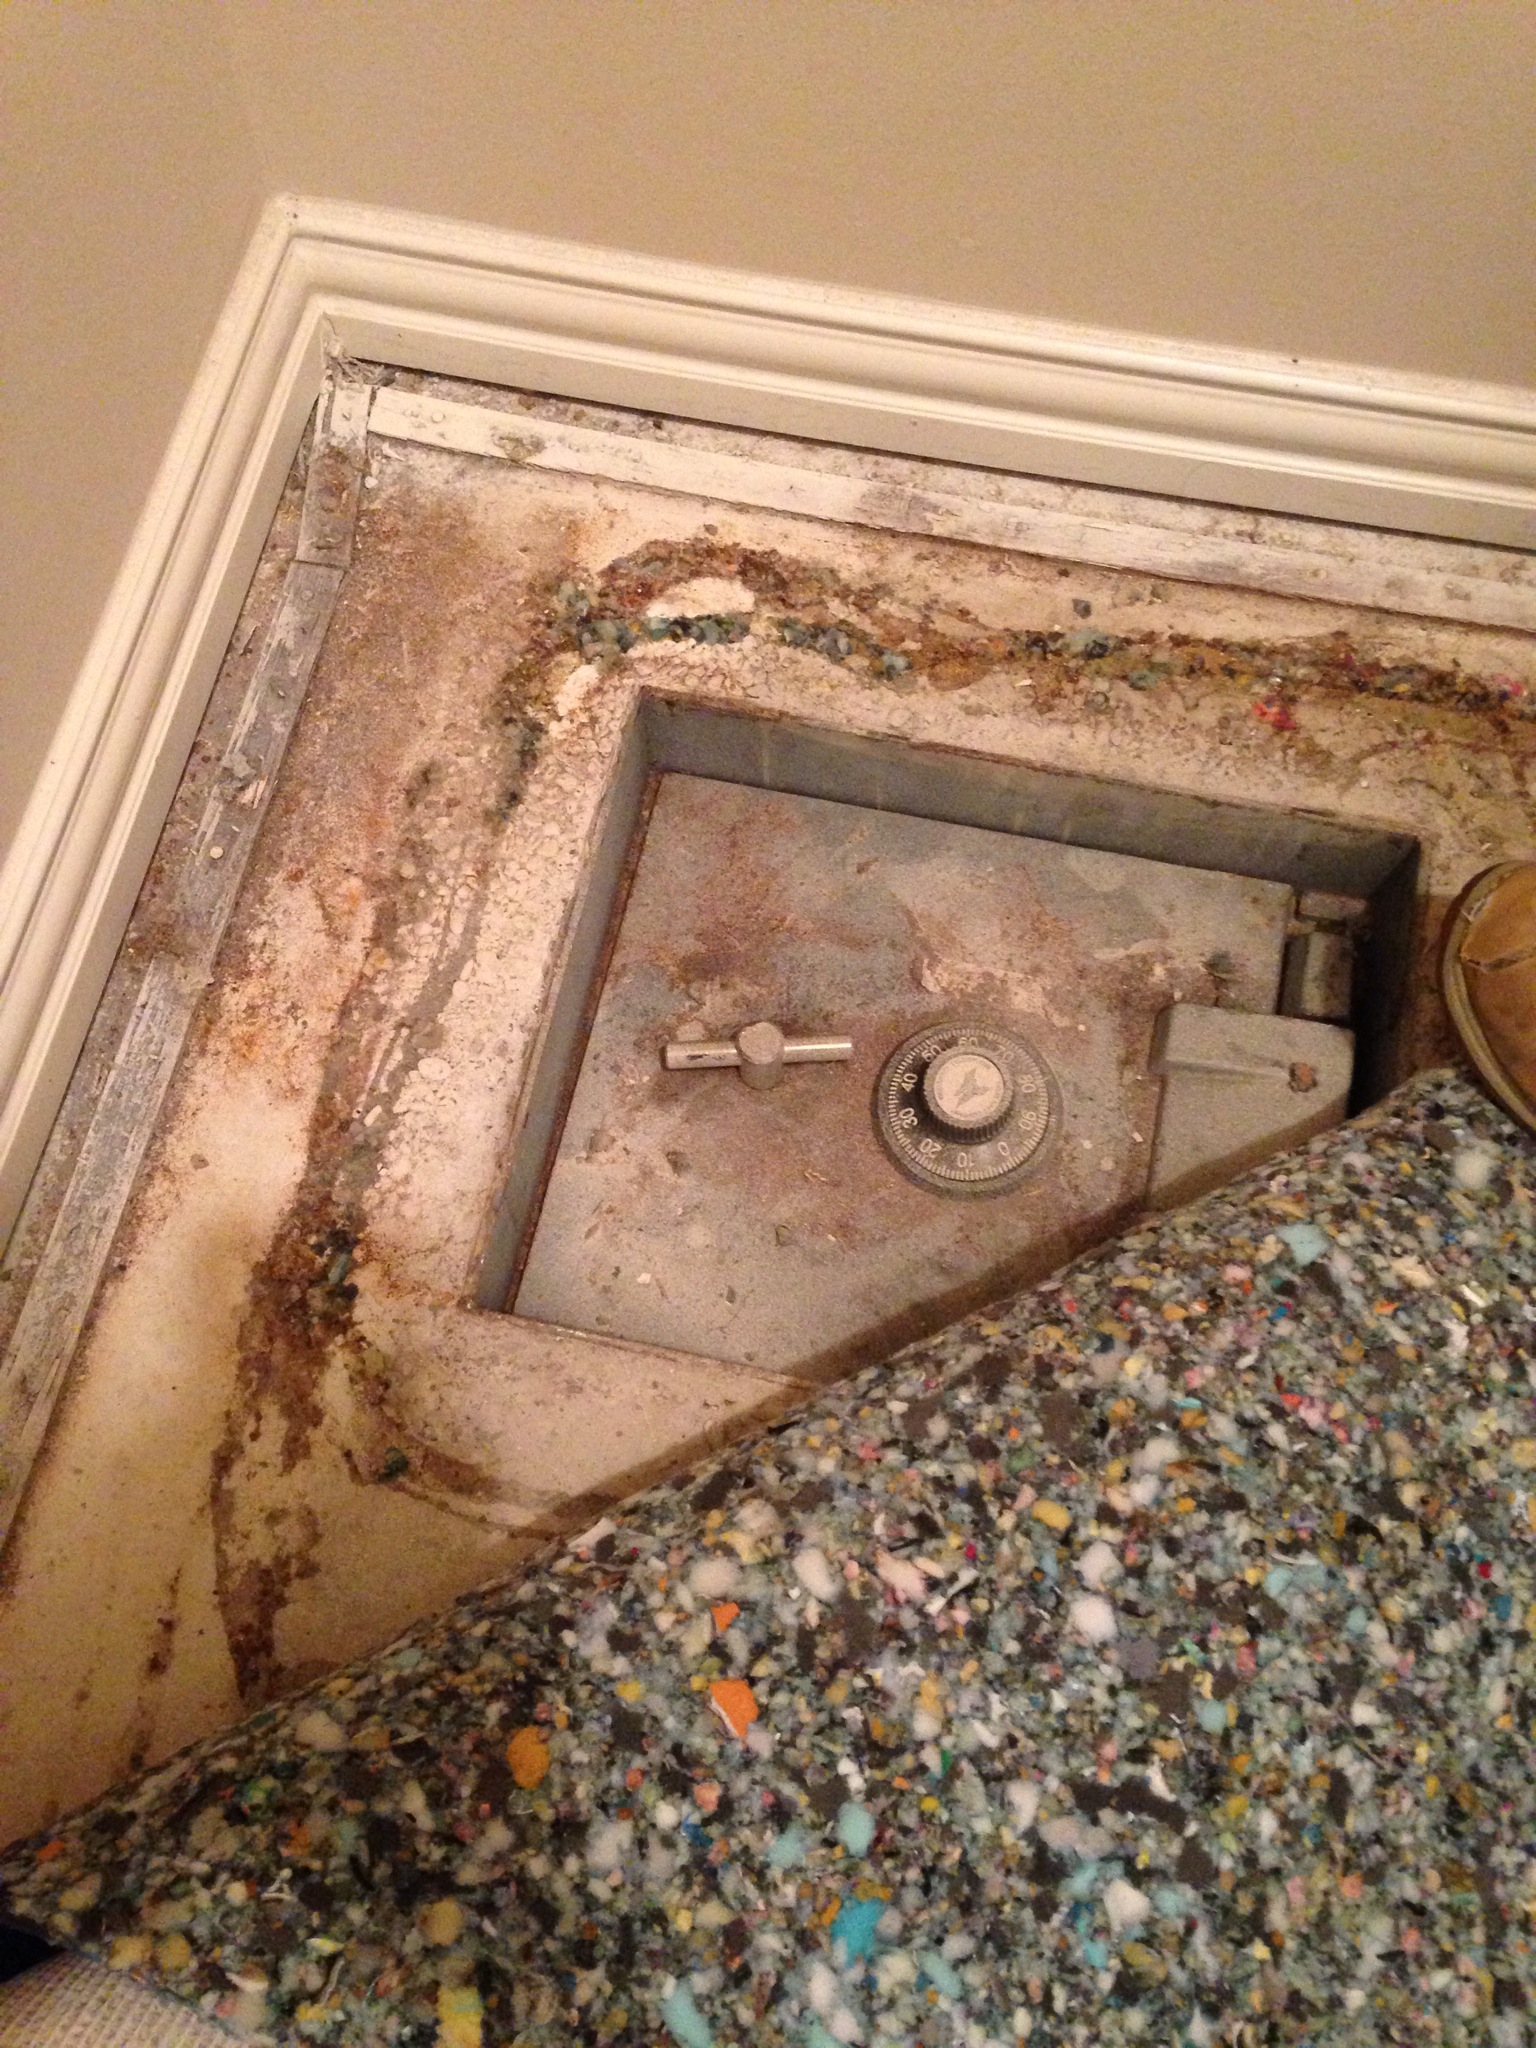
Total old school. This is awesome, no?? We talked to the neighbor and he said that the previous owners had opened it and it was empty. But, still cool huh??
In choosing our flooring for the living and dining spaces, my main goal was to allow the fireplace to shine. The floor needed to contrast with it so it would stand out. So, that pretty much left really light floors (but all their lighter options were way too yellow), or really dark floors. So, we went really dark.

We chose an ebony laminate flooring that came in 7″ wide individual planks. They didn’t have that ebony color in real wood or we probably would’ve gone that route. I have to say though… we installed laminate in our first house, and nothing could beat its durability. NOTHING scratched it. And we had a 50 lb crazy-muscular pitt bull at the time who LOVED to slide all over the floor. The laminate wasn’t great with moisture, but we were assured by Empire that this particular flooring choice is made from a much denser material which allows it to tolerate moisture better. They explained that this is also why it didn’t need time to acclimate to the home prior to installation.
One thing that I really loved about Empire was that they were the only company who didn’t use quarter-round at the baseboards. They actually removed the baseboards, installed the flooring and then reinstalled the baseboards for a more seamless look. So much better than quarter-round in my opinion.
Here are a few before and afters for your viewing pleasure…


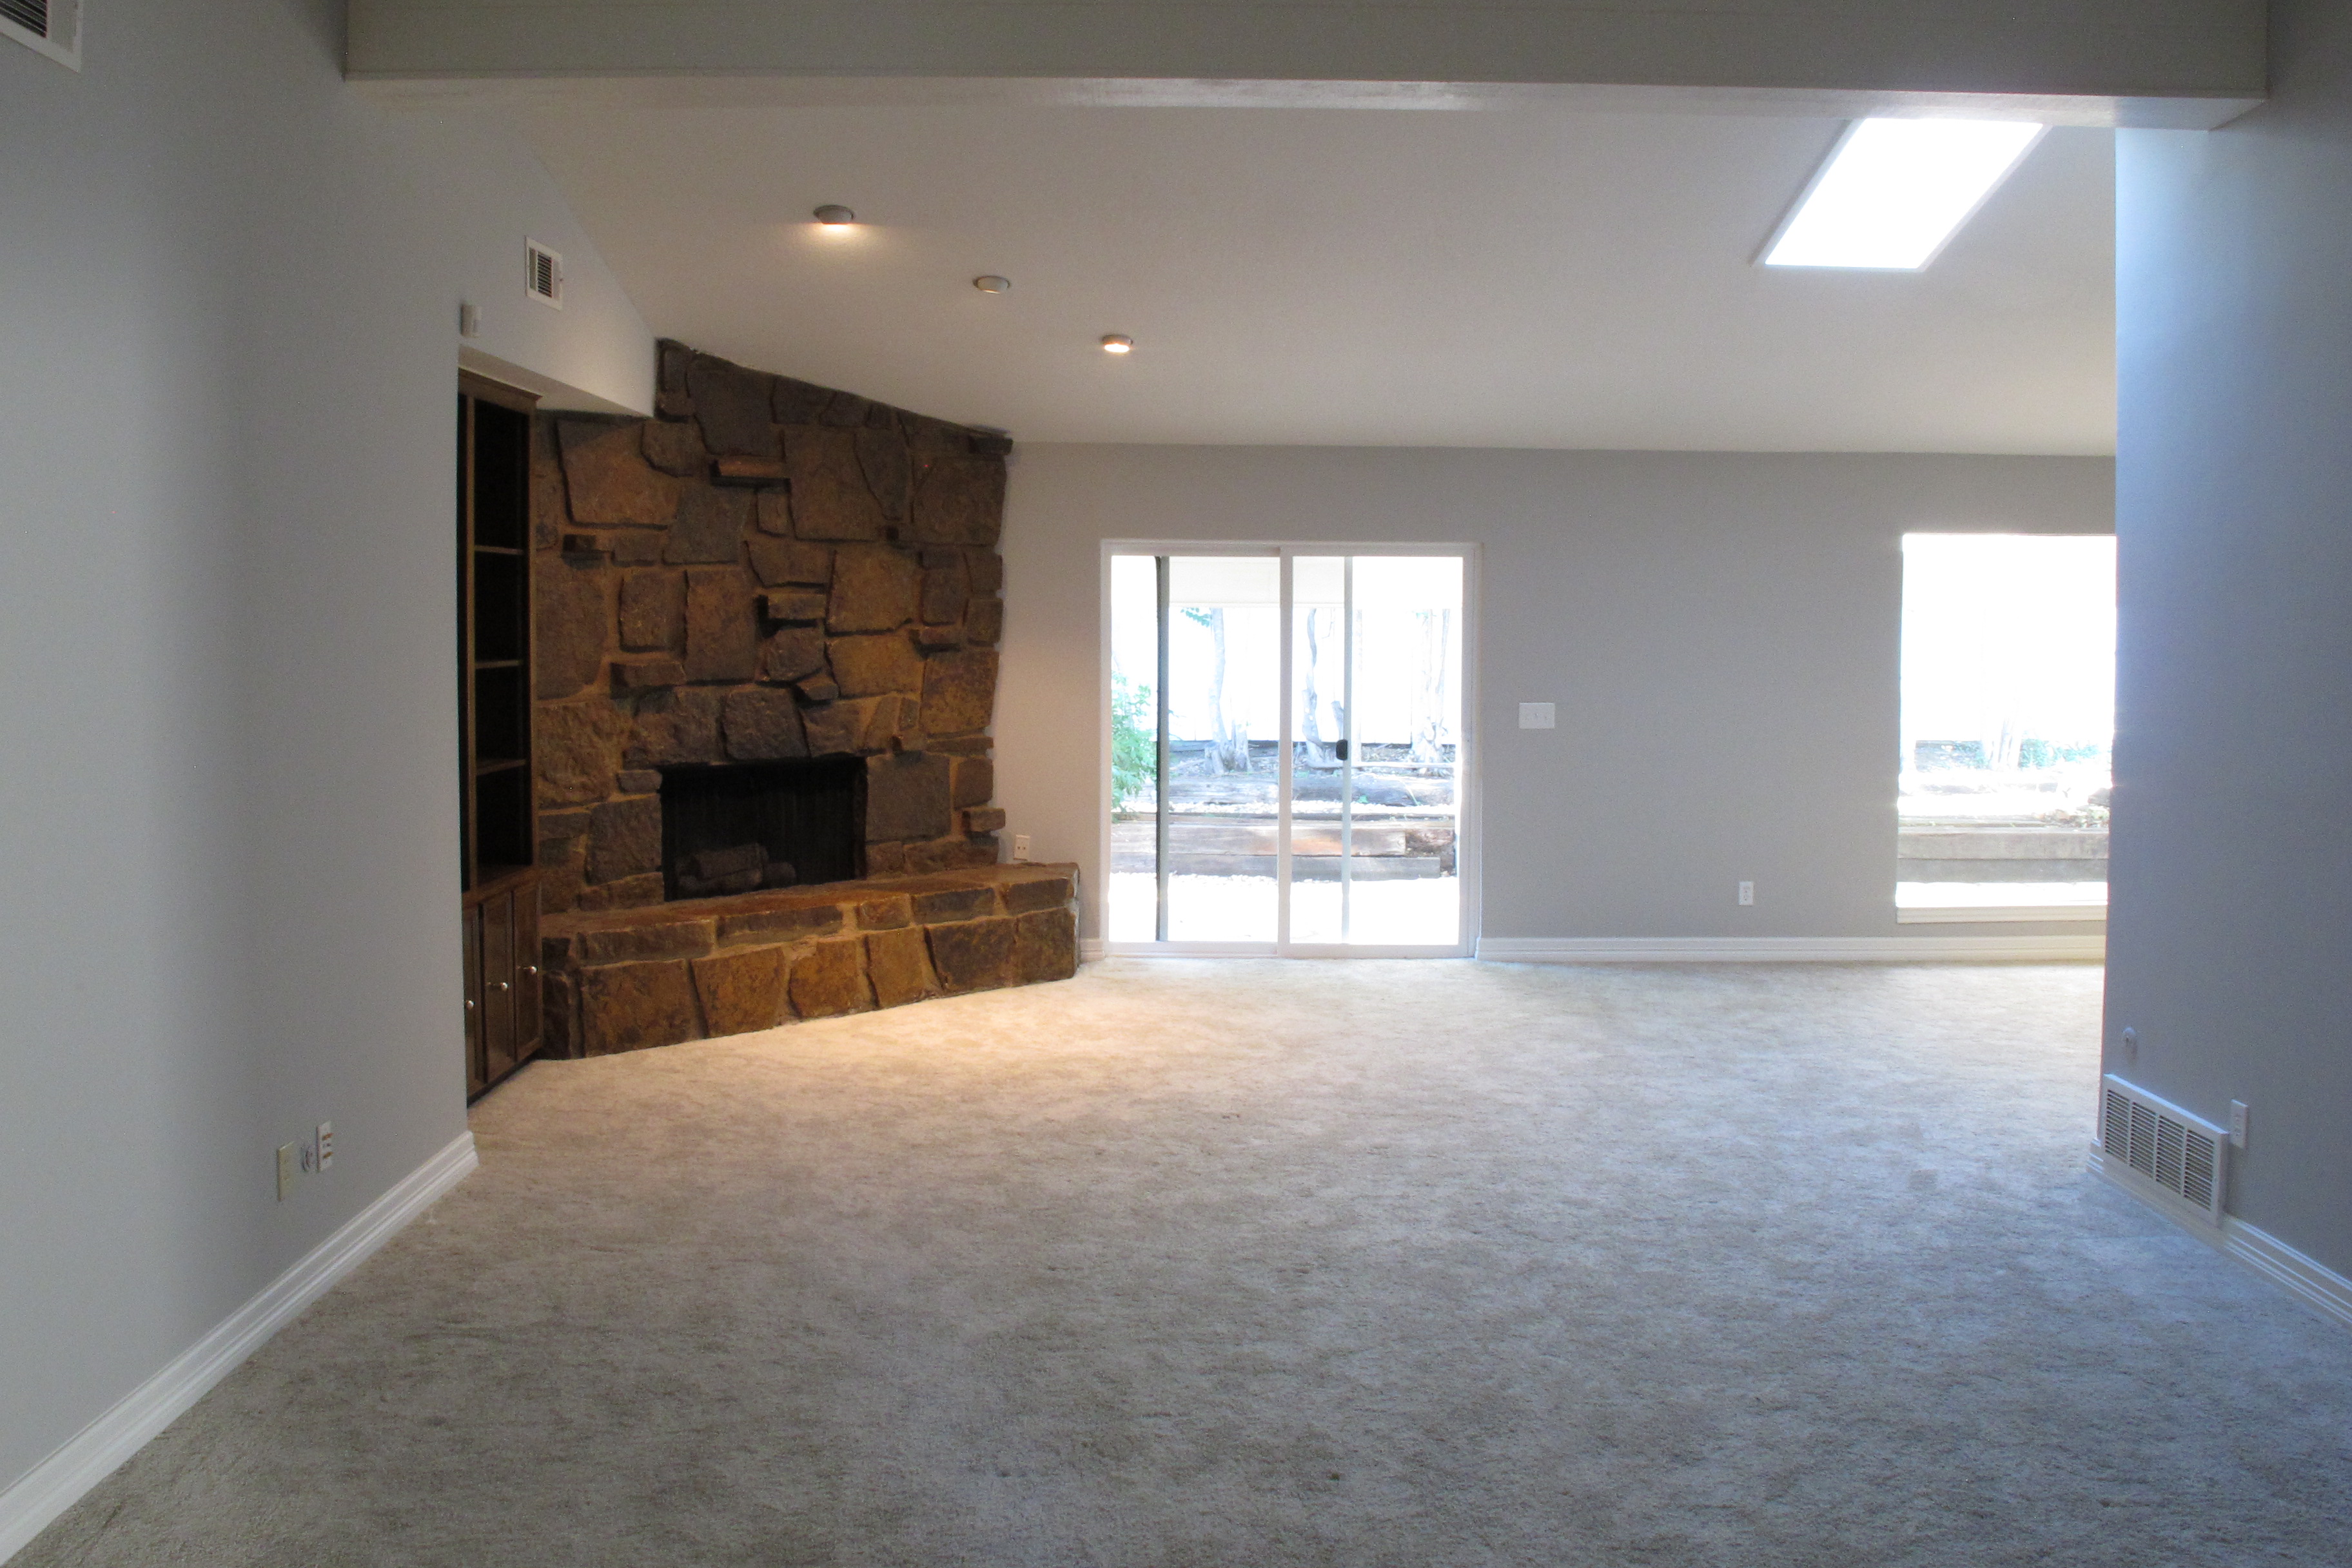

The floors were dusty in these pics and needed to be cleaned up a bit (I hadn’t gone overboard with cleaning at this point since we still had work to do before moving in). They’re a bit darker when clean. I really love how they turned out. They provide just enough contrast with the fireplace and really make the space feel elegant. I can’t wait to paint the built-ins white. That’s really gonna allow the fireplace to pop.
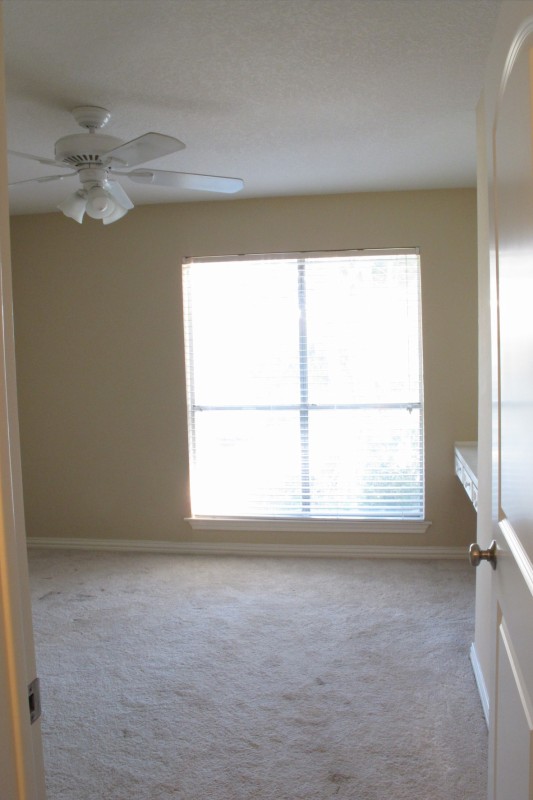
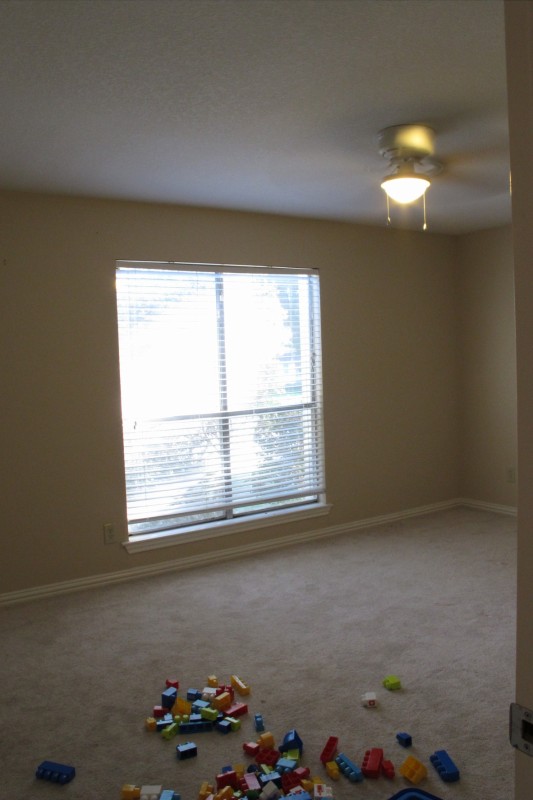
The carpet that we chose for the bedrooms was a speckled Frise carpet called “Ginger”. Some before and afters here….
Before:
After:

Before:
After:

I only took pics of a few of the rooms to give you an idea since it’s the same carpet throughout. We LOVE this type of carpet as it is so forgiving. It hides stains so well. We installed similar carpeting in both of our previous homes and have zero complaints. As mentioned earlier, we chose a type of padding with a plastic barrier on top which prevents stains and other groddies from penetrating the padding. Supposedly, it extends the life of the carpet by 5-7 years.
After the floors were installed, we were feeling pretty darn good about the house. The following day, we walked in expecting to rub our faces all over be enamored of our fresh, new carpeting. But, instead what we walked into was a flooded bedroom. Among the many quirks of a 1970’s house is apparently the weird placement of copper pipes. And while the carpet was being installed in the first bedroom, one of the installers knicked a pipe while installing tack strip.

Which left the room looking like this…

Greatness. We think that the installer pounded the baseboard, which drove a nail that was in the baseboard through the pipe. The thing that was most frustrating to me was that I HEARD IT. When I went into the bedroom to inspect after they’d finished installing the carpet, I heard a hissing sound which I thought sounded like water. I looked, but didn’t see anything, so I just assumed I was hearing the reverberations of the power saw through the wall (they were still cutting laminate outside). It was a smaller leak, so at the time, it just hadn’t spread to where I could see it yet. I just shrugged it off and went home (Note to self: Don’t do that. If it sounds like water, FIND the water.). Literally, the leak continued all night long due to my negligence, which left most of the bedroom carpet and padding completely saturated by the time we returned the next day.
Luckily, we were able to utilize a plumber friend after Joey and my Dad tried to DIY the leak to no avail. So, now it’s fixed. I called Empire Carpet to report this and see about getting the carpet fixed/replaced. And I have to say that I was not thrilled with the problem-solving process of this company. It amazed me that it had been only 48 hours between when I’d initially called to schedule an estimate to when the flooring was actually installed, yet when there was a problem, I was told that I wouldn’t receive a PHONE CALL about it for 1-3 business days. REALLY??!!! I tell you that your installers caused a flood and I don’t even get a phone call for 1-3 business days?? Nice.
In actuality, it took five days and about seven phone calls to get a response. But, I will say that once I finally got that return phone call, it was less than 24 hours until the issue was resolved. They arrived, changed out the padding, and reinstalled the carpet in the blink of an eye. Which left the room looking like this…

Obviously, I’ll be repainting. We repaired the drywall, but I’m being slow, and sanding the spackle in tiny little fragmented phases. It’s still unacceptably bumpy at this point, but it’ll get there. That is, if I can actually spend a solid five minutes sanding without getting distracted first. Having an older house has definitely affected my focus… Every time I start on one thing, I get distracted and begin something else. TOTALLY not like me usually. I expect it’ll be like this for a bit, though, until the house reaches some semblance of order. It’s all in the spirit of moving, I s’pose! At least we have carpeting now and can stash various odds and ends in the room until I actually manage to complete a project. Progress is progress.
So, anyways, I’m gonna continue plugging away at the new place and update ya’ll whenever I can! Until we meet again…
Shared at: