DIY rustic, modern towel hook

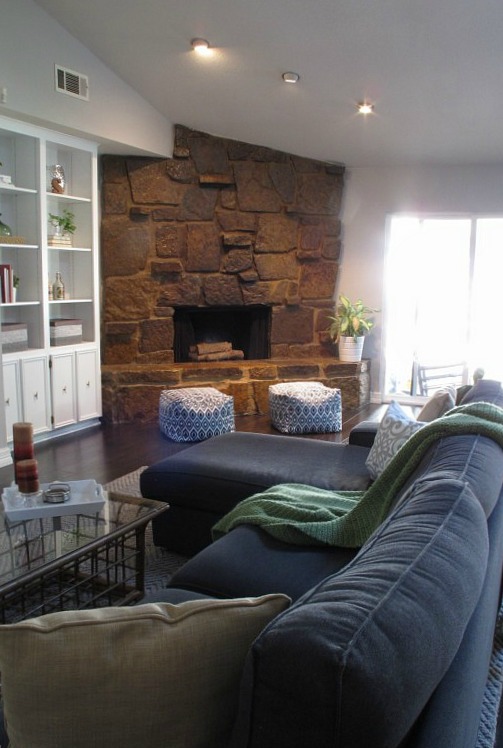
This is a super simple DIY project that’s inexpensive, easy, and functional (aka: the holy trifecta of DIY projects).    I’ve seen different versions of this all over the internet and decided to give it a go since I already had all of the materials on hand.   The room in question for this project is our pool bath.   I’ve wanted to add a towel hook behind the door since we moved in as I figured it’d be the perfect place to hang damp pool towels in the summer.

Now, if there’s one thing you may not know about me, it’s this:  I’m a hoarder hooks.  Allllll the hooks.  Seriously, whenever I see them on clearance, I buy them.   I literally have a drawer full of hooks still in their original packaging.   I figure that they’ll all be used eventually somewhere.  Ya know, if I’d just get on that already.

So, anyways, here are my hap-hazardly-placed materials for this project…

A piece of scrap wood that just happened to be the exact length I needed

2 – 3″ wood screws (not shown)

3 – Young House Love hooks that I found at Target for (drum roll please)….

$1.18 (Woot!)

To get started, I decided to determine placement of my hooks and pre-drill my holes prior to sanding.  This way, if any splinters were created by my drill, the sander would quickly bid them adios.

I began by measuring three even distances across the board with my yardstick.  I placed my hooks on the plank at these designated locations and marked the holes with a pen.  Human note: I actually think this was the most time-consuming part.  Not because it was hard, but because 1. I’m clumsy… several times, I got the hook placement right, only to accidentally nudge the board and shift everything, which resulted in overly-dramatic-fake-ugly-cry-face.  Sorry, neighbors.   B. I’m the parent of a 4-year-old… who “helped” by “cleaning up my project mess”. #thanksbutnothanks #ugh

Once I finally managed to control both my child and my own appendages, I got my holes marked, and used a drill bit slightly smaller than my screws to drill pilot holes…

232323232-fp83232-uqcshlukaxroqdfv387;8-nu=3396-6-9--78-WSNRCG=35-8-795-3346nu0mrj

As you can see in the shot above, I also drilled screw holes that would be used to attach my board to the wall.   I don’t have pictures for this part, as the process took both hands to complete, but allow me to explain…

I wanted at least one of the wood screws to hit a stud, so I used my trusty stud-finder to locate said stud.   I held my board up and marked the stud placement on the board.   Then, I simply measured in the same distance on the other side of my board to determine where the second hole would be located.  This way, both screw holes would be evenly placed on the board.  I wanted a rustic flare, so the screw heads will be visible using this method.

Once all of my pilot holes were drilled, I used my orbital sander to remove any splinters and dirty spots.  Next, I stained my plank with the same grey stain that I used on my industrial pipe shelf

I used the same technique as I did on that project.  Wax-on/wax-off with zero time to allow the stain to penetrate, which left a nice, light grey tone with lots of sandy wood-grain showing through.

And then I accidentally took a random shot of the ground…

Which coincidentally is clearer and more artsy than the shots I mean to take most of the time.  #youarewelcome

Next, I screwed the board to the wall behind the door in our pool bath, using a level to verify correct placement…

As mentioned previously, one screw went into a stud and the other went into a drywall anchor.   And, I attached my hooks…

Because I’d pre-drilled pilot holes for the hooks, attaching them to the board after the fact was a piece of cake.   I find that when it comes to glossy hooks like this, it’s better to use a screwdriver than a drill to avoid accidental scrapes or marring of the hooks.

Now, for a wider shot…

232323232-fp83232-uqcshlukaxroqdfv34-72-nu=3396-6-9--78-WSNRCG=35-8-88732346nu0mrj

I have to say that I’m totally digging the contrast of the rustic wood next to the more graphic print…

232323232-fp83232-uqcshlukaxroqdfv3--;6-nu=3396-6-9--78-WSNRCG=35-94789-5346nu0mrj

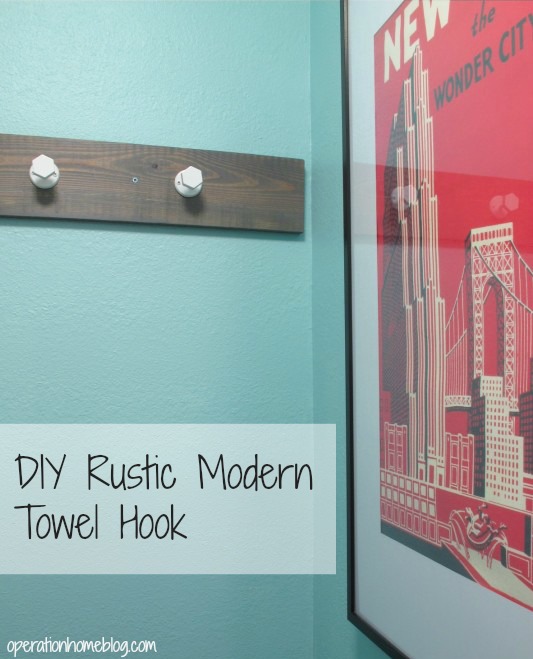
As well as the glossy hooks against the rough, greyed wood…

Not too shabby for a project that literally cost me $3.54 (plus tax) (since I already owned the wood, stain, and screws).   Plus, now we have a place to hang our pool towels to dry once the warmer weather comes.  One small step towards a more functional home.  Music to my ears.

TDC Before and After

Pouf! Magic.

Hey y’all!

So, I’ve been searching for something to add softness to our fireplace area for some time now.  Remember this bad boy?

My goals in doing this were to (1) break up that continuous sea of brown (ie: the floor and fireplace) with some brightness and pattern, and to (2) add more seating… all without obstructing the view of the fireplace (aka… my favorite feature in the house).

I’ve loved the idea of poufs ever since I first laid eyes on these magical creatures.   I mean, they’re like sophisticated bean bag chairs.  And nothing beats a bean bag chair…  I.mean.nothing.   Picture my child-self perched on a red vinyl bean bag chair in our basement, playing Super Mario Brothers on the original Nintendo system, jerking up the controller every time Mario jumps.  Because that helps. Totally. Not as much as actually jumping with Mario, but close. 😉

We still own a black bean bag chair that Joey’s parents gave to Lucas.  It’s currently in the hangout room, but seems to migrate around the house from time to time.   It’s casual cool.  I have to keep it.

Anyways, after searching for poufs for a while, I became pretty depressed.   They can be pricey.   Some at upwards of two hundred beans.  The cheapest I’d found was around 60 bucks a pop at Tarjay.   Still no drop in the bucket considering that I wanted two.  And keeping cost down is a must… With all of the larger reno projects we have going on (our pool renovation, the front door, vent cleaning, etc.) my “design budget” is practically nonexistent.

Then, one fateful day, I hit up Tuesday Morning and found a GREAT navy and white ikat-ish pouf for.. Wait for it… $24.99!!  Shut the friggin’ front door.

I asked an associate if they had a second pouf in stock but they didn’t.  Bummer.

So, what’s a girl to do when faced with this sort of dilemma??

Answer: Drive 20 minutes to another Tuesday Morning while crossing all appendages that she’s not too late.  Clearly.  😉

And it worked.

I powered through the aisles fully intending to take down any pouf-lover who got in my way frantically seeking out that blue and white ikat-esque goodness.  Which is when the skies parted and a ray of sunlight illuminated the pouf’s essence while a heavenly choir sang “I’ve Got That Loving Feeling” a la Maverick in Top Gun in the background.

Or maybe I just saw my new BFF, paid for him, and ran.  Whatever floats your boat.

I got my twin poufs home, rushed them to their new abode in front of the fireplace, and stepped back to admire as Lucas (a fellow pouf lover, apparently) immediately began smooshing his face all over them.  Love that kid.

And here they are strutting their stuff…

And yes, that plant is dying. I mean, duh.  #whereplantscometodie

232323232-fp83232-uqcshlukaxroqdfv3-766-nu=3396-6-9--78-WSNRCG=35-348;8;6346nu0mrj

blue and white pouf

They’re exactly what I was going for…  They add crisp coziness to the fireplace area without taking away from it.  I love the cool, brightness of the colors against the warmer brown tones.  And the contrast in textures makes me happy.  Way to read my mind and totally accomplish my goals, poufs…  It’s like you have ESPN or something.   😉

Here’s the current view of the living room.   Slowly, but surely it’s coming together….

vintage modern living room

And just for fun, here’s the before shot when we first got the keys to the house…

IMG_7239

Now, if I would just get over the “art paralysis” that’s taking place in my brain so I could get on that wall above the TV.   I have a few ideas, I just haven’t gotten around to trying them yet.   I also need to come to a decision on the coffee table.   Whenever I posted about our new rug, I received several sweet suggestions both on the blog and on Facebook to paint the coffee table anything from white to a bold color like green.   I’m leaning towards white, but until I’m fully certain, I don’t wanna mess with the original finish.   I’m letting it marinate, if you will.

So, anyways, another small tweak to add coziness to our space.   What tips do you have for adding coziness?

TDC Before and After