Masterpiece for our Master

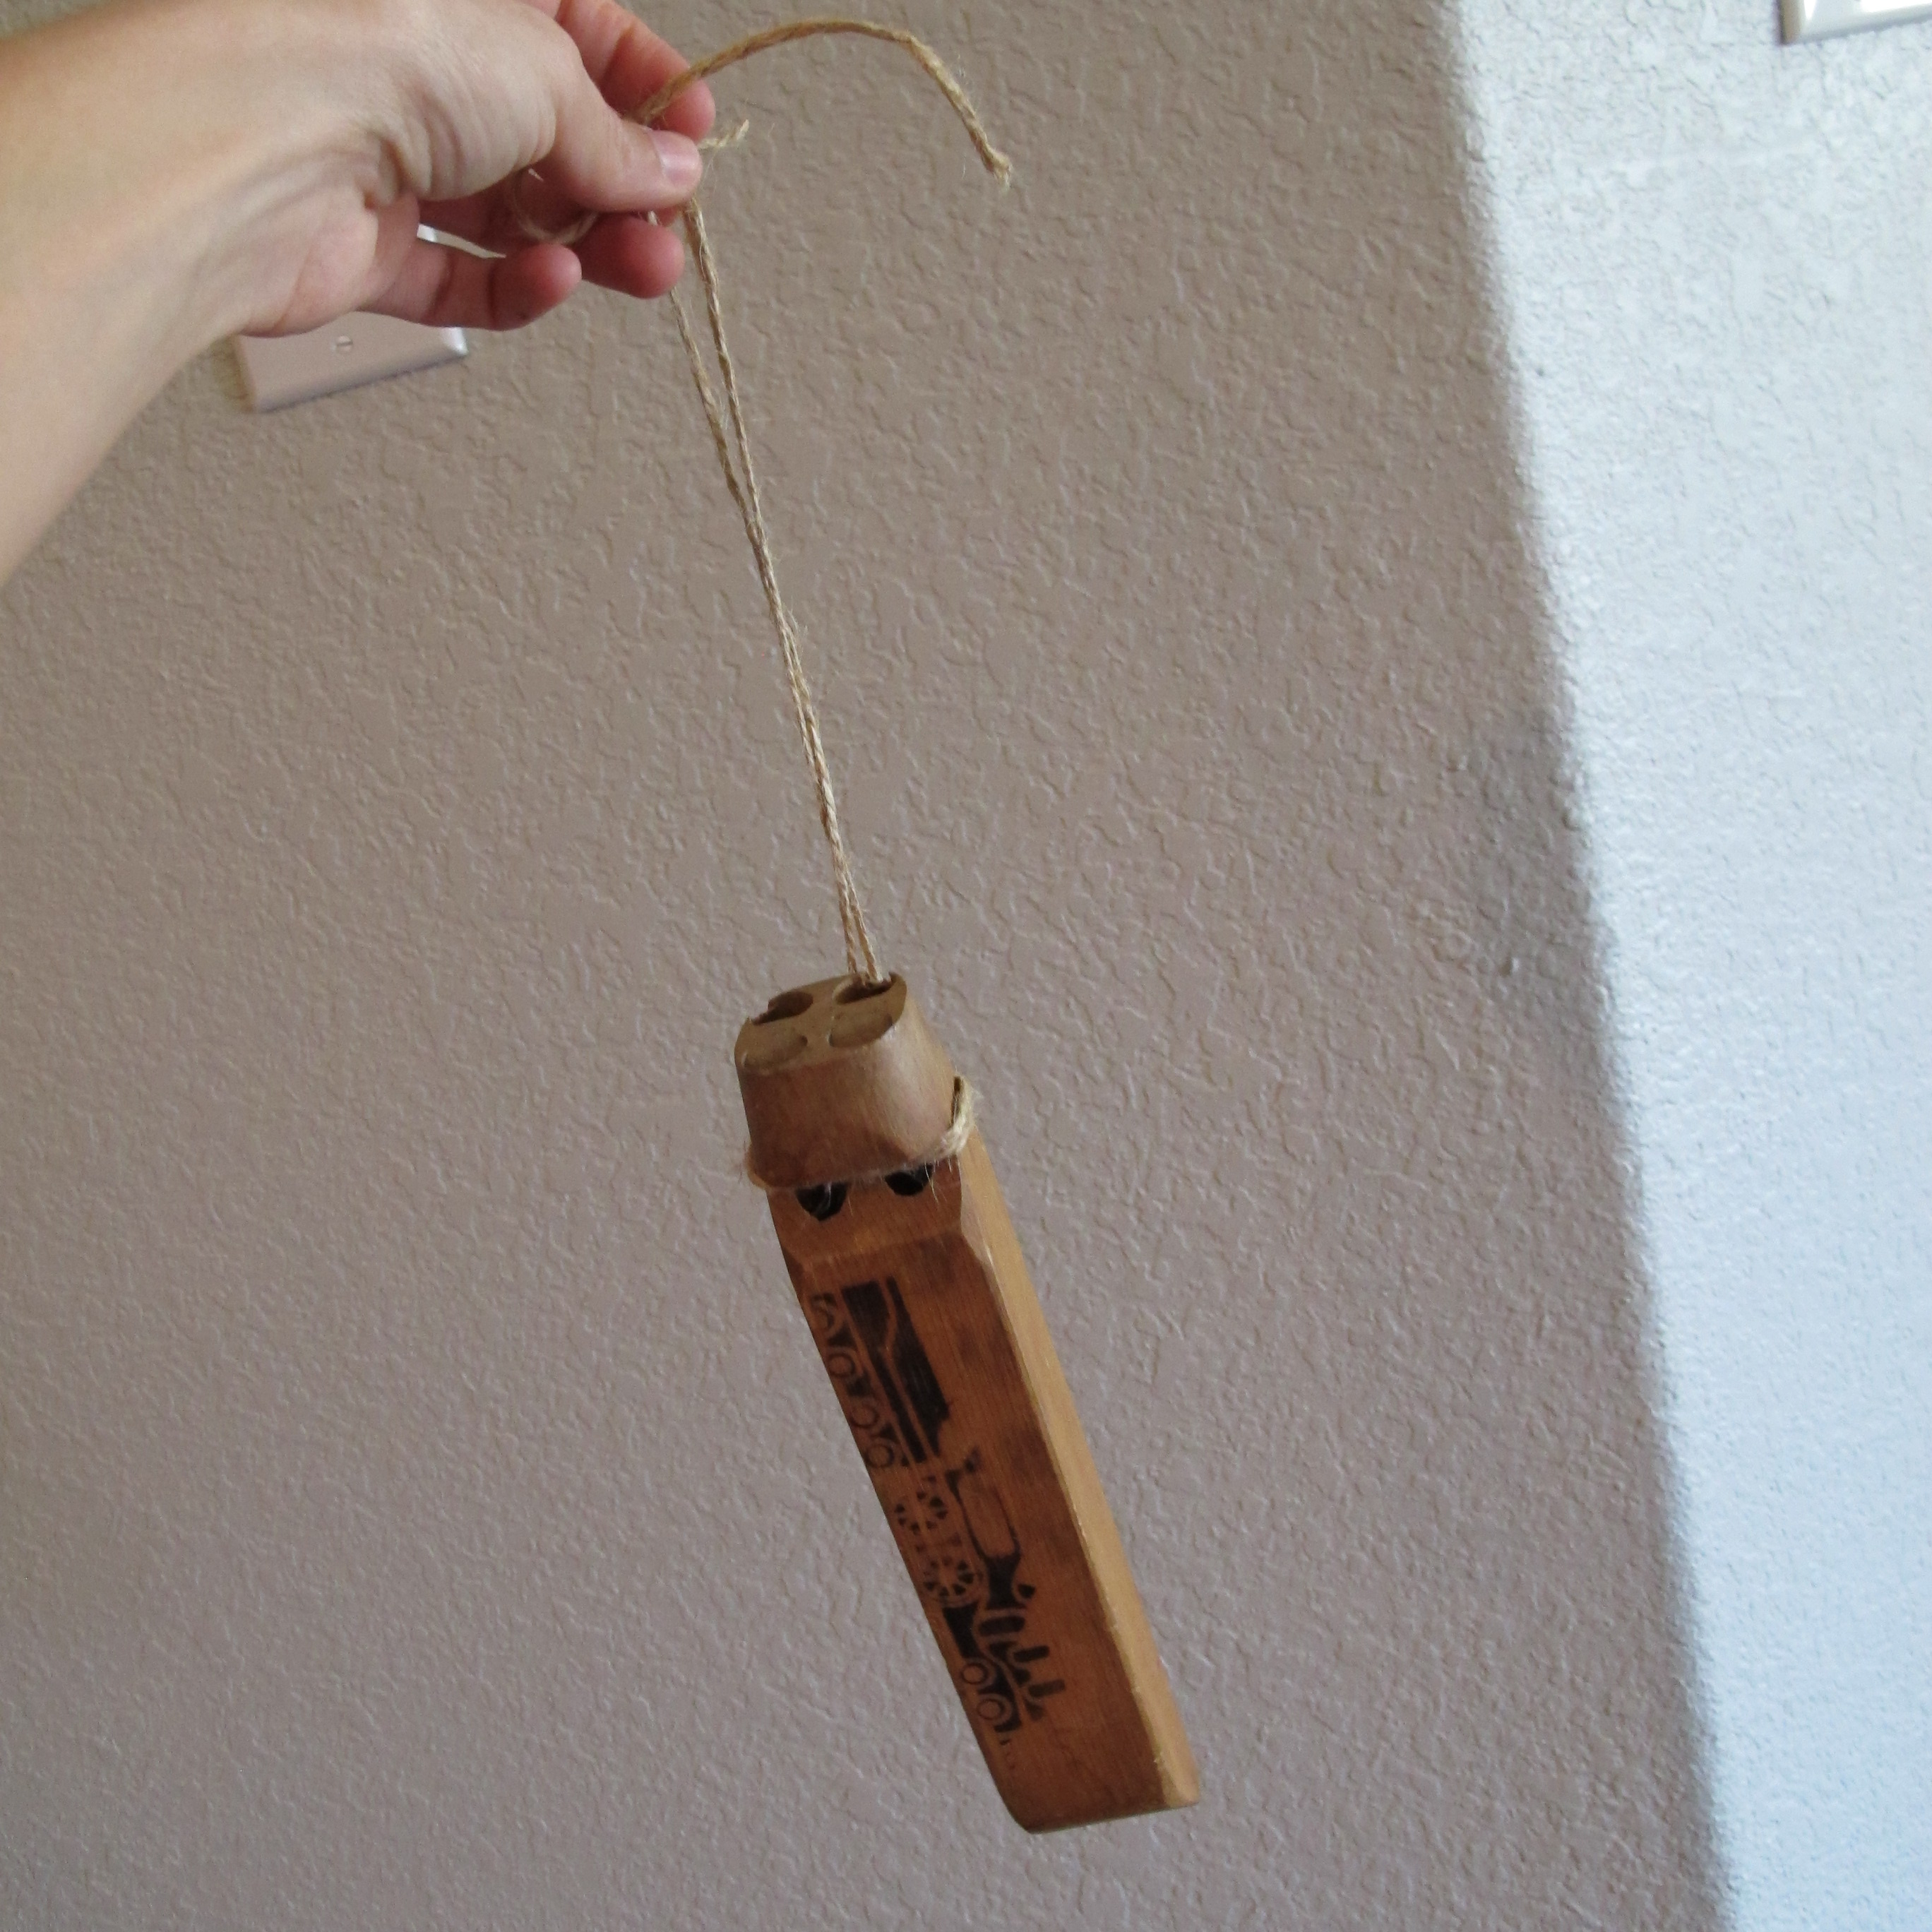
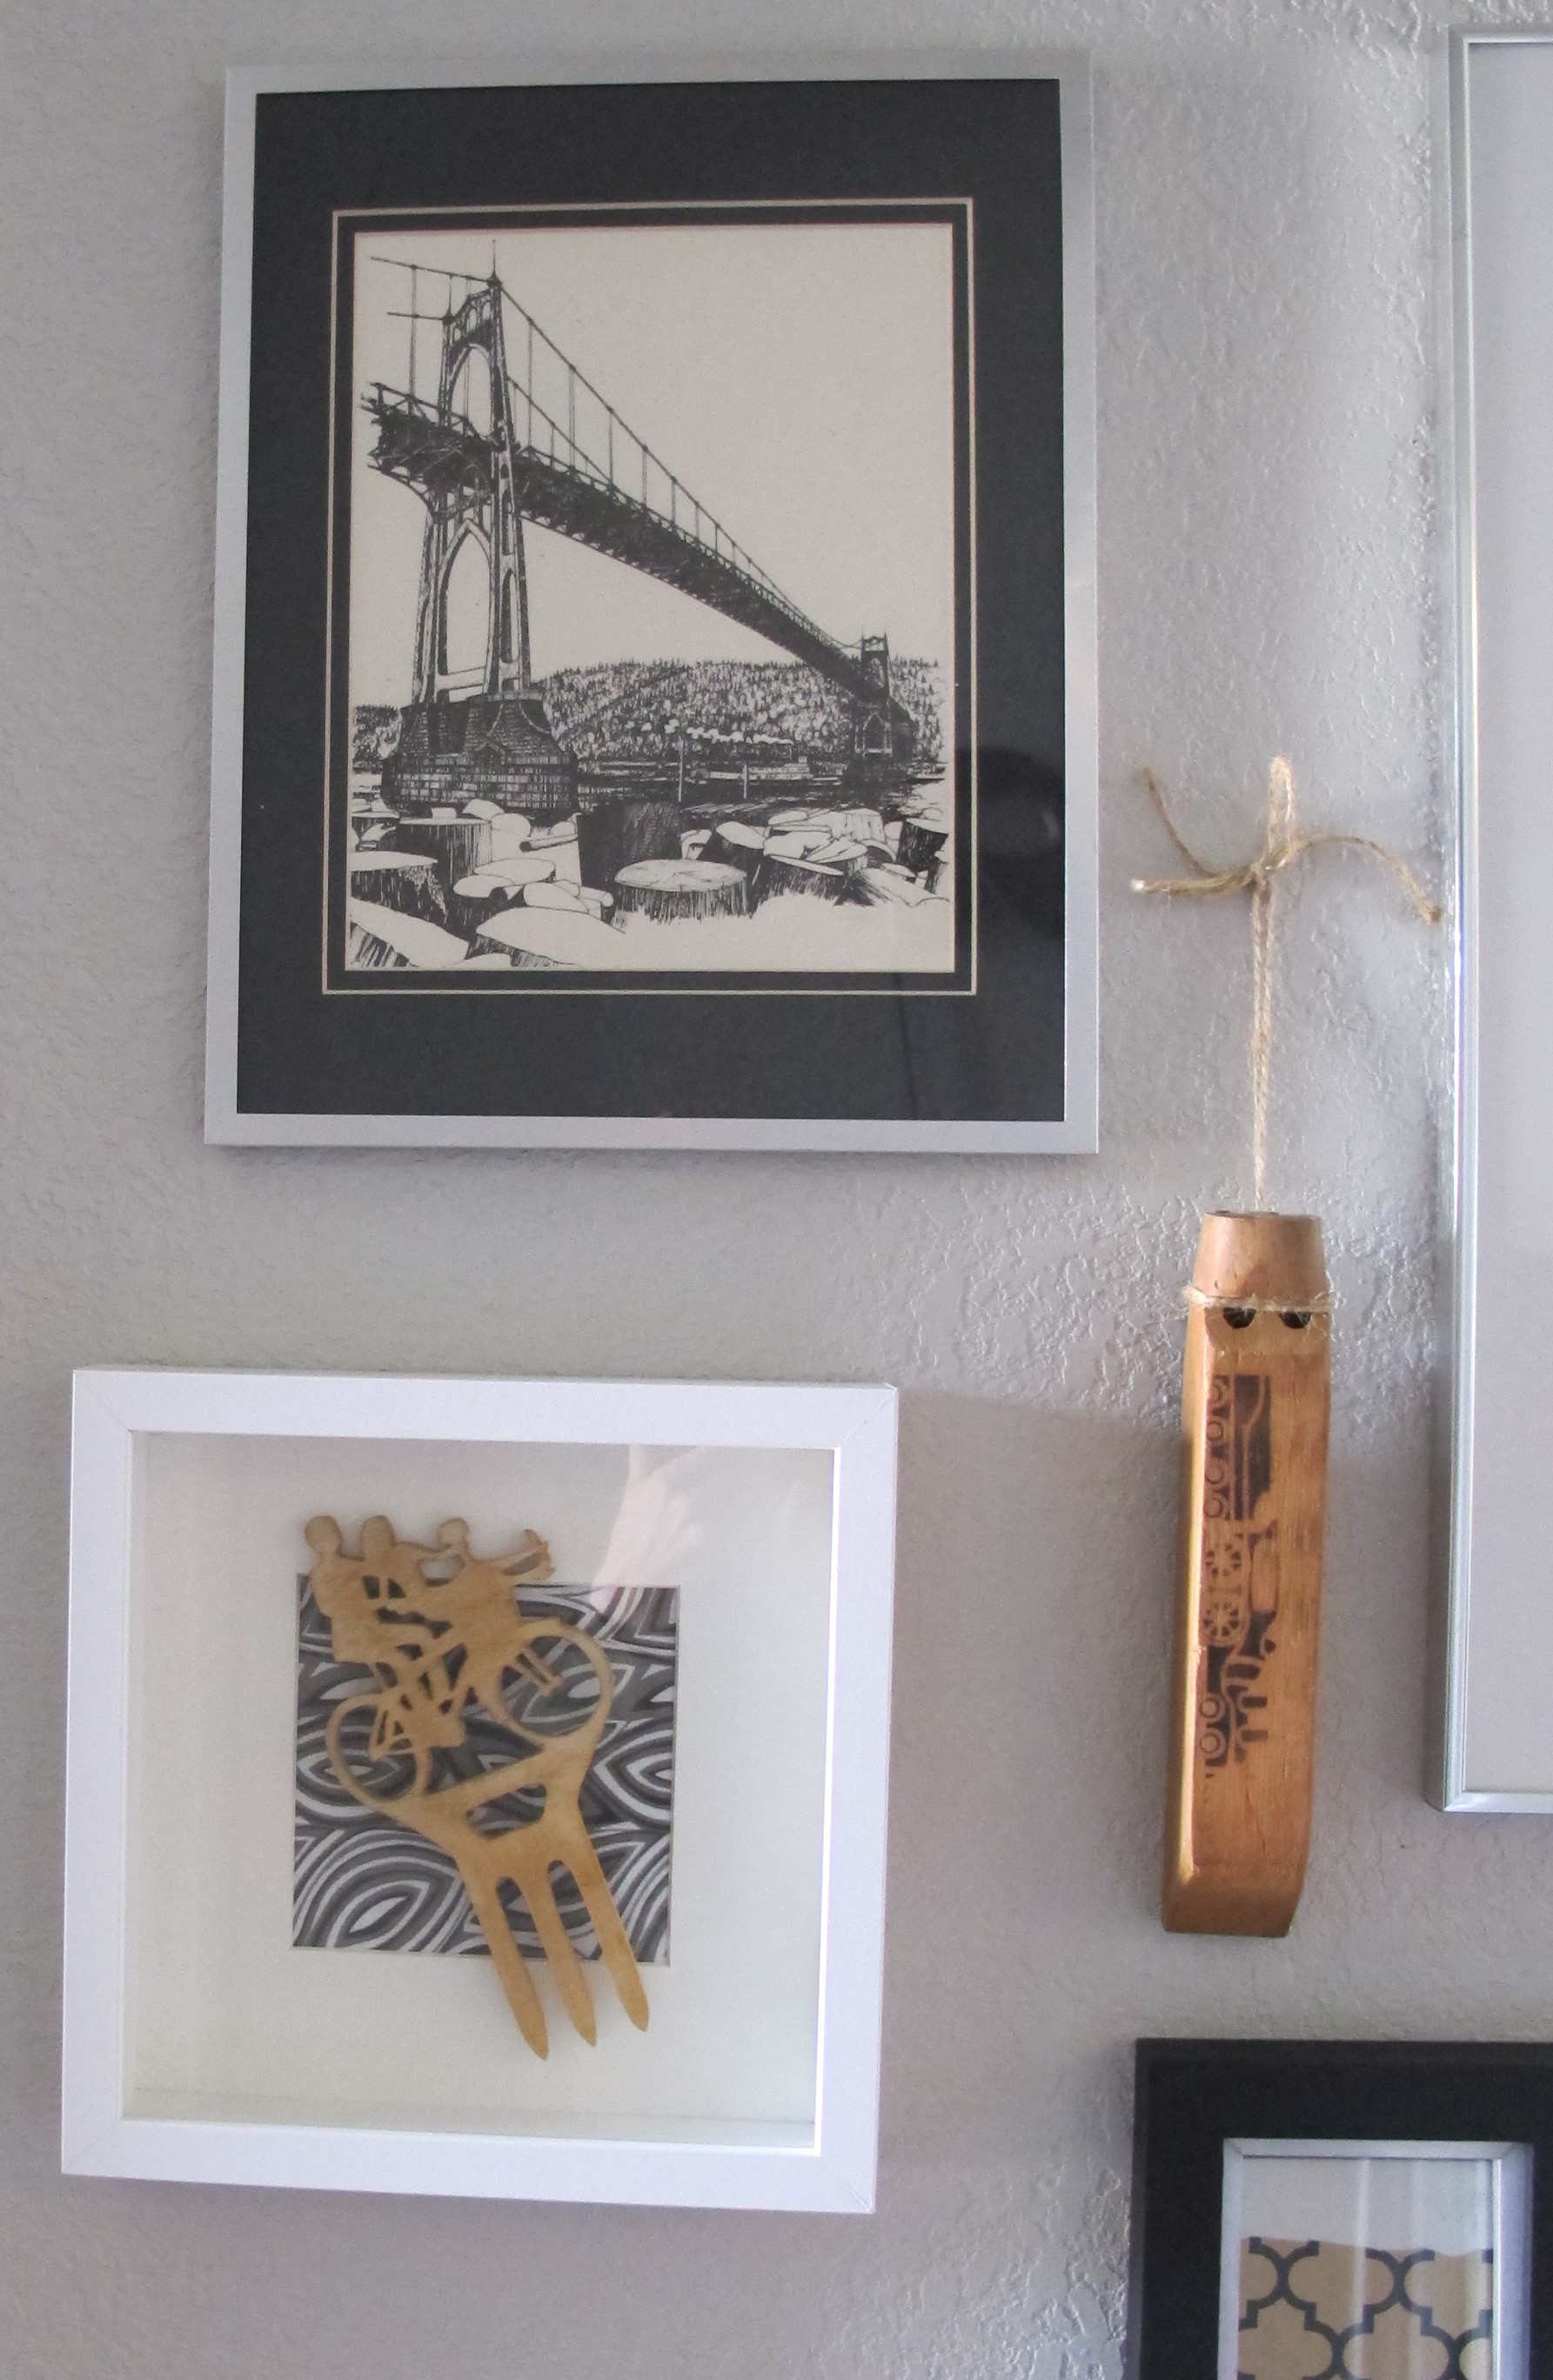
So, we had this empty, lonely wall in our bedroom that was desperately in need of a friend some art…

IMG_4365IMG_4231 

And now we’ve got some…

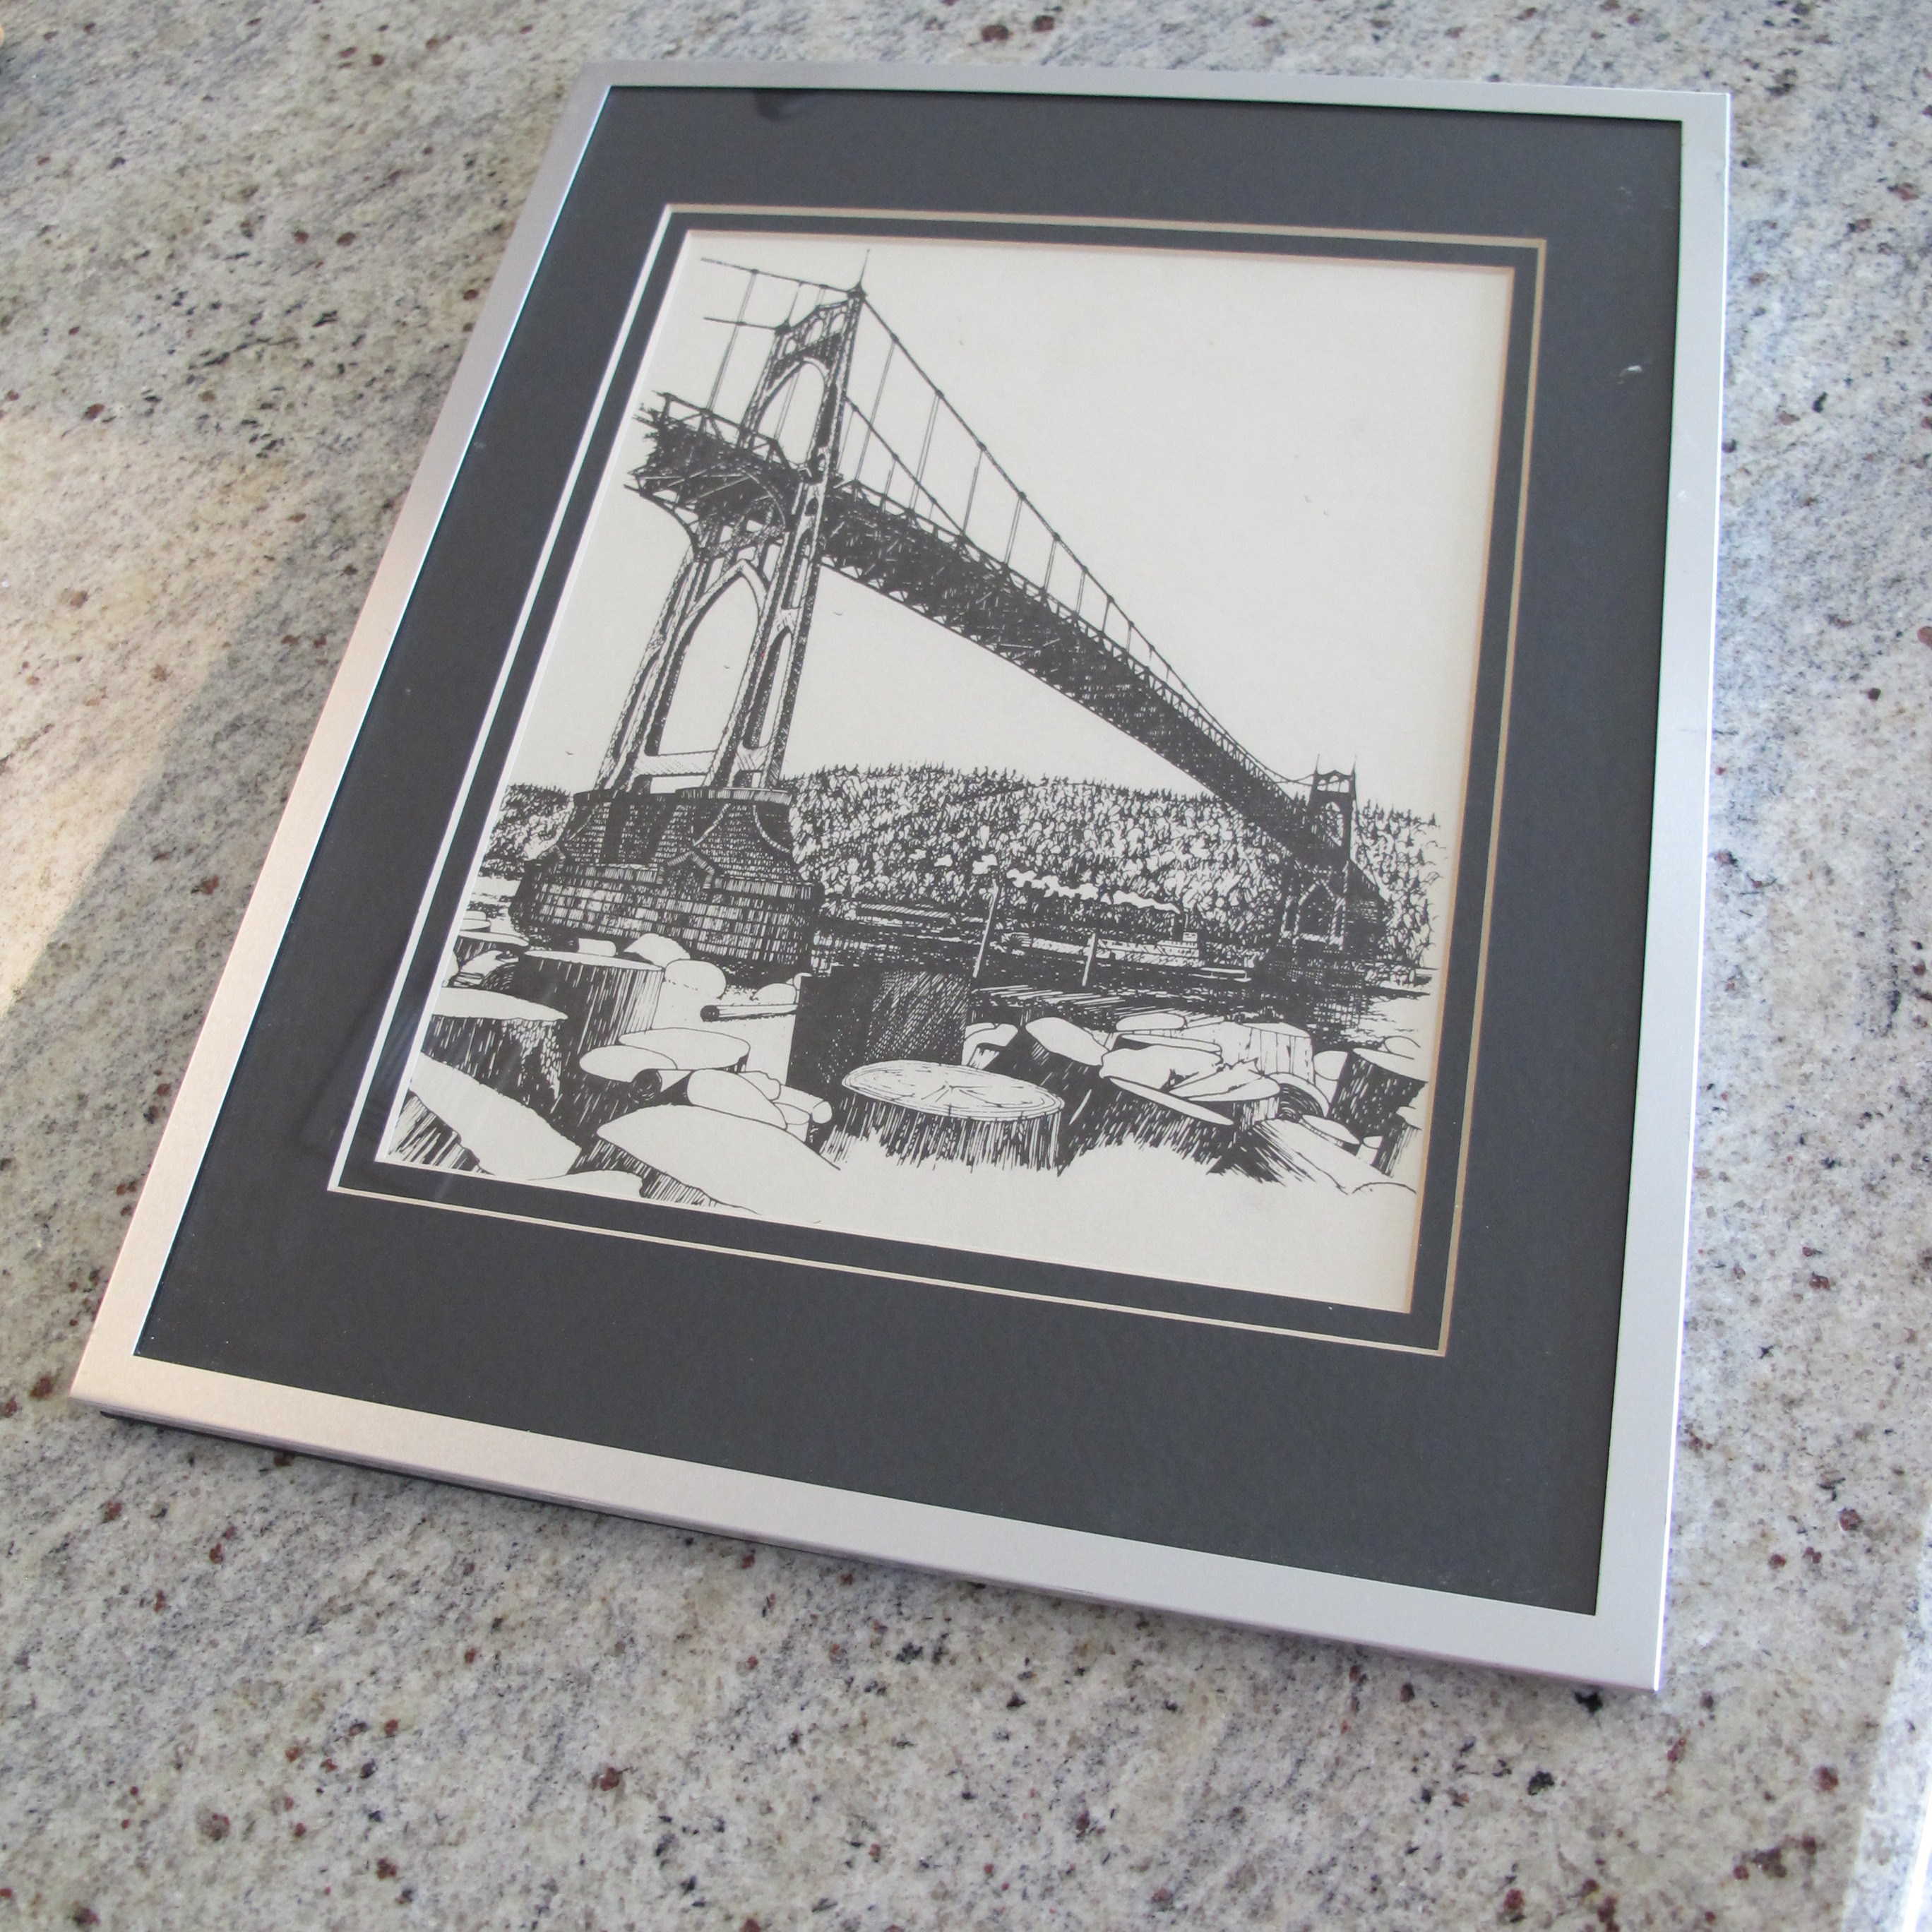
This piece was created by my mother-in-law, Mac.   She offered it up when I’d mentioned that I needed some art in this post.   She actually said that she didn’t have room for it and that I could alter it any way I wanted.   I briefly considered painting it white, since I thought the green was too bright, but couldn’t make myself do it.   It’s just too cool of a piece.   And once I set it up on the dresser and let it marinate in my head for a while, I ended up simply loving it as is.  The color is off in this next shot by quite a bit, but I wanted to include it so you’d get a feel for the detail and texture in the piece…

And a few more glamour shots…


IMG_4864

You can see that I was playing around with the styling as I took pics.  I couldn’t help myself.   It’s still not completely right, but it’ll get there eventually.    I love that the green coordinates so nicely with our bedding.   Happy accident, if you ask me.    Plus, the painting is modern and graphic without being too in-your-face.  And I like the message.   Make The Time.   To me, this means make the time to just do nothing.  Make the time to sit and play and be silly with Lucas.   Make the time to enjoy the little things.   A good message to wake up to every morning, for sure.

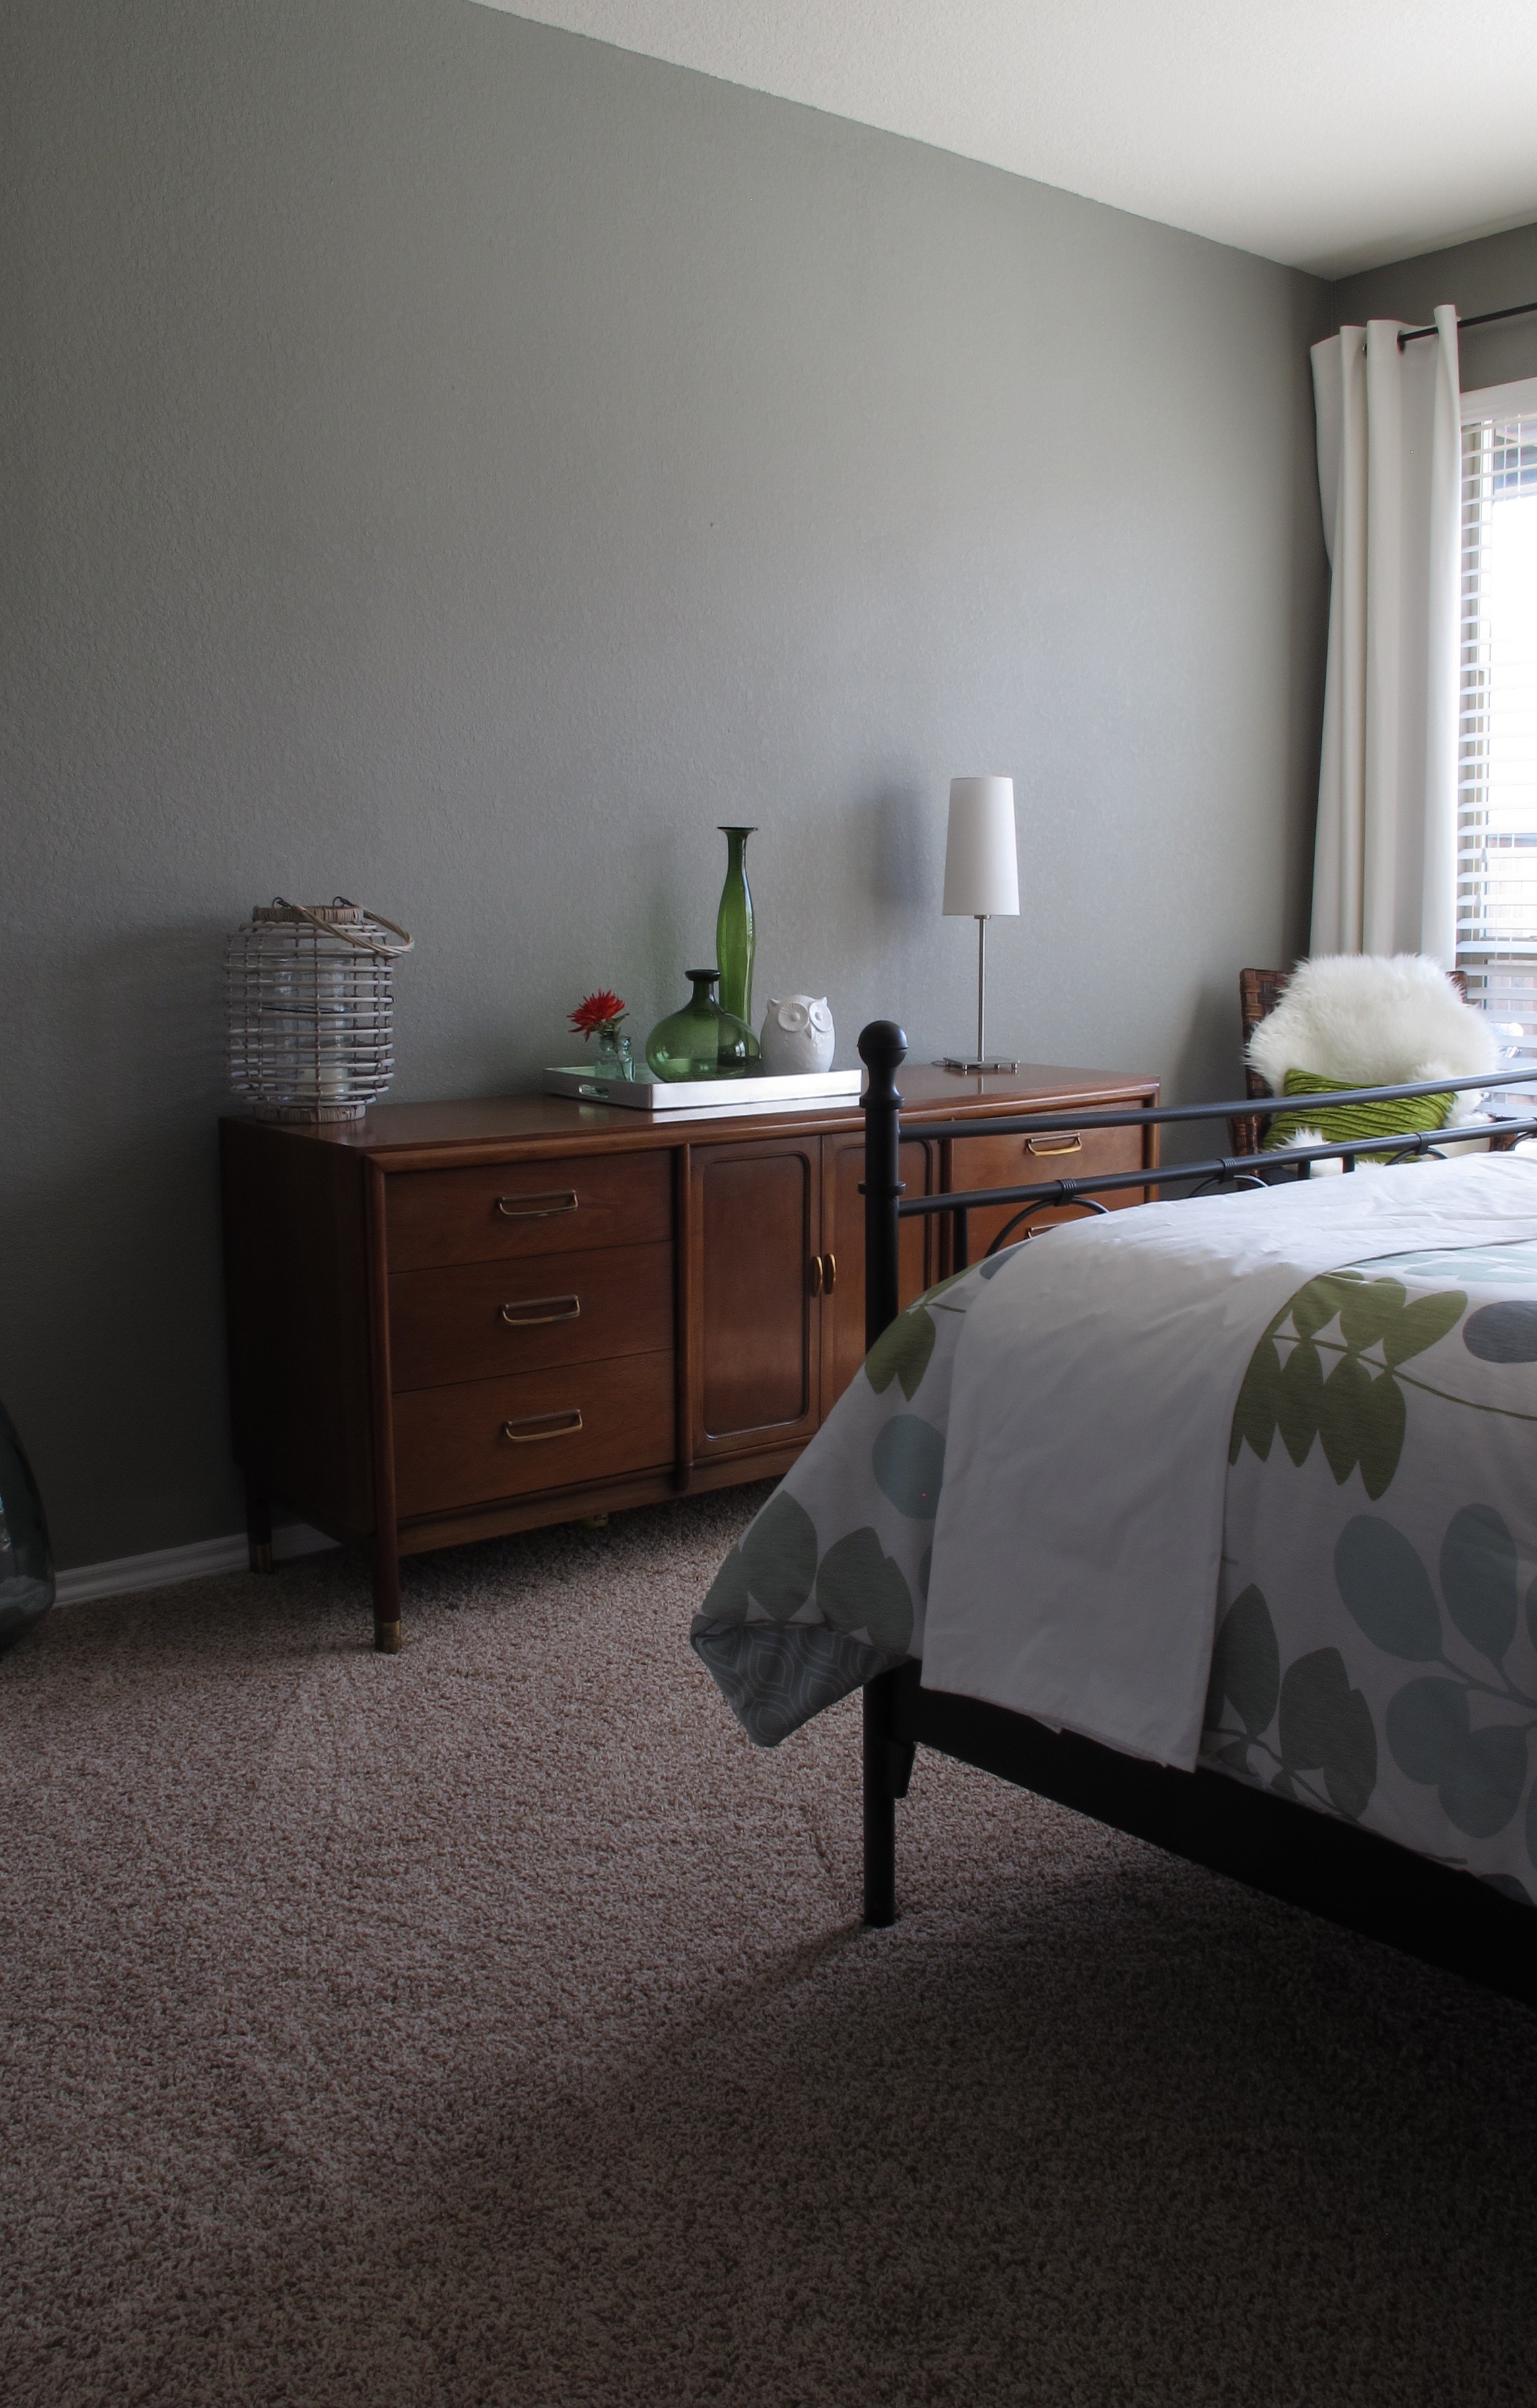
This side of the room is definitely coming together.  It’s slow, but it’s happening.   I still need to play a bit more with the styling and am still on the hunt for a mod white chair to replace this brown guy….

I don’t often show this corner of the room because it’s just…. so… brown.  I’ve had this chair forever and didn’t have another place for it.  And although I’m a fan, it’s just not right for the space.

I’ve considered breaking down and simply painting it white and calling it a day.  Though, I’ve hesitated in doing this because I was afraid that the chair would take on more of a country vibe (what with it being wicker and all).   But then again, this chair has such clean lines that it may be fine.

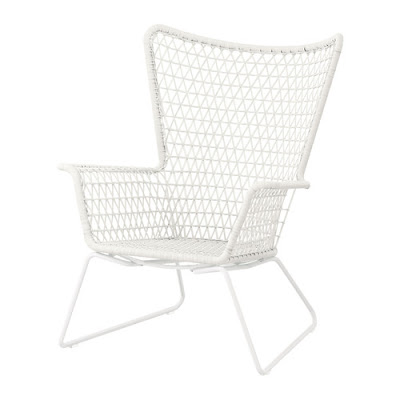
Or maybe, I’ll just nix that plan and go for something like him…

Overstock

Or him…

Loveshack Chic

And don’t even get me started on this happy egg chair…

Young House Love

(DROOL! If only the thrift store gods would bestow a coveted egg chair upon me.)

I do know that a white chair (whichever route I choose) is definitely the right call for this corner.  I recently experimented by throwing a white sheet over him to see what I thought.  And it was perfect.  It caused the chair to recede visually, which allowed Drex and our new painting to move forward and become the stars of the show.   As they should be.    Right now all that brown is just competing with itself.    So, unless I come across the deal of the century on a kick-bootay white mod chair, I may very well be adding this chair to my “to be painted white” list of items.  So, we will see…

So, what do you guys think?   Paint the chair?   Go retro?


Can’t get enough frame walls….

Before we put our last house on the market, we engaged in full house decluttering.  This process included renting a storage unit and storing every item that we didn’t absolutely need in an effort to make our closets appear more spacious.  Several weeks ago (almost a year and a half later), we finally got around to unloading our storage unit and bidding it adios.

I’ll tell ya, sifting through things that you forgot you had is pretty fun.  And I say that literally.  Its like shopping out of your own stuff for free.   Among the old Lucas baby paraphernalia and random college textbooks we found a few gems worthy of sharing.

First is this neat, hand-carved whistle that Joey’s had since he was young…

IMG_1641

It sounds like a train whistle when you blow into it. The picture of the train is burned on.  And check this out…

IMG_1640

I wonder if his patent ever went through.   Next, we have this awesome ink drawing of St. John’s Bridge in Oregon….

IMG_1642

Then, I found a box of memorabilia from our wedding.   It was only five and a half years ago, but I have to wonder why I boxed some of this stuff up.  For example, our cake topper…

IMG_1656

I had searched high and low for a cake topper with a bride and groom on a bicycle, only to find one cartoony (read: ugly) one, so Joeys parents graciously offered to make us one.  It was drawn by my mother-in-law and cut out in wood by my father-in-law.  And it turned out awesome.  Grossly enough, it still had frosting on it when I pulled it out of the box.  I’m wondering why I packed it like that. Ick.

And just for fun, because it’s difficult to describe the travesty that were my bangs as a child….

IMG_1649

They seriously went back to the middle of my head.   Heehee!  Ah, memories!  Growing them out was interesting (and not in a fun way).

After tossing these items around in my head for a while, I decided to use most of them (Ie: not my bang pic) in a casual photo collage wall. I know… Another collage wall? Oh yes. You bet. But I wanted this one to feel more organic and natural.  Less uniform and organized than our living room photo collage.

I decided to extend upon this wall in our foyer….

IMG_2001

You can see I was already experimenting with placement of the ink drawing. I decided to start by creating some easy art with our cake topper. Here are my materials…

IMG_1986

The shadow box is from Ikea and the fabric remnant was 99 cents from Walmart. I simply cut out a small swatch of the fabric and taped it onto the back of the mat with scotch tape…

IMG_1987

Then, I used a spare Command strip from a package of utensil hooks to adhere the cake topper within the shadow box. I cut small pieces to fit behind the cake topper like so….

IMG_1989

And Command-stuck it to the matting. Ta-Dah!!

IMG_1990

Easy peasy lemon squeezy. Then, I took the whistle and tied a piece of twine around it….

IMG_1993

And hung it with a finishing nail on the wall between the two existing pictures. I left the twine long so that I could adjust the length if needed once hung.

IMG_2027

I hung the shadow box next to the whistle and added a double black frame from Ikea that I also found in storage. I filled it with a piece of striped fabric layered with a scrap of wrapping paper…

IMG_2472

Then, I stepped back and observed…

IMG_2015IMG_2016

But the arrangement felt a little lost on the wall and slightly off balance. I adjusted the length of the twine on the whistle to lower it some and added a few more frames up top (that were also found in storage. Seriously, shopping in your old stuff rocks.)….

IMG_2478

IMG_2337

Much better. Ill probably tweak the arrangement a smidge as time goes on, just because that’s what I do, but I’m really satisfied with it for now.

I didn’t use any techniques to plan out frame placement with this one. I just winged it and hung the frames where I felt like it. I’m really liking the different styles of frames and the mix of black, white, silver and wood tones. It might be fun to extend this one from floor to ceiling.  Hmmm…. Oh the possibilities.

Here are a few close-ups….

IMG_2340

IMG_2473

IMG_2474

It feels good to have gotten started on this wall, for sure.   It stared at me for far to long just begging for some pizazz.    So, anyways that’s my story of forgotten treasures and frame walls!  I hope everyone has a happy Wednesday!!    🙂