Modern Vintage Happy

As some of you may know, I’m a thrift store/Craigslist junkie.   I love finding and revamping (or not revamping) vintage pieces.   They lend so much personality and warmth to a room.   I would LOVE (with a capital LOVE) to grow our collection and am constantly on the lookout for new, quality finds.   Pairing vintage with modern allows both elements to shine in their own right and it’s a combo that makes me happy.   So, when I received an email from One Kings Lane promoting their new Home Decor Resource and requesting a post on how vintage and modern team up in our home, I jumped on the opportunity.   Here are a few examples of what we’ve got going on….

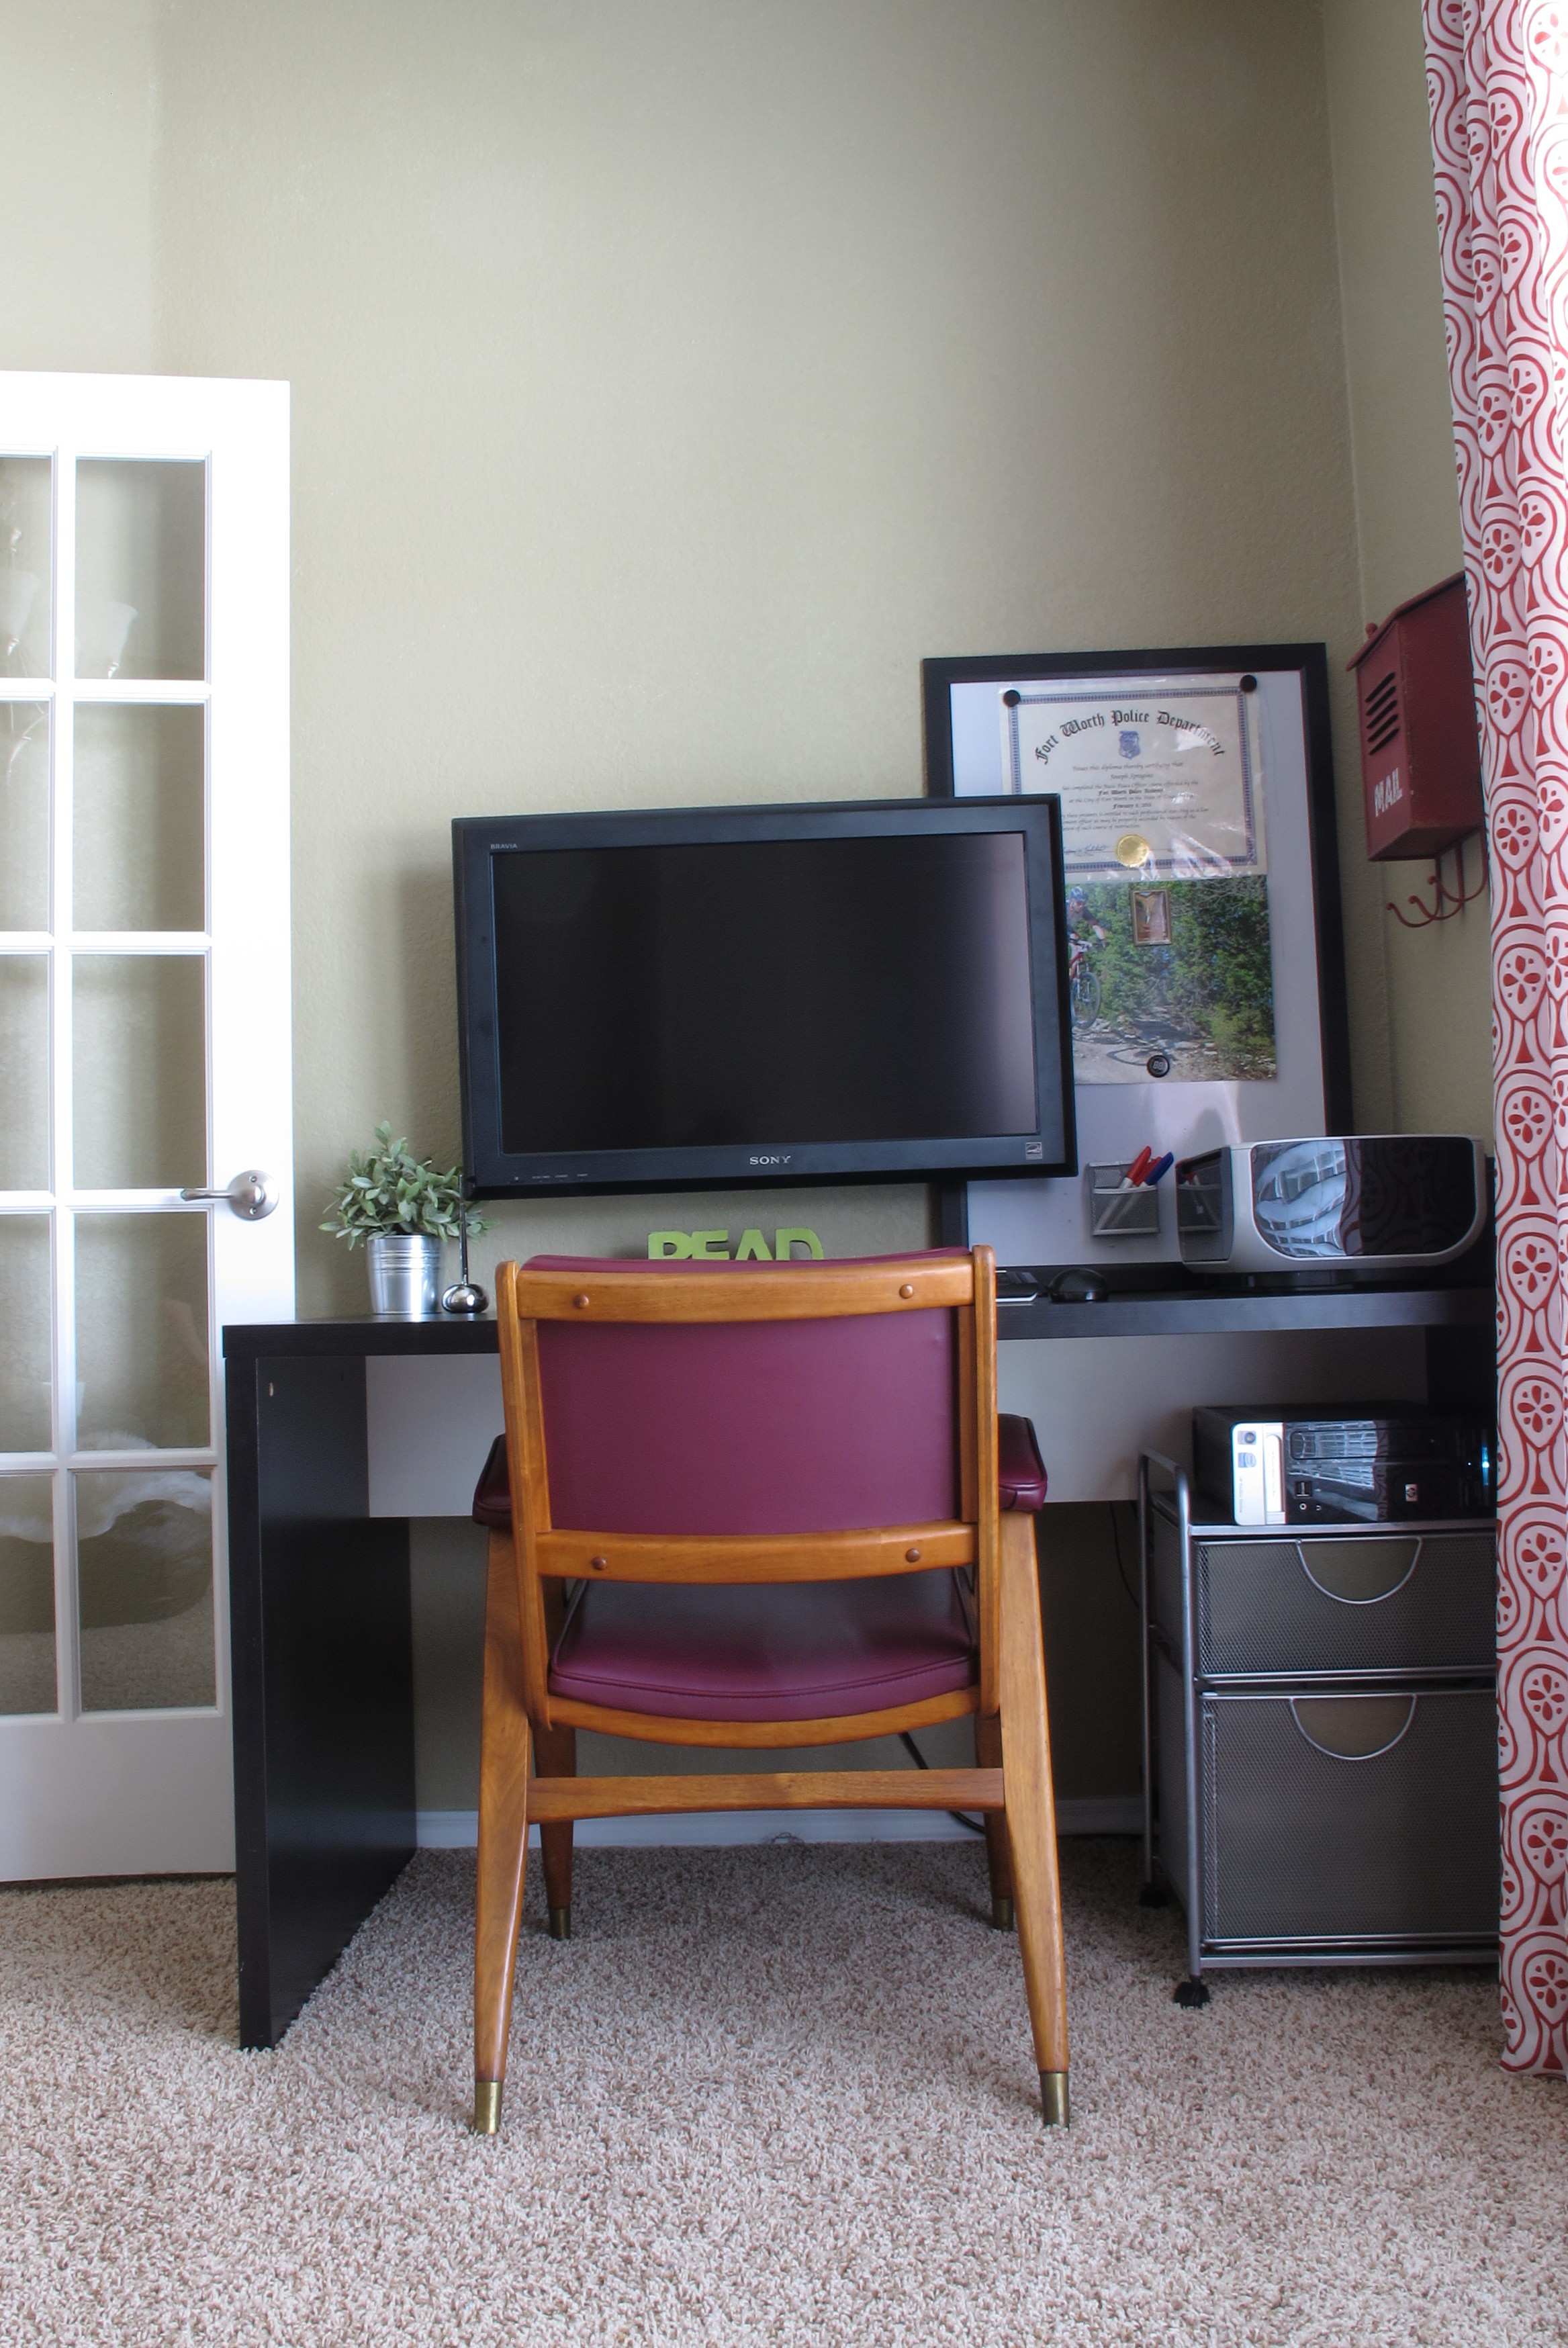
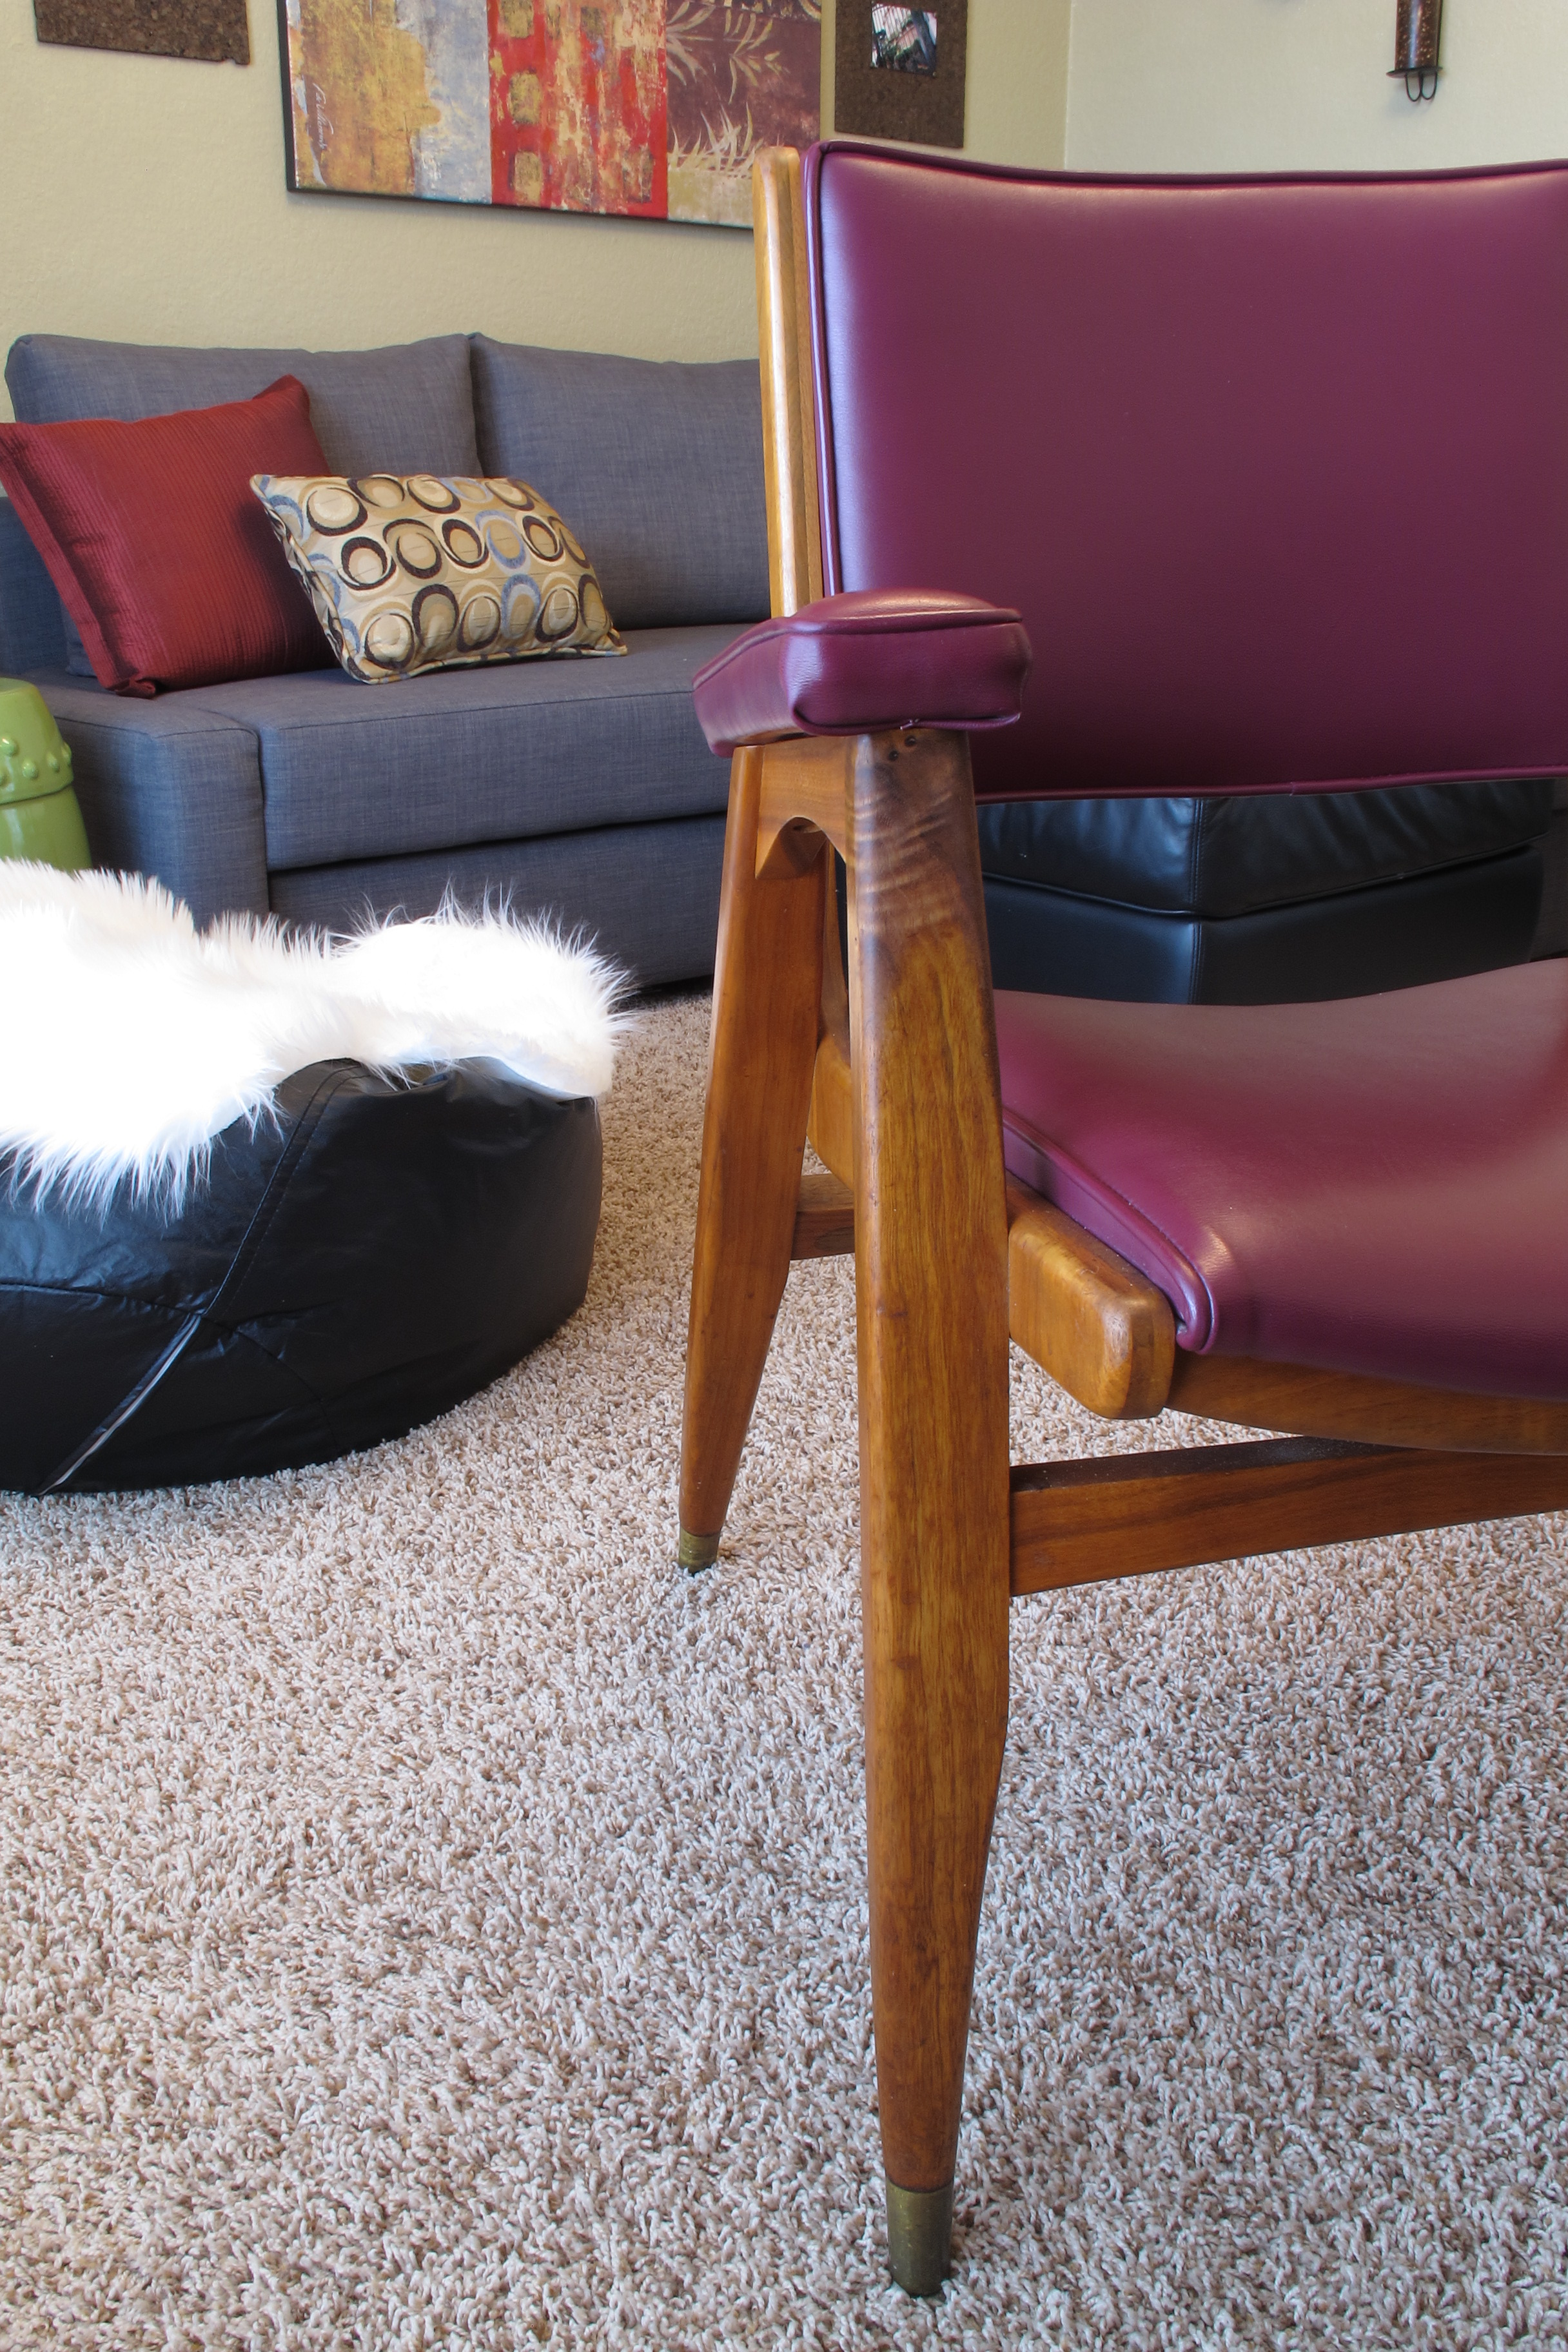
First, we have My Beloved desk chair.  I wrote about him in detail in this post, and yes, I still hear cheesy 80’s love songs in my head every time I see him (and Joey blames me for this happening to him, as well.  Mission. Accomplished.).   I got him for a steal at our local Goodwill.   He’s a mid-century modern bombshell of clerical chicness with beautiful wood construction and an original vinyl seat.   He currently is the only vintage piece in the sea of modern furnishings that composes our front room.

For example, our unassuming Ikea desk…

IMG_4414

Our clean Friheten Ikea sofa…

IMG_4408

As well as our hacked storage cabinet

IMG_4392

And I love the combination.   The contrast in colors and textures and the simplicity of the other furniture in the room allow My Beloved to truly steal the show (whilst smiling back at me through the glare of stage-lights…  Yup. I’m going with it.).  

Next, we have Drex…

IMG_4365

Our mid-century, Drexel dresser that I scored on Craigslist after an exhausting hunt.   I love his tarnished brass hardware and rich wood tones.   This area still desperately needs some large-scale wall art, but in the meantime, I’ve done my best to style him in a more modern way with a linear tray (which I lined with some retro-patterned fabric),  sleek vases and a simple, brushed-nickel Ikea lamp (and, of course, Hootie… Nothing completes a room like a white ceramic owl in my book ;)) …

IMG_4374

IMG_4378

I feel like the differing metal finishes plus less-is-more styling gives Drex more of a modern appeal.

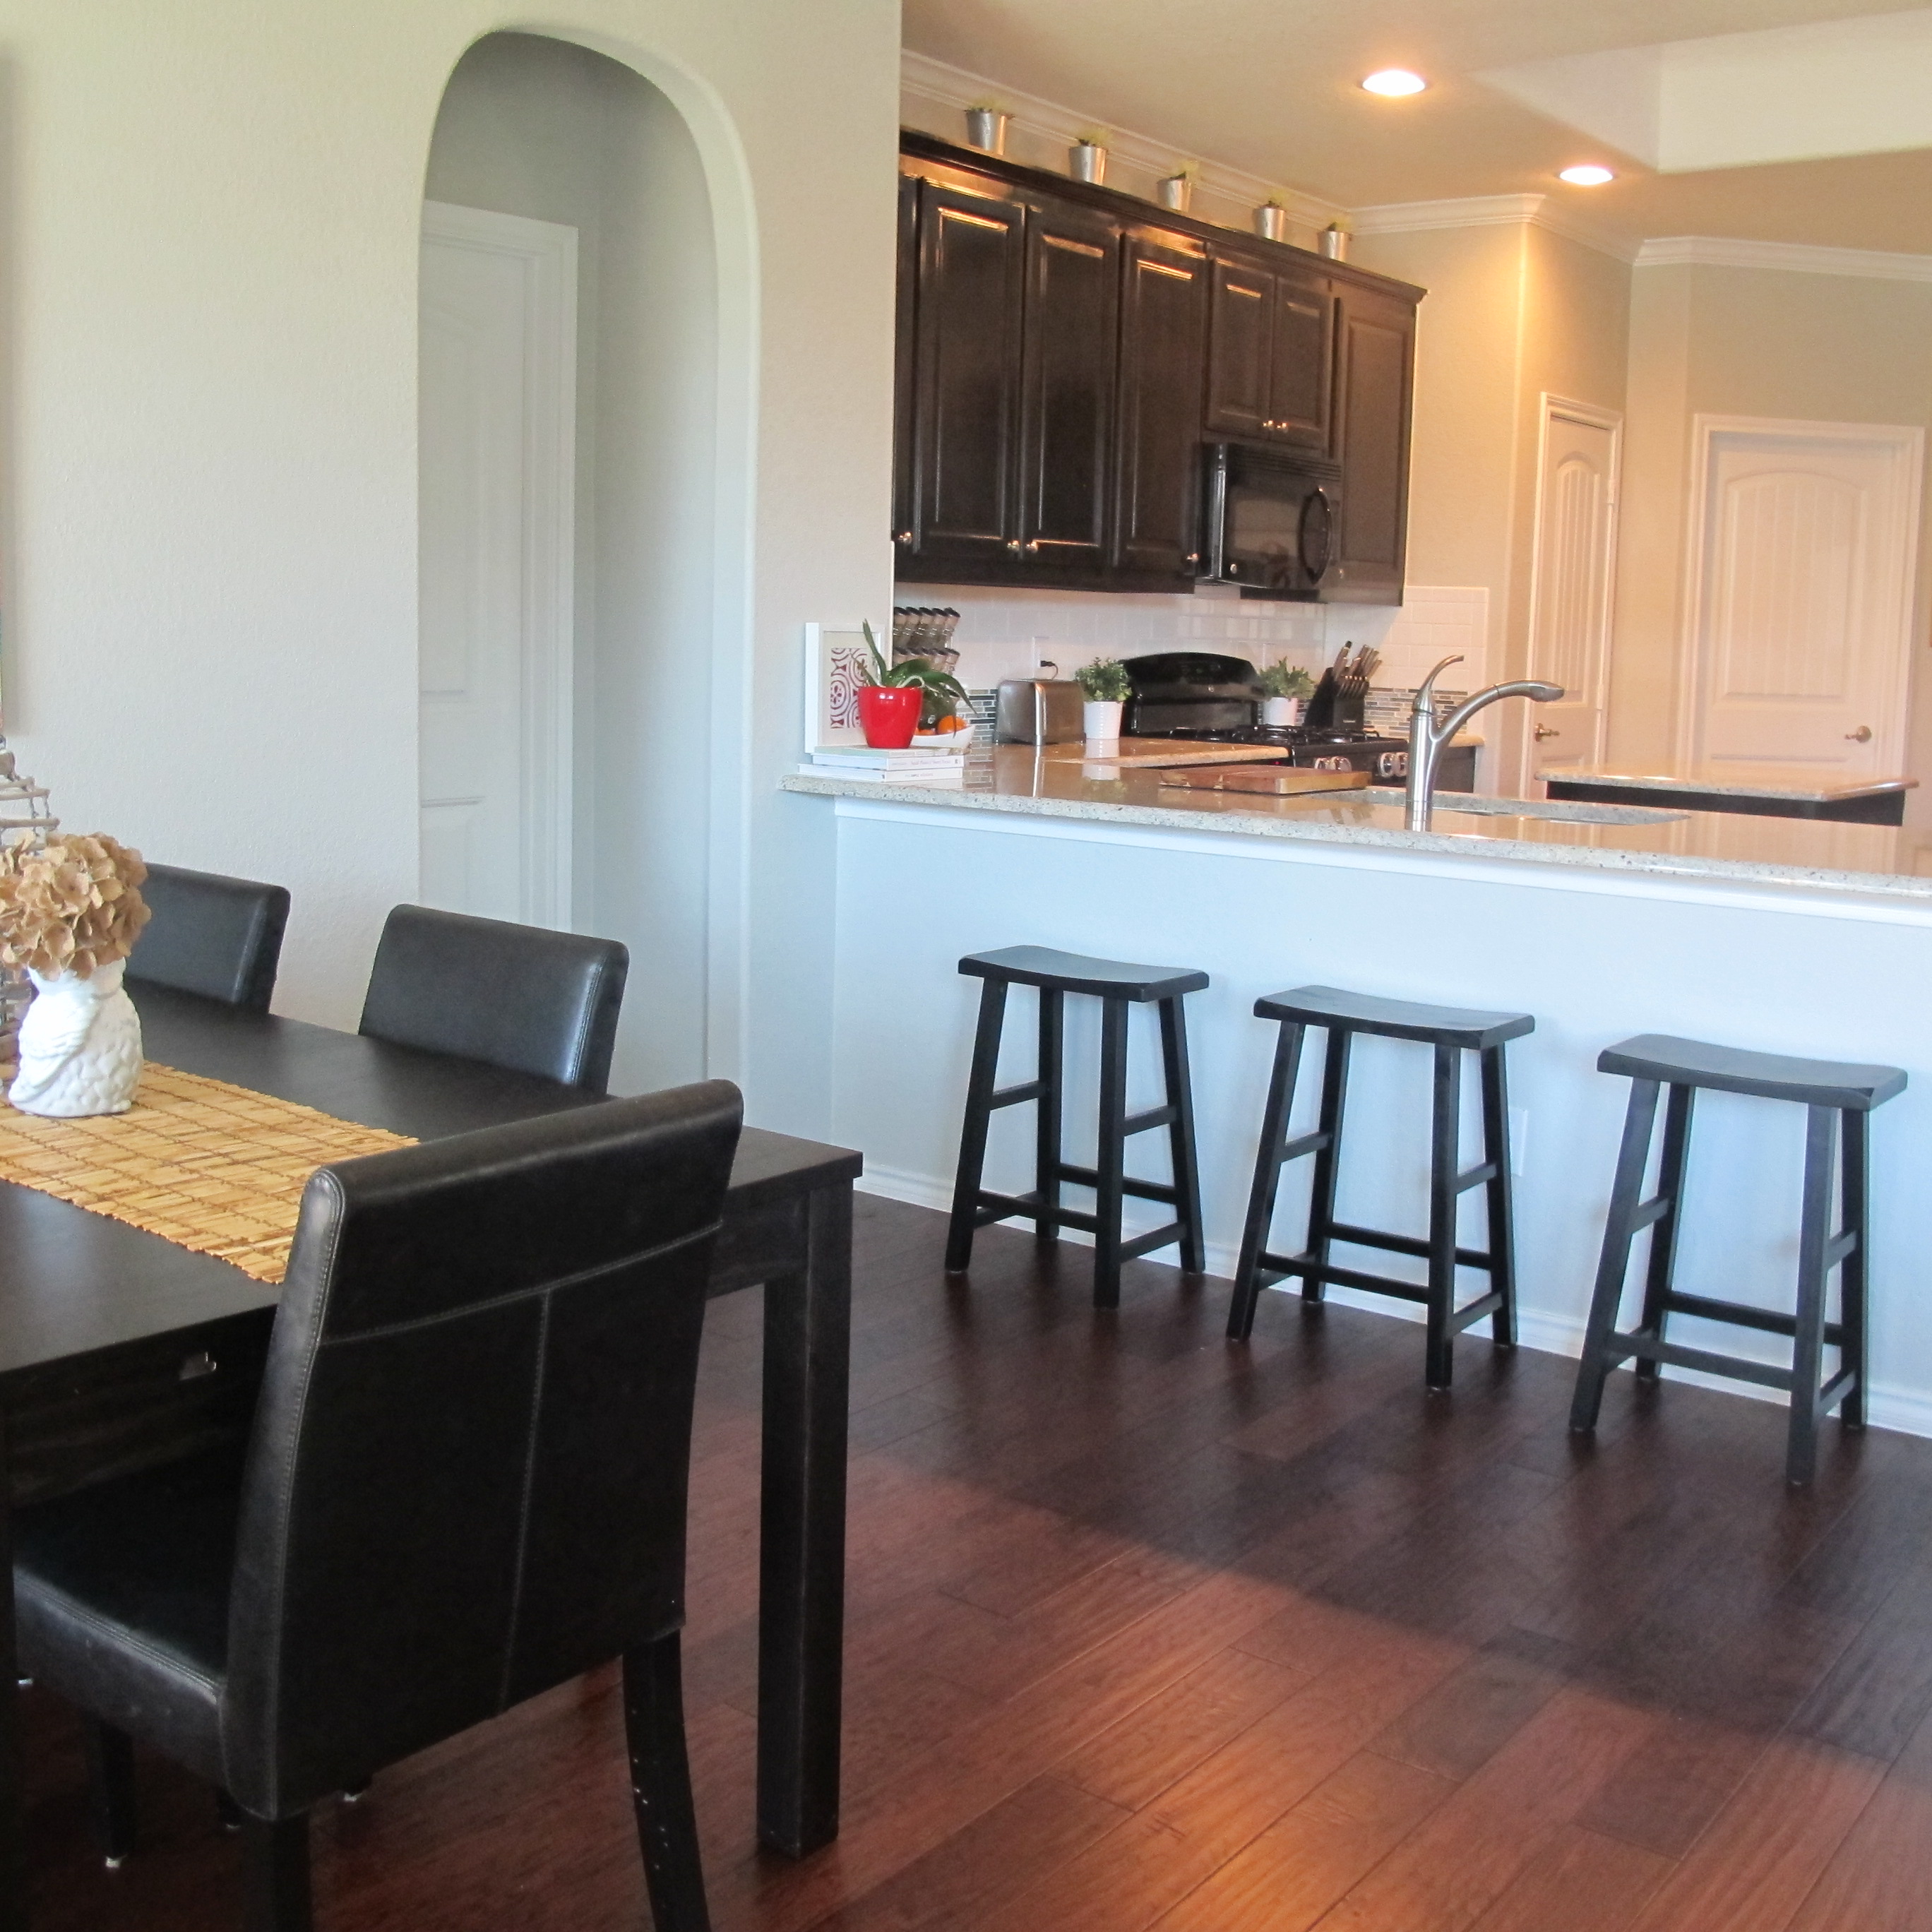
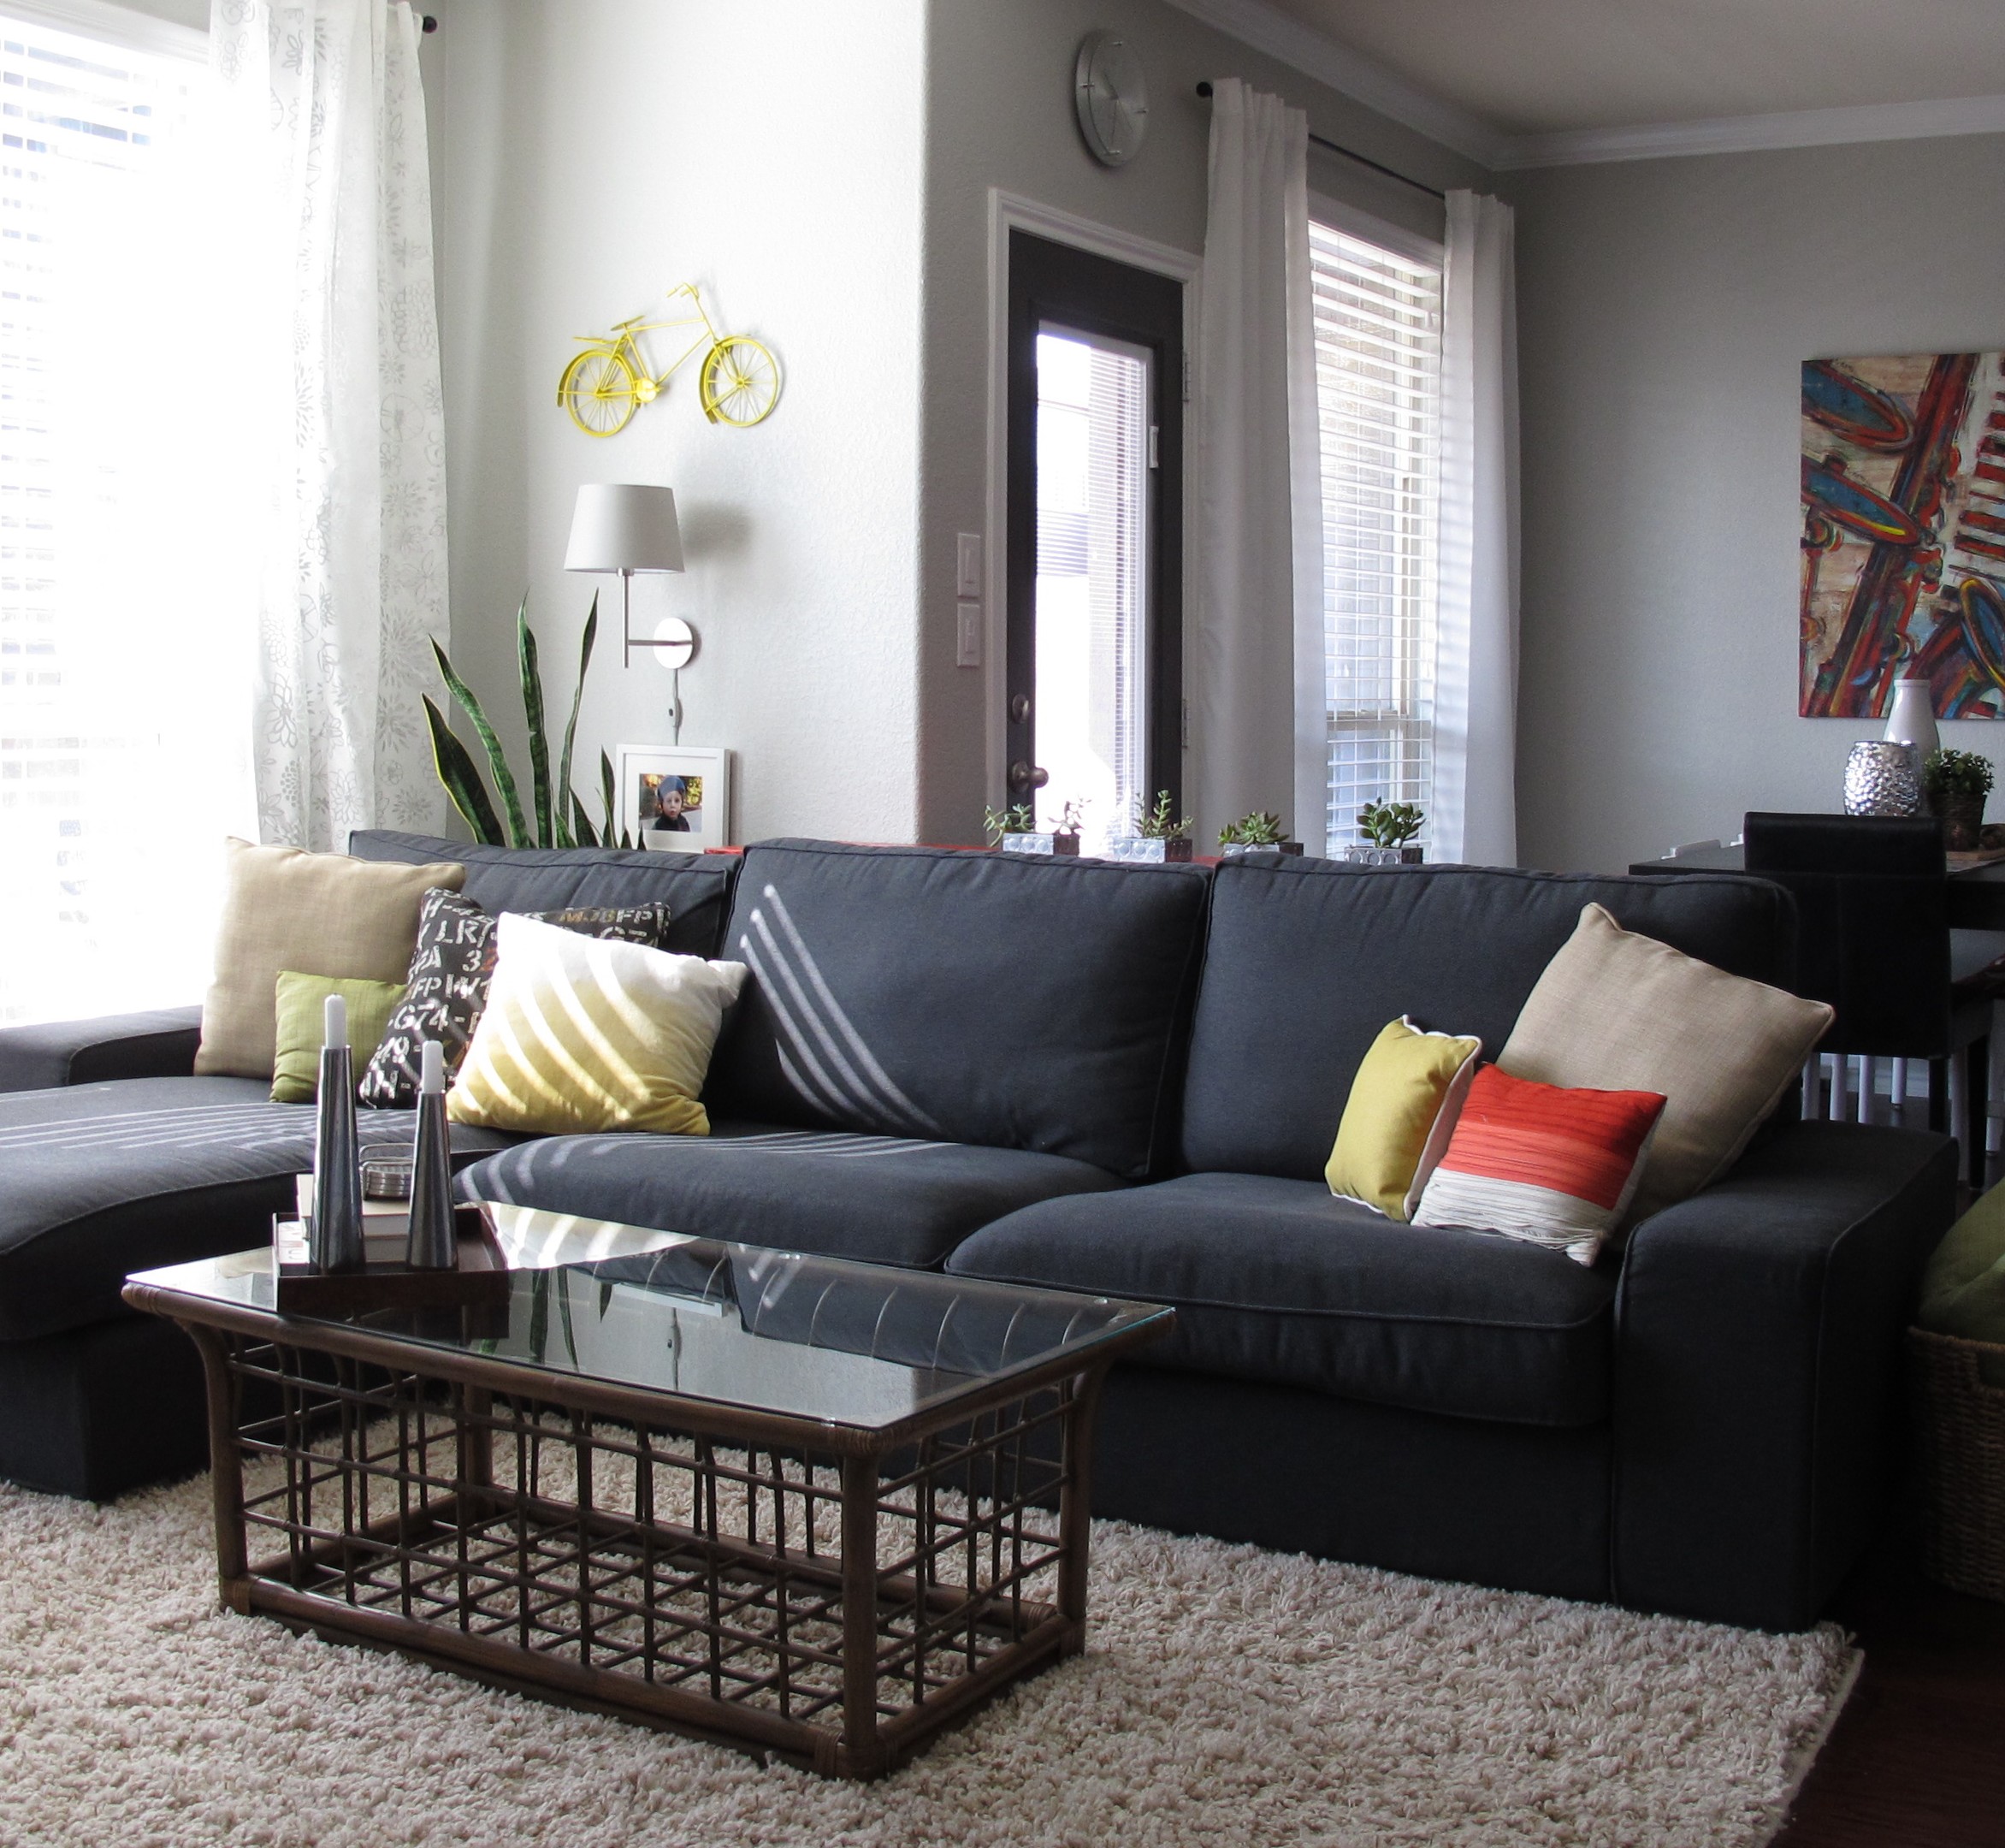
Our living room is another space where modern plus vintage come out to play.  This combination speaks to our personalities so well.  Updated, with a hint of quirk.  Our media cabinet was in sad shape when I purchased him at a local thrift store.   After a little makeover, he shines his vintage aura across the land….

IMG_4352 IMG_4348

The contrast of rich, cozy wood plus our clean, white floating Ikea shelves totally puts the wind in my sails.   The simple leather chair adds some sleekness and masculinity to the space while the floral pillow and garden stool help to balance out that manly vibe.  In my opinion, this wall wouldn’t have a speck of the personality it does without our media cabinet.   He adds warmth to an otherwise linear, modern space that might have come off cold without him.  In fact, when I placed him in his current abode, I stated, “Character, I’d like to introduce you to our living room.”  (I mean, it’s only polite to make introductions).   Fortunately, they happen to be getting along swimmingly.

Then, we have our coffee table.  After we adopted Kivvy (our beloved Kivik sectional from Ikea), I was dead-set on finding a coffee table with character to balance out the cool, clean lines of our new sofa.   I searched high and low and finally found our sweet rattan coffee table on Craigslist, which we purchased for a song…

IMG_4363

IMG_3911

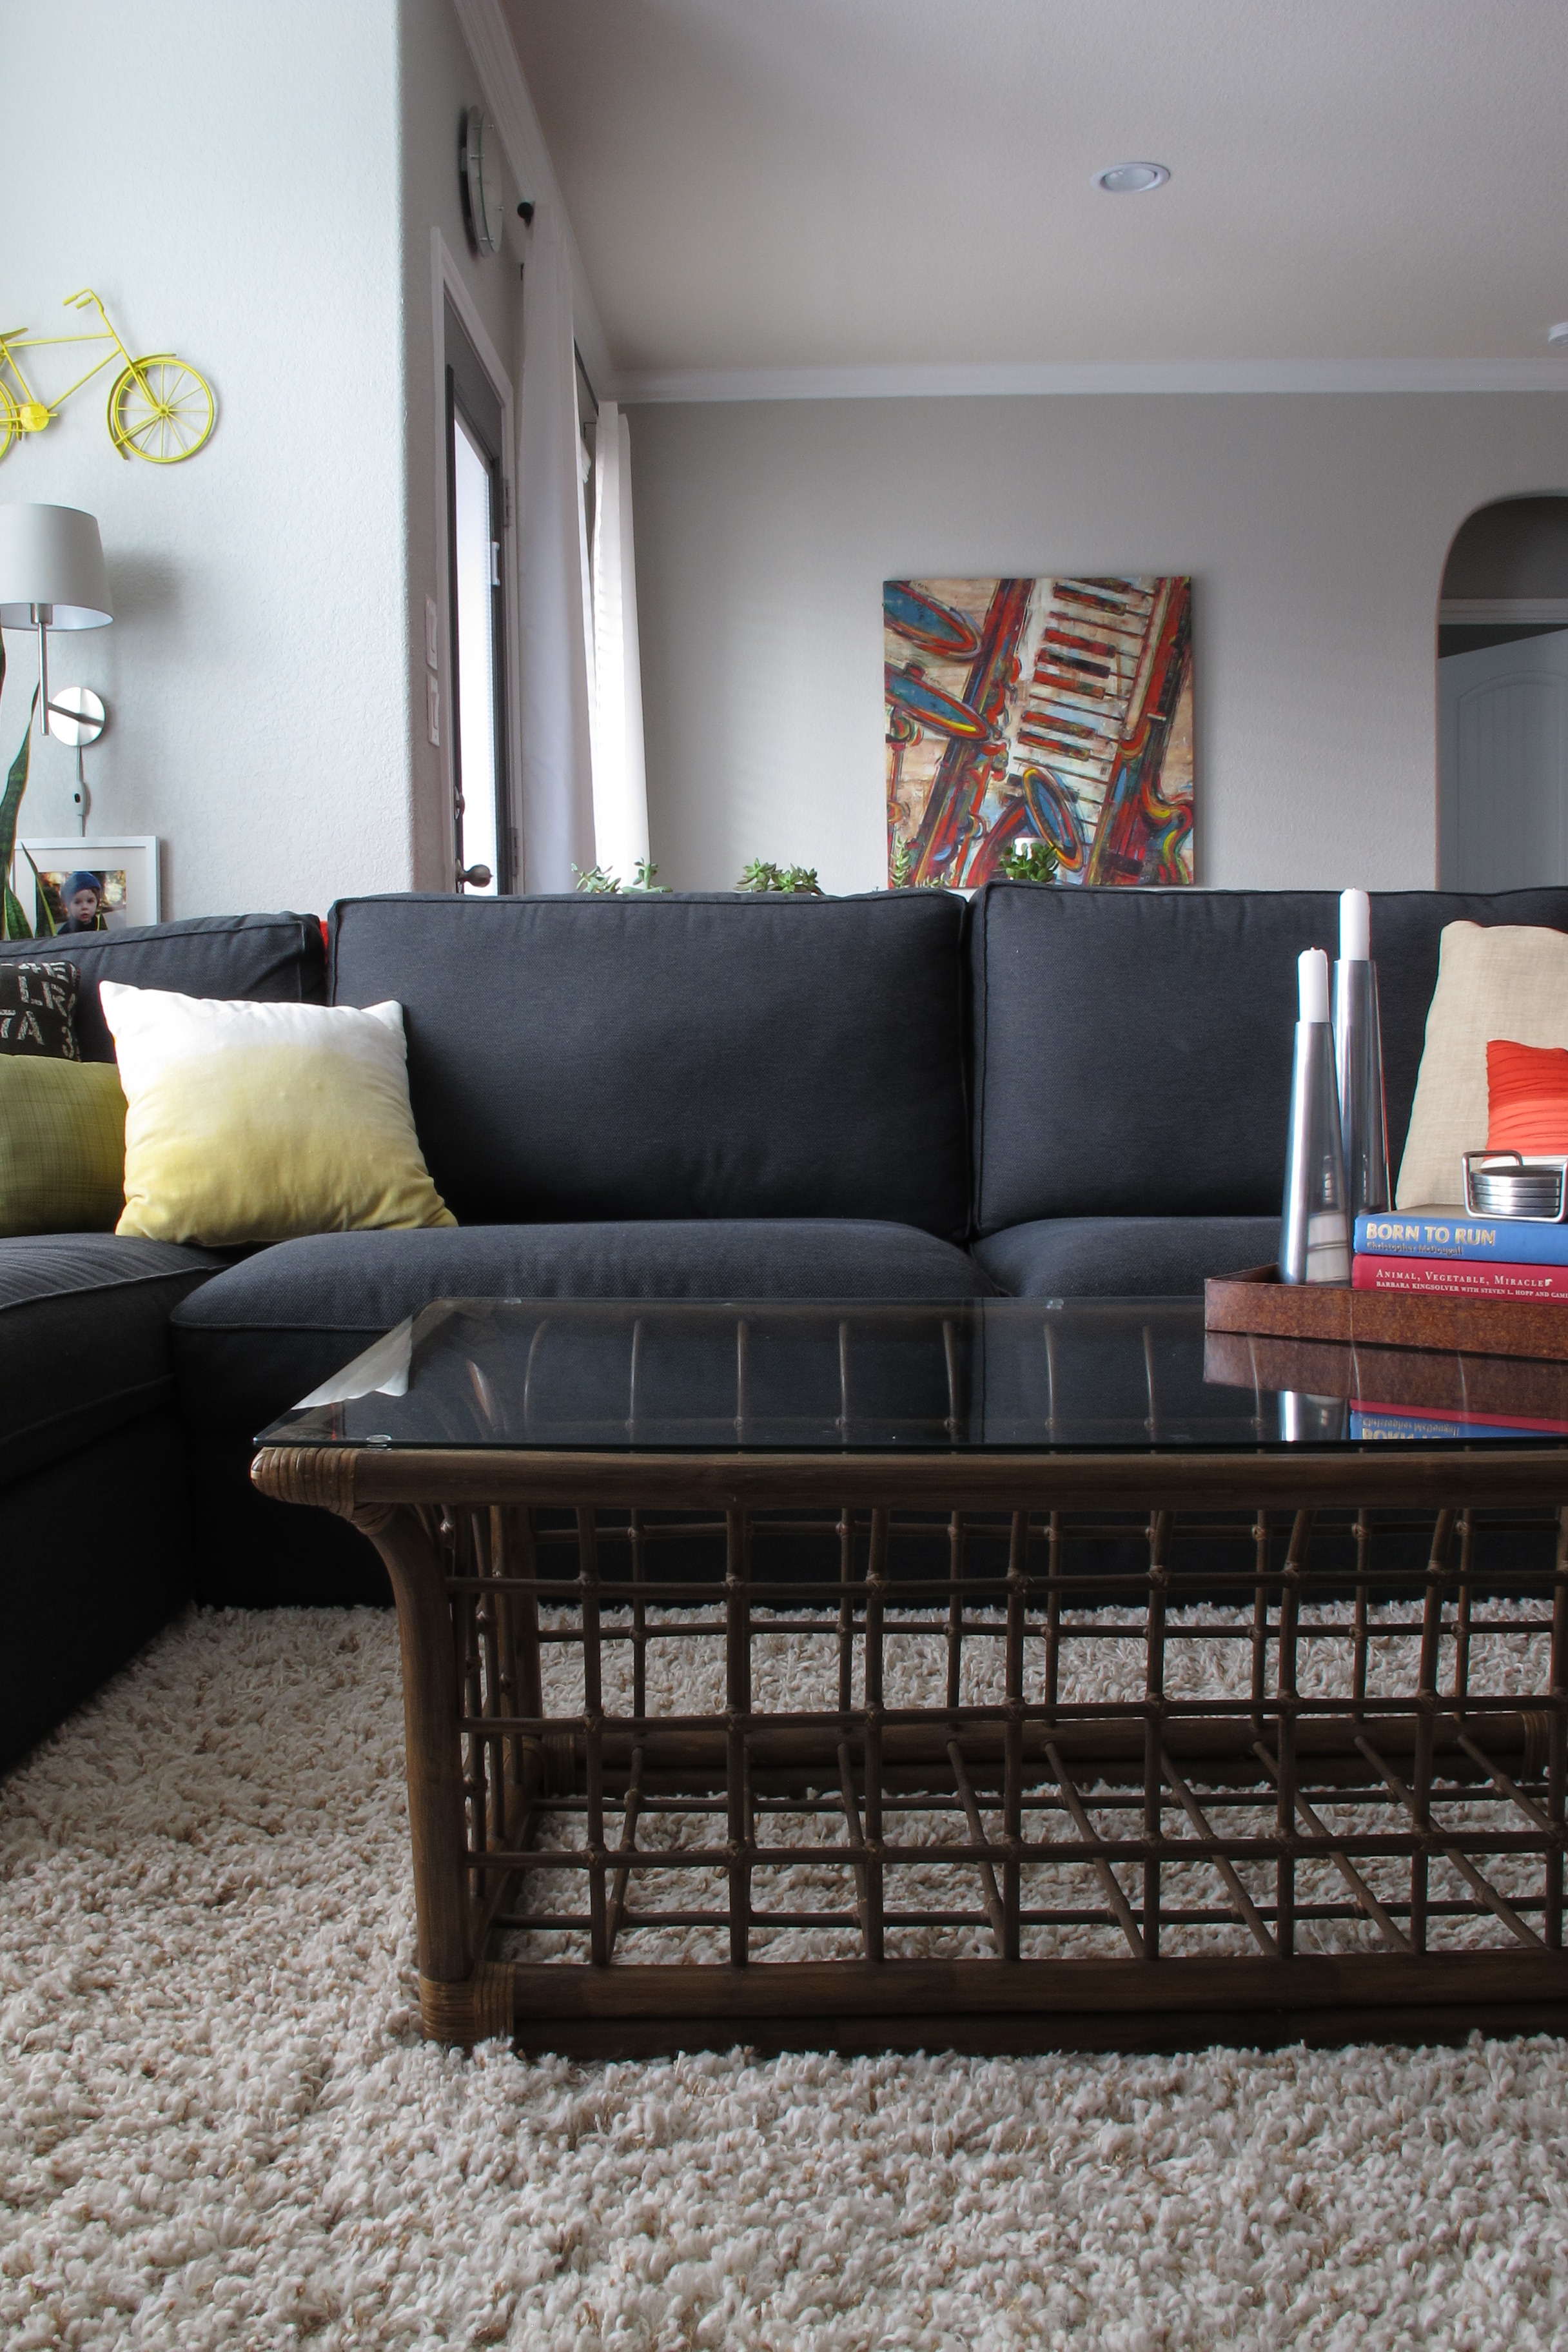
A spit-shine was all this baby needed to reach his full potential.  I absolutely love the tone of the bamboo which plays perfectly with our media cabinet.   He adds glorious texture without taking up a ton of visual space thanks to his glass top.  I love the straight lines of the bamboo which have just enough curve to bring in the interest he deserves….

IMG_4355

Coffee table…  You. Complete. Me.   Now, I must name you.

Lastly, I thought I’d throw something small into the pot.   Our train whistle, which belonged to Joey as a child…

IMG_4385

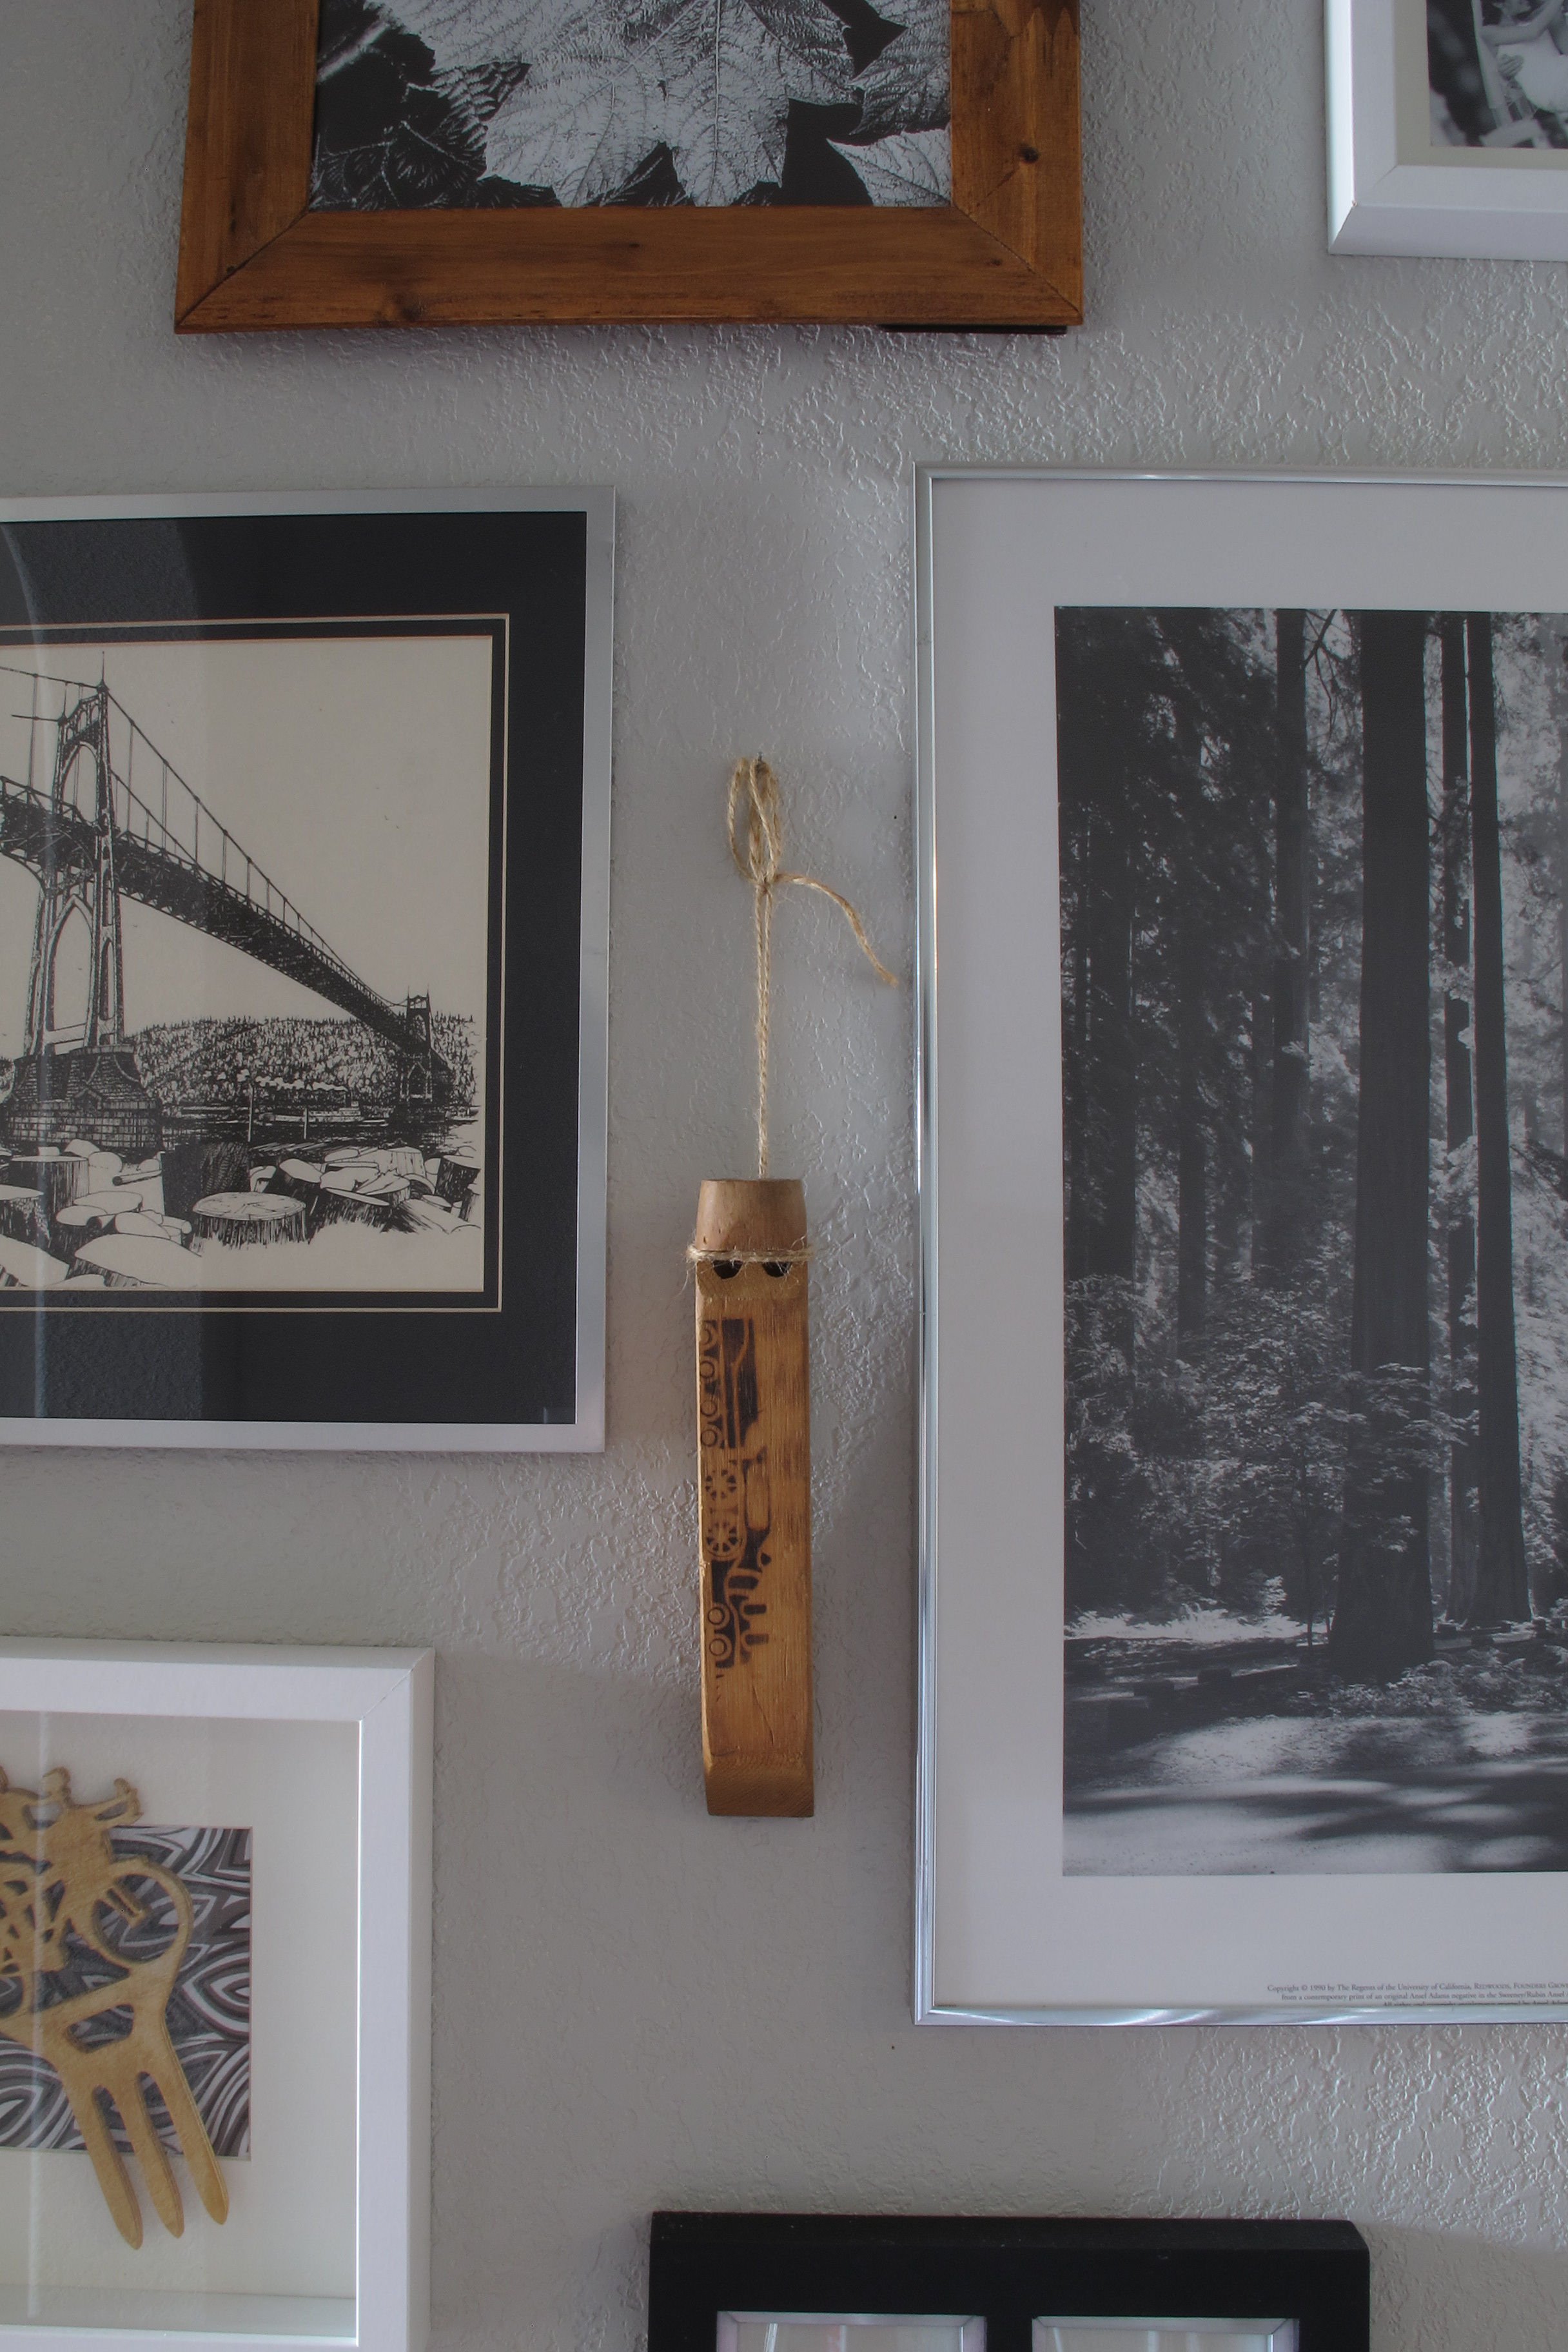
It currently resides in our hallway frame collage as the centerpiece for the mix of more modern frames.  I simply hung it from a nail with a piece of twine (as described in detail here).   And here’s the wall as it stands now…

IMG_4379

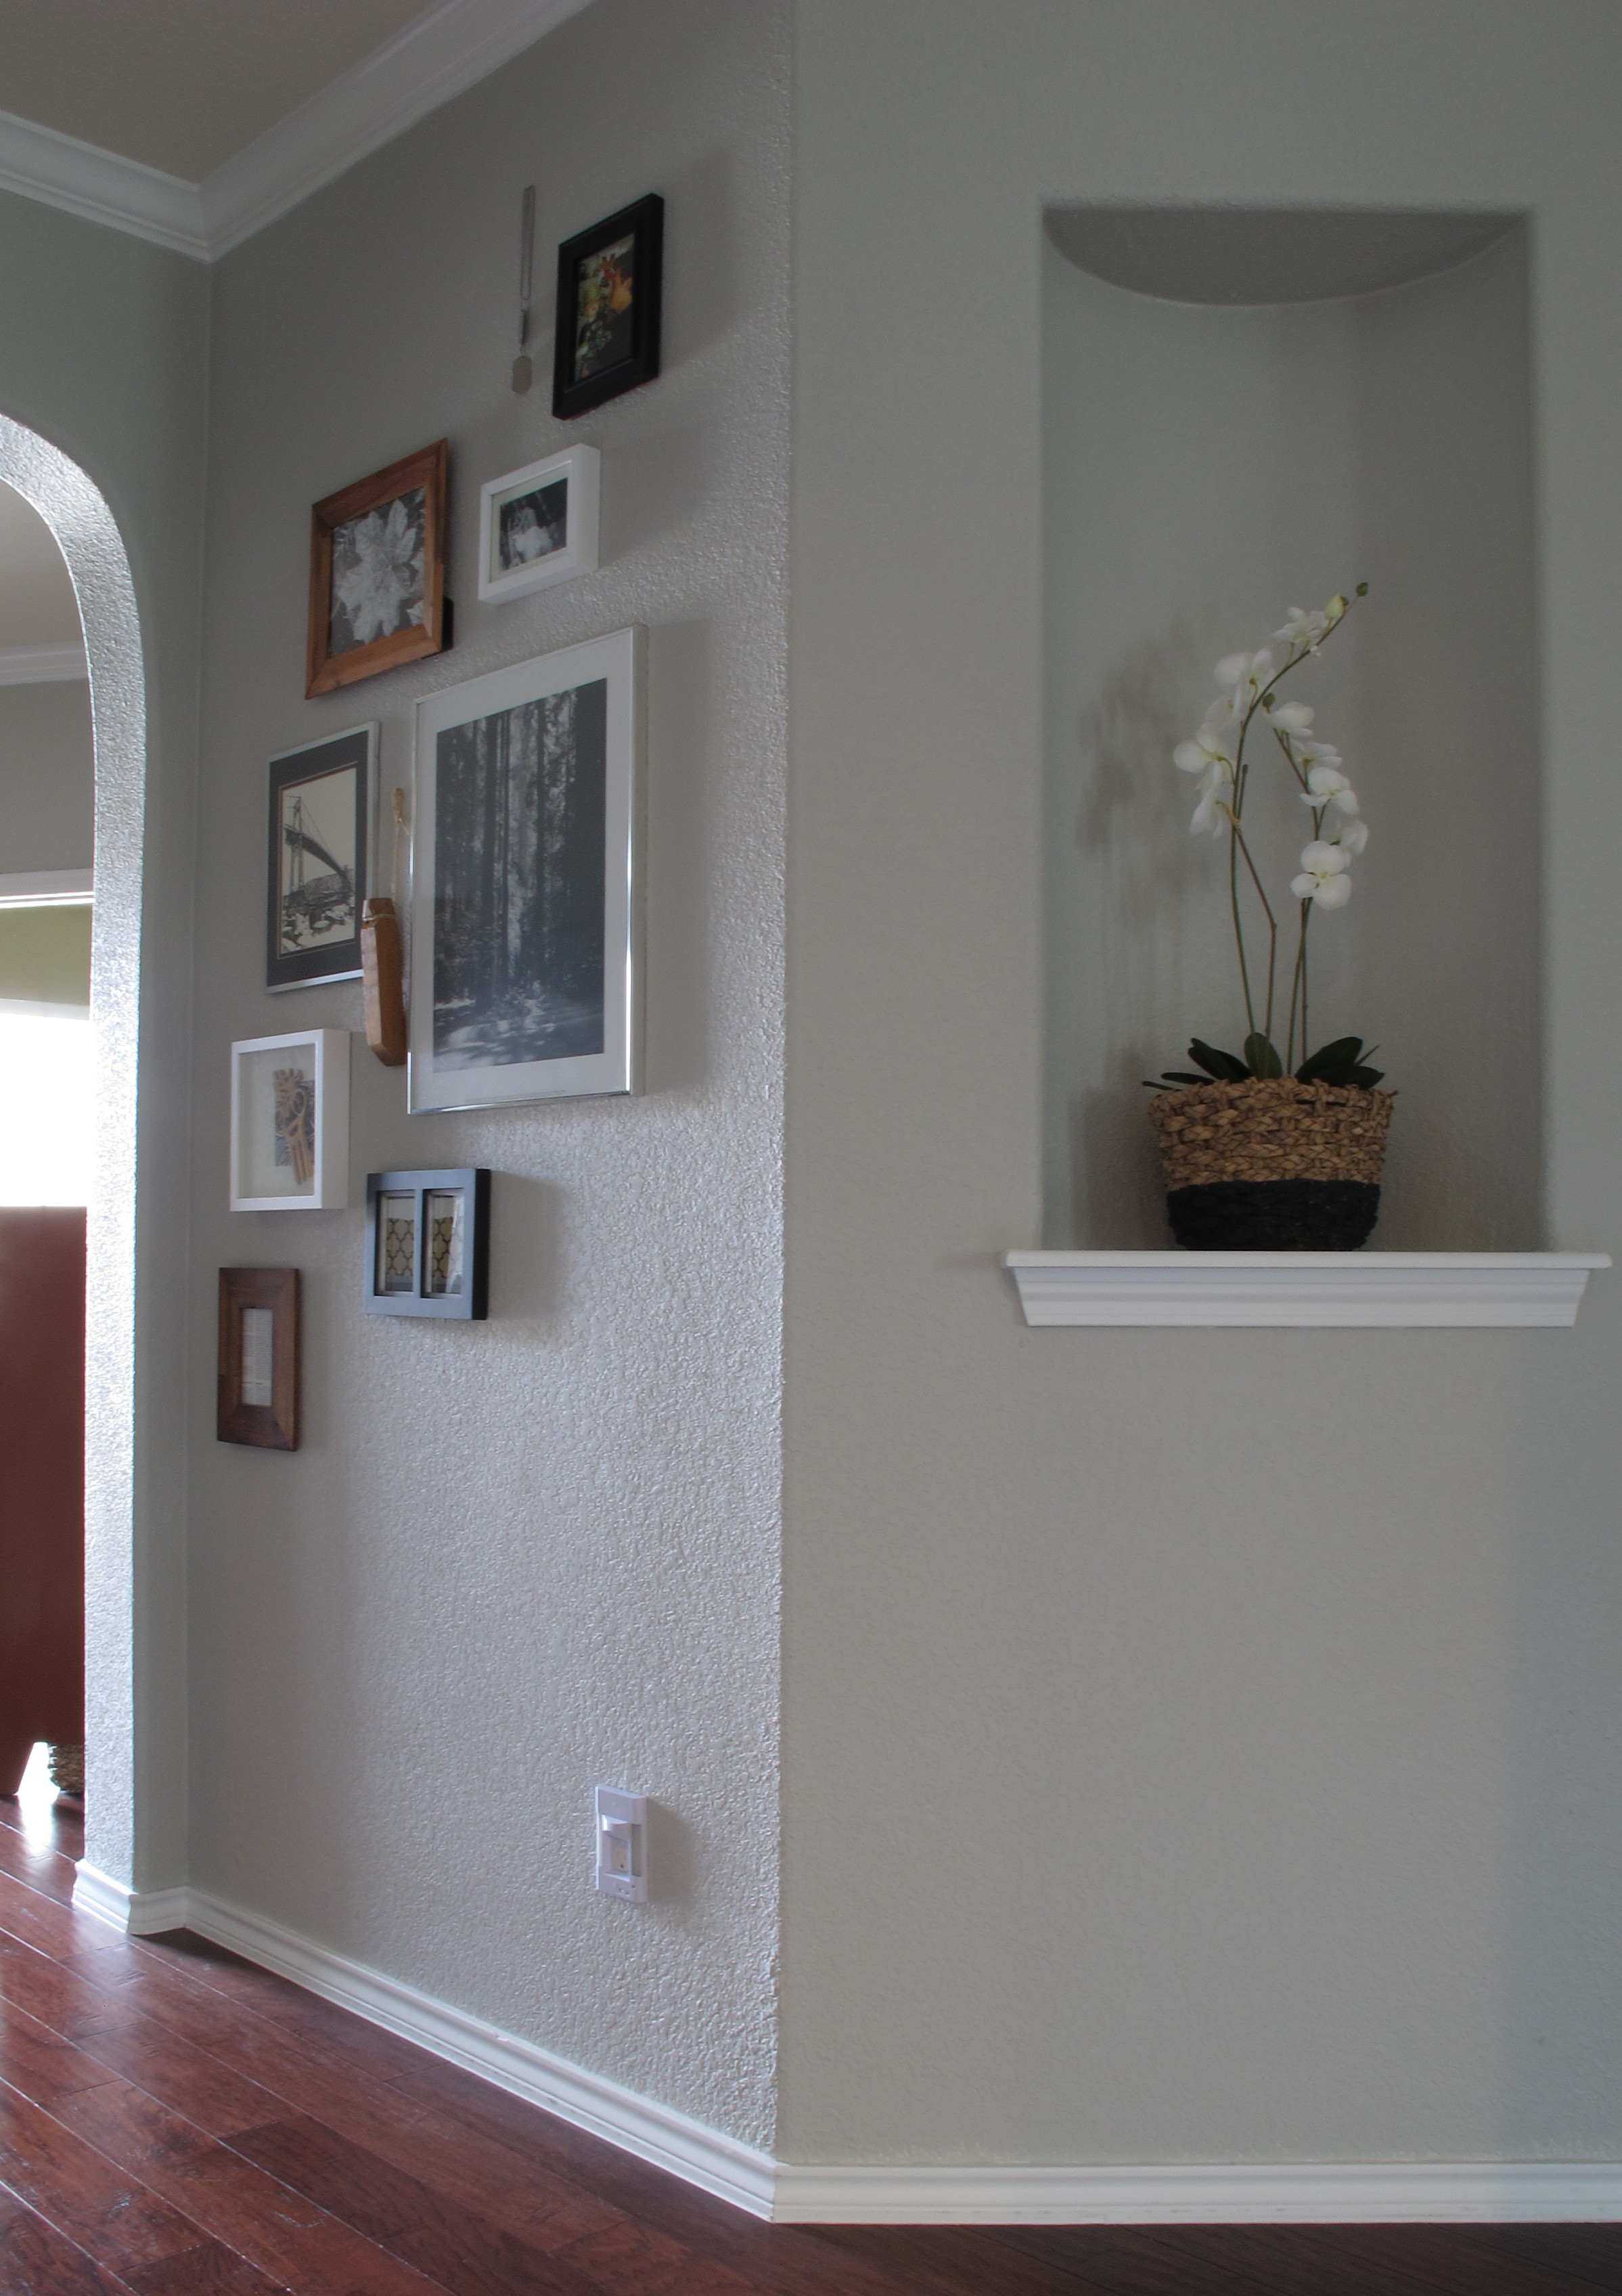
You can see I’ve made some changes recently, which I’ll describe in another post soon.  The mish-mosh of modern frames and differing finishes along with the antique train whistle forms my very favorite wall-hanging in our house.   It just wouldn’t be the same without our “something old” thrown in.   The train whistle is the cheese to the frames’ macaroni.   The peanut butter to their jelly.   I’m not ashamed to admit that I have crushes on inanimate objects.  It happens.

So anyways, Modern + Vintage is a combo that I cant resist.   They compliment each other so well.  And I’m the first to admit that I’m still happily learning about this subject as fast as I can soak it up… I’m definitely no expert.  But, I know what I like… and this is it.   Non-cookie-cutter.  With personality.  Quirkiness, if you will.   And nothing helps to match that description better than a good vintage piece.   Which, coincidentally, is easily complimented by the clean lines of modern decor.  Peas and carrots, people.  Peas and carrots.  🙂

I have to tell you… right now, as we speak, I’m throwing mental hugs at all of my vintage finds and appreciating them all over again after having written this post. So, tell me… Where does modern + vintage fall in your style?  Any one-of-a-kind finds that make glow in adoration whenever you glance their way?

Advertisement

Eight dollar chairs… Woohoo!

About six weeks ago, I came across this Craigslist ad…

20130914-102628.jpg

Eight bucks, for wood chairs?? Sold.

We’ve been wanting to change out our kitchen chairs for a while now, but just hadn’t found the right deal yet. Don’t get me wrong, the black leather parsons chairs are classic and comfortable… it’s just that the black chairs plus the black table and the black bar stools are a lot of black in one small area for me, so I wanted to try a little contrast.

IMG_1308

We figured we’d buy six chairs (6 chairs for $48 bucks?!!!), fix them up and then if we didn’t like them we would just resell them on Craigslist. Like I’ve said before, I like to buy, try, and either return/sell if we don’t like them. Plus, I just like fixing stuff up anyways, so no matter the outcome, it’s win-win for me.

The chairs were pretty filthy when we got them home. Nasty, was more like it. Gross. I used a damp rag and magic eraser to clean them. Some of the finish was worn off in spots and there were areas where someone had haphazardly reinforced the chairs, leaving messy screw holes.

Once they were clean, I set one of the chairs by our table to see how it looked. I liked the style and size, but the wood was too blonde compared to the rest of our stuff. It stuck out like a sore thumb, actually, so I decided to refinish them in a darker stain.

Now, I’d refinished furniture before, and learned first-hand that EVERY trace of clear lacquer must be removed to achieve an evenly stained finish. And sometimes its hard to determine if all of that lacquer has been completely removed. But, I figured that since the finish was in such shoddy shape to begin with, I’d at least give it a shot. I removed the seats, which were simply screwed on, and started sanding with 80 grit sandpaper to remove the finish. I did it by hand, since there were so many curvy areas on the chairs. The larger areas were easy, but I was having trouble with detail areas like this….

IMG_1043

I knew it was imperative that I sand in the direction of the wood grain to prevent ugly sanding lines once stained, so removing the lacquer in these areas just wasn’t happening.  At least, not with the tools I had available to me.  One afternoon, as I futilely sanded during Lucas’s nap time, our neighbor walked over with the gift of lacquer thinner. He instructed me to rub it on with a rag to dissolve the finish.  After thanking him profusely and staring at the can as though it radiated magic beams of light, I began this process.

Sadly, I found that it was very slow going and VERY fumey.  I spent several hours rubbing lacquer thinner onto various chairs thinking that I just wasn’t committing fully, but alas, in the end I still felt that I couldn’t safely stain ANY chair and achieve an even finish.  So, I decided to paint the chairs instead.

I returned the lacquer thinner to our neighbor with a huge thank you, and called it a day. After a little mental recovery period (of a few weeks), I purchased, this spray paint….

IMG_1218

I had used it on our patio furniture in black and was really impressed by the spray quality and finish. So, I bought some in gloss white. I decided to start with one chair and see how it went. I roughed up the finish with 220 grit sandpaper, wiped the chair clean, then applied several light, even coats of spray paint, leaving 10-15 minutes of dry time between each. Which left this…

IMG_1227

While I liked the glossy finish, the flaws were definitely evident with the spray paint, and I was using more paint than expected (almost 2 cans for this one chair and I could’ve used more). Take a gander…

IMG_1225

IMG_1226

IMG_1232

I didn’t have a complete problem with the flaws. They kind of lent a shabby-chic kind of feel. But since our table is currently in a peninsula formation against the wall, we only need 4-5 chairs to be used on a daily basis (with the other chair(s) to be used when we have guests). So, I thought I’d hand-paint one of the chairs to see if I liked that finish better. Then, later, I’d repaint the odd-man-out to match the others without having to sacrifice our normal day-to-day seating.

Having seen the flaws that showed on my spray-painted chair, I decided to use this wood filler to fill any large gashes and screw holes.

IMG_1233

IMG_1234

After the allotted dry time, I sanded it with 220 grit sandpaper to smooth it out, then repeated the process with a second coat of wood filler followed by sanding. The second application really was key in making a smooth, even finish. I thoroughly cleaned the chairs to remove all the dust. Next, I applied a coat of Kilz Premium primer with an angled brush, waited an hour (per the instructions) then applied 2 coats of leftover white trim paint left by our builder. Which left me with this…

IMG_1243

IMG_1244

I definitely preferred the hand-painted to the spray-painted version. It just appeared more crisp. Plus, it was free since we already had the paint and primer. So, hand-painted it was. With that, I proceeded to prime the remaining four chairs by hand.

The next day, I walked into the garage where my completed hand-painted chair was drying and took a look.  Only to discover unsightly yellow bleed-through. Jeepers. (My pics of this didn’t turn out, unfortunately.)

Now, I’m not sure exactly what I did to tick off the DIY gods, but my projects lately seem to be riddled with way more obstacles than usual. Seriously. Now, I had not one (the spray-painted chair), but two chairs to repaint. Not the end of the world, really, but not something I was über excited about at this point either.   So, I purposely decided to ignore the problem children chairs for now and refocused on the others…

Since one coat of primer was clearly no match for yellow bleed-through, I added a second coat to the four chairs that I’d primed the previous day.  Then, I waited until they’d fully dried and searched for telltale signs of yellow betrayal. For the most part, the chairs looked good, but there were a few small areas that did need a third coat. The next day, (after inspecting for more bleed-through) I applied 2 coats of shiny white paint.  And I’m happy to report that we are “so far, so good” on the bleed front. I’m hoping that the second/third coat of stain-blocking primer was adequate to stop future bleed-through from occurring. (Fingers crossed!)

For the spray-painted chair, I knew that I’d need a different primer since most spray-paint is oil-based. Latex over oil = A peeling mess.  And, since I had the yellow bleed-through problem with the other chair, my mother-in-law, Mac (who has oodles of experience with painting, especially white painting), recommended a shellac-based primer. It can go over or under any paint, sticks to any surface, and blocks all bleed-through. It’s a smidge more expensive, but seemingly worth it. Plus, I could use it for both chairs.

So, I bought a quart of this…

20130923-195138.jpg

I painted one good coat of shellac primer over both of the remaining chairs, then followed with two coats of white paint. And it worked like a charm. Thank yoooouuuu, Mac!

So, here’s where we are so far….

IMG_1320

All chair frames are primed and painted. Finally. (The other two were drying in the garage when I took this pic)

And they look so glossy and fresh. I can’t wait to get the seats on them and bask in their doneness. And beauty. Did I mention beauty? Speaking of which….

Next, is the really fun part…. I’ll be back with details for recovering the seat cushions with a bold fabric (that I’m 100% completely obsessed with) and then the final “after” results.  We’re in the home stretch with these $8 chairs, my friends… (Fist pump!!)