Heehee! <-me laughing at myself.
Why? Well, what started as me simply painting the wet-bar cabinetry has resulted in the start of a full-on makeover. Donchya just love it when that happens? 😉
First, let’s start at the beginning…
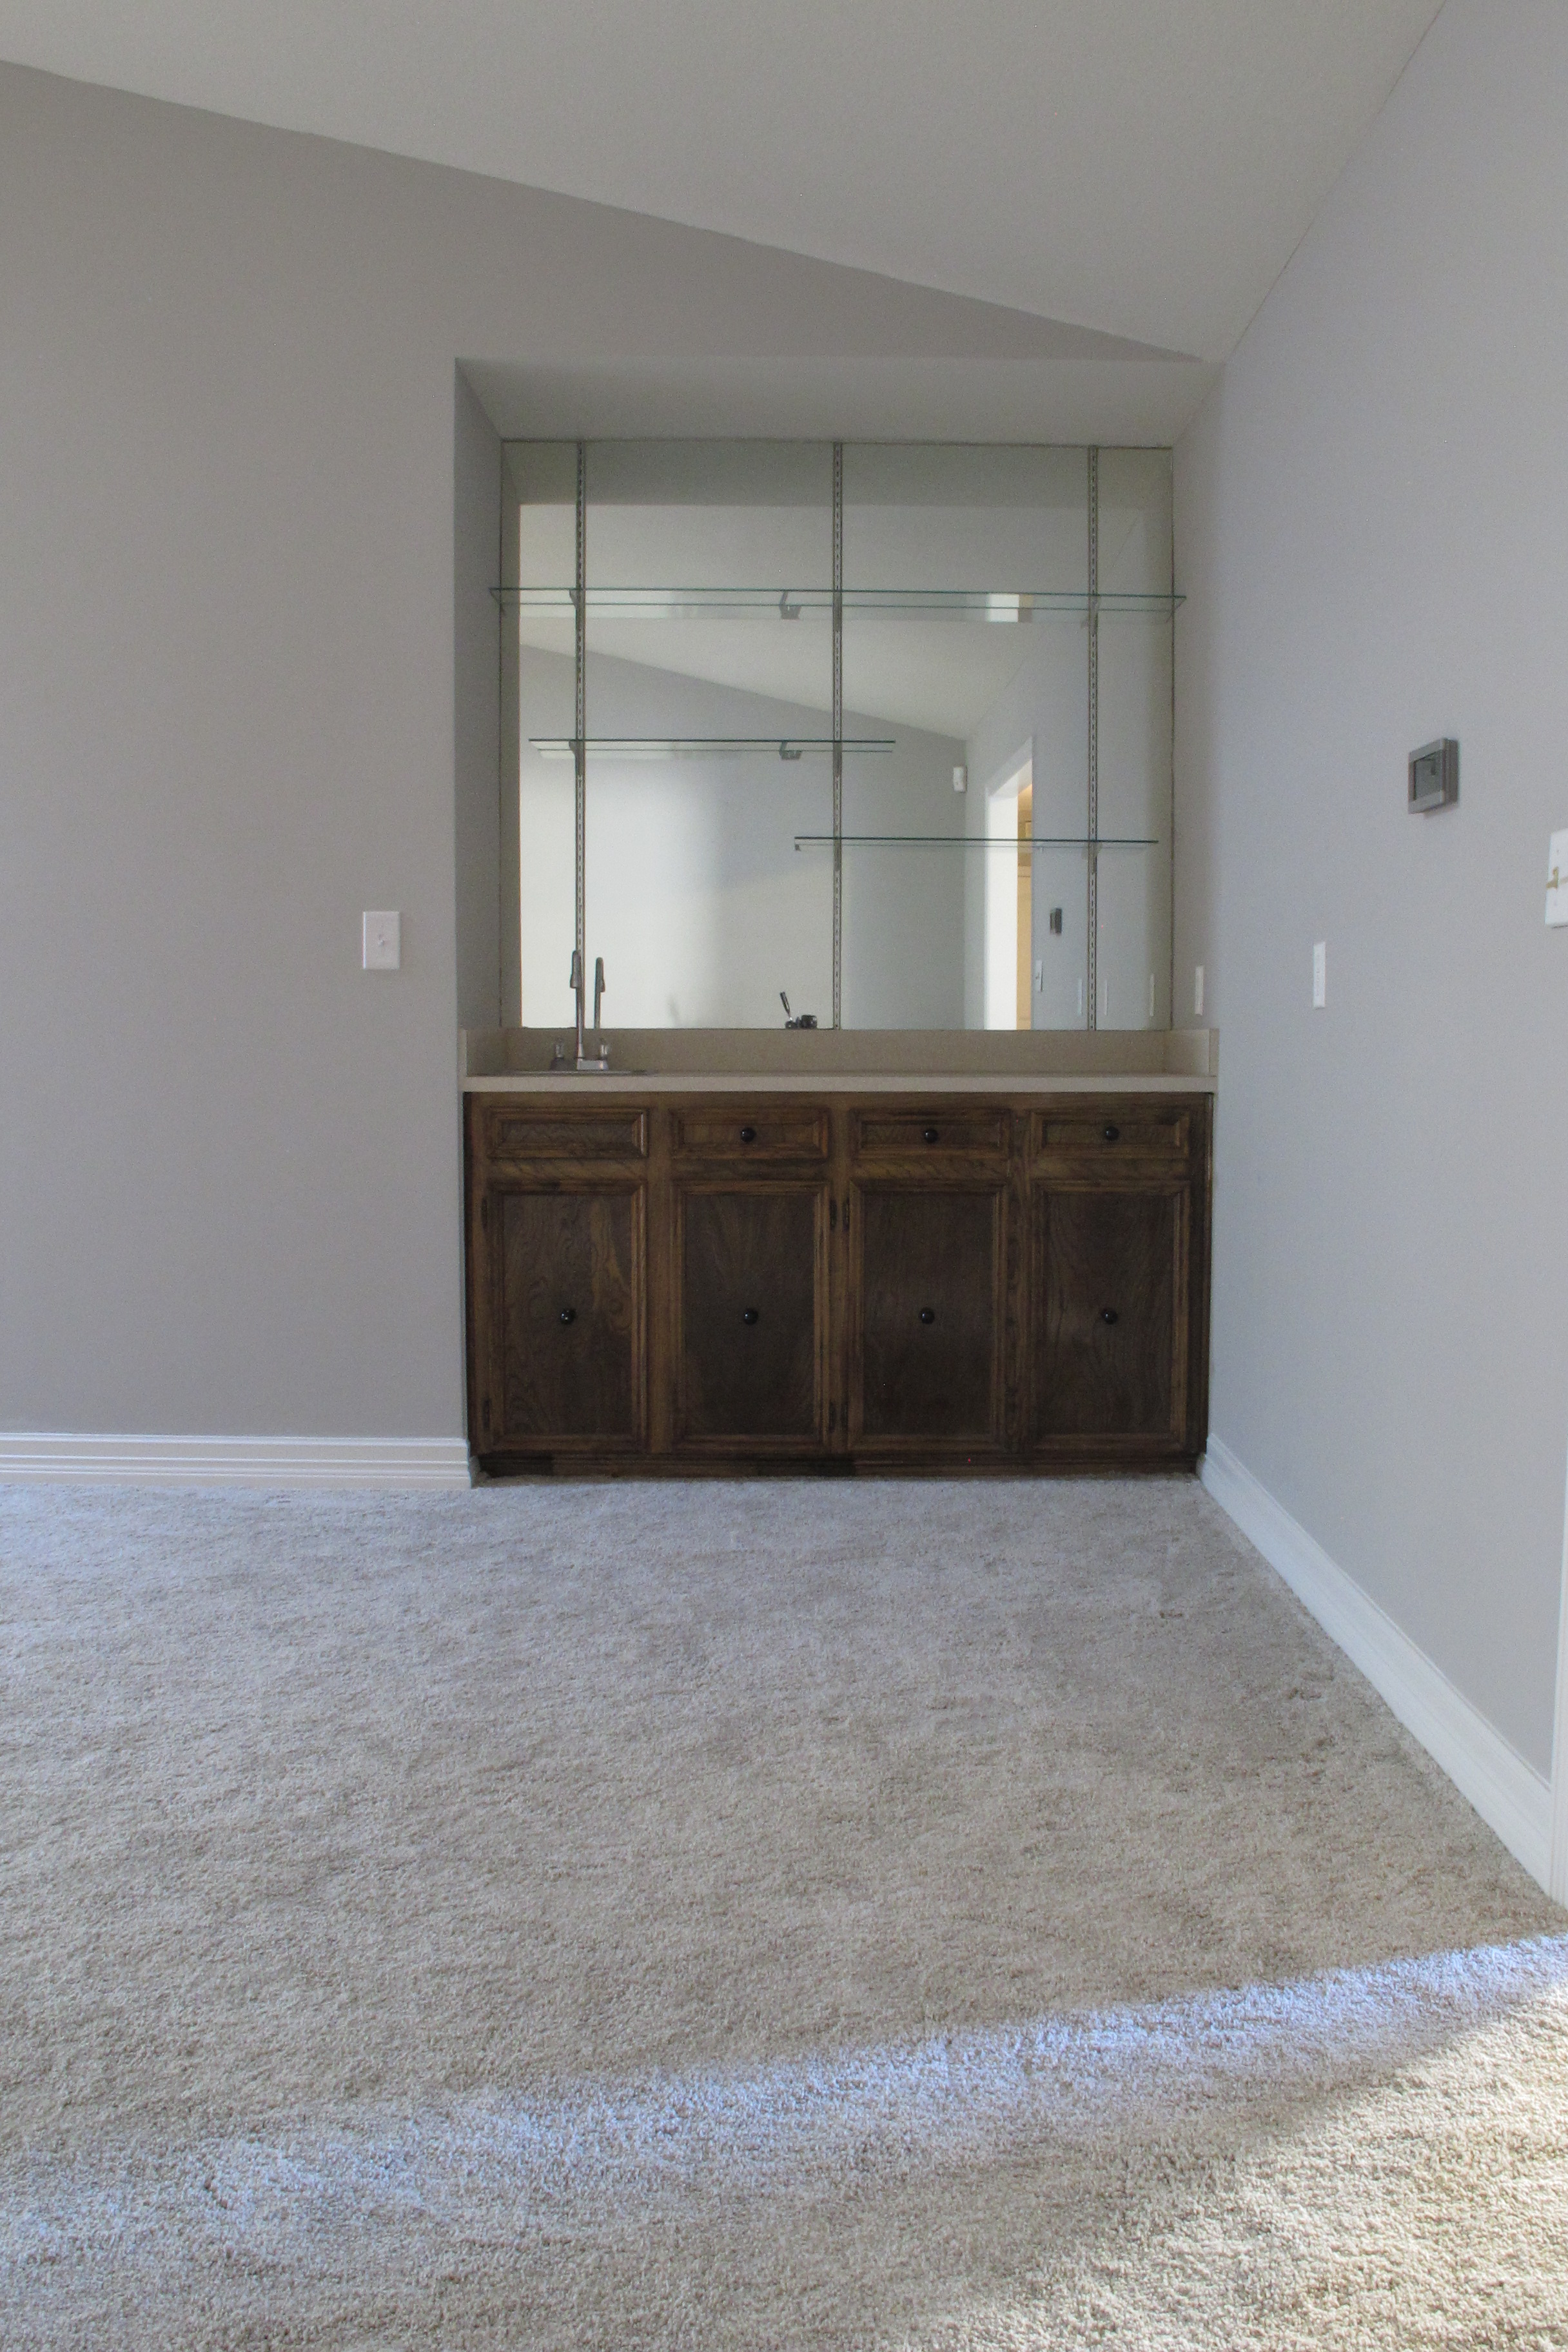
This was our wet-bar on the day we got possession of the house. Kinda dated. Kinda ugly. Kind pointless (in my opinion). Don’t get me wrong. I have no problem with bars, it’s just that something about a sink in a living room just seems like an accident waiting to happen. Like when my back is turned Lucas will decide to play “splashpark” or something of the like. But regardless of my worries, we have it. We own it. It’s ours. And we’re not taking it out. So, we’re gonna make it work. And heck, not only that, we’re gonna WORK IT. Make it cool. Snazzy. The place to be.
So, once we finally had the keys to the kingdom house, we changed out the flooring and I accessorized a bit…

Better. Still dated, but better. Then, I painted the built-ins on the opposite side of the room, and it became glaringly obvious that I needed to paint the cabinets on the wet-bar to match.
So, I got going…

I used the exact same process for painting these cabinets as I did for the built-ins, so check out that post if you’d like more details. Everything went smoothly with the painting process except that I could NOT for the life of me figure out how to remove the drawers. I ended up having to leave them in there and paint around them, which definitely lengthened the process, but wasn’t too bad. Once I got ‘er done, I decided that the crisp white cabinetry was awesome, but the new color emphasized just how peach the countertops were. Now, granted, I’ll be doing a concrete treatment to them soon, but in the meantime, I wanted to minimize the pastel quality as much as possible.
I’ve discussed how I removed the sidesplash in our old bathroom before, and decided that I should do it again here. I basically wanted the wetbar to feel like more of a piece of furniture than a random sink in the living room, and removing the side-splashes would help with that. We never really use the sink anyways, so I didn’t foresee moisture being a huge issue. Again, I followed the exact same process that I used back then, so check out that post if you’d like more details (sorry… this is a long post already, so I just wanna prevent it from becoming a novel if I can). Plus, those other posts are pretty detailed.
Now, I’m just gonna say this… Our house is weird.
The things we would’ve loved to have been completed right (Ahem! An intact roof, plumbing without leaks, a front door that closes. etc.), were done halfway. Something like our fugly sidesplashes? Built like a friggin’ tank. You wouldn’t believe the time and effort it took me to get here…

It took me about an hour and a half and much sweat and muscle to pry those suckers from the wall. The process toughened me. Aged me. In the end, I looked like this…

That, my friends, is the face of victory. Also known as, sidesplash-you-are-my-bit#%-face.
Once the side-splashes were off, I decided that I wanted the backsplash off as well. But, we couldn’t remove the backsplash without first removing the mirror, so….

Which left this original wallpaper….

Psychedelic, baby.

I might’ve considered keeping the wallpaper had it been in better shape. Unfortunately, it was riddled with glue and screw holes. So, I got to removing it. I pried off the backsplash first, which didn’t put up a quarter of the fight that the side-splashes did, and peeled off the wallpaper…
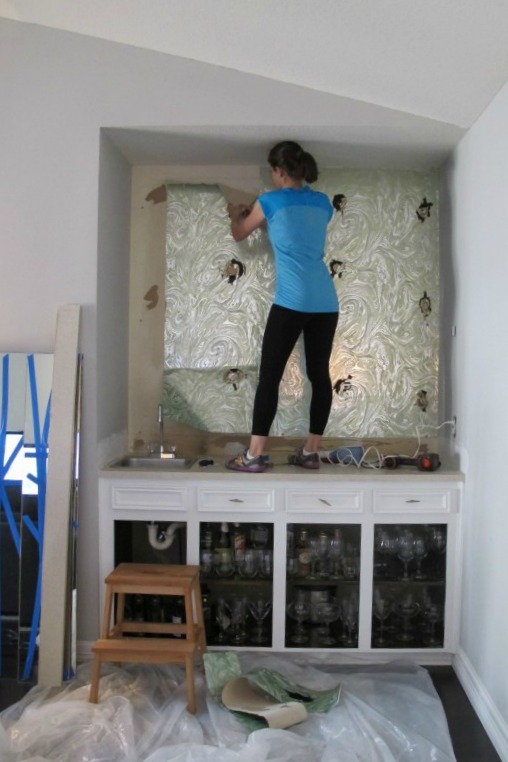
Excuse the attire. I’d just been jogging, which seems to motivate me to make split-second decisions about removing large mirrors, apparently. Anyways, the wallpaper was surprisingly easy to remove. It literally peeled off the wall in large pieces without ANY prep. I just pulled at it and off it came. Kinda scary when you think of how heavy the mirror was and how the entire weight of the mirror was simply glued to the wallpaper. Not only that, the glass shelves were screwed into the wall, but not a single screw was attached to a stud. The screws were simply sitting in drywall with no anchors whatsoever. When we tried to unscrew them, they just spinned in place aimlessly since they weren’t actually gripping anything to begin with.
Once the wallpaper was gone (I totally kept some of the larger, intact pieces to use for art somewhere), the wet-bar looked like this…

I made a very small effort to remove the wallpaper glue residue from the wall. This is a really important step if you’re looking for smooth walls. BUT, since I knew our plan was to tile this wall anyways, and I saw how much work removing the glue would be, I decided to leave the glue and simply patch and prime the wall. This is what I used to patch…

(Note: It was NOT ready to sand or paint in 30 minutes. It took substantially longer than that to dry.) It was lightweight and really easy to work with for the most part, though. I simply troweled it on, waited for it to dry, sanded it smooth with a sanding block, and repeated the process a second time. The wall looked like this when I was done….

I then caulked the gap between the counter and wall with paintable caulk…

Then, I primed the wall with shellac primer…

Unlike our other homes, we actually have smooth walls in this house, which is pretty rare for Texas. The wall behind the wet-bar, though… NOT smooth. Namely because I didn’t remove the glue. But again, we’ll be tiling the wall, so it’ll be fine. Once the primer was dry, I applied two coats of wall paint (Gallery Grey by Kelly-Williams). And here’s where we ended up…

Now, I’ll be honest. I kind of missed the mirror once it was gone. The wall seemed so plain and generic without it. And really, I never had a problem with it. It was kind of retro. But, then I reminded myself that (1) The mirror wasn’t the safest feature in our house, having seen how insecurely it was mounted, and (2) we aren’t done yet. I need to learn not to second guess our decisions in the middle of a project. The middle never makes sense.
So, basically, the plan for the wet-bar is as follows:
1. Change out the faucet handles to update the fixture on the cheap
2. Coat the countertop in concrete and seal that puppy up. Once this is done and the tone of grey concrete is apparent, we can…
3. …Choose tile to install on the entire wall behind the wet bar (anybody have a wet-saw we can borrow?). I’m thinking some kind of glass mosaic tile or maybe marble? Once this is done, we’ll…
4. …Add a large framed mirror to bounce some light around. And the piece de resistance.,,,
5. Install two pendant lights above the bar for additional light and style.
Woop-AH! (That’s a whip sound) (which made sense in my head) (but now, not so much) (thanks for sticking with me) (loveyou)
So, anyways, I’ve already changed out the faucet handles, reattached the cabinet doors, and accessorized the area as a Phase One step to tide us over until the other improvements are complete. I’ll have a post about that up soon… I just didn’t want to overload y’all in one post, so I’m spreading the love. Next, I’ll be concreting the countertop (yes, I totally verb-ized ‘concrete’). And I already know which pendants I want. We just need to get them and install junction boxes in the ceiling. I can’t WAIT to get this all done and see it come together. I’m pretty excited about it.
So, have any of y’all started a “small” project as of late which snowballed into a big one? Tell me about it!!
You can check out the next steps in the makeover here: switching out our faucet handles on the cheap, and finding a CRAZY awesome vintage mirror