Hey guys! I hope everyone had a great Christmas! Ours turned out a bit differently than planned… My mother, Lucas, and I were all sick, so Christmas plans were cancelled. Total bummer. Seriously, if there’s one thing I can say about this time of year, it’s this…. if you’re under the weather, or know that your kiddos are, just stay home. Don’t spread your germies. Trust me, everyone will thank you.
In other news, I’ve been a total DIY FIEND these past few days. Seriously. It’s crazy. For the past few months we’ve had a TON of company in town, then with the holidays and Lucas’s birthday, I haven’t had much time to really get my hands dirty with projects. Fortunately, I wasn’t nearly as sick as Lucas and something about being homebound for days set the ball rolling. I.just.can’t.stop.DIYing. This is how I know that DIY is my passion. If I’m unable to do it for a few months, I sort of reach my limit and binge as soon as I have the opportunity. Unhealthy? Perhaps. But this is me.
To elaborate on my recent insanity, allow me explain…. Since Thursday, I’ve painted our front doorway, painted our hang-out room, cleaned up the spare room (new, neater pics of the room are now in our House Tour), hung curtains and art work in 3 of the bedrooms, hemmed the aforementioned curtains (in the easiest possible way… Can’t wait to share!!), and painted our half bath… Twice. And it’s about to be painted again because the color isn’t exactly what I was looking for. And I’m painting our tv stand white today. Oh, and I finally took pictures of everything listed above plus pictures of the updates in Lucas’s room that I made months ago. Yes, and this was all in three days (whatiswrongwithme?). So, it’s fair to say that I have a ton to share with you.
Anyways, today, because I absolutely despised the gloomy pictures of our house that I took when we had the exterior painted, I’m starting there. With our front door. And much prettier pics of our home’s exterior. As I’d described in this post, I’d planned to paint the doorway a nice charcoal grey. And I was going between just painting the door….

Or painting the entire doorway,…

Well, let me tell you… I started by painting the front/storm door only and it was so painfully obvious that the entire thing needed to be painted, I didn’t even take a picture. I just kept painting. The color I settled on is called Black Bean by Behr. To decide, I basically just taped paint swatches to the door and stepped back. It was obvious right off the bat that Black Bean was “the one”.
Painting was pretty straight forward. Since I knew that the door surround had been painted with water-based paint, I just simply painted that straight off. Our actual door and storm door, though, had been painted in oil-based paint. I knew this because our painters told me, but if you ever need to determine the type of paint you’re dealing with, here’s a tip….
Rub a cotton ball dipped in rubbing alcohol on the paint in question. If it’s oil-based nothing will happen. If it’s water based, the paint will become mildly sticky and start coming off on the cotton ball.
Since my door was oil-based, I basically had two options:
1. Paint it with oil-based paint (Nope. I already had water-based paint and didn’t want to expose my family to the fumes or crazy long dry-time of oil-based paint. I mean, we need to close our front door at some point, right?)
2. Use a primer designed to go under or over any type of paint.
So, number two it was (“…who does #2 work for?” Heehee! Moving on…). I used my favorite go-to shellac primer….

It sticks to everything and can be recoated in as little as 45 minutes. Sold!
So, I gave my door and storm door a thin and even coat of primer with a foam roller, then followed up with two coats of Black Bean. Here’s after the first coat…

I have to say, I was very impressed with Behr’s exterior paint. It covered like a dream. Two coats left a nice even finish. And here is how it turned out…..

SUCH an improvement from this pic from the day we closed…..

Next, I’ll be (*coughcough*weeding*coughcough*) sealing/enhancing the terracotta tile to bring out those gorgeous, rich colors (like I did on the back patio), painting the rusty green gate and post lighting fixtures a sharp, clean black, and eventually changing those teeny lighting fixtures for something more modern.
Here’s a shot of the entire house….


And a before from when we closed….
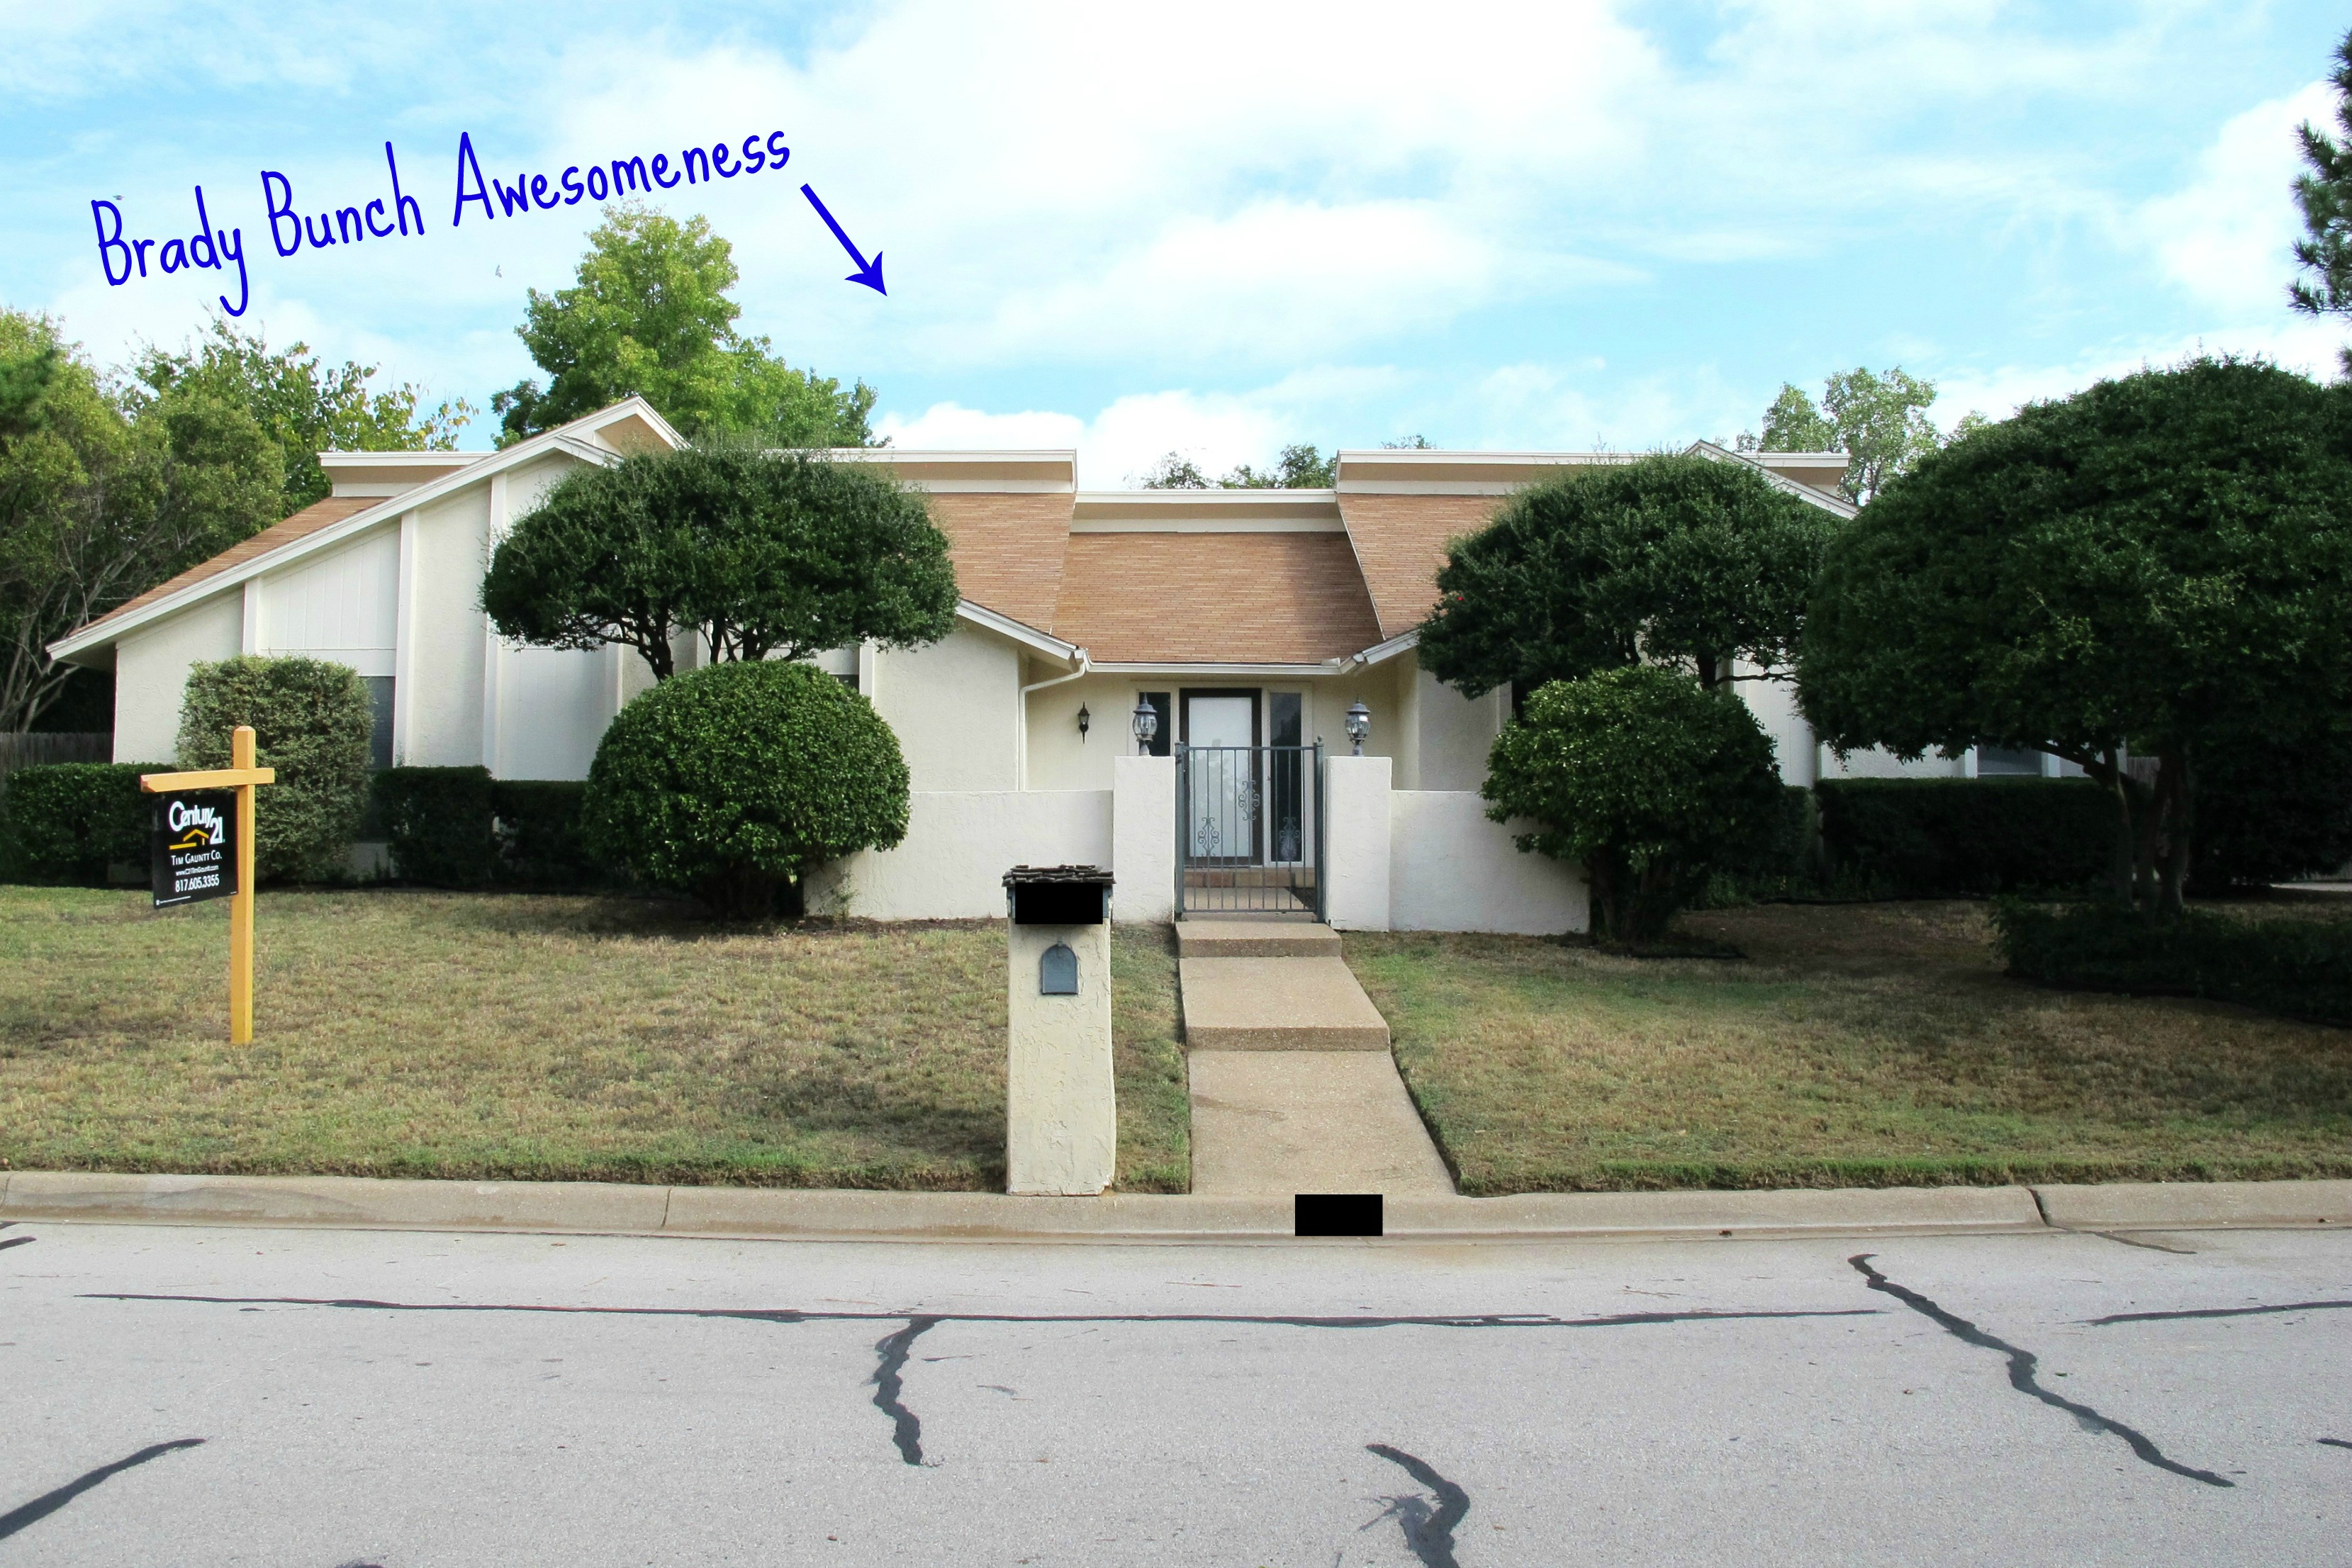
I love how the charcoal adds some much needed contrast and interest to the house. It really compliments the new paint job well. Plus, Joey’s landscaping job really warms up the front, especially the added beds/bushes in front of the courtyard. Can’t wait to paint that gate and really work on that courtyard!! Mother Nature, we need your assistance on this one… Niceweatherniceweatherniceweather….
So, how was your Christmas? Any post holiday projects you’ve been working on? Have you ever been so-so about a project (much like I was on our exterior paint job) and then you add one more element and it totally clicks?? Spill! 🙂