Happy Tuesday, Folks! I hope everyone had a safe and relaxing weekend. As mentioned in my last post, ours was a little different… though with a few nice surprises. For example, if you follow me on Facebook you may have seen my excitement on Sunday when I woke to discover that my revamped foyer cabinets (aka: my brightey whiteys) were featured on Tatortots and Jello! I was so amazingly flattered that they chose my children cabinets to sit alongside such greatness. You can check it out (along with the other awesome projects) at this link. And yep! After looking at all of the big, beautiful, bright photos in that wonderful post… and then my teeny, tiny pic… I’ll definitely be incorporating larger pictures on the blog from now on. Ya live, ya learn. 🙂
Anyhoo, the other day, I was minding my own business when I had another sudden bout of inspiration (sort of like with my bamboo light fixture). Ya see, we’ve had a little eyesore issue that I’ve been trying to contend with. Brace yourself.
This was the view through our bedroom door…

Attractive, right?? We used to have a cute little shelving unit in this space, but once we adopted our new grown-up nightstands, I moved it out. It just didn’t work anymore. And what was left was an ugly cord and blankness. I really just stuck the blue vase over there to get it out of the way. I decided that some sort of bench would be a good solution for the space, and absolutely fell in love with yet another inanimate object the last time I was at Target…

It was perfect! A smaller, bold pattern to contrast our larger-patterned, muted bedding. The size was right. I liked the legs. But I wasn’t willing to pay a hundred bucks for it.
So, I chose to create my own version on the cheap. Ya see, my moment of inspiration occurred in the instant that I remembered that we had this ottoman in our attic…

I raced up there in a moment of determination and brought it down in a haze of glory. I thought it would work well. It was small, square-cushioned, and free. A good blank slate. 😉
I started by removing the cover (my mother-in-law recovered it years ago with the brown microsuede)…
…and discovered ducks!! Huh…

Then, I used this spray paint and gave the wood legs a few thin, even coats (check out some general spray-painting tips in this post of yore )…

…Which left this…

Yeeeahhh… I didn’t even bother to cover the fabric. Alas, there will be no ducks in my future.
I found the fabric below at Hobby Lobby and just knew it was “The One”. I thought it was similar to the Target bench fabric in the lines and feel, but was slightly more graphic, which I was all for. It was $8.99/yard and I had a 50% off coupon which brought it to around 5 bucks including tax for the one yard I purchased.

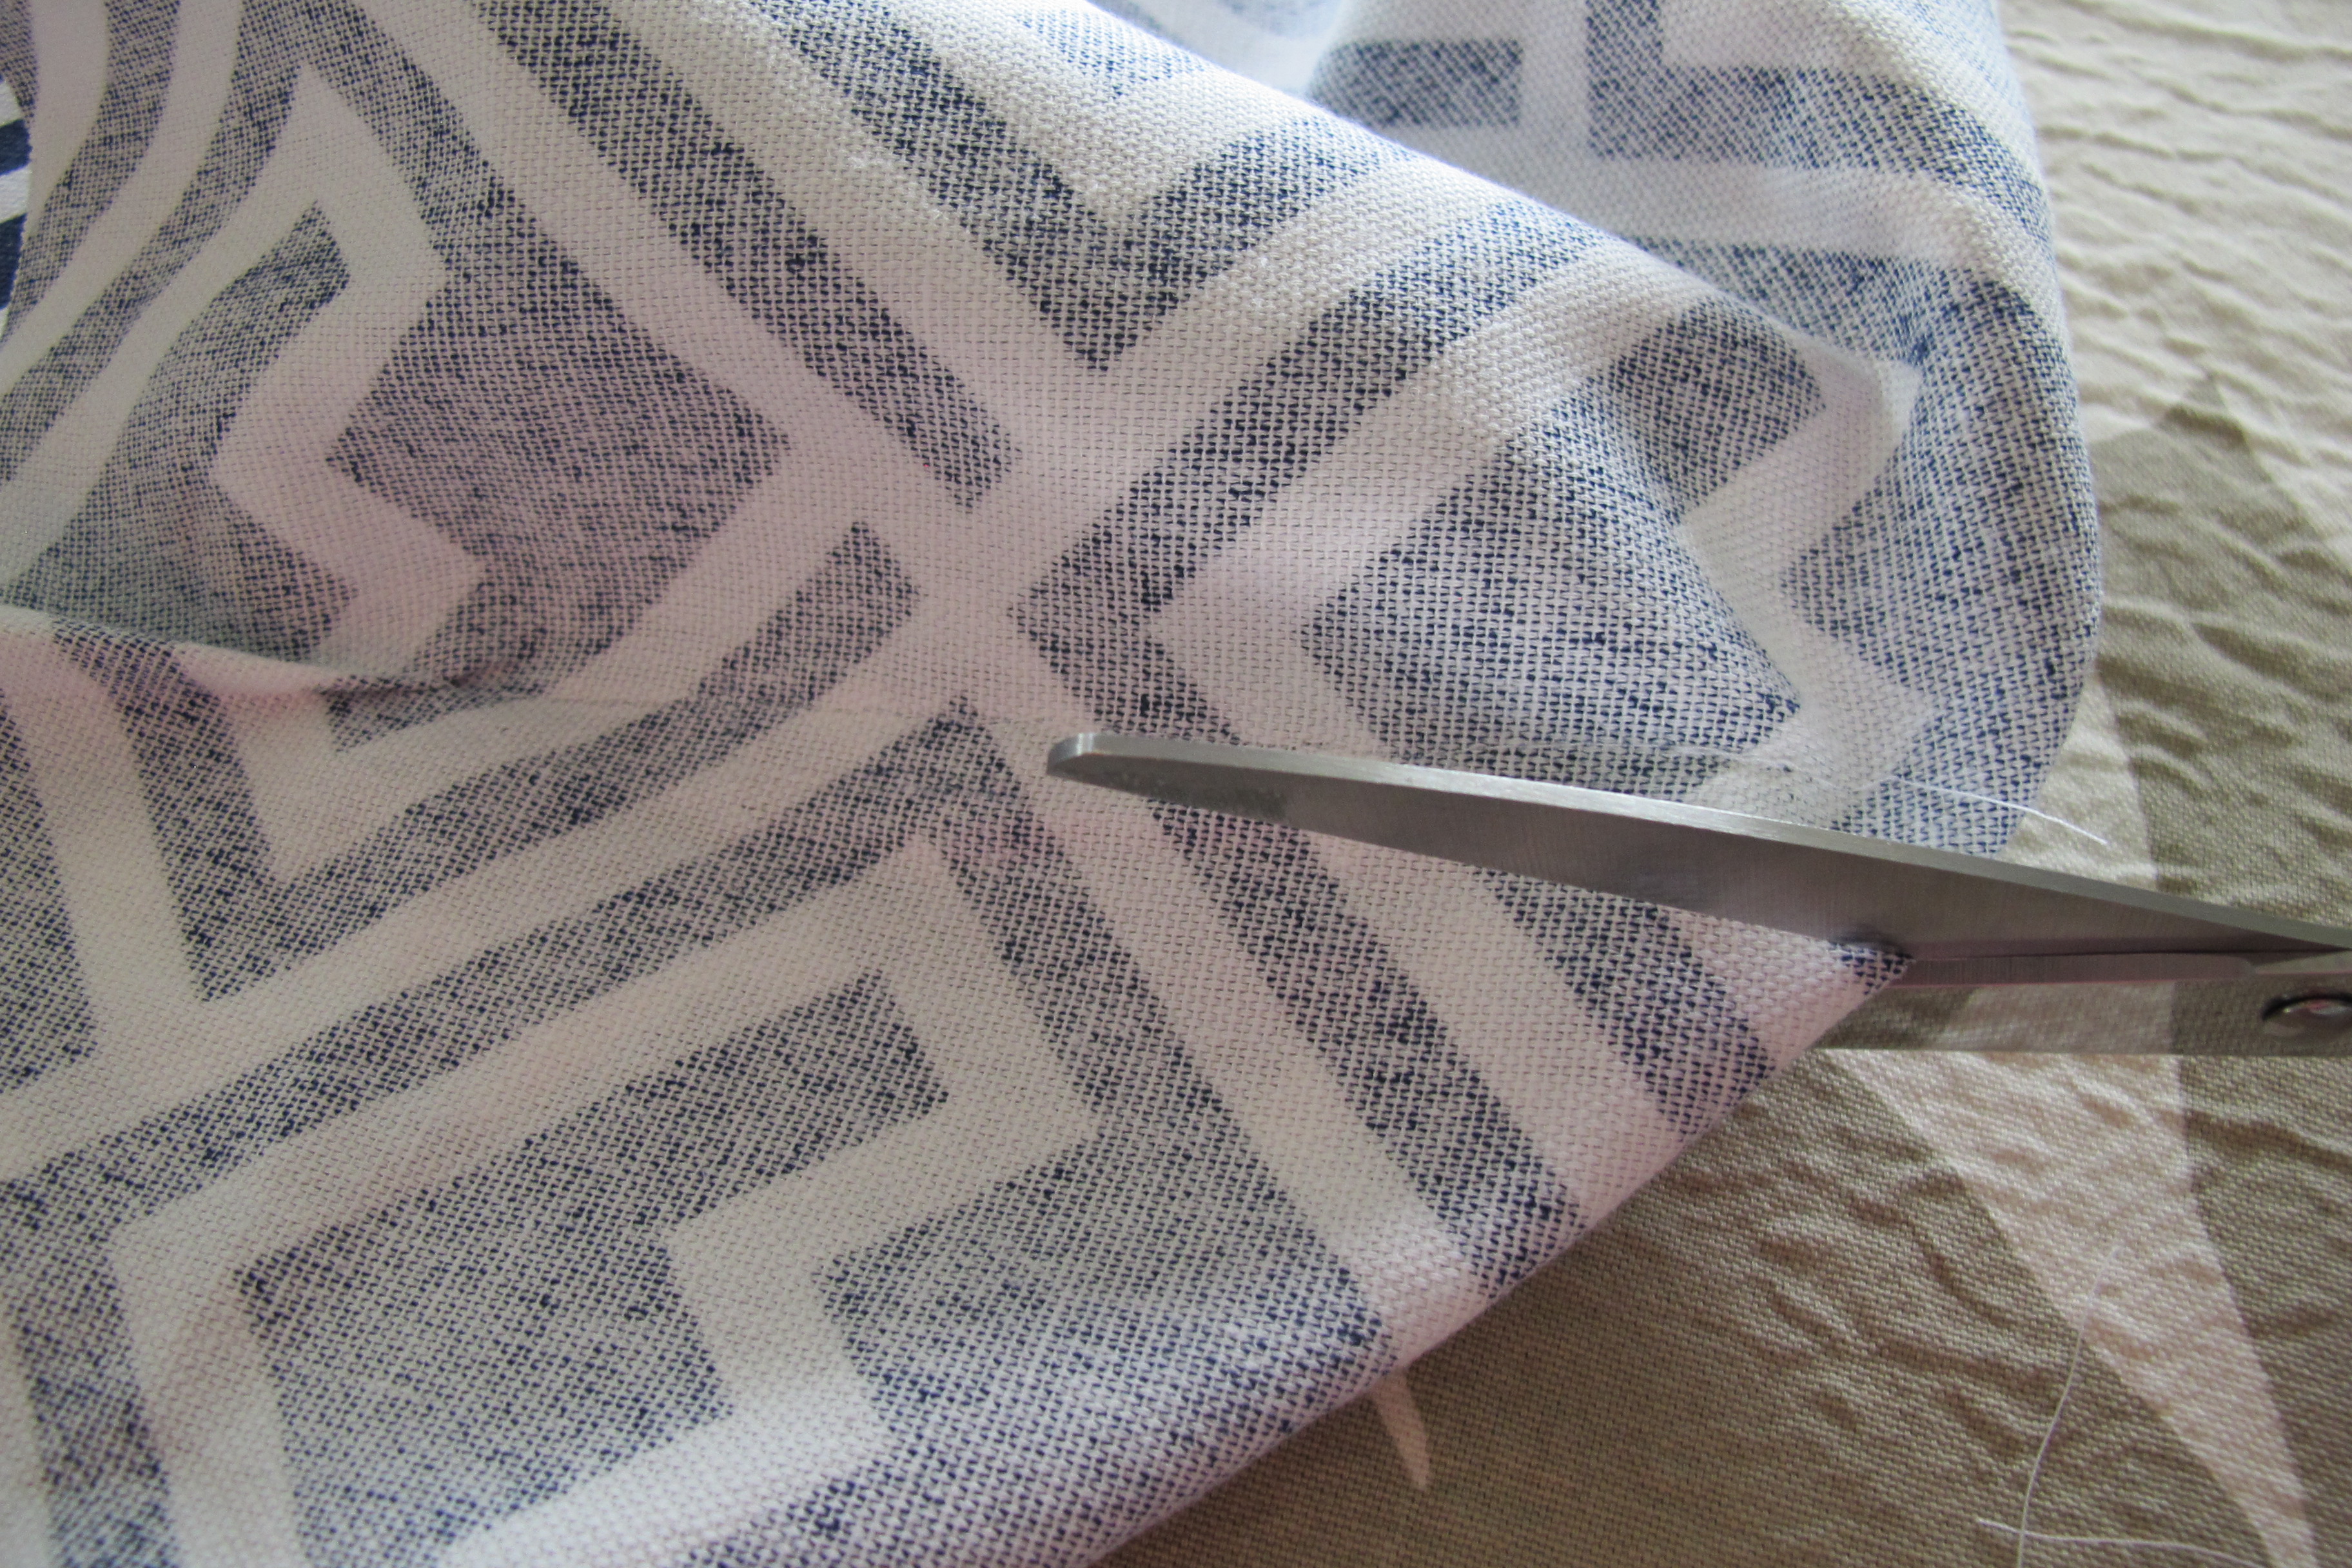
Now, as many of you know… a seamstress, I am not. However, I’m trying to grow my skills, so I figured, no time like the present! And then I procrastinated. Out of fear. But only for a little bit. I decided to pin and sew along each of the corners to create darts of sorts (if there’s a correct term for this, please let me know). I started the process, and then as I got to pinning my second corner, I realized that the fabric was the wrong way… so I flipped it over, wrong side up and started again. My corners looked like this once pinned…

Then, I retrieved Dusty (aka: my sewing machine), and simply sewed straight(ish) lines right over my pins. I turned my slipcover right side out and tried it on for size…

To my sheer and utter amazement, it didn’t look too bad. Sure, its not perfect. It has a few puckers and curvy lines, but ya know what?? I’LL TAKE IT!!!! I removed the cover, trimmed off the excess material…
… and slid the cover back on my ottoman. I trimmed the bottom fabric, leaving about an inch of excess and folded it under so that the fabric would be neat around the legs…

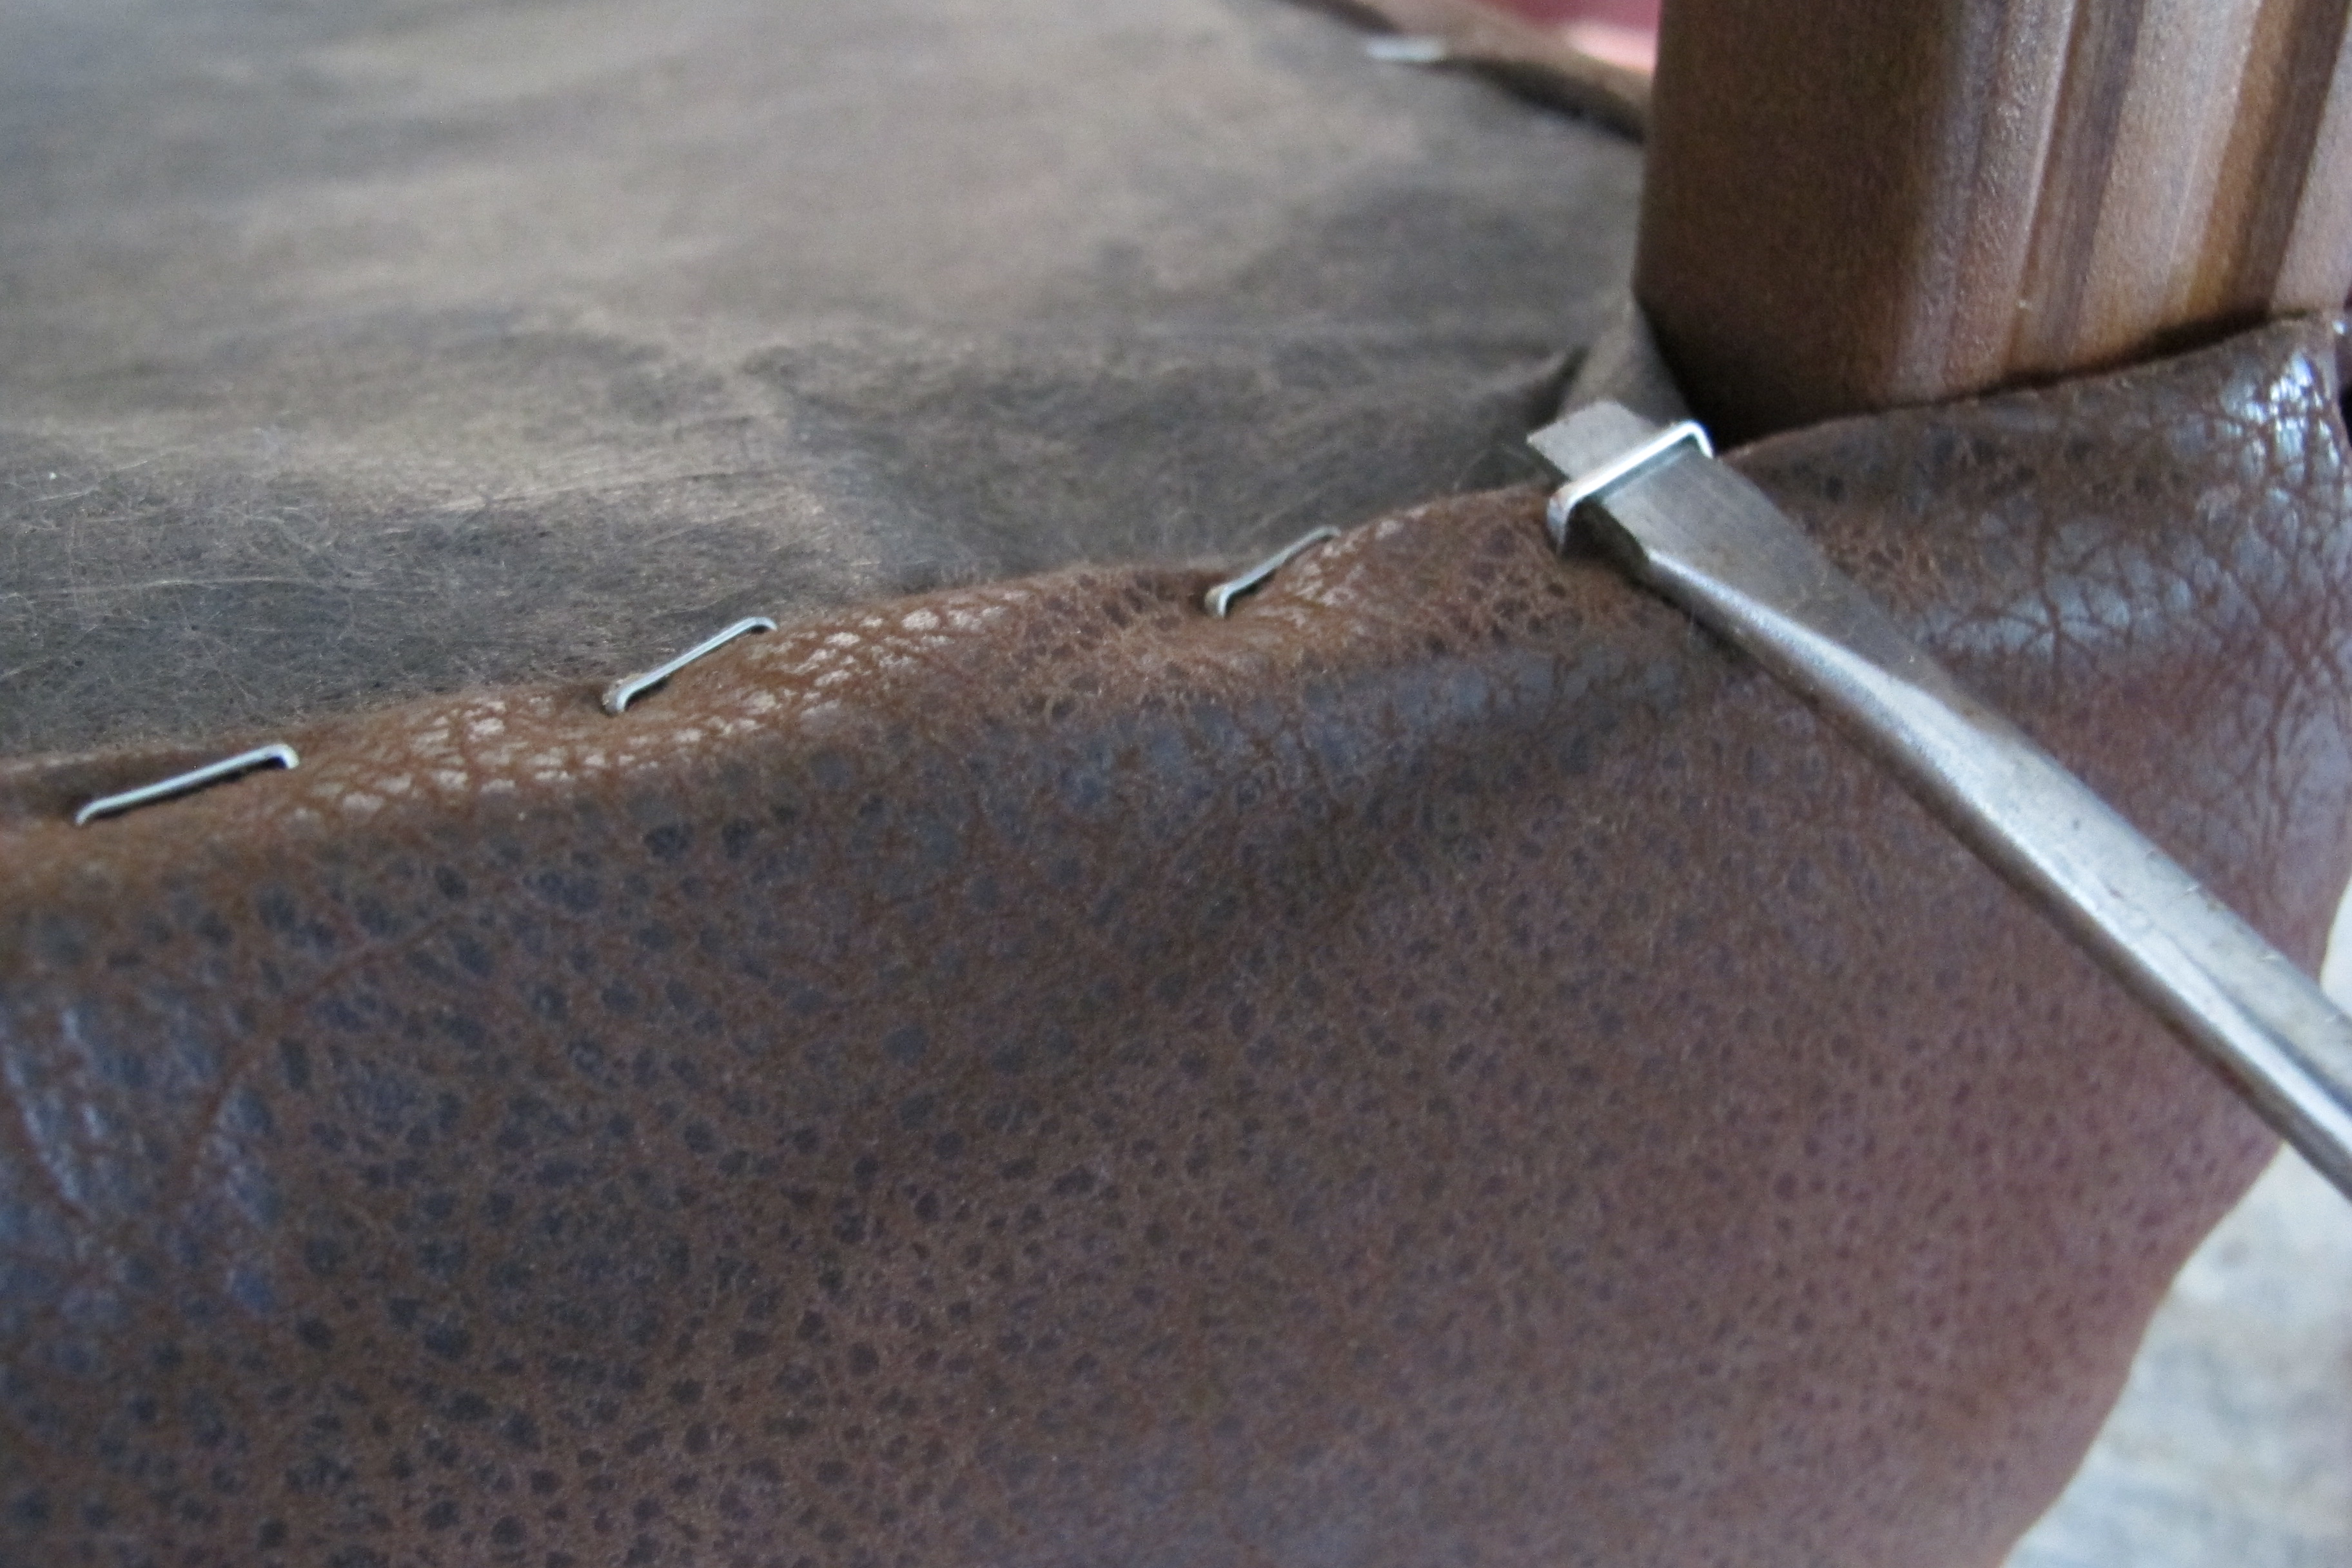
Then, I used my trusty staple gun to secure the fabric using the method outlined in this tutorial for recovering seat cushions…

This next part, I have no pictures for, unfortunately. But I’ll just say this… anyone who can secure embroidery tacks in a straight line deserves a medal (or a talk show)! I spent ages (and sacrificed many an innocent tack) trying to hammer them in straight around the legs. I’m happy with how they turned out in the end, but the process was no joke. So, without further adieu, here’s the final result…


And here he is in his new home….


Our doorway view is much cuter now in my humble opinion.
So, here’s the cost breakdown for this project…
Ottoman: Already owned
Spray paint: Already owned
Fabric: $5
Embroidery Tacks: $2.50
TOTAL SPENT: $7.50
So, yeah. I’m definitely satisfied with this project. I think I actually like my bench better than the Target version, which says a lot, ’cause that Target bench is the cat’s meow. I like the bolder fabric, but that the overall bench has a similar feeling to my inspiration. And the embroidery tacks… Worth every frustration. They add a little rustic twist and contrast the gold legs, which now tie in to Drex’s brass accents on the opposite side of the room. And.I.sewed. And.liked.it. Weird.
So, what have you guys got going on?? Any inexpensive knock-offs happening in your neck of the woods??
Like this post?? Share it or follow me on Facebook or Instagram!! 🙂
Linked up to: Home Stories A to Z, Home Coming, The DIY Dreamer, I Heart Nap Time, Natasha in Oz, Burlap and Babies, Lines Across, Tip Junkie