This is gonna be an Ikea hack kinda week. I’m just feelin’ it. So, I’m gonna ride that feeling to Happinessville.
Remember this cabinet?
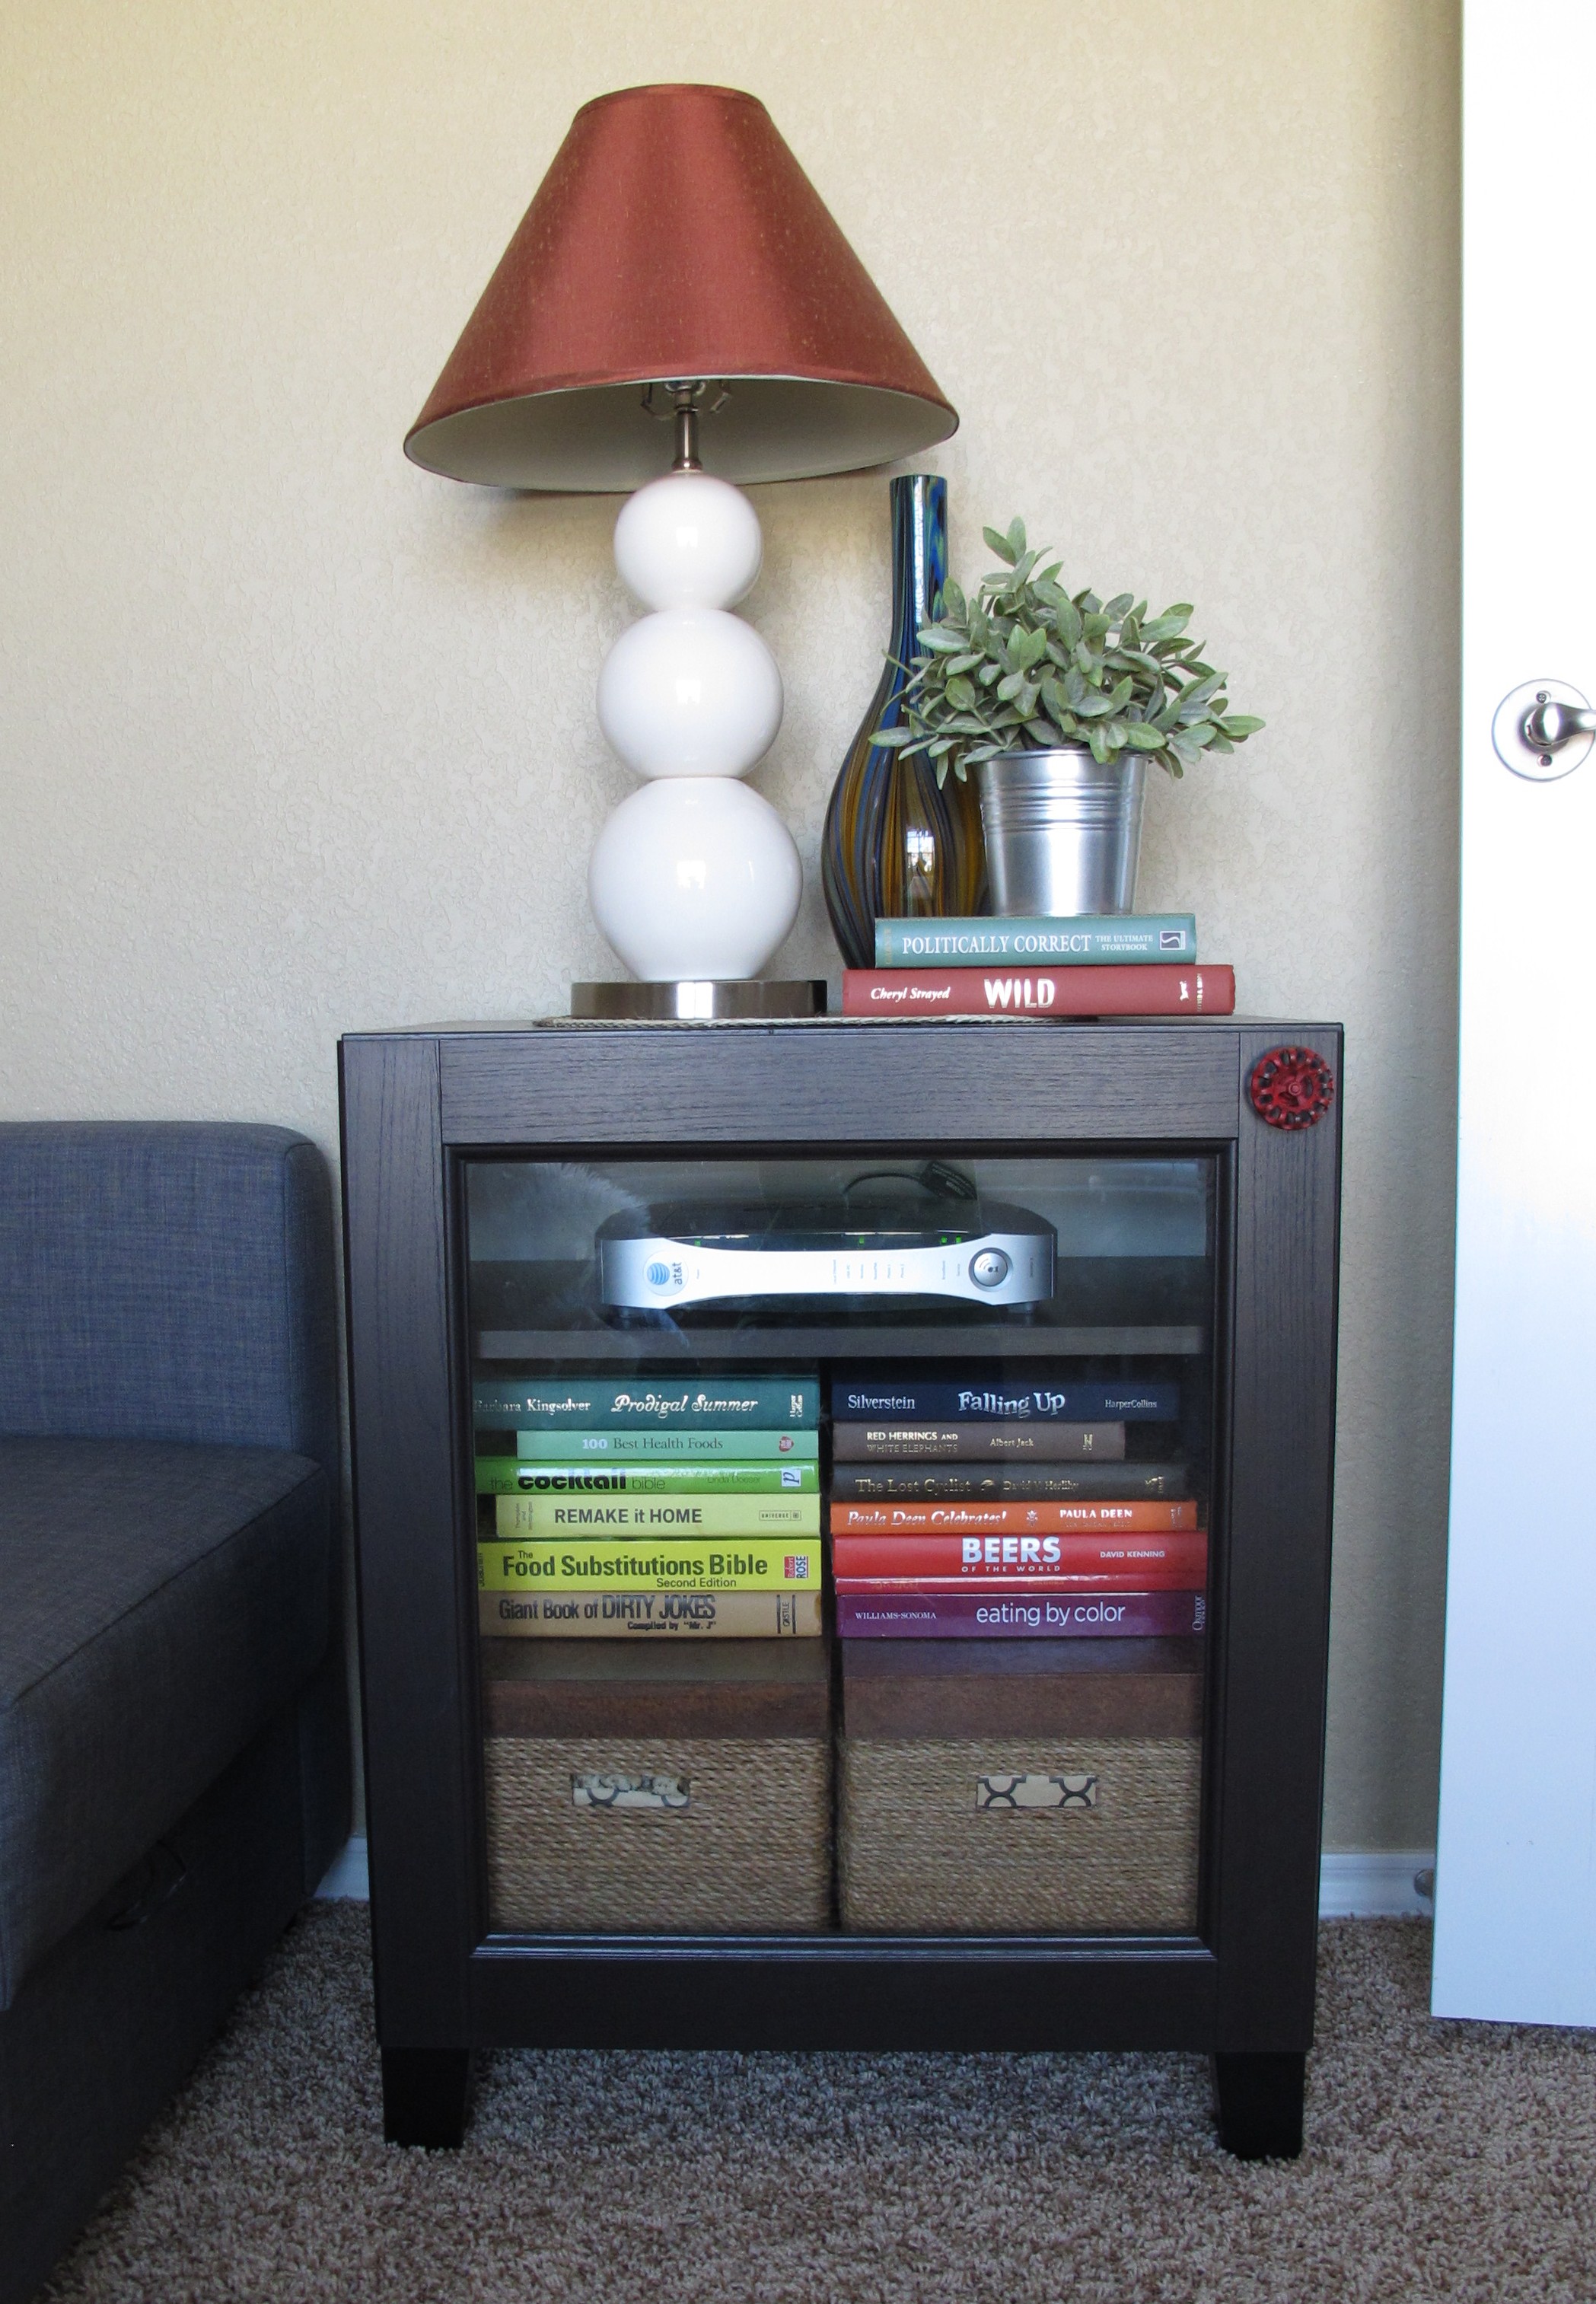
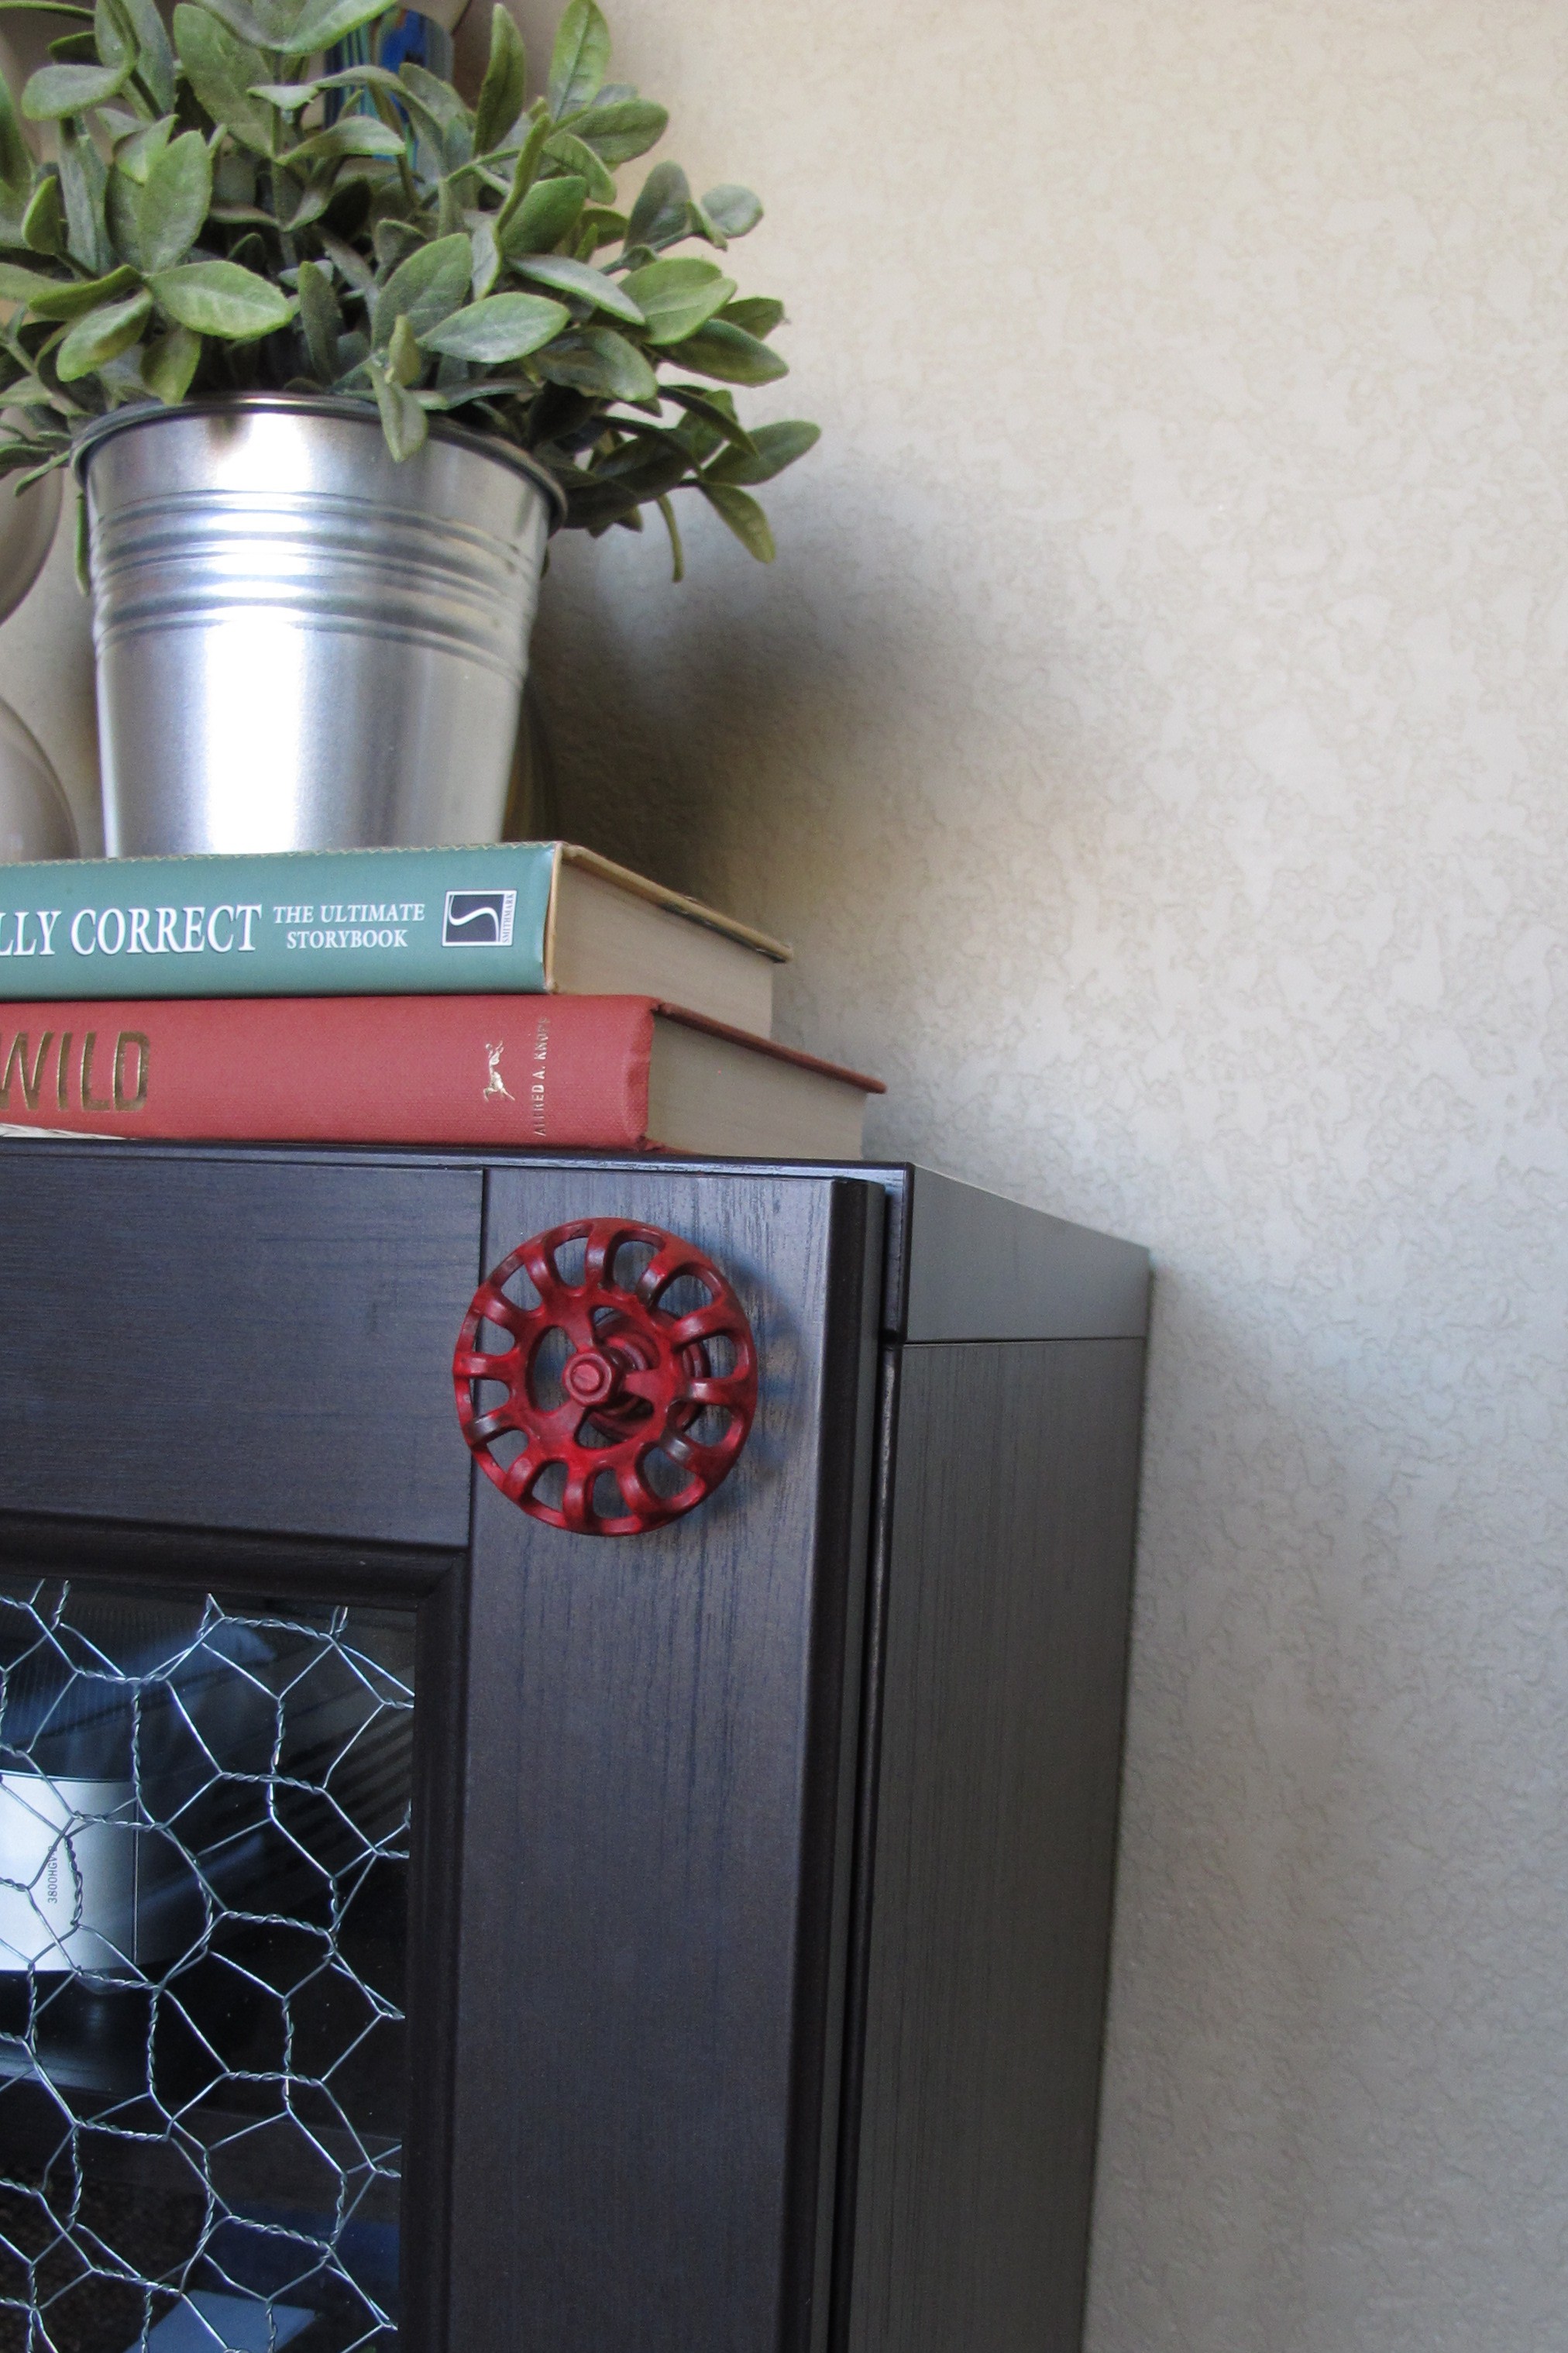
I briefly referenced it in this post. We originally purchased it to be our media cabinet for the living room. And it was purchased during this time period, when I was highly confused about what furniture and layout would work best in our oddly-shaped living room. I’d erroneously convinced myself that we needed a teeny media cabinet since the room is smallish. But, honestly, I never really liked the darn thing. Sure, we needed something. But, it’s just so… Blah. And boxy. And brown. I tried to jazz it up with the spigot faucet knob from Hobby Lobby. I even painted the back panel on the inside grey and navy for a splash of color (although, it’s kind of hard to tell). Once we adopted our current media cabinet, ole’ plainface here was demoted to the front room where it’s been holding down the fort ever since.
Now, although this cabinet isn’t my fave, we never really had a reason to part with it. After all, it’s the perfect size for its current home, it provides storage and is a good place to keep our cable/internet/modem/router thingie thanks to the glass door. I was just never particularly excited by the sight of it.
So, the other day, as I was doing a yoga video in the front room, I completed one fateful upward dog, glanced at the cabinet and exclaimed “EUREKA!!!”. Yoga must’ve brought me clarity or something. Unexpected bonus, right there. I realized that the cabinet simply needed a bit of organic detail. Something rustic and curvy to offset the plain, square lines. And, the detail needed to allow our wireless modem to still function. So, preferably something meshy, with holes. “CHICKEN WIRE, YOU FOOL!!” I exclaimed. How had I never thought of this before??!!
So, I hit up Home Depot and grabbed a roll of chicken wire for just over six bucks…
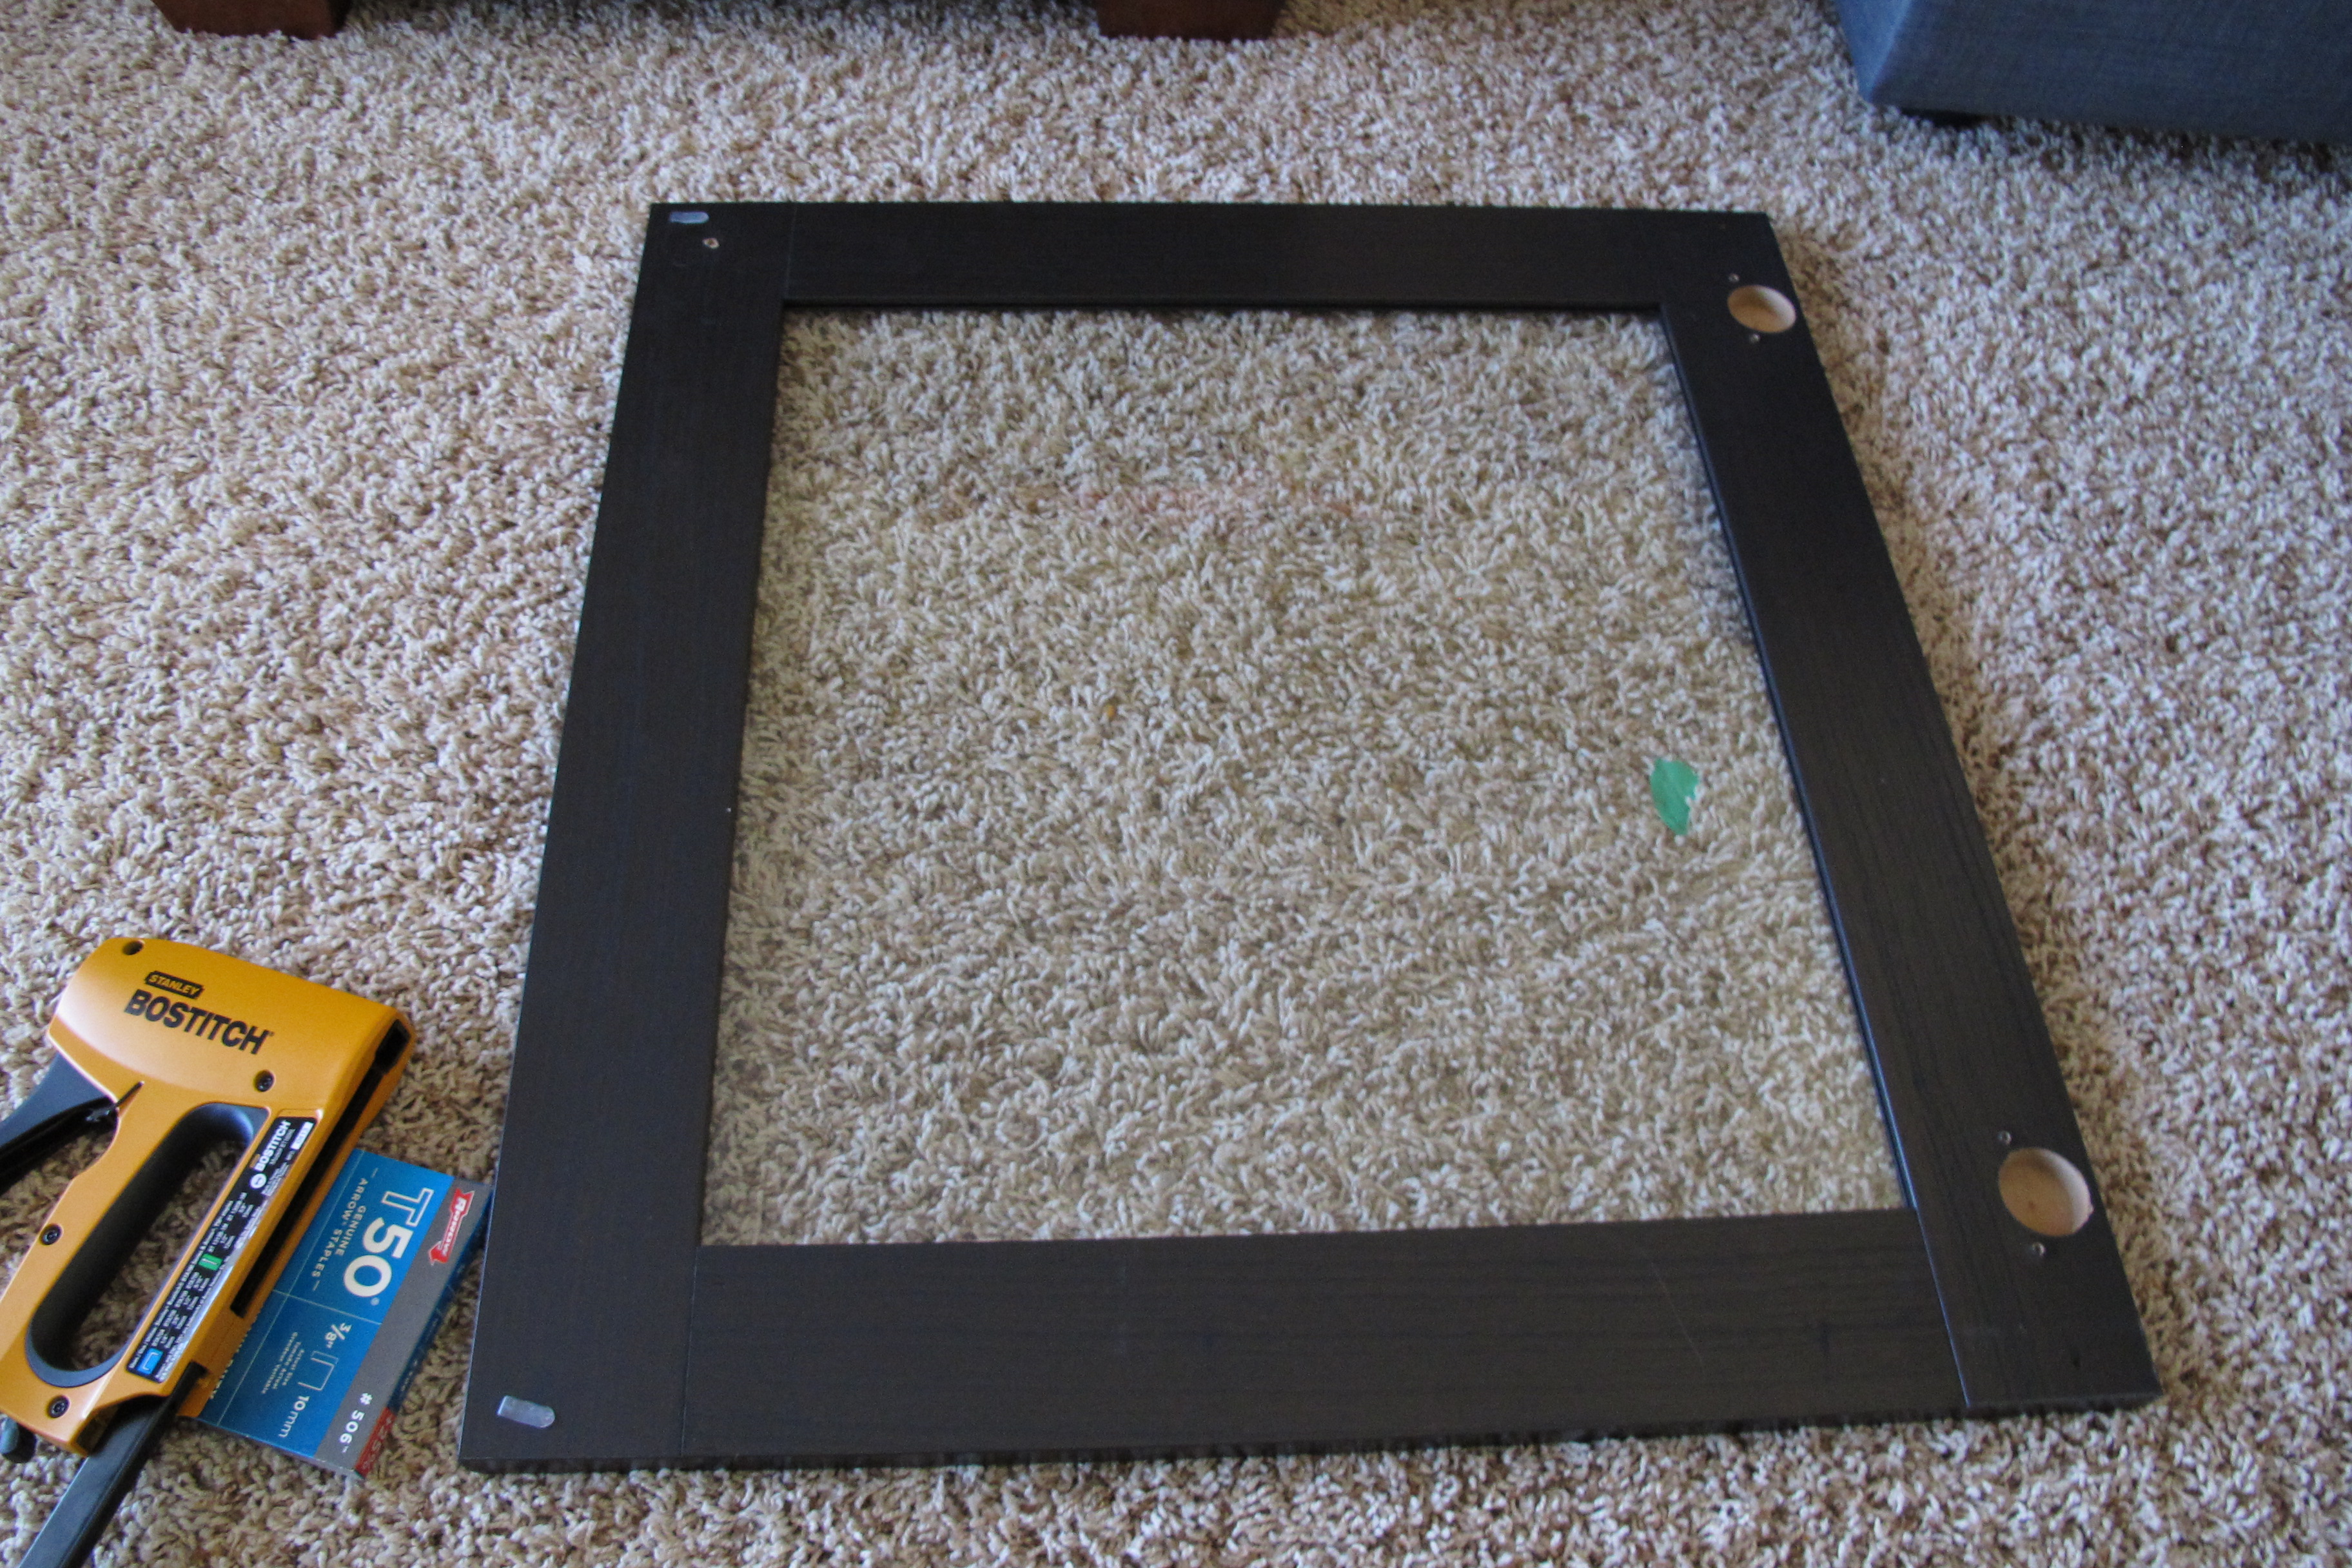
Once I got home, I removed the door from the cabinet and took off the door knob….
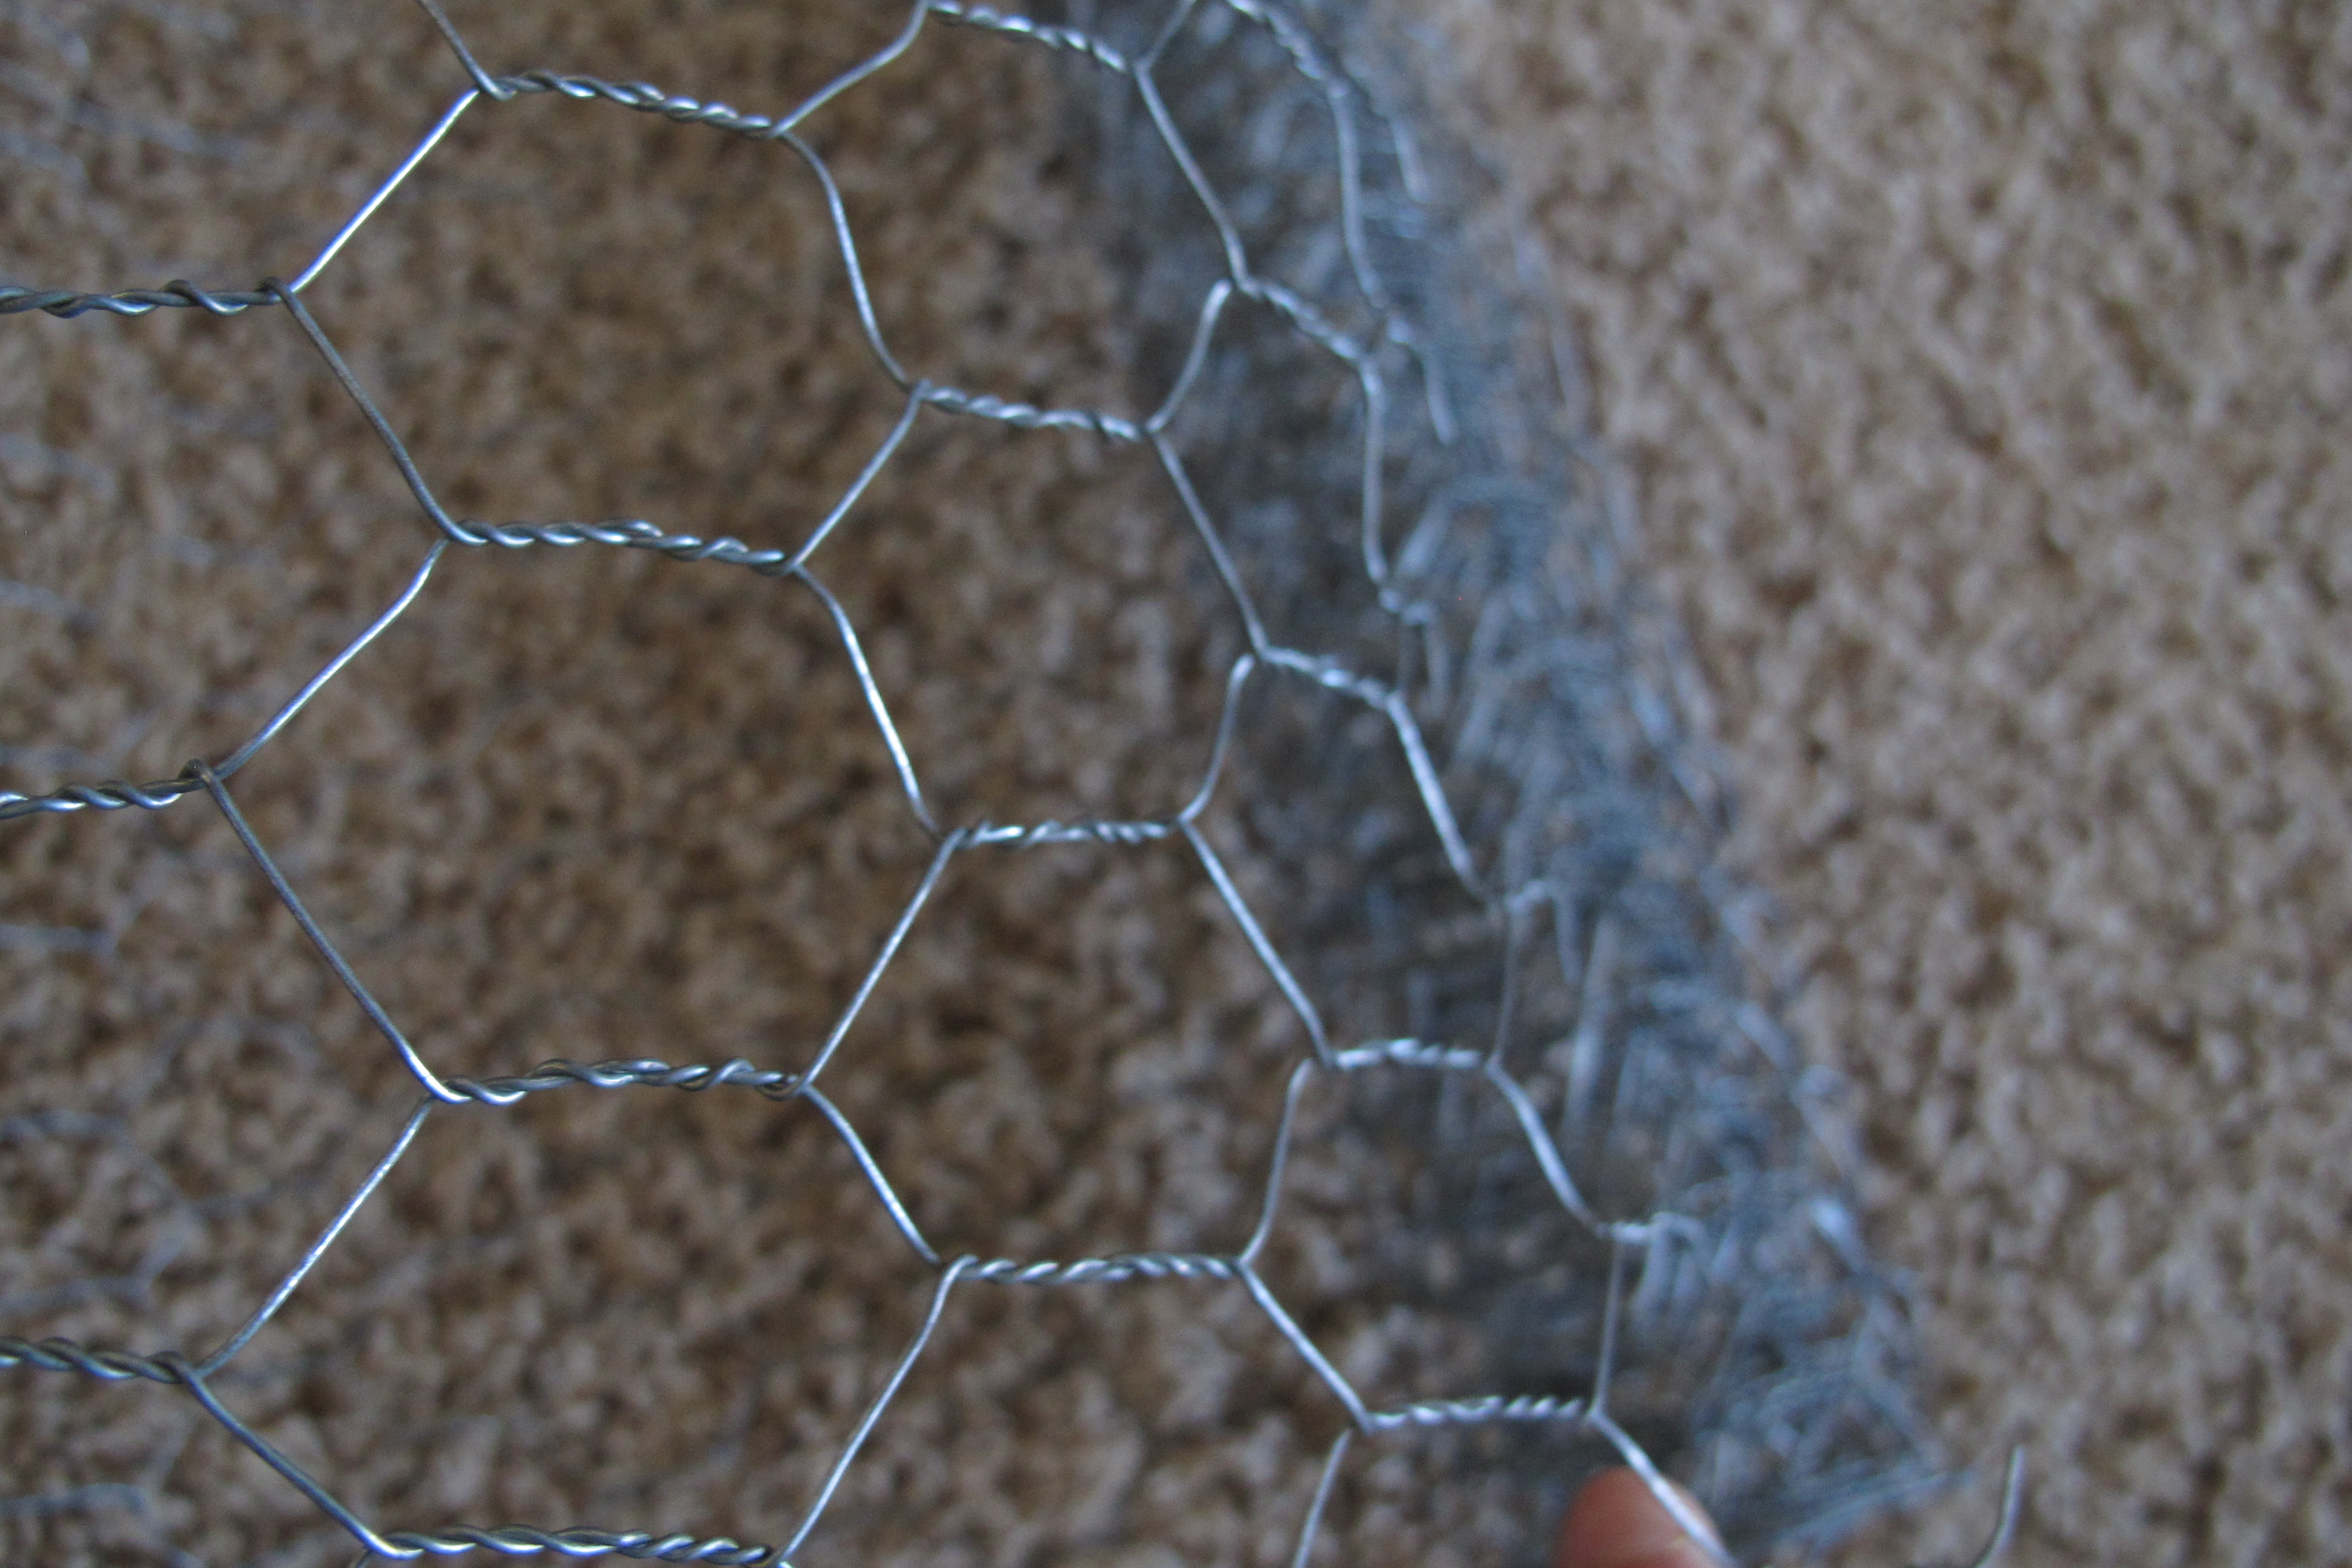
I measured the window, allowed about another inch on each side and the cut my chicken wire down to size with some wire cutters…

I did my best to flatten out the chicken wire by bending it against the arch (caused from it being rolled up). It was easiest if I stepped on it while bending it in the opposite direction with my hands. Then, I used my trusty staple gun and stapled the chicken wire to the inside of my door…

I will warn… Chicken wire is feisty stuff. I highly recommend wearing protective gloves. My hands got scratched up all over during this process. After attaching the chicken wire, it looked like this….


Which, I liked.
But, then I decided that if one is good, two must be better. So, I cut out a second piece of chicken wire, but in the perpendicular direction to my original (so that the honeycomb shapes were turned 90 degrees). Then, I stapled the second sheet over the first…

I trimmed all of the excess chicken wire around the edges, reattached the door and handle. And I was left with this….


A little side-by-side before and after action…

It’s exactly what I was going for. A bit of rustic detail in a more freestyle pattern to break up the blockinesss of the cabinet. It gives some subtle interest and style. All for under 6 bucks (if you consider that I still have chicken wire left over for other projects).
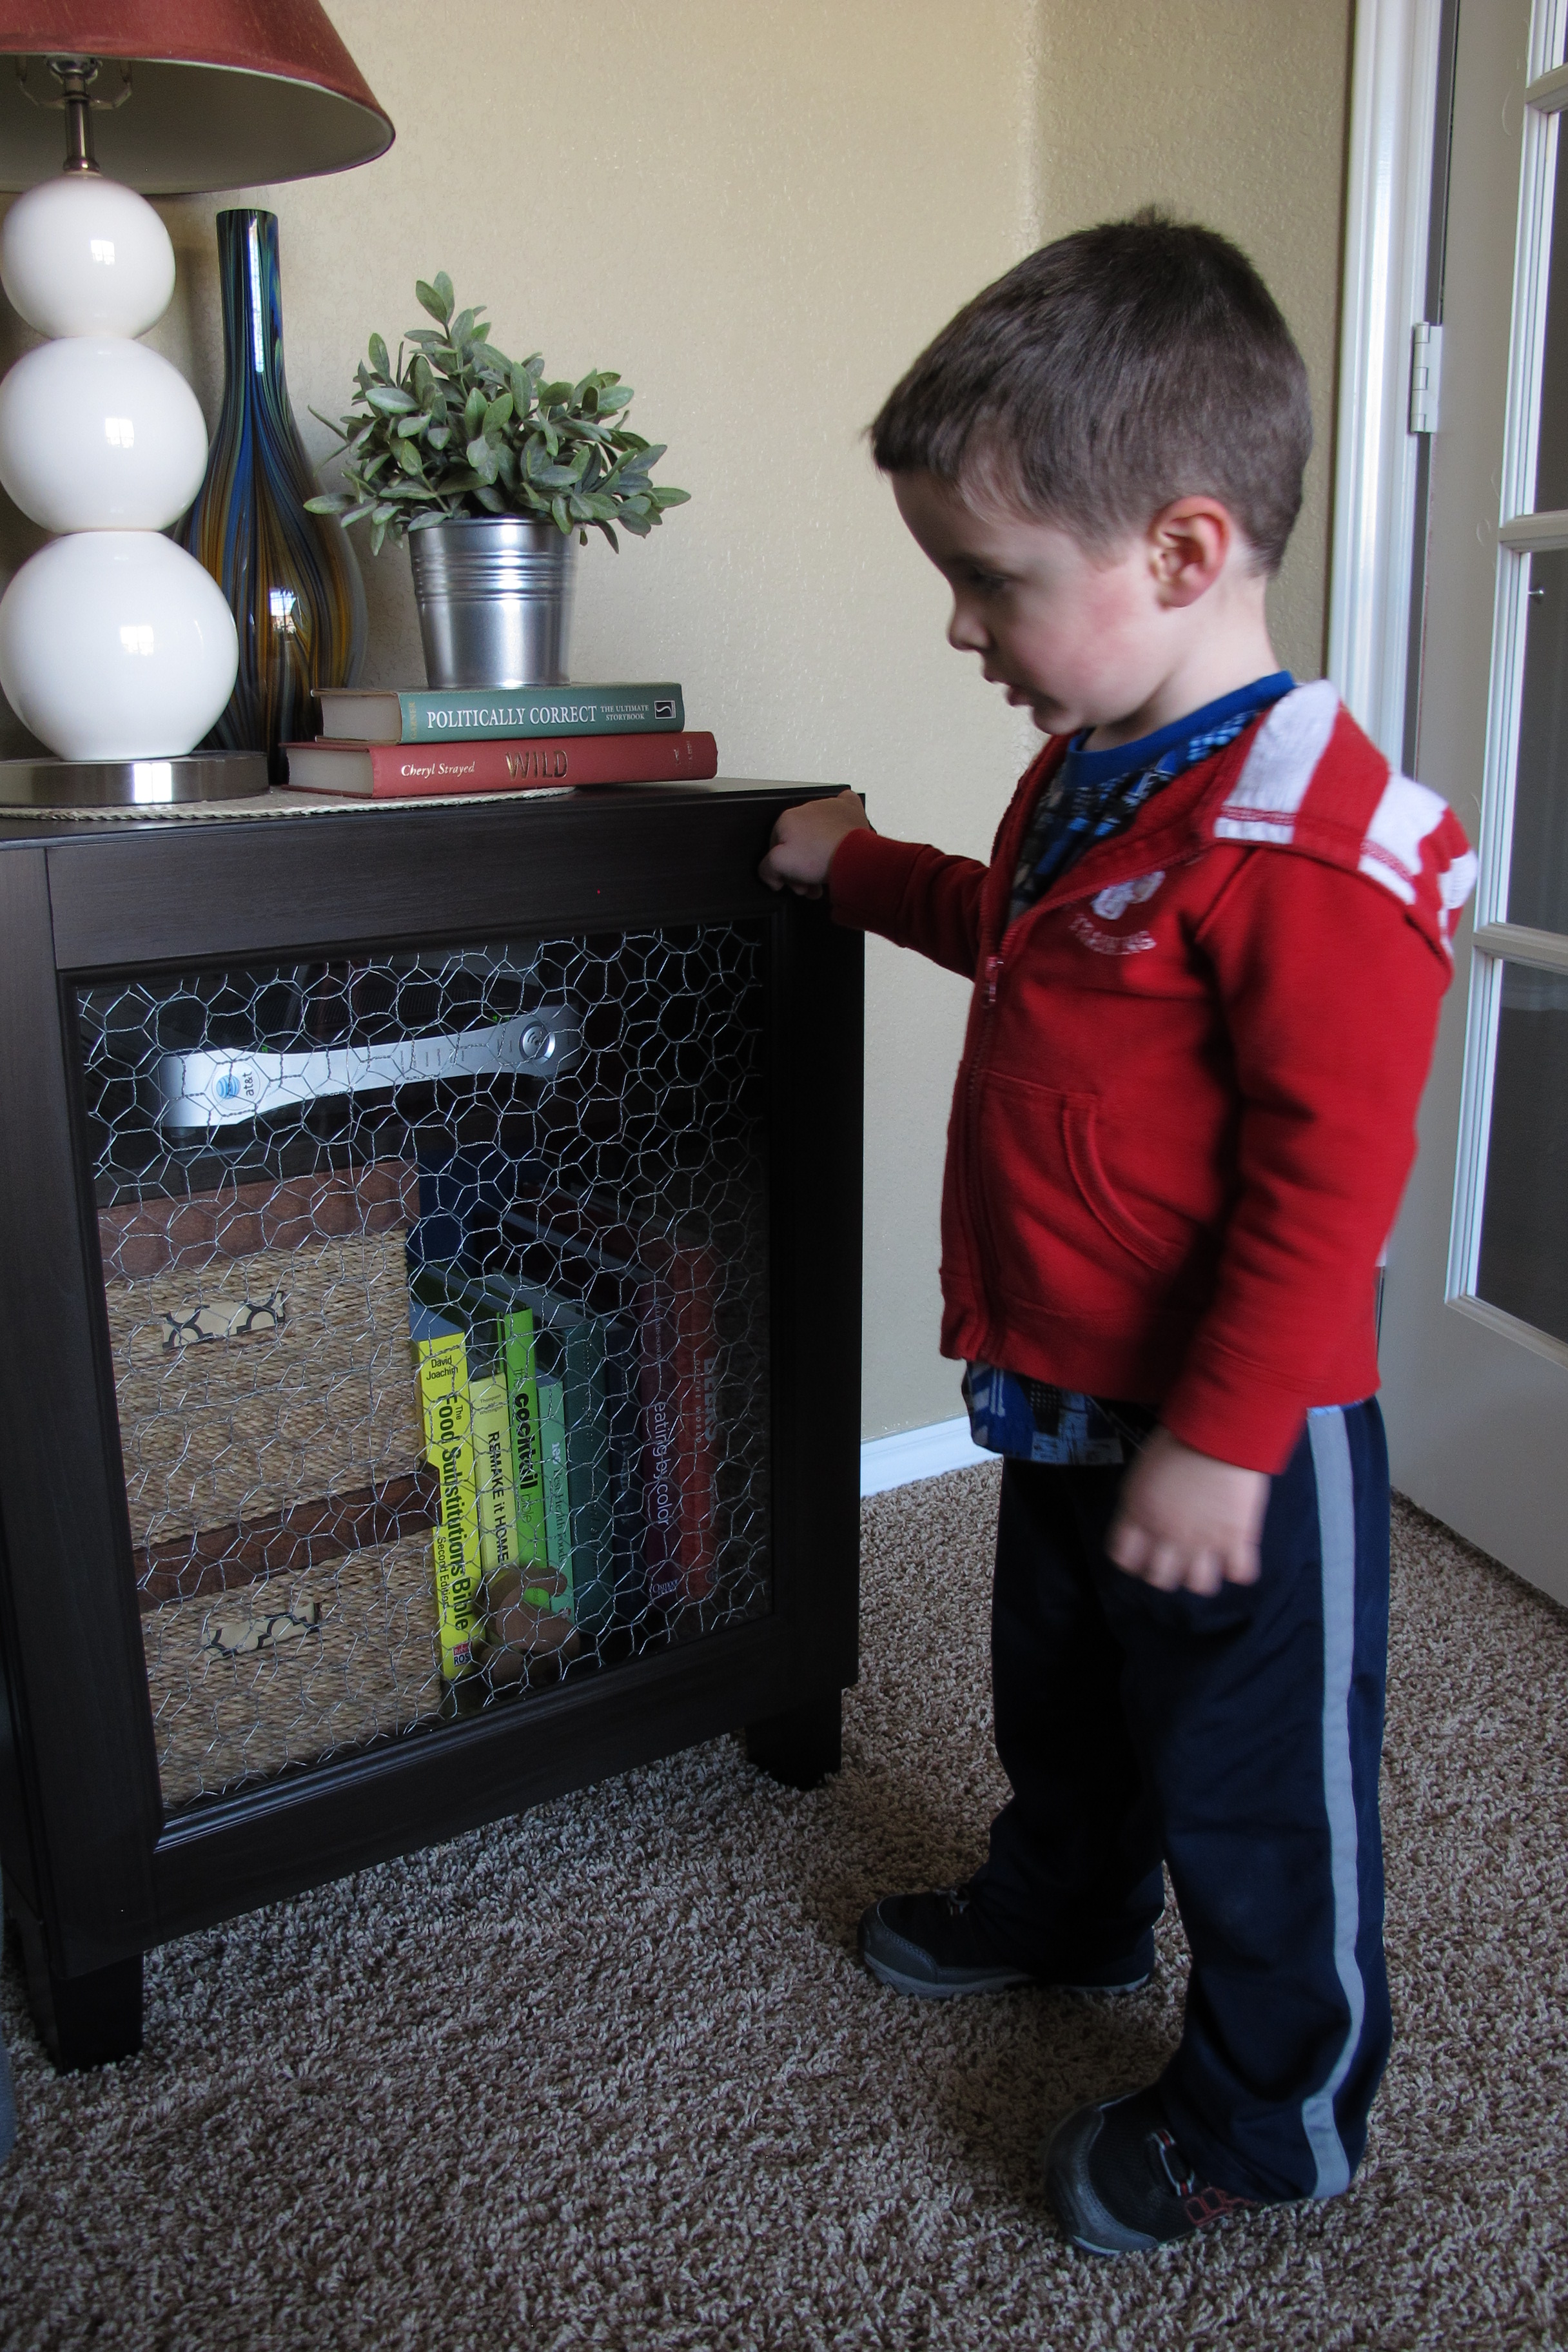
Even Lucas liked it….
So, anyways, this project was quick and easy… it took under an hour to complete and I couldn’t be happier with the result.
Also, on another note, I’ll tell ya’ll….. I’m getting excited about the bathroom. I finally found fabric for the shower curtain, so now that I’ve gotten that, a paint color has been chosen and I’m hoping to get my paint on next weekend. YEAH!!!! Fingers crossed and knock on wood that all goes to plan. 🙂
