From No Man’s Land to Craft room

Hey Ya’ll!  So, last we left off with No Man’s Land (our spare room), I had just stripped and painted the new craft table.  And now, I’m happy to announce that the space has a functional new lay-out.  Woo-hoo!

Let’s recap our journey thus far…   The room began as a veritable Monica Geller Closet, which I then lovingly dubbed “No Man’s Land”.  Because, I mean really.  Just LOOK at it….

IMG_6132

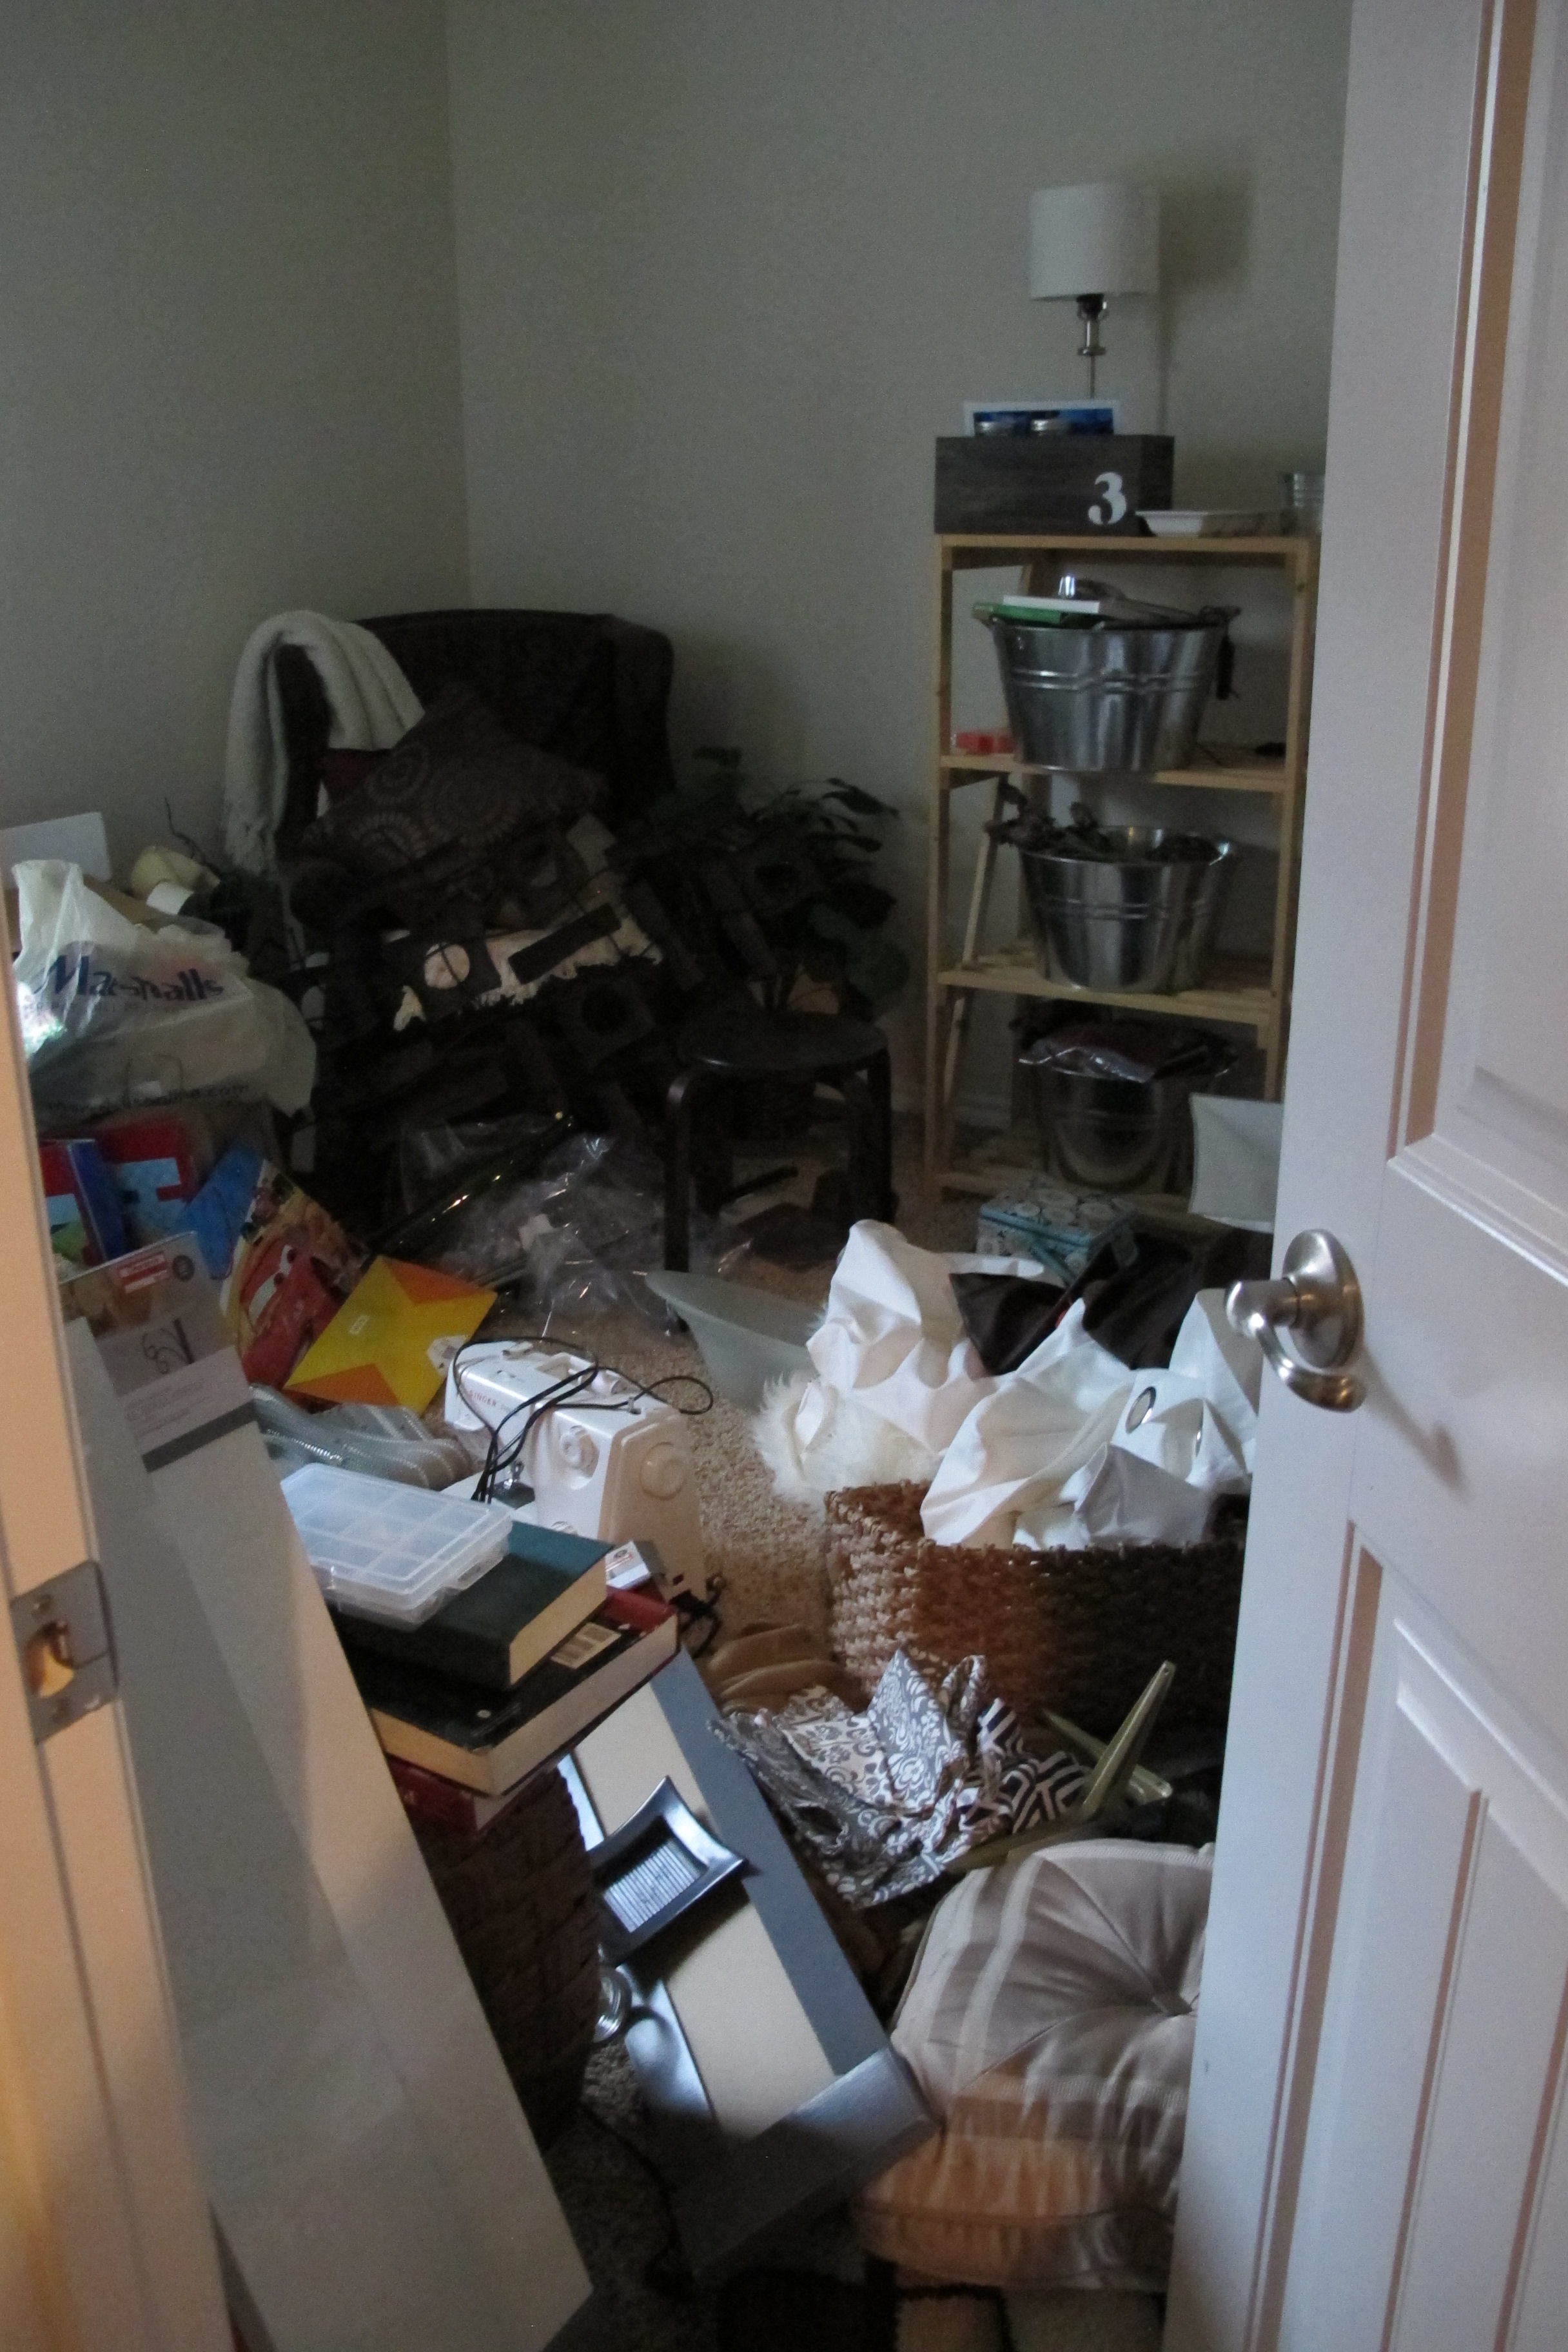
Didn’t it scream “Enter and never return!!”??   It was wrong.  Just so very wrong.   Then, one day, I couldn’t take it anymore, so I cleared it out and organized the dickens out of it.  Which basically transformed it from the Pit of Dispair to a glorified waiting room due to the hodge-podge of leftover furnishings….

And now, it looks a little something like this….

I replaced the generic, ugly light diffuser-thing on the ceiling fixture with a simple white shade for a more streamlined, custom look.   It was an easy switch that involved unscrewing the diffuser and screwing in the shade.   Ignore the table beneath the table.  My little mid-century gem is there temporarily until I can move it into the garage (some crazy stuff is going down in there right now, so I didn’t want to risk this little guy getting scratched up).  I probably should’ve removed him for these shots, but honestly, I’m just now thinking about it.

The table now lends a nice work space for projects…  Aaaaahh, function.  Such a beautiful, beautiful word.  The way the table is situated also allows it to extend easily to accommodate the extra leaves as needed for even more surface space.

To the top of the table, I added a lamp that I already had (would love to change out that shade, though), along with a tray containing books and thrift store sundae glasses filled with sharpies and colored pencils.

In the adjacent corner, I decided to leave the little sitting area that was there before…

I would love to recover that wing-back chair someday.  Mac did an amazing job covering it in the brown microsuede fabric when we moved into our first house, but alas, my love affair with brown has ended.  I’m craving some color and subtle pattern. Something a little more fresh.  The small end table actually came with our coffee table in the living room when we purchased it off Craigslist.  I can’t help but think that it would look super awesome painted a bold color.  One day I’ll get to it, I’m sure.

And just in case any of ya’ll were wondering what ever happened to my chicken-wire-hacked cabinet (don’t lie, I know this question has haunted your dreams), here she blows…

I simply topped it with a “To Do” board that I made by framing some fabric.  I just used dry erase markers on the glass.   I added lamp, a few books, a faux plant… and called it a day.  I also traded out the previous high-water brown curtains for a white grommeted pair that I already owned.   They really add some much needed softness to the room while keeping the space feeling light and bright.

Across the room, I moved my shelf for additional storage…

I would love to paint the walls, switch out the art for something more colorful and inspiring, and make the aforementioned changes to the chair and end table, but honestly, I’m just happy that the room is now a usable space that we aren’t embarrassed to show people.   Total plus in our book.

So, as of now, I officially remove the moniker “No Man’s Land” from this space and replace it with “Craft Room”.  (sniff!)  I thought this day would never come. 🙂

Shared at:

TDC Before and After


Oh, the difference a year makes…

So, this week marks the one-year anniversary of Operation Home! Crazy, right??!  In this time span, I’ve published 127 posts including this one. That’s 127 posts mostly containing craft/DIY projects that I/we’ve attempted, along with several decor posts and a few personal posts mixed in.  This past year has been so rewarding thanks to this little blog.  It’s been an outlet that I’ve been lucky and grateful to have, and it’s allowed me to meet some really cool people whom I would’ve never met otherwise.  Plus, I’ve learned a ton!!  Not only about blogging in general, but about DIY… I’ve taken on projects in the last year that I’d never tried before and might not have had the courage to do if it weren’t for Operation Home.  So, thanks little blog and all of you lovely readers who support it!  🙂

Over the past few weeks, I’ve been working on updating Our House page in the bar above.  It contains updated photos with links to the most pertinent projects within each space.   So, check that out if you’re bored (or just, ya know, if ya just like me.  Nopressure).  😉

I haven’t really posted a ton about our backyard since the inception of this blog.  A few random posts here and there but not the full-monty, if you will.   So, I thought an updated tour could be fun since the foliage has changed quite a bit.  I mean, what could be more fun than watching plants grow? 😉

On that note, I’d like to take a moment to marvel upon the magic that is the Southern Wax Myrtle.   The most amazing shrub I’ve ever come into contact with.   Seriously, I’m about to justify this statement with pictures.   Just wait.  Wait for it.  Okaaaay.  Onward…

See, when we planted these guys in February of 2013, they looked something like this….

IMG_0646

By September of 2013, they looked like this…

IMG_1105

And now, one measly, piddly year later….

I know.  SHUTTHEFRONTDOOR.   They’ve flippin’ exploded!!!!   It only took a year and a half for them to begin providing privacy above the fence line.    That is, unless you count this from last September...

IMG_1098

I was so excited about “all that privacy” provided by those two little branches.   Heehee!!!   I was such a kid.  Now, I’ll admit…. there is one little runt bush that hasn’t quite caught up with the others, but he’ll get there.  No doubt.

The wax myrtles were a generous housewarming gift from Mac and Pop when we moved into the house.   (Need a housewarming gift idea? Buy a shrub.  You won’t regret it.)  And they seriously MAKE the yard.   In these pictures, they almost look a little messy because it was so incredibly windy when I took these shots, but in person they’re lush and warm and bring such a cozy dynamic to the backyard.   Our goal was to allow them to grow larger and then trim them into a privacy hedge.   The plant beds that Joey created with moss boulders are still going strong and look amazing.

Unfortunately, I can’t say the same for this sad, sad live oak tree (seen in the back of this shot)…

It’s alive.  Just not looking great.  The brutal winter really took a toll on him.   Maybe one day he’ll come back and be happy again (Ihope).

The other side of the yard looked like this last year after we’d planted a few crepe myrtles along the fence as well as another live oak tree (…who did remarkably well in the frigid winter. Way to take one for the team, tree!)…

IMG_1113

And now that side of the yard looks like this…

So, not a ton different, but definitely more filled in.  Sorry for the blurry pic.   It was far too windy for my lack-luster photography skills.

The rosemary beds looked like this before…

IMG_1101

And now…

And that’s AFTER Joey gave them a significant haircut.   As for the porch…

We got a new umbrella, which makes the space so much more livable in the hot Texas heat.  It’s from World Market in case anybody’s wondering.  We need to get a better umbrella stand, since the umbrella is leaning quite a bit.  It’s much heavier than our last umbrella since the rod is made of wood.  It’s an aspect that I neglected to think about when deciding to re-use our old umbrella stand to save some cash.   Sometimes, ya just gotta spend the money, I guess.   I love the colors and simple pattern the umbrella adds to the yard.  Plus, it helps tie in all of the colors from the conversation area nicely and provides much-needed shade over our newly waterproofed table.  As an added bonus, it blocks out some of the surrounding roof lines from inside the house.  Score!

Speaking of the conversation area, the space looks much the same from when I added the herbs and flowers.  Shockingly, they’re still alive.  Although there’s a chance that a few of them loathe me for adopting them (*coughcough*parsley!).  They aren’t exactly thriving if ya know what I mean.

See???  You can see the one little runt shrub in the background of this shot.  That’s really just a living metaphor for me standing next to my friends and family.  I can totally relate.  Just keep swimming, my little vertically-challenged friend!  You actually have the option to keep growing, so run with it!

I apologize for the lighting in some of these shots.  Our schedules as of late basically forced me to take these pics around dinner time… Not only was it insanely windy, it was pretty harsh lighting.  I totally know better, but sometimes ya just gotta do what ya gotta do.  Here’s a shot from earlier in the summer to demonstrate the actual colors on our porch…

IMG_5771

It blows my mind just how much the shrubs have grown even since then!

Functionality-wise…

… the beverage fridge is the bomb. When we have people over we stock it with water, soda, beer, etc. it keeps guests from having to go in and out so much.  Of course, it doesn’t look like anything special as of now.   It *may* even be on the slightly fugly side.  Especially with the *meh* concrete.  But a few shelves above, maybe a little appliance paint? Or perhaps, a little wood facade… It could be a really cool little area.

In any case, I think we’ve (and by “we” I’m referring to Joey) done a pretty good job with the space so far, especially being that it started off here…

20130907-170732.jpg

Joey’s really outdone himself with the landscaping, in my opinion.   And despite me and my olive thumb, the majority of the plantings have taken off beautifully.  I think it’ll be a really charming (and private) backyard once everything matures and blocks out the view of the surrounding neighbors.

Anyways, I’ve said it before and I’ll say it again.  Thanks for stopping by my humble little blog!  I totally love ya’ll for it and hope you continue to visit for ANOTHER year of blogging! 🙂

Shared at:

TDC Before and After