Howdy, Folks! I love blogging. I have to say. It’s fun, rewarding, therapeutic and a great way to meet some awesome people whom I would have never met otherwise. A while back I agreed to team up with some amazing bloggers for a project challenge. Basically, we all had to go buy crates from Michael’s and do something with them. Thus, The Great Crate Challenge was born….

I thought about it for a while, and after some deliberation, decided to take my crates and make a bench for either our foyer or much-neglected front porch.
Before I began, I developed a highly technical plan…

Impressed? 😉
Then, I purchased my materials…
– 3 crates from Michael’s
– 1″ x 12″ x 12′ whitewood board (cut down to (2) 1″ x 10 1/4″ x 55″)
– Bolts, nuts, and washers to bolt the crates together
Other materials, which I already had…
– Wood screws
– Stain/paint
– Wood legs (which I found at Goodwill for practically pennies)…
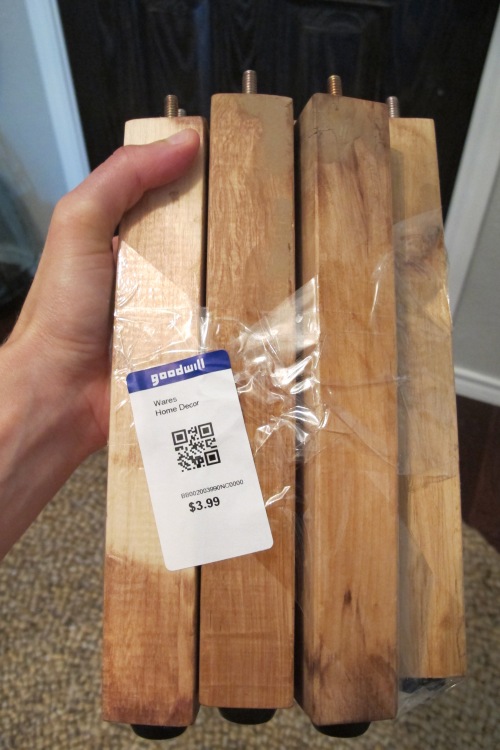
I was cracking up as I left Goodwill that day because the cashier made such a stink that I’d found the legs before her. Heehee! Sorry, lady. Finders keepers. Anyhoo, I’d done some research prior to making my plan, and found that 17-18″ is a good height for a bench, thus these legs were too long. So, Joey cut them down with the miter saw to 4 inch lengths.
Once I had all of my materials together, I did a dry run in the foyer so that I could figure out how I wanted to paint/stain the bench (Lucas helped).

We placed various stained items nearby and tried to visualize which finish would look best. Lucas was no help in deciding. He liked everything. But somehow, I managed to convince my lovely cousin, Kristyn, to babysit AND brainstorm with me all in one day. It was super helpful to bounce ideas off her and I came out deciding to stain the top, bottom and legs and red-wash the crates to give the bench kind of an industrial-old-schoolhouse feel.
I sanded all of my pieces to take off any splinters or harsh edges. Then, I used Varathane’s Early American stain, applying 2 coats with dry time between to my whitewood pieces and legs. Once the stain had dried, I treated the stained elements with several coats of Formby’s Tung Oil as discussed in this post.

For the crates, I decided to use a red-wash technique so that the woodgrain would still show through. I poured some of this paint…
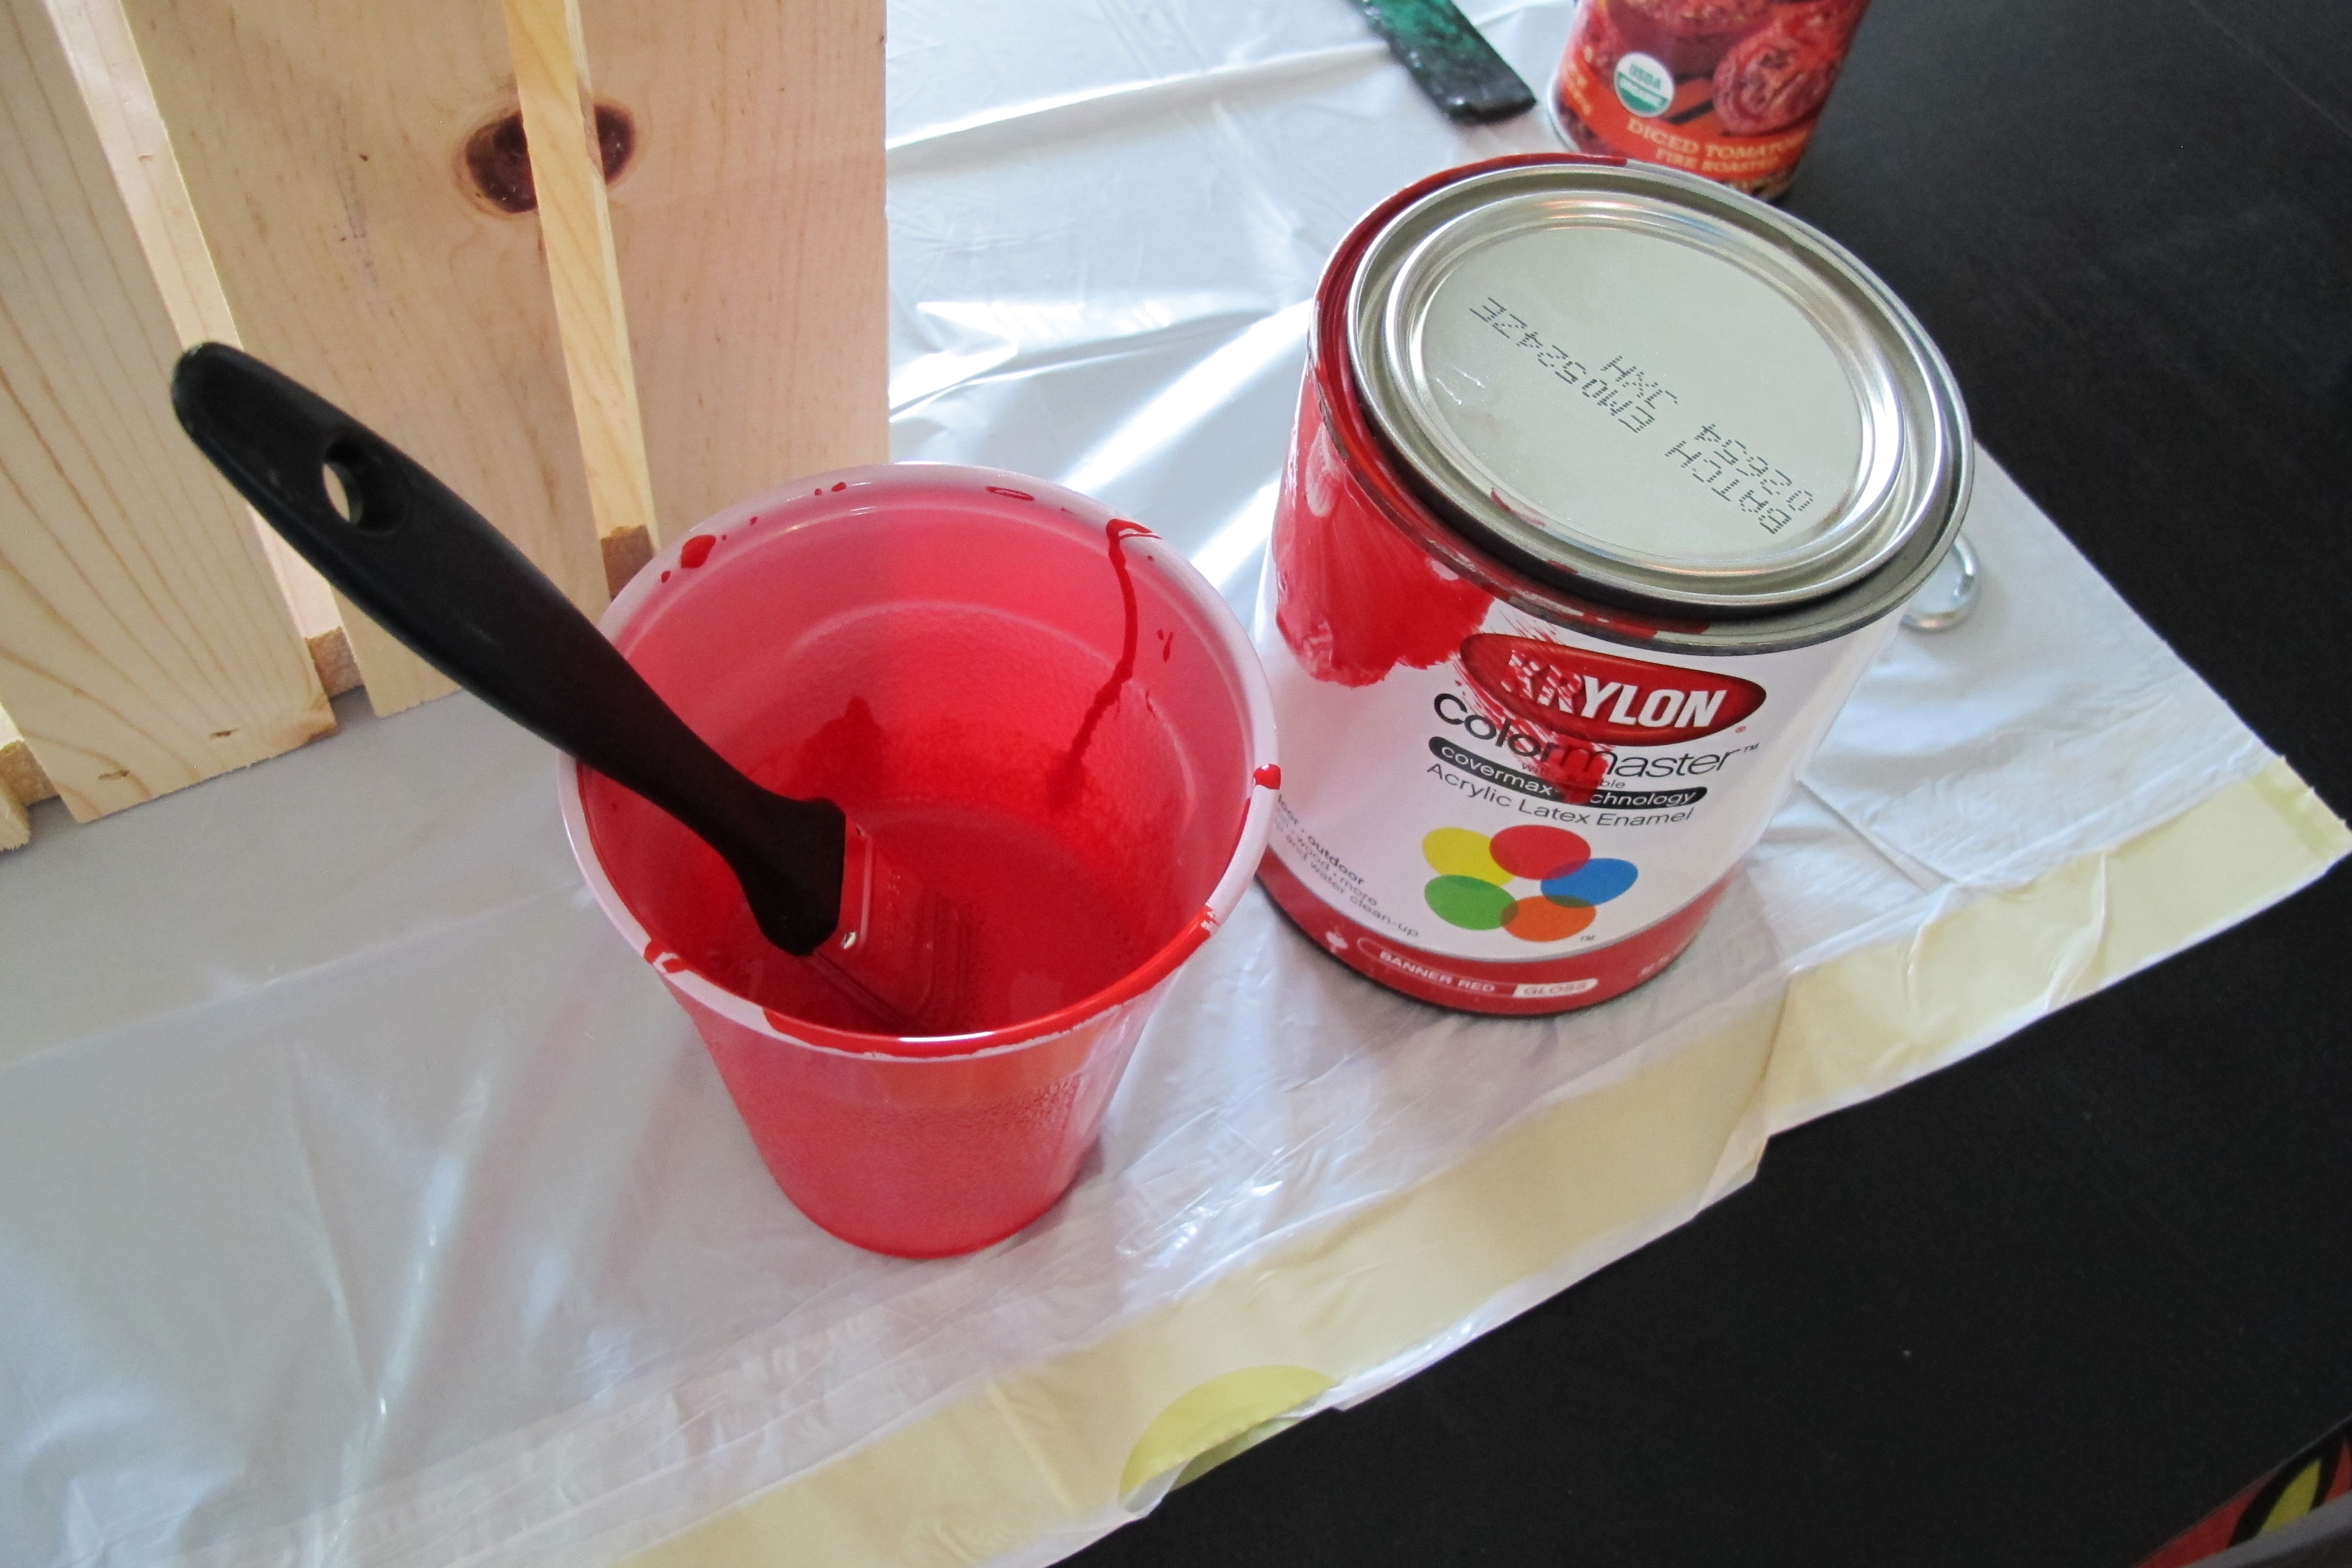
…into a cup and diluted it with equal parts water. I simply painted it on and let it dry. I experimented with wiping off the excess, but that caused the crates to take on a pinkish hue. Not good. Plus, the wood was so absorbent that simply painting it on didn’t leave drips anyways, so I just applied the paint and called it a day.

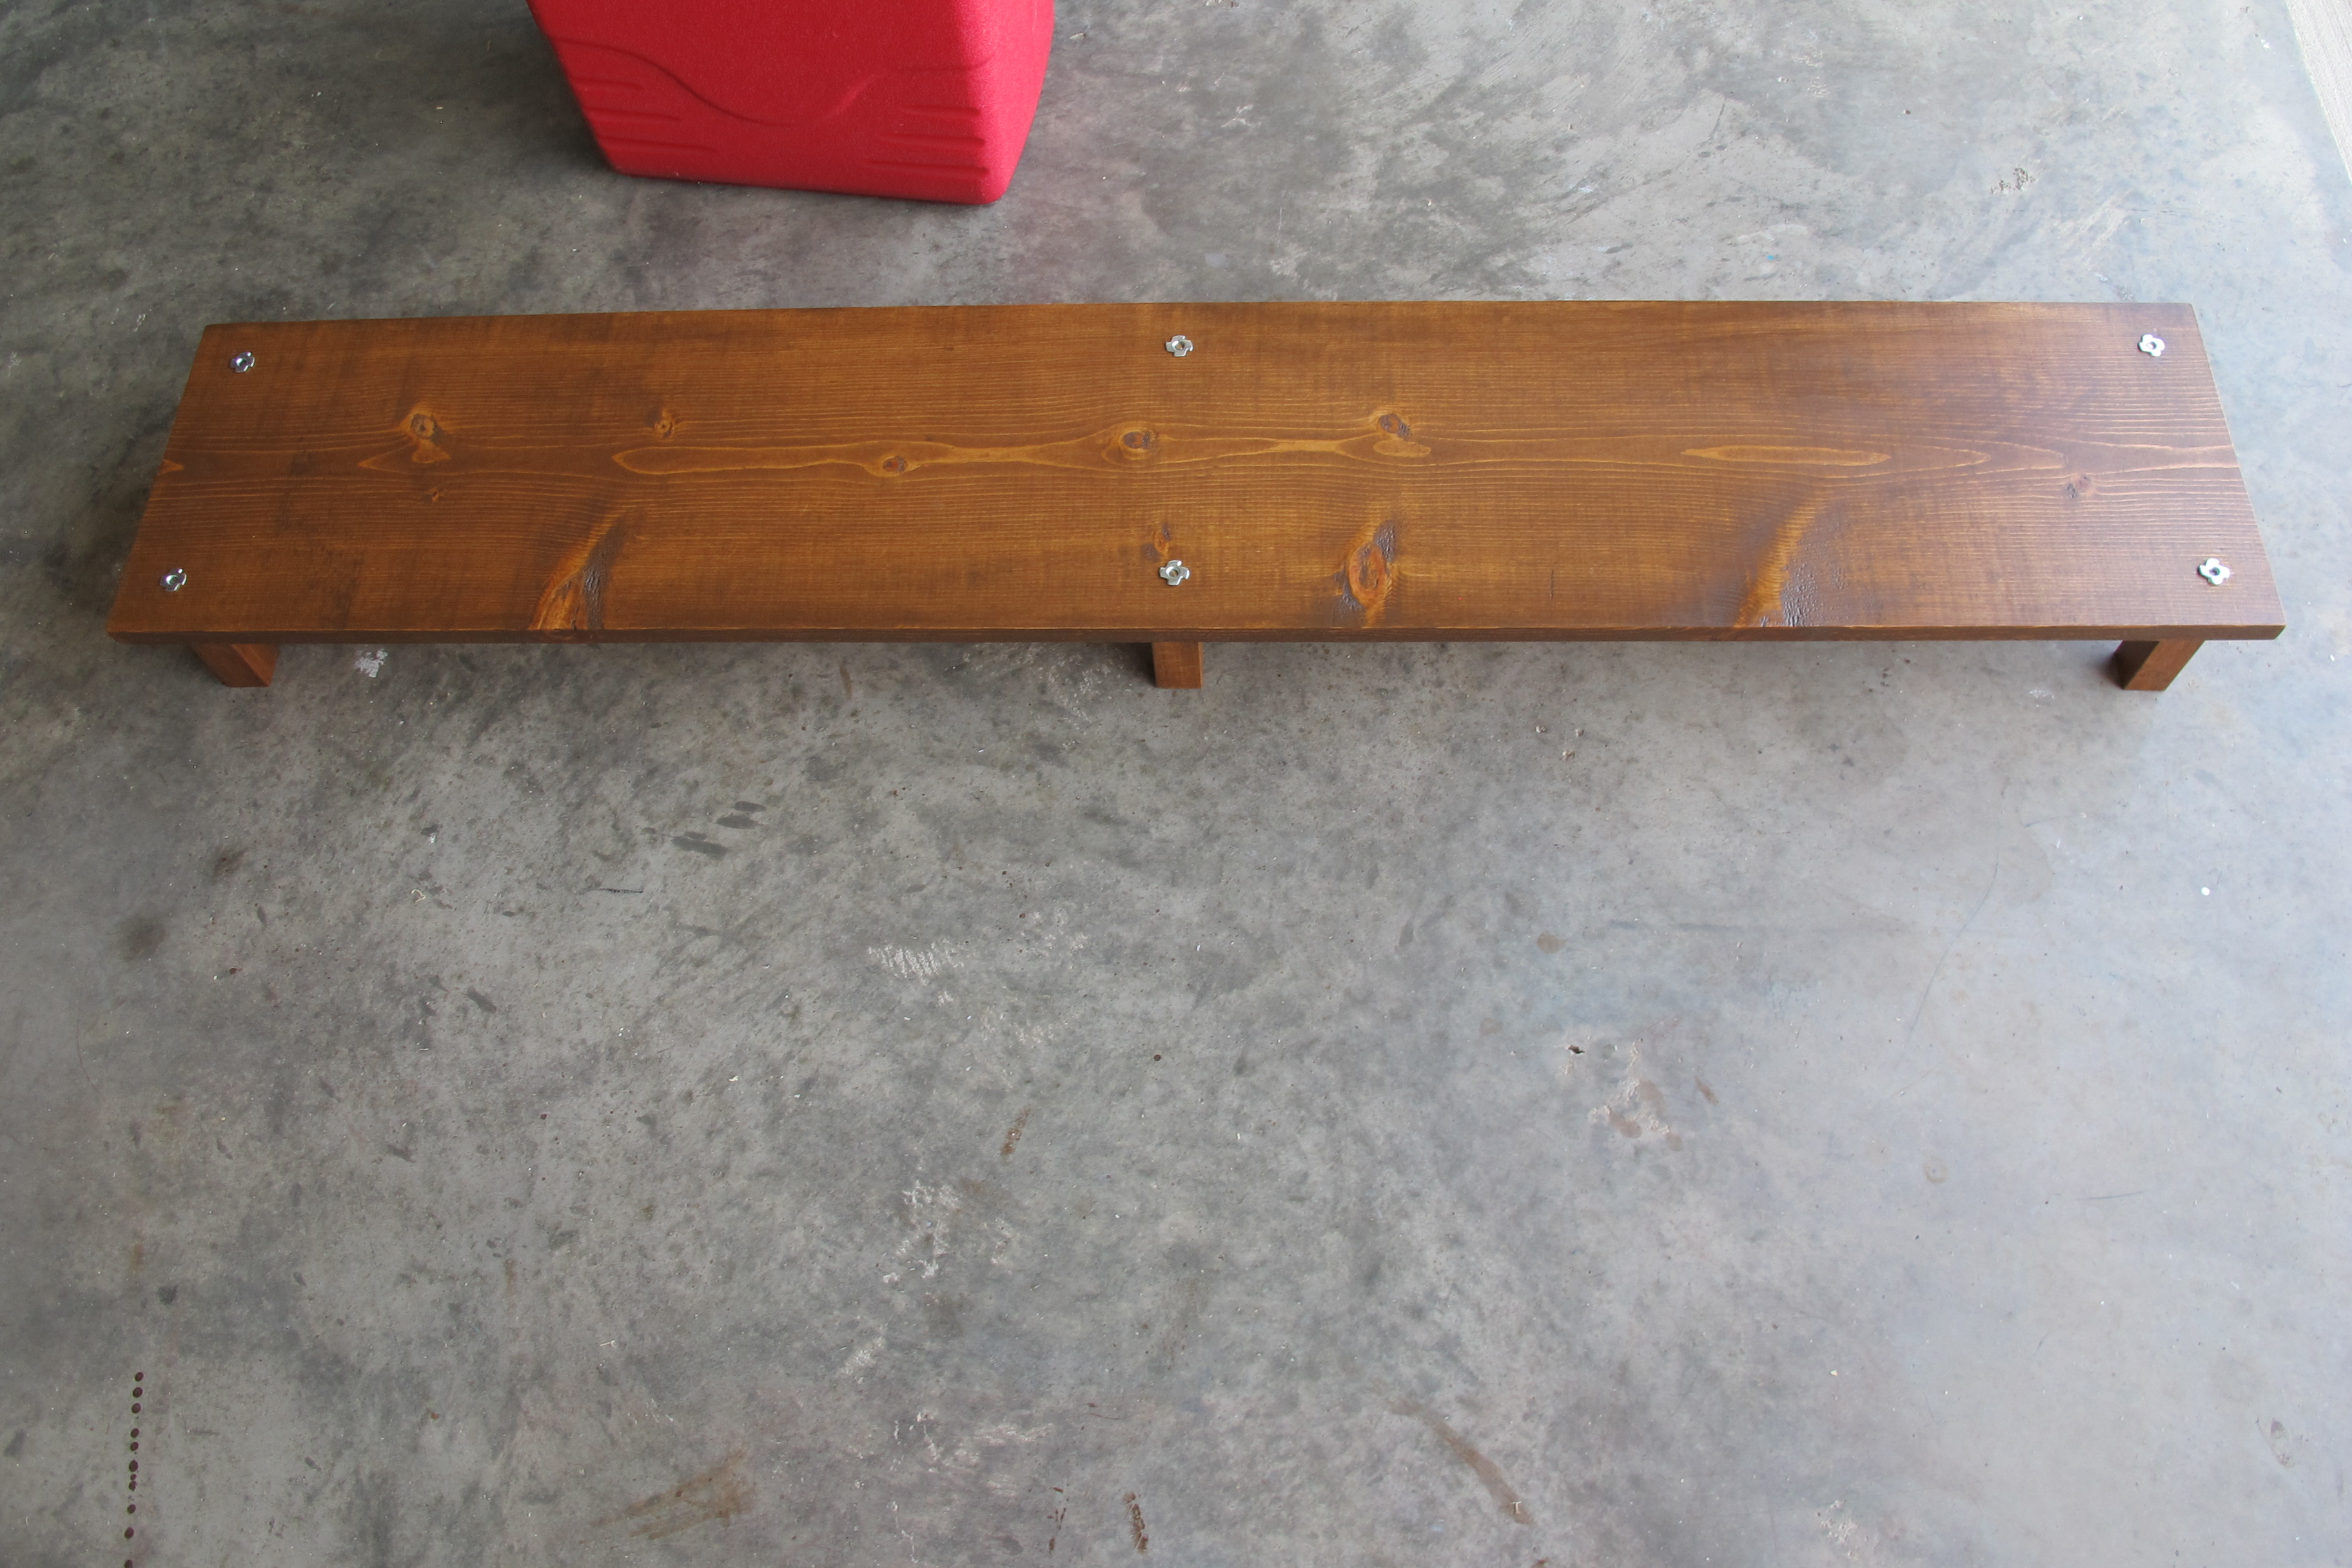
Once the components had dried, it was assembly time. Joey did most of it with some direction from me per my plan. We started by attaching the legs to the bottom. This was a bit of a different process for us because of the random Goodwill legs I’d found. The screws on top were much too long for the standard brackets sold at home improvement stores. Luckily, Joey figured out that the metal threading that held the feet in place on the bottoms of the legs (the part that he’d cut off) fit the screws perfectly. So, he removed them…

He drilled holes in the bottom board where the legs would go and played around with the components to determine the most secure way to attach them. Ultimately, he found that inserting the metal screw-catch thing (technical term) to the opposite side of the board allowed the legs to be attached more securely. (Note: If you simply purchase legs from Lowe’s or Home Depot or whatever, you can purchase metal brackets right along with them to secure the legs, easy-peasy.)

You can see here how the metal threads are on the top side. The screw catches the thread from the opposite direction holding the legs snugly to the board…
Next, he bolted the crates together using a clamp to keep everything flush and lined up…

Once the crates were bolted together, he screwed the crates to the bottom using wood screws….

…and repeated the process with the top…

Once we’d completed our new baby bench, I tried it in the foyer and then on the porch. And the porch won out. Big time. (HEADLINE: Porch Engages in Victory Dance While Foyer Weeps Rocking In Fetal Position)…

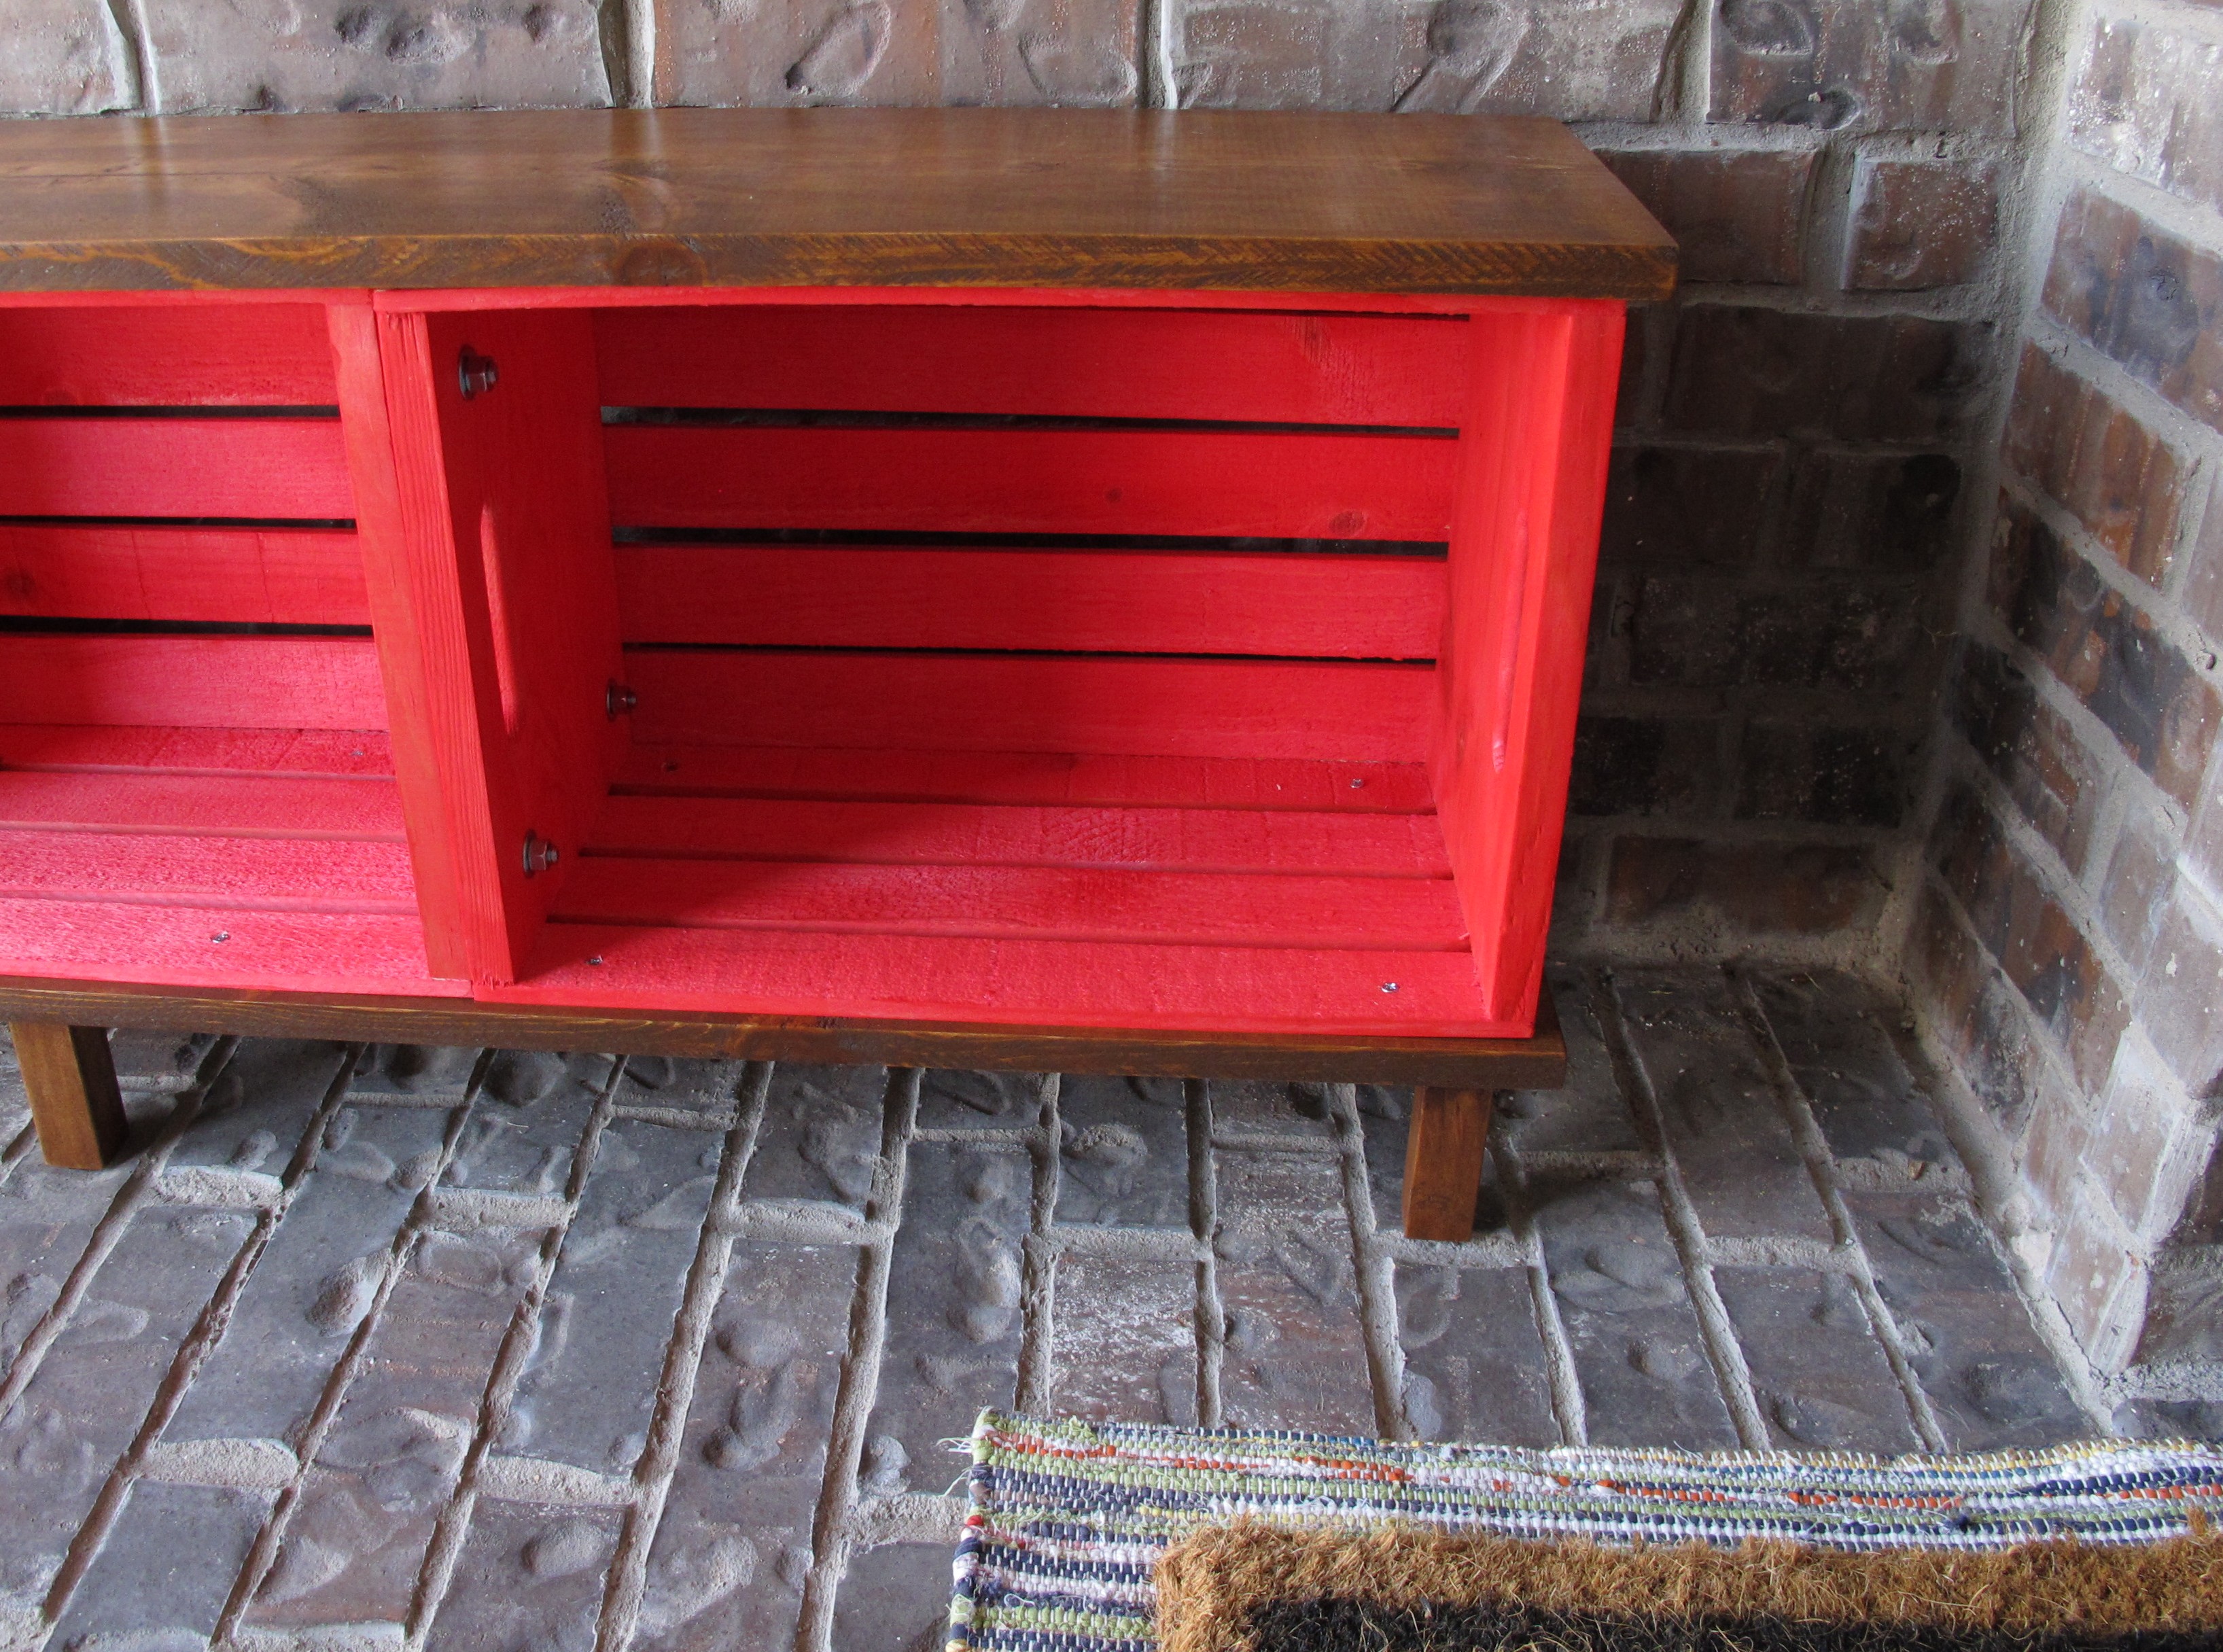


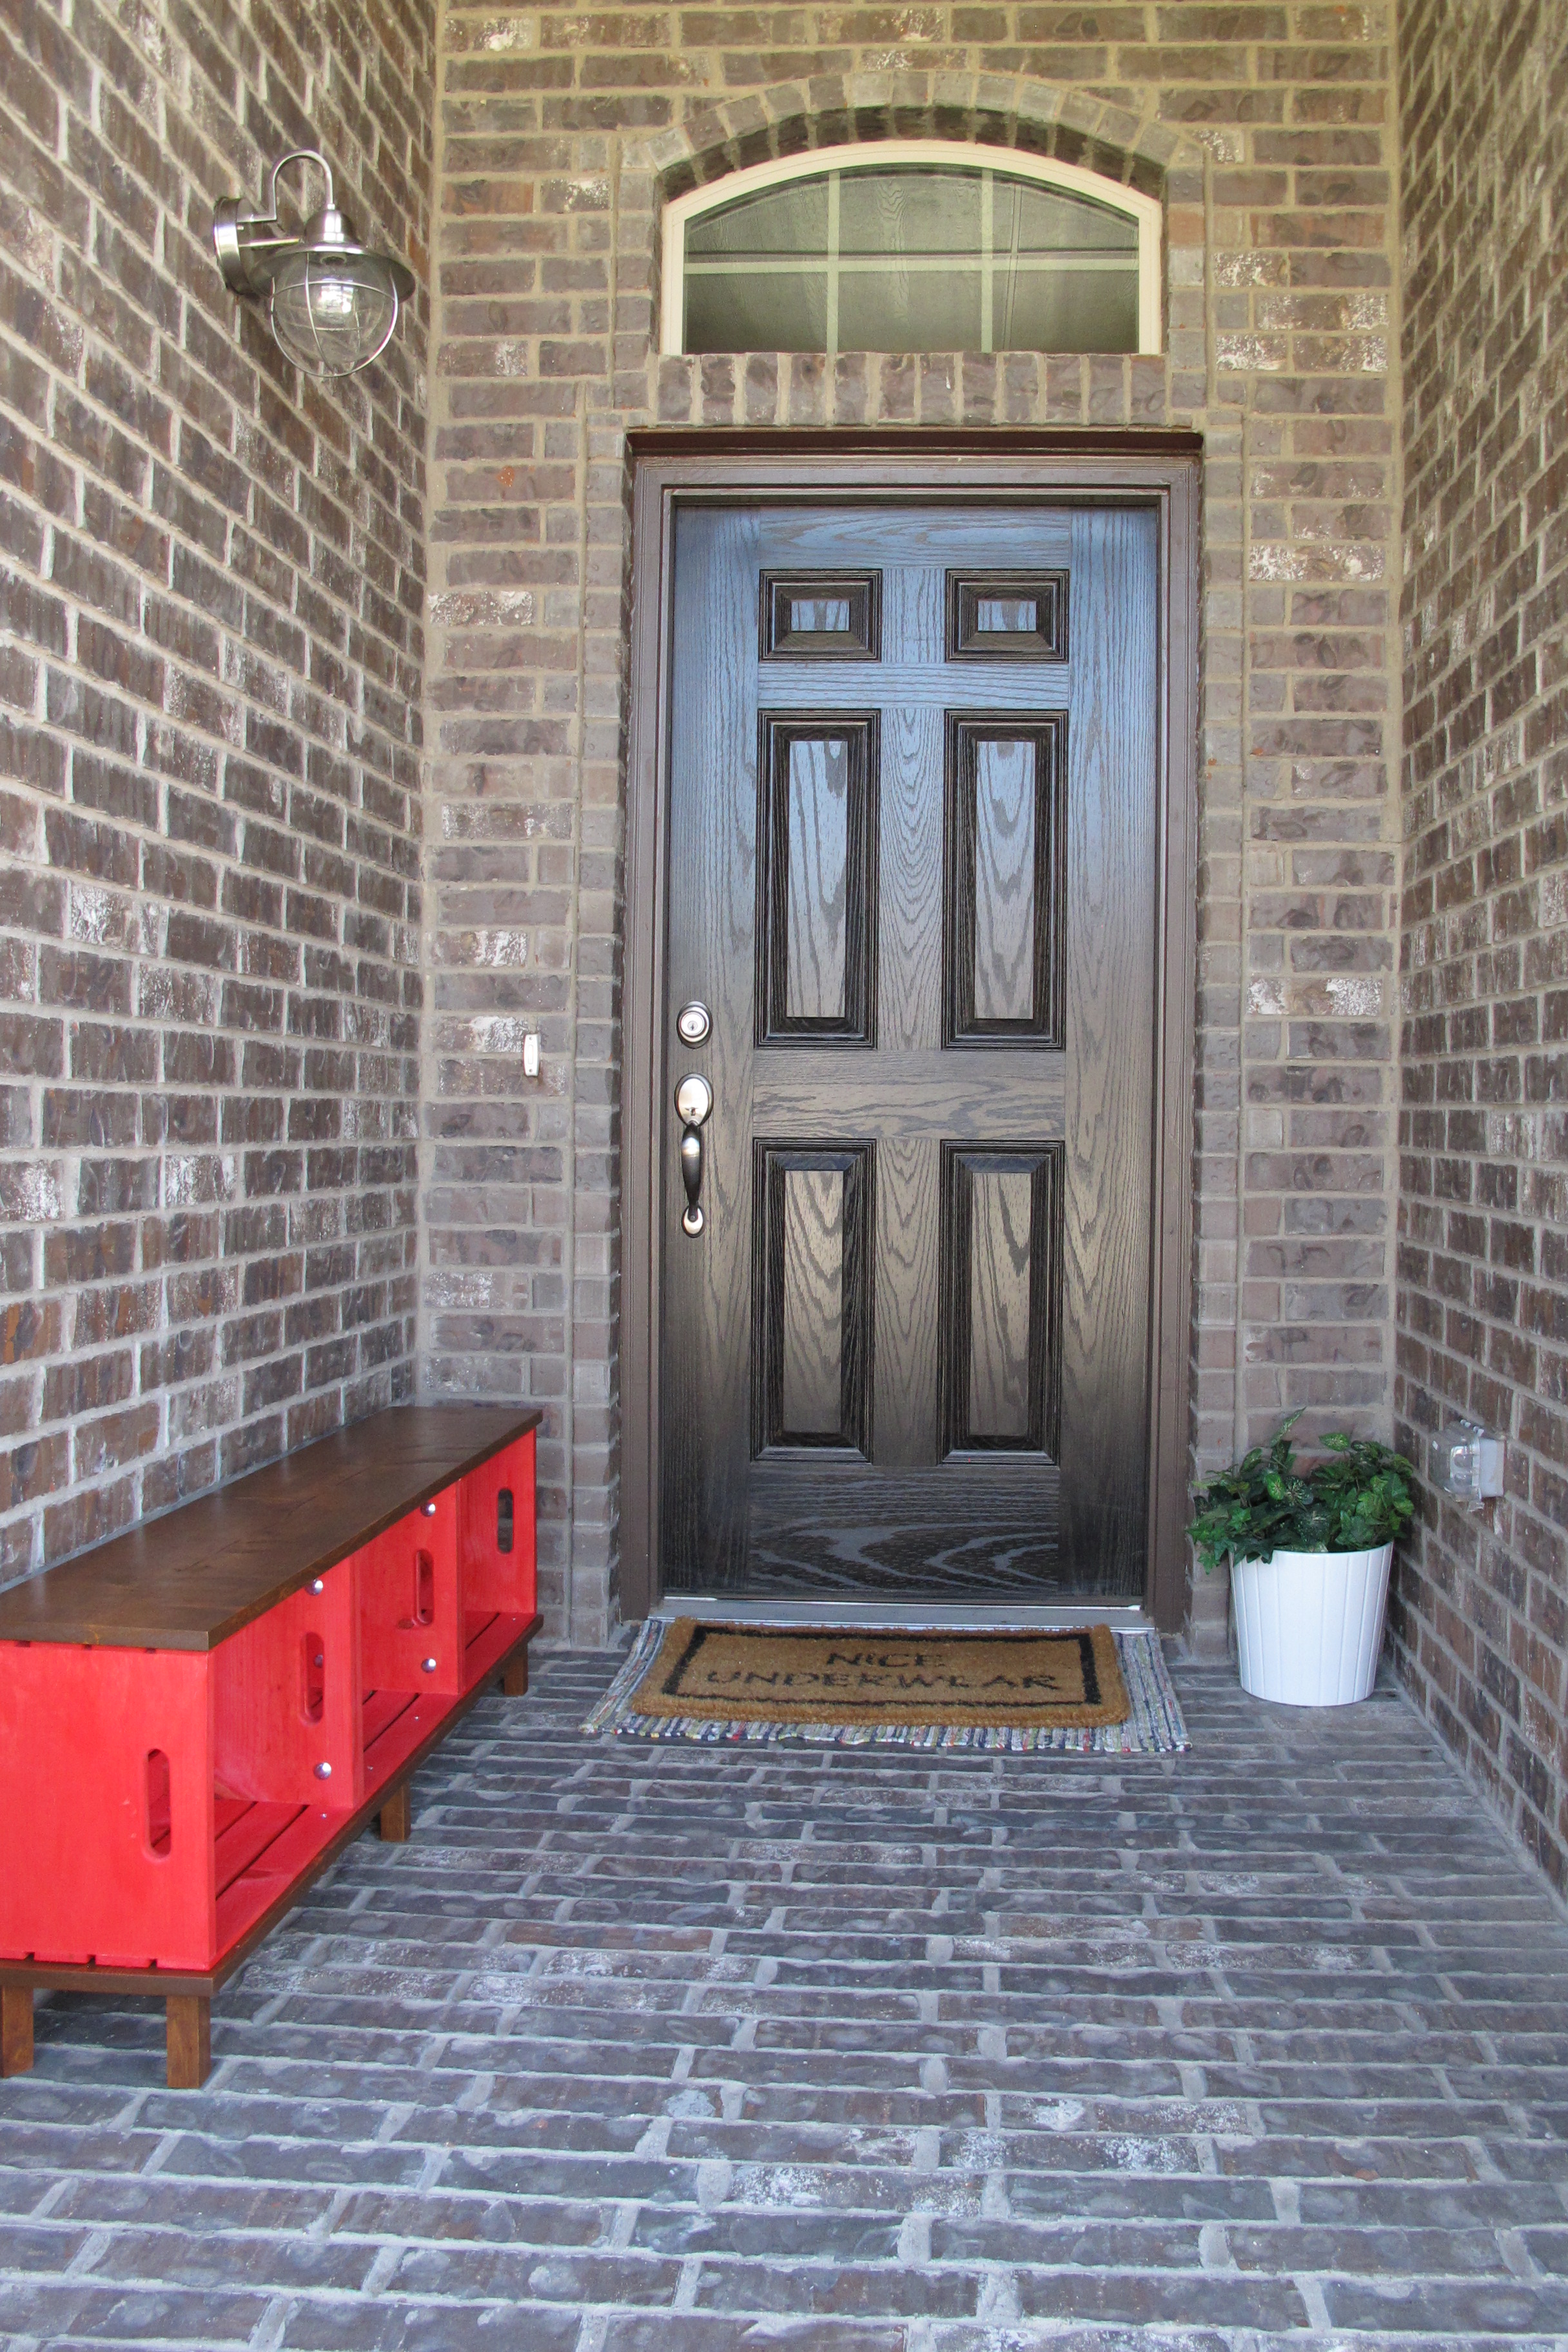
I absolutely love it! It turned out better than I imagined. I feel like the industrial schoolhouse vibe was totally achieved and it adds a nice punch of color to our porch. Plus, crates + bricks are sexy. Forhousestuff. Just sayin’. I still need to treat the bench with something more inclement-weather friendly now that it’s final placement is determined. Honestly, I really thought this guy’d end up in the foyer so I wasn’t too worried about that in the painting/treating stages. I’ll get that done soon to keep him looking healthy. In the meantime, I will spend my free time sitting and staring at him with a goofy smile on my face. Crate. Mission. Accomplished.
Update: It’s been approximately 9 months since we built this bench and I’m happy to report that it’s still going strong. It has remained in only outdoor covered areas (first our front porch, and now our covered back patio) and it has suffered no damage or weakening whatsoever and remains sturdy as can be. I can’t speak for how it would fare if left in exposed outdoor areas, but it seems to be perfectly fine if sheltered from the sun and rain. We still couldn’t be happier with this project. 🙂
So, that’s my contribution to The Great Crate Challenge! Now, check out the other awesome projects created by my fabulous bloggy friends….
 |
 |
 |
 |
 |
 |
 |
 |
 |
 |


 (See that nice smooooooth surface with the pretty woodgrain showing through??? THAT’S a fully stripped table, people! Way to blow my skirt up, table. This picture makes me giddy.)
