Trash to Treasure Mirror – Monthly DIY Challenge

Well, folks!  It’s my favorite time of month again… Monthly DIY Challenge time!

For any newbies, this is a monthly challenge where several bloggy friends and I are assigned a theme or item and must simply make something of it.  And in honor of Earth Day (which was on April 22nd), we chose….

trash_to_treasure

Trash to treasure!!!

Before I get into my project, let me give you a little background on the space where this project will go.  Our master bedroom “atrium” as I call it, is an area that I’ve had some difficulty with on the decorating front.   This little hallway-ish area of our bedroom (which leads to both our closet and bathroom) looked like this when we first purchased the house…

232323232-fp83232-uqcshlukaxroqdfv7453=ot-2487=7;-=;69=XROQDF-267-78773-255ot1lsi

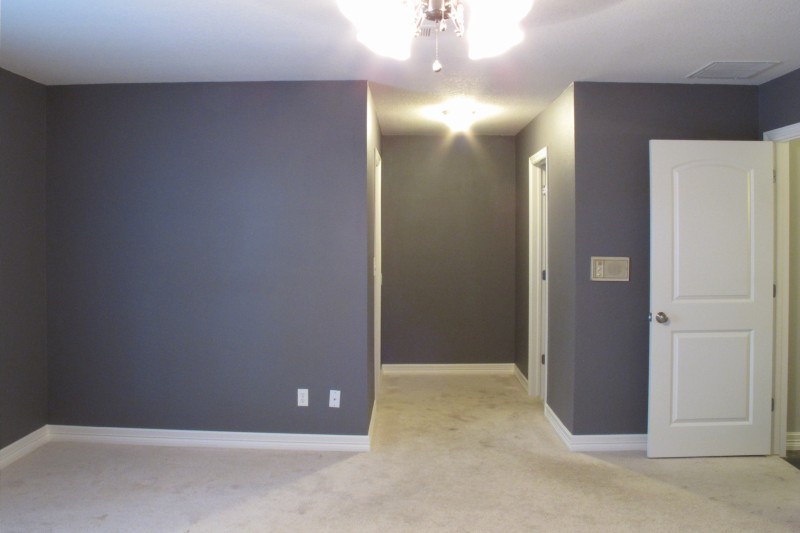
Very purple and very dark with VERY little natural light.  Our master bedroom is pretty large and has only one window. Since our backyard is so shady, it’s often a darker space anyways.  Which makes the atrium REALLY dark.

After we moved in, I painted the bedroom a soothing grey color and I relocated our vintage Bassett tall-boy into the space to try and dress it up….

IMG_8173

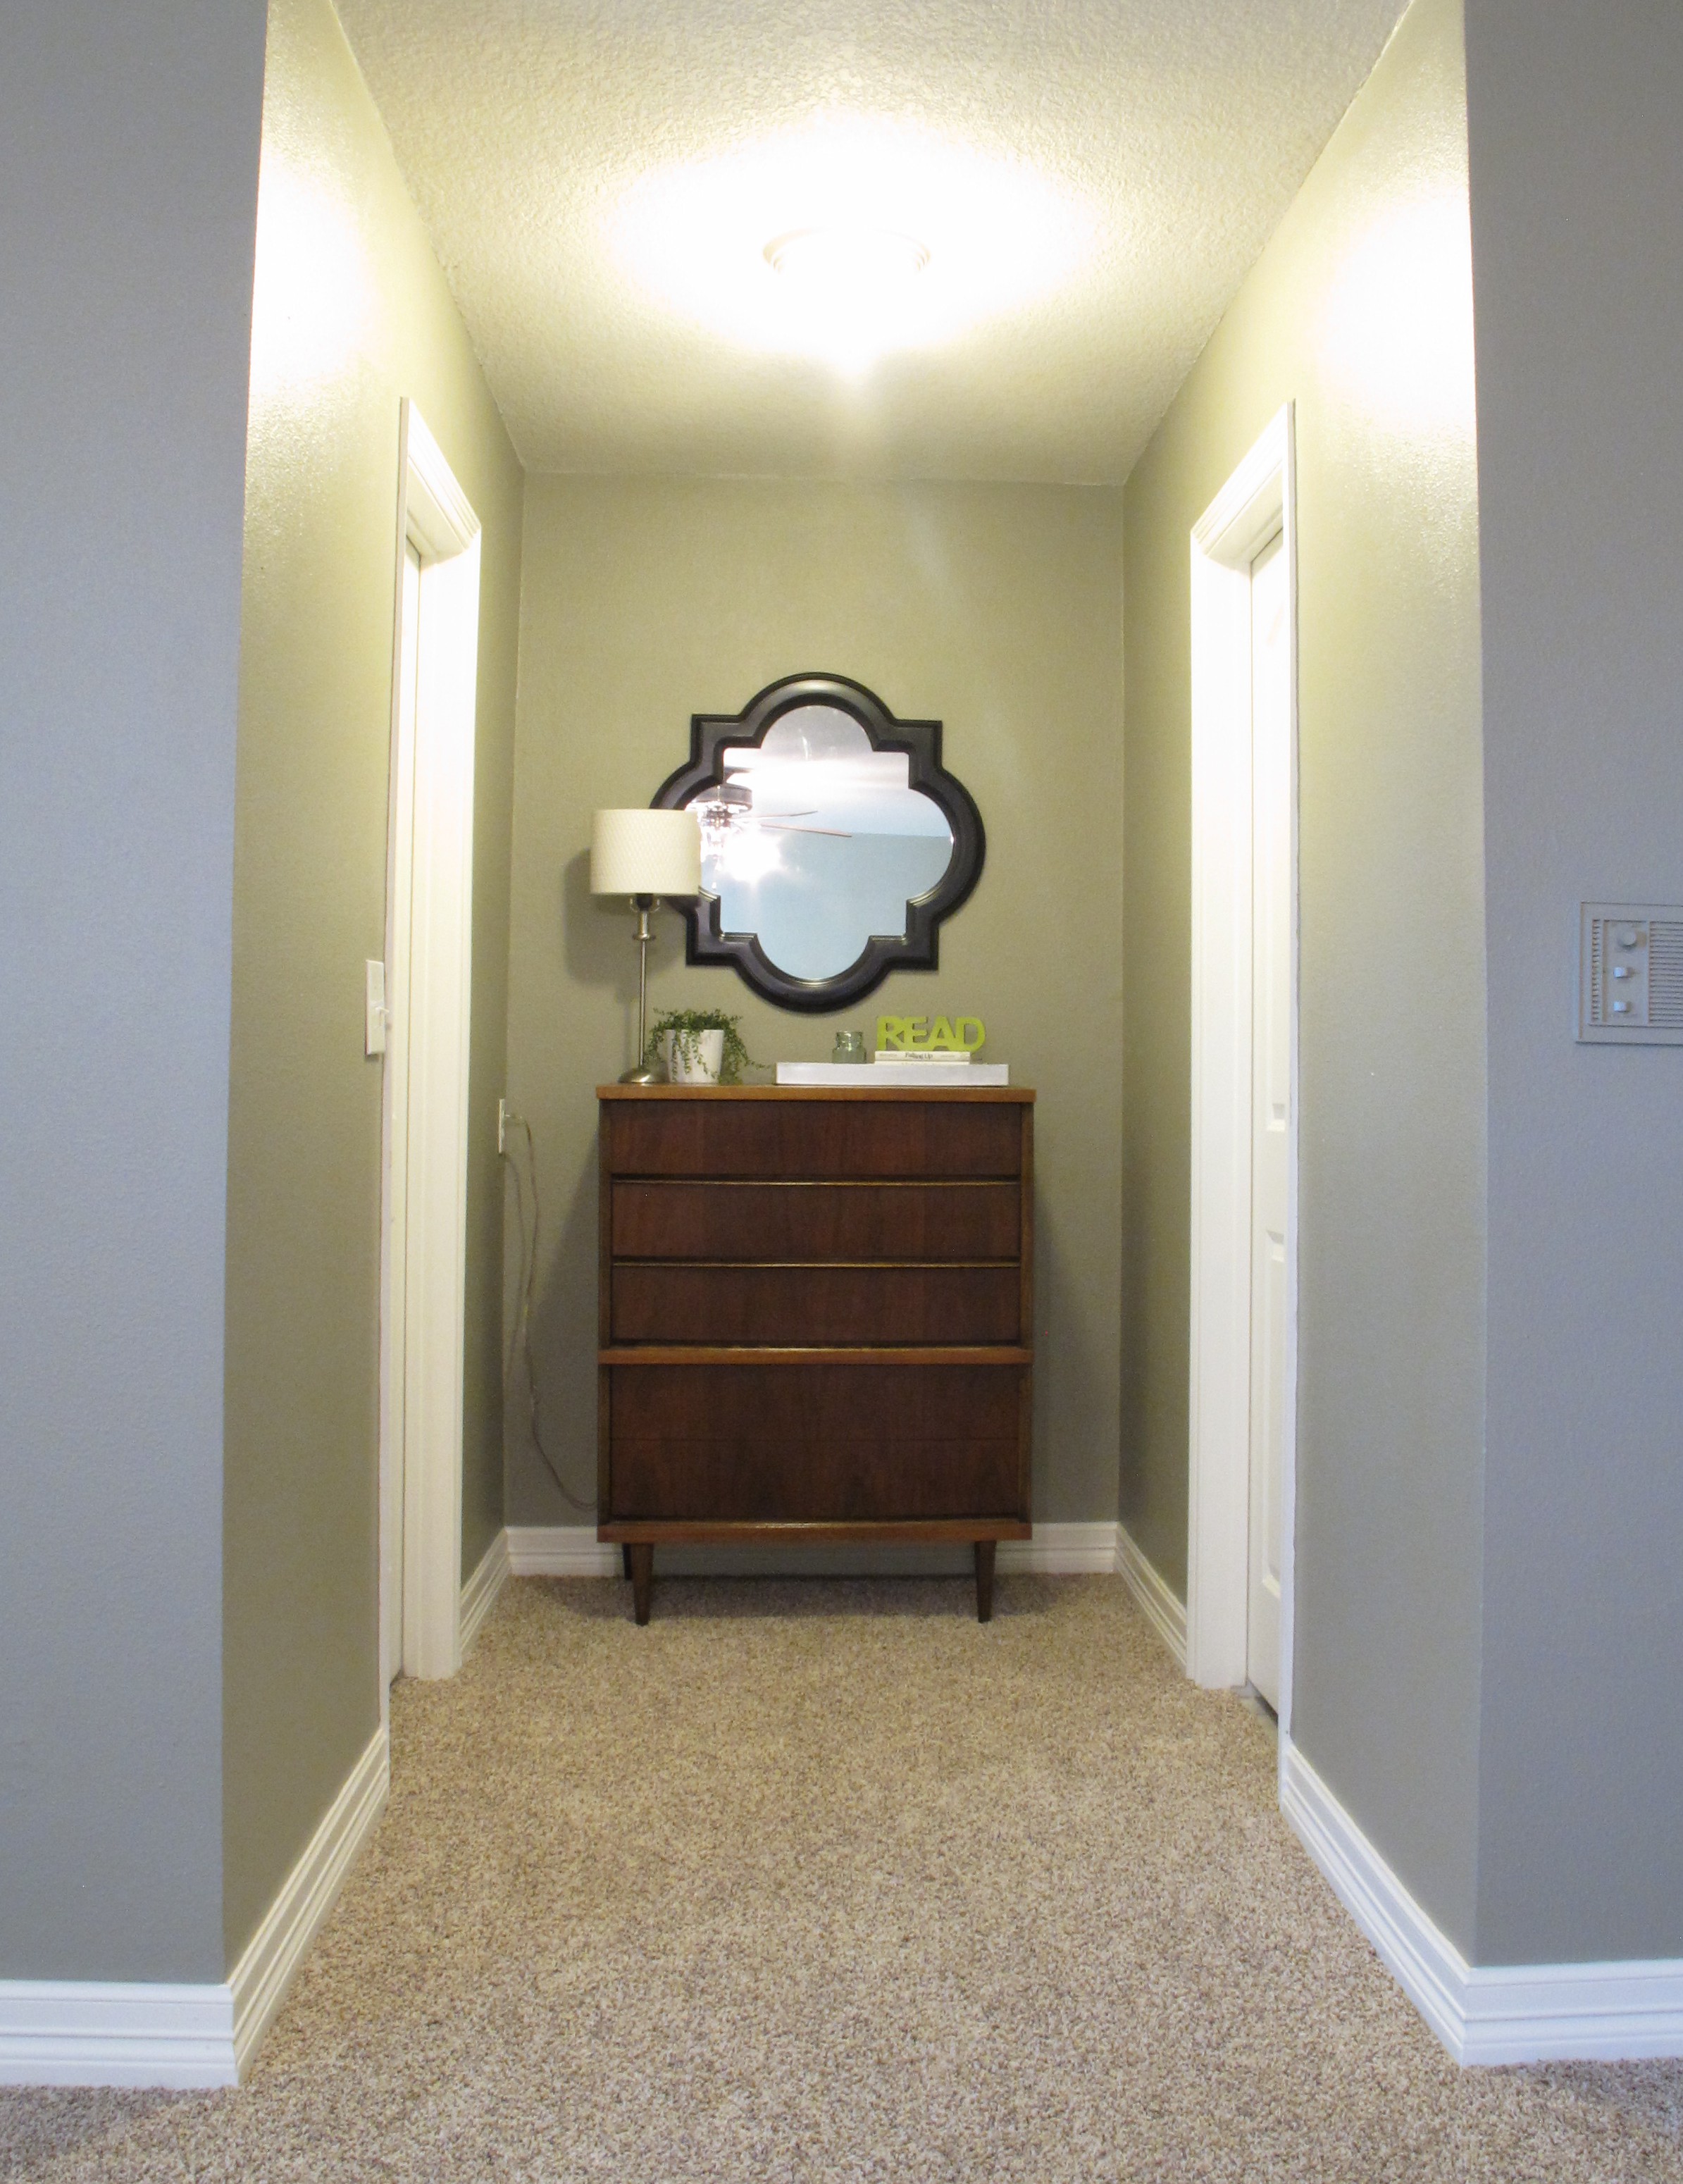
Clearly, it wasn’t finished, but even knowing this, something was still bothering me.  The space was dark and lifeless.  It just wasn’t doing it for me.  I tried painting the mirror white, but never ended up taking pictures because it still didn’t jam (Plus, I really wanted to use that quatrefoil mirror in our hang-out room instead anyways… post to come).

Then, out of nowhere, something random (and totally awesome) happened.  If you follow me on Facebook you may have seen this post about it….

#dumbanddumberforever

And the stars began to align (as evidenced by this grainy iPhone shot that I excitedly sent to Joey as I danced with glee — which, in my head, was the most graceful thing ever, BTW 😉 )….

232323232-fp83232-uqcshlukaxroqdfv39862-nu=3396-6-9--78-WSNRCG=3636964589346nu0mrj

The mirror was the perfect size and shape for above the dresser.   The curved top was a great way to add some softness and interest to contrast all of the straight lines that were happening.  Plus, the huge size really helped bounce light around the room.   And all of the sudden I could see it.    A vision of a cool chandelier which reflected off the top of that curved mirror.  A linear, light-toned fabric brightening the wall behind it.   It ALLLLL started coming together in my head.

Boo-Yeah.

So, now that I’d decided on a location for the mirror, next came the question of color.   Obviously, I wasn’t going to leave the mirror as it was.  I’m personally not a fan of the sorta-matches-but-not-really-thing.  Which is exactly the description of this wood tone.  And I knew that I didn’t want it to be a light color as this would emphasize the braided detail seen below….

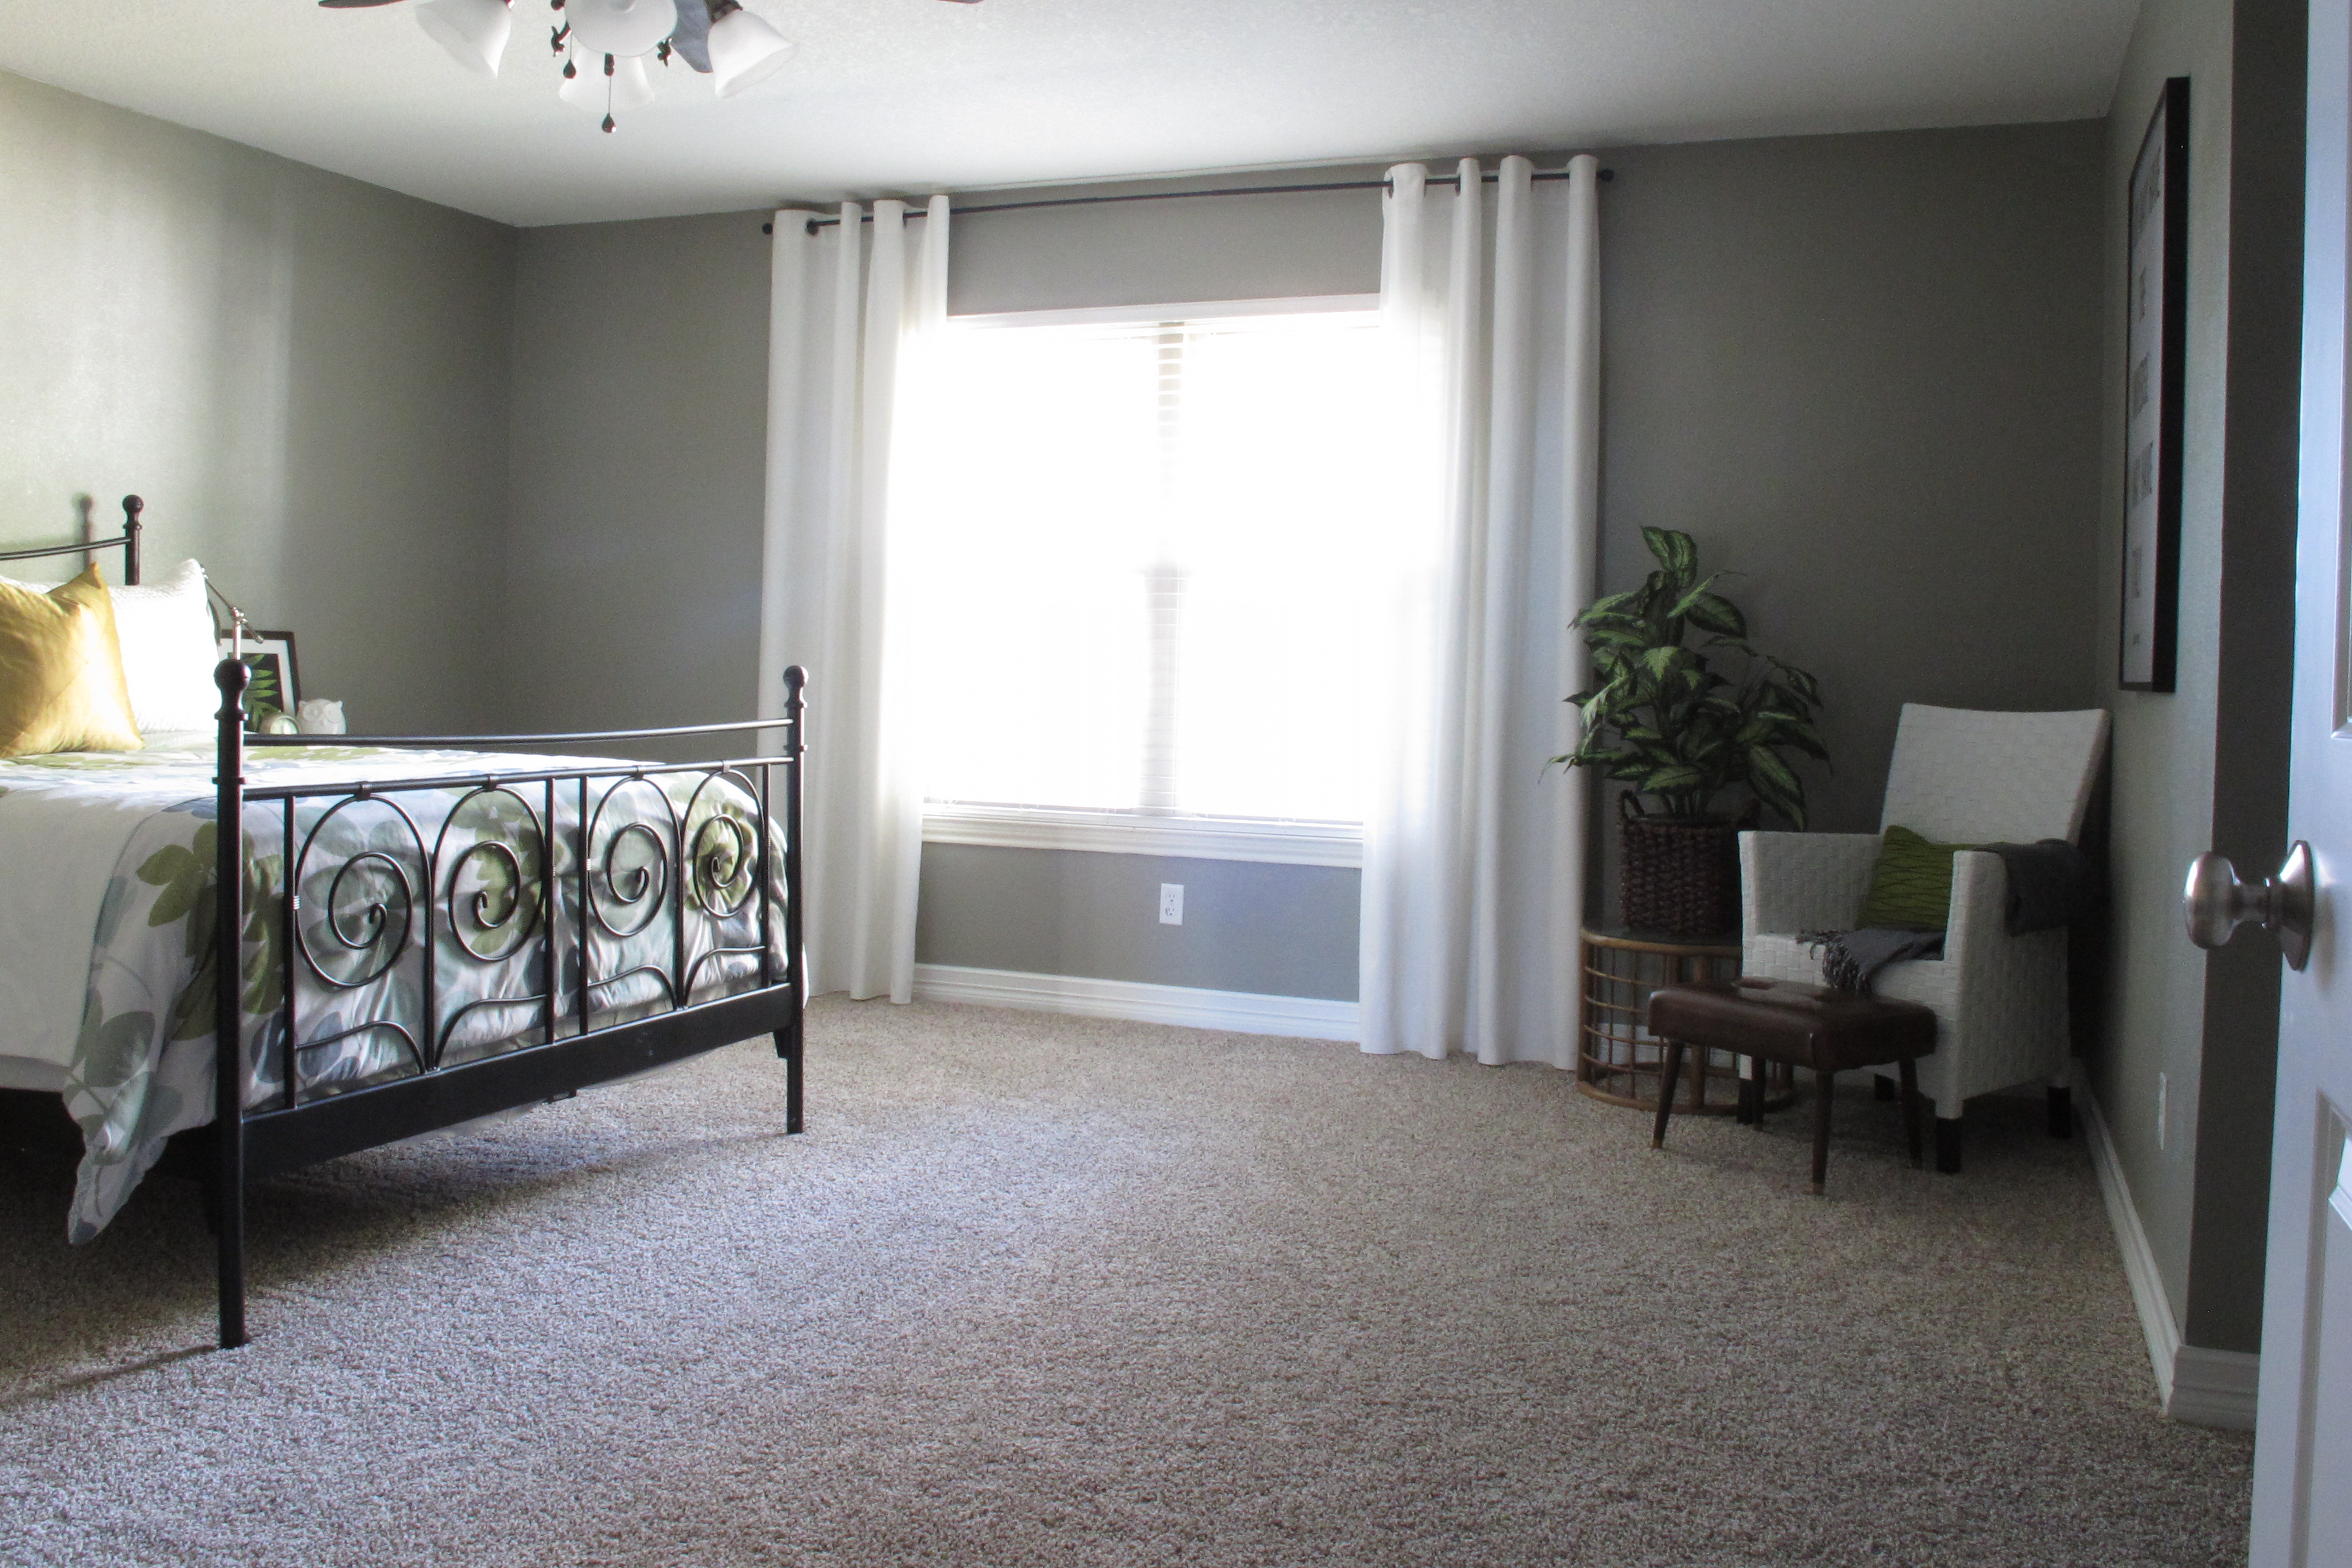
So, a darker color.  I wanted to tie it into the other side of the room (Which looks like this now minus that off-balanced bench in the corner… still lots to do.  pleasedontjudge)…

IMG_7610

IMG_8167

IMG_8170

And I decided that navy blue was totally the way to go since I already had some navy accents going on around the space.  So, I purchased a can of this spray paint…

I taped off my mirror and elevated it on a few scrap pieces of wood, then applied several thin and even coats of spray paint…

This was taken after about two thin coats… there were many more after that. Once everything was dried and cured, Joey helped me hang it. Which left this…

IMG_9257

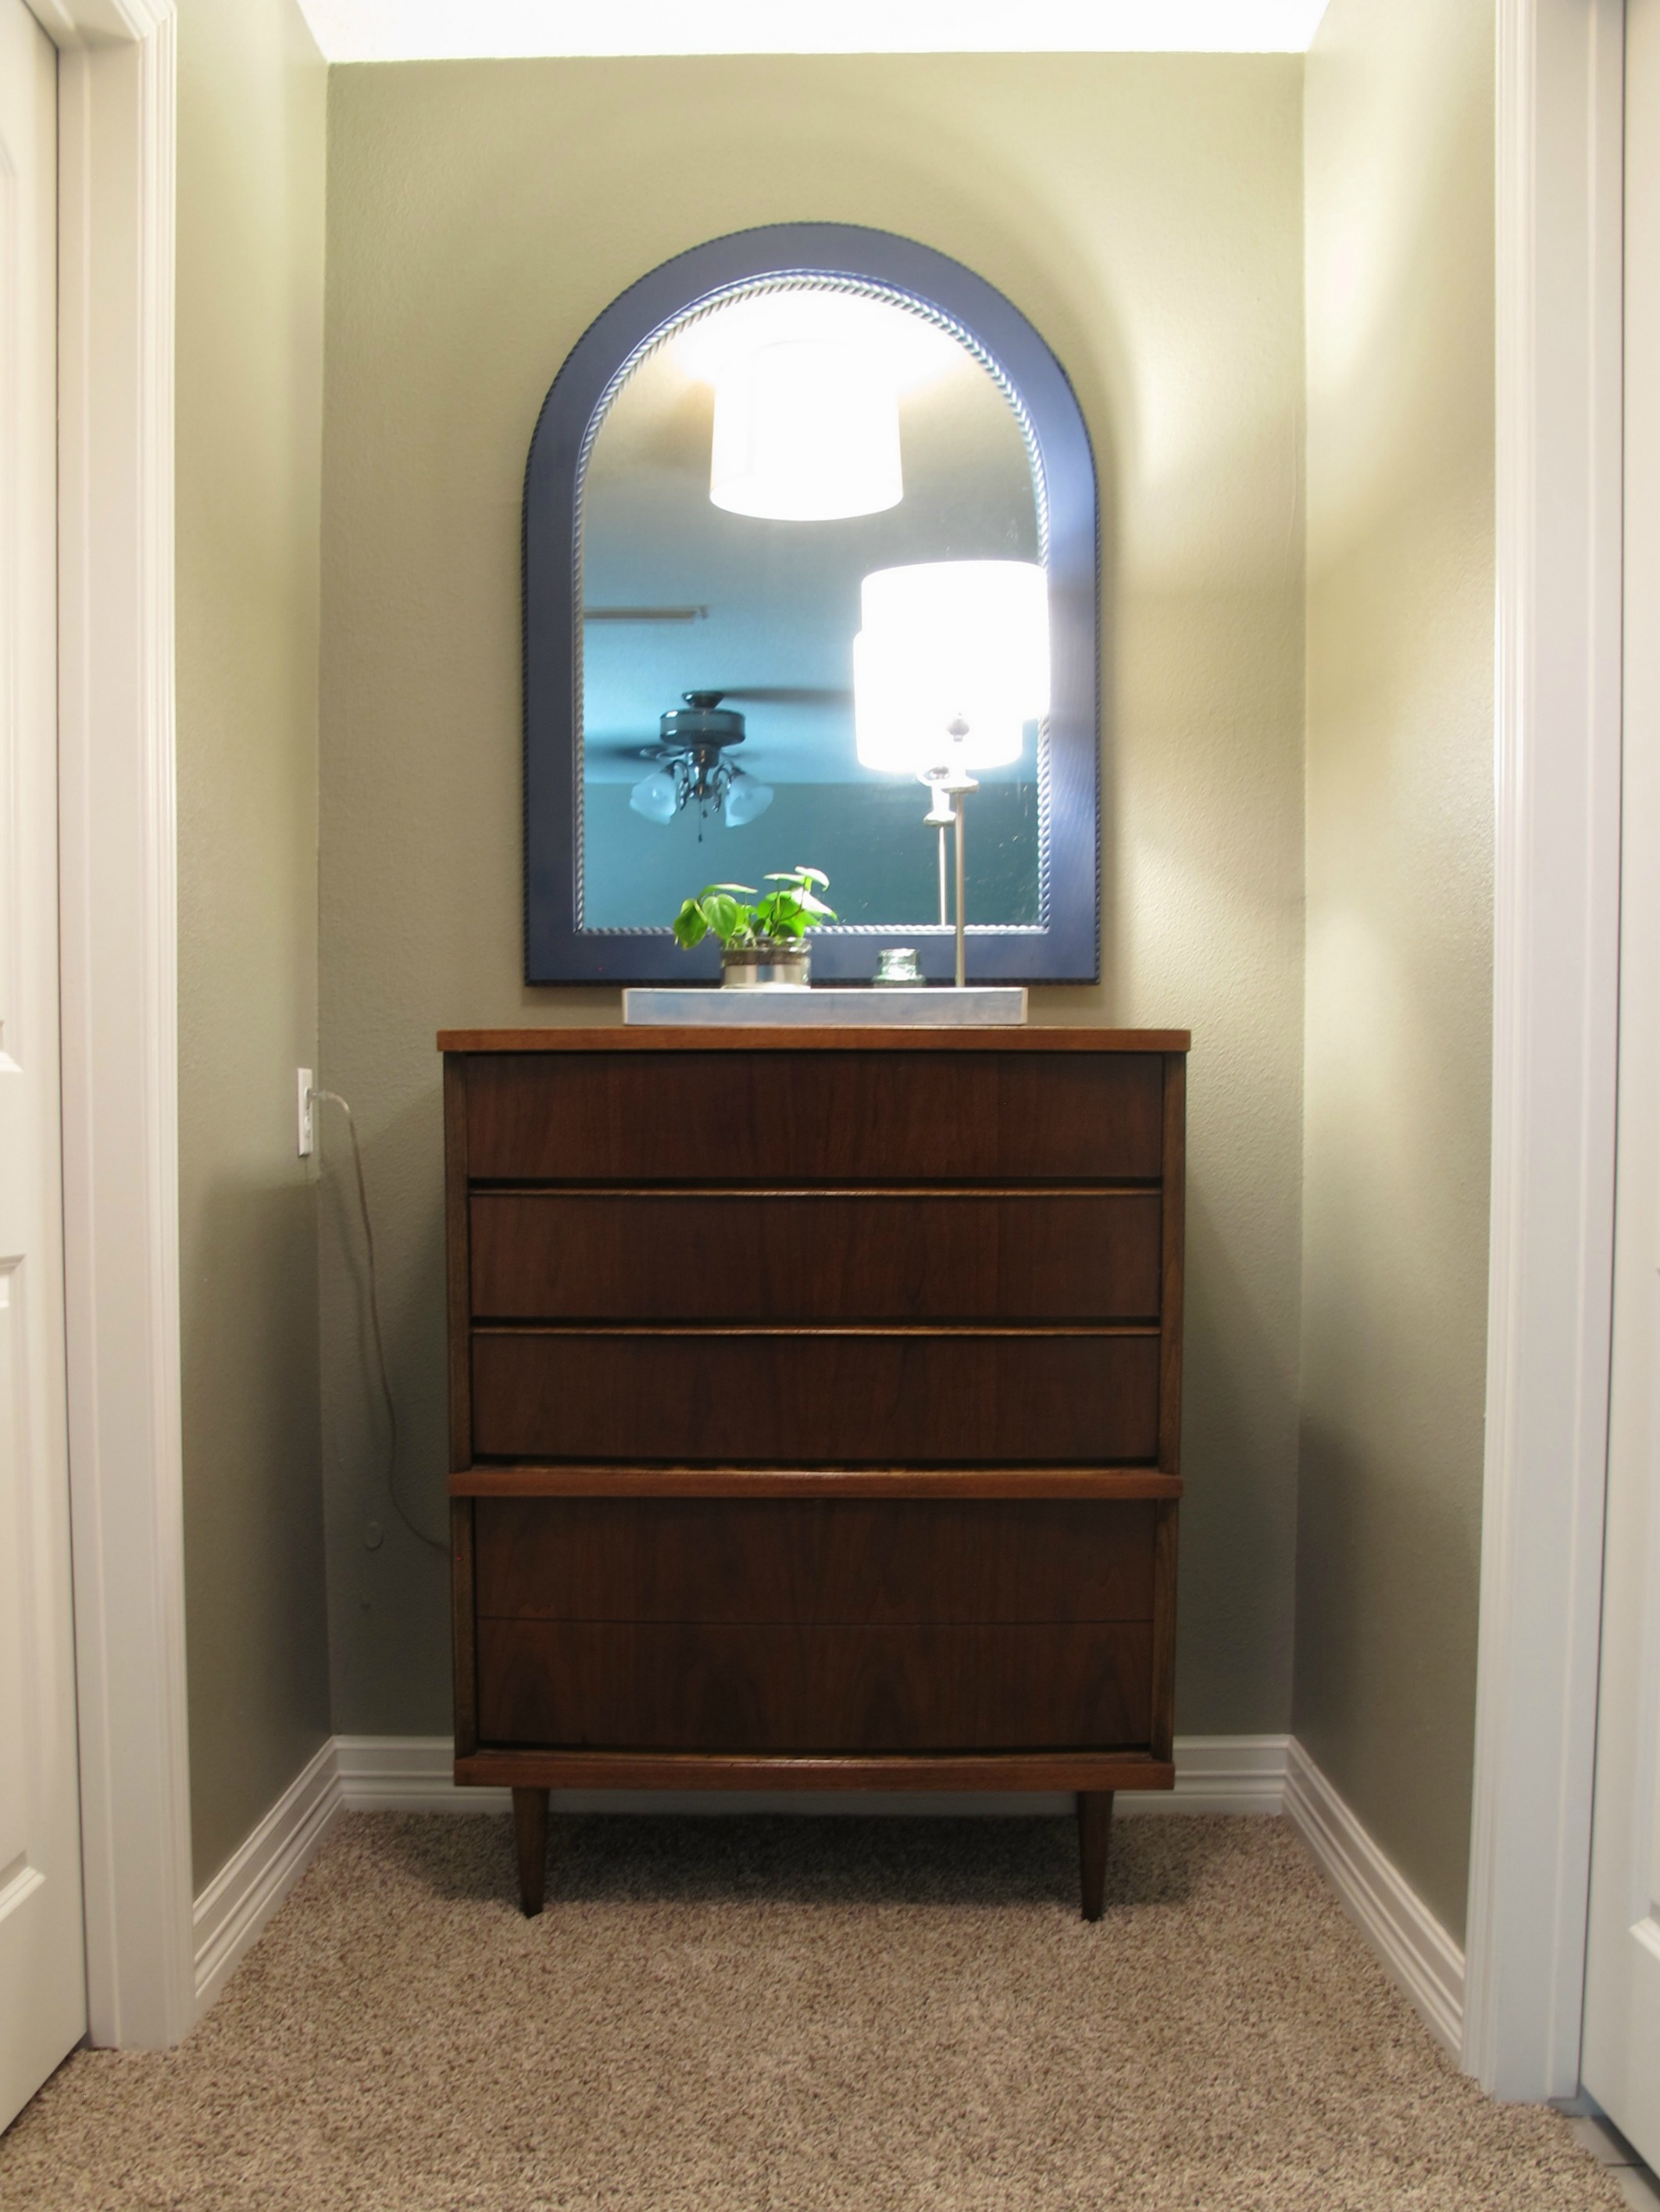
Notice my little mirrored planter from last month?  Still going strong!

And here’s that entire wall now…

232323232-fp83232-uqcshlukaxroqdfv34;54-nu=3396-6-9--78-WSNRCG=363838929;346nu0mrj (1)

Still far from finished, but a step in the right direction.  I really love how the mirror turned out, though I do think it could stand to be hung a little higher.  We’ve actually been meaning to do that but ran out of time before today’s challenge.

It just never ceases to amaze me what a little spray paint will do to change up a piece, though.  That’s what I love the most about DIY… it doesn’t necessarily have to be hard or time-consuming to be effective.  It just took a little good luck in finding the mirror and $5 worth of spray paint to take our little atrium from this…

IMG_8173

To this…

See how much more alive the space looks now that the mirror is tall enough to reflect the lighting fixture?  Me-OW.  And speaking of light, you can see that another easy trash-to-treasure hack that I employed in this space was adding an old drum shade to our existing boob light…

I actually followed the same process that my bloggy friend Mary Beth used in this post (which includes the genius use of a simple rubber band).  I’m sorta jealous that I didn’t come up with that little tidbit on my own.  Lol!  I’m not gonna go into details, but you can read her post if you wanna see how I did it.

In any case, I’m so happy that this area is starting to come together.  I still want to add a light-colored, patterned fabric to the wall behind the mirror to brighten up the space and add interest.  It’s really just a matter of finding the fabric.   And then I want to change the lighting fixture out for more of a chandelier-type aesthetic (The drum shade is a great way to camouflage the boob light in the meantime, though).  And I would LOVE to get that weird outlet in the middle of wall beside the dresser (aka: The zit on the nose of our atrium) moved to a normal location behind the dresser.   I have no idea why it’s so high.  It makes me wonder if there was once a built-in against that back wall or something.

**Update: Wanna see our atrium area now?? Click on this post!**

So anyways, that’s my Trash to Treasure story, now check out the other awesome projects created by my other bloggy friends…

Advertisement

Turning a dresser into a media stand

Last we’d left off with our newest family member Craigslist find, I’d just divulged the story of a sweet, sweet man who’d sold me this lovely mid-century Bassett dresser and made my New Years complete…

I knew immediately that I wanted this beauty to serve as a media stand in our living room, so we tried him out in the space to be sure he’d work.  As anticipated, I LOVED the result (He fit right in.  Made friends immediately.), so we got to work transforming him into a media stand.

We began by removing those wooden mirror supports (shown in the pic above).  Then, Joey drilled large holes in the back of both the dresser and the top drawers to allow space for wires to escape and ventilation to ensue…

232323232-fp83232-uqcshlukaxroqdfv37966-nu=3396-6-9--78-WSNRCG=35;78694-3346nu0mrj

Then, we purchased this puppy for $30 from Radioshack…

This IR repeater allows you to hide your media equipment behind closed drawers (or doors… whatever floats your boat) while still being able to operate the remote control.  The only external evidence of this smart little device is a small eye which is attached to the TV….
IMG_8397

I have to say, it works pretty well.  Not perfect by any means, but that’s okay.  We have to point the remote at crazy angles sometimes to get it to work, but really, it hasn’t been much of an inconvenience in the grand scheme of things.  I’ll gladly take a little remote control gymnastics over having our media equipment exposed.

All-in-all, when we purchased it, the dresser was in pretty good shape.  Some scratches and imperfections in the finish (which is to be expected of a 50+ year old dresser) and three small missing areas of veneer on the side (Note: I’d already “blended” the missing areas in the middle and left of this pic when I snapped this shot… they were quite light-colored and glaring prior to this)….

To help camouflage these areas, I simply used some oil pastels…

And simply layered and blended the colors until I had a close enough match…

I tried using stain and a permanent marker prior to this, but neither worked well.  The oil pastels were great because I could just keep layering and adding color until I achieved a match.  And the more I added, the smoother the areas looked and the more they matched the dresser in terms of texture as well as color.   In the end, I was left with this…

IMG_8395

It’s not perfect, but these areas definitely blend much more.  I barely notice them from afar.  Unfortunately, for whatever reason, the camera makes these spots appear more noticeable than they are in person.  So squint when you look at these shots.  Heehee!  I will say that prior to using pastels, the missing veneer grated at my nerves every time I walked past.  Now, I barely see it.  So, we’re cool. Thus, I’ve placed the stink-eye back into hibernation mode…

IMG_8396

And here’s our dresser in action…

232323232-fp83232-uqcshlukaxroqdfv39;66-nu=3396-6-9--78-WSNRCG=35;9-96-85346nu0mrj

COULDN’T.LOVE.IT.MORE.   It’s like this dresser was born to reside in our living room.   It takes up less space than our previous media cabinet, thus, makes the room feel bigger.  And it balances the console table on the opposite side of the space perfectly.  Plus, the era of the dresser suits the 1970’s vibe of the room better than its more modern predecessor.  I heart you, dresser.  You sexy, sexy beast.

As for our living room…. it’s definitely coming along, though there’s still more to do.   I’m on a perpetual hunt for a larger rug for the space.  Our little postage stamp of a 5×8 just isn’t cutting it…

This space is quite cavernous compared to the smaller, cozy living room in our last house.  And I love it, but the decor needs definitely change when the scale of the room does.  I’m currently on the lookout for a rug large enough to fit the entire couch on top of it (likely a 9×12), so wish me luck with that.  Big rug, decent quality, little price tag.  This is my mission.  Well, my secondary mission.   I’m also putting forth effort to de-brown the space.  I realize that this makes no sense being that I just moved a new brown piece of furniture into the room, but hear me out…

Since taking these pics, I’ve finished painted the built-ins beside the fireplace and am now in the process of putting everything back together.  I’m giddy each time I see it.  Y’all… painting it was SO the right decision.  I can’t wait to show you.   The rug that I ultimately choose won’t be in the brown family either –possibly grey undertones or something with a pop of color.   Then, I’m tossing around the idea of moving the coffee table into the hang-out room and replacing it with something either white or with a pop of color (depending on the rug we end up with).  Or maybe a sleek glass table would be nice.  Something with a metal base.   My next painting project will be to paint the wet bar cabinets (seen two pictures up) white to match our new-and-improved built-ins.  Ultimately, I want the only major brown items in the room to be the fireplace and the media stand.  The two items that deserve the attention most.  I also have some crazy-cool artwork that needs to be hung around the television.

I know it seems like a lot when I’m listing it off in writing, but this stuff really excites me, so it doesn’t seem like much to me at all.  I think the biggest thing will be simply FINDING the rug.  The rest will come together after that.

So, anyways, that’s the plan, Stan!  I hope everyone has a safe and fabulous Superbowl weekend!!   What projects do you have going right now??

TDC Before and After