Can you tell I’m married to a police officer? Hehe. And guess what?? I’ve been married to that guy for 7 whole years now!!! Woot!
 I will never stop laughing at Joey’s face in that picture. Hahahahahaaa!!!
Well done, Joe.
We celebrated our anniversary this past weekend and it was total a blast. We didn’t do anything crazy… Just coffee, dinner (really, really delicious dinner actually), and drinks, but it was super fun. Date nights are just much needed sometimes, ya know? Good times.
Speaking of times, I say we talk about a clock.
That’s where this post all started after all.
With a clock.
A cute little clock that I found for $9.99 at TJ Maxx.
See, Lucas had requested a clock in his room from day one. He can’t tell time yet, but for some reason was completely enthused about it. I’d been casually keeping an eye out for a clock that would compliment his room, but up until this point, I hadn’t found one that I liked. When I saw it, I knew. It was simple, graphic, and inexpensive. I brought it home, and propped it up on Lucas’s dresser to surprise him. I wasn’t sure where I wanted to hang it, so I figured that it’s temporary spot on the dresser would do until I hammered it out.
When he walked into his room, Lucas was absolutely ecstatic about his clock. It was all he talked about. “Thank you, Mommy!” “I love my clock, Mommy!” …And that’s when the nagging began. You wouldn’t think that a four year old would be so obsessed with a clock. But, holy moly, y’all. From the time he first saw it, he wanted it hung on the wall, like, YESTERDAY. It was every 5 minutes. “Can we hang my clock now?”, “Can we hang my clock now?”. And oh, the hysterics… At bedtime, he broke into tears because he didn’t want to go to bed without his clock hung on the wall. I tried to explain that I was simply trying to decide where to hang it, and once I’d figured it out it’d be done. But, no. That provided no solace for my clock-loving baby boy. It wasn’t enough that the clock was sitting, displayed nicely on his dresser. OH, NO. It had to be ON the wall. Yikes.
Now, don’t get me wrong… I totally get it. I mean, I’ve cried over decor a time or two myself (sortof). And he IS my son, after all. And really, his excitement for the clock was pretty awesome. But, dang. The nagging did not speed my creative process. Like, at all. It did, however, make me resolve to always hide the item in question until I know where to hang it next time. Heehee! Duelly noted. 😉
So anyways, after three days of dramatic clock banter, inspiration finally hit. I knew that I wanted to do something with the license plates that hung in his last bedroom (plus, I have a about 20 more now than I did then). And although I ultimately want to create a giant statement wall with these license plates, I decided to hang the clock within a smaller grouping of plates for the time being to appease the child and then slowly add more license plates as I decided on how to execute my statement wall.
I started by figuring out the arrangement of the plates with the clock on the floor. I basically moved them around until I was happy with it, which landed me here…

Then, it was a matter of transferring this arrangement to the wall. I basically used the above photo as reference the entire time. I measured the middle of his bed, measured the height of the arrangement, and figured out how high I wanted it to go from his headboard. Then, I started at the bottom, like so…

I used small finishing nails to hang the license plates and made sure each plate was level before tapping it into place. I gradually worked my way up…

Until I had everything hung on the wall as it was on the floor…
I’ll admit that the above shot was taken after I raised the entire arrangement a few inches. The initial starting place ended up being a little low for my taste once I had it all up there.
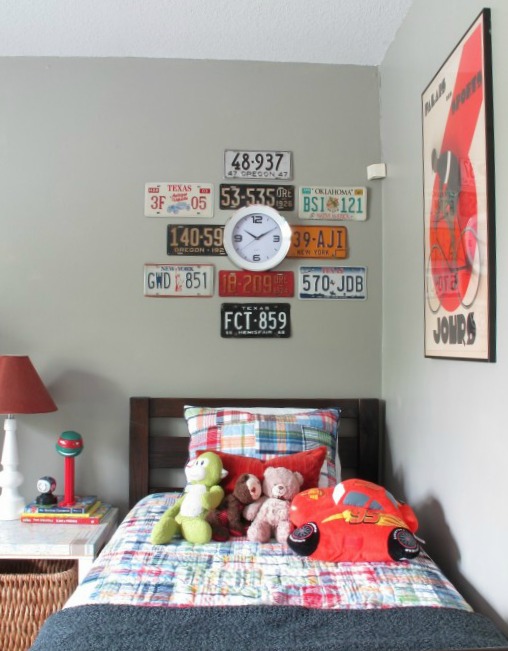
Here are a few close ups…


I love the thin chrome frame and the white inset. It’s reminiscent of an old-fashioned wheel in my head which is a great play for his transportation themed room.
Here’s that side of the room now…


The funny thing is that despite Lucas’s persistent nagging for me to hang the clock, he hasn’t seemed to notice that it has no batteries in it. Lol! It’s been 10:11 for over a month now and he hasn’t seemed to mind. Oh, four year olds…. 🙂
Since it’s been a while, let me show you the other tweaks I’ve added to his room as well…

The painting over the dresser was another TJ Maxx find for $11 on clearance. I initially purchased it simply for the canvas as boats aren’t really my thing. But then I realized that it coordinated with Lucas’s room perfectly. I want to add some lime green accents to the painting modern it up a bit and tie it in even more, but I haven’t gotten around to it.

Last we looked at Lucas’s desk area, it looked like this…

Since then, his desk got a little organization, a lamp (found for $8 at Target on clearance), and some art. My parents had that “Lucas’s Hot Rod Shop” art made at a car show. The hot rod in the pic is actually my dad’s car.

Pay no mind to that wood chair. It’s just there because we had it, but I’m on the hunt for something sleeker.


Straight when you walk in, you see the Rubik’s cube art that I made in memory of my brother, a metal bicycle which I spray painted orange, and his magnet board.

And here’s the rest of the room from the doorway the last time we looked…
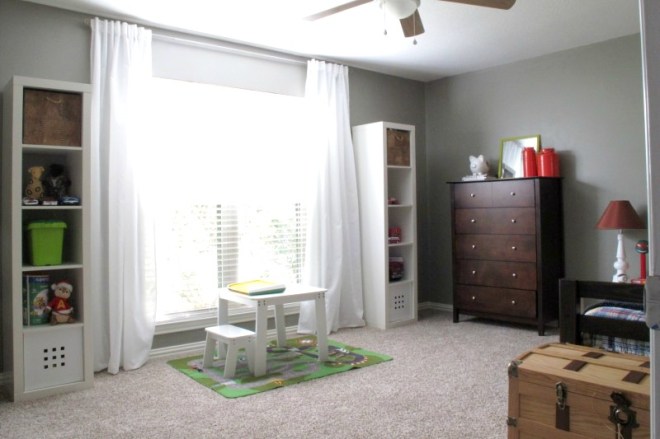
And now…

I quickly lost that rug beneath the tent because, well… it looked weird. I just forgot to snap another pic after the fact. We had to give the white table that was there before the boot because both chairs broke and then the table started getting wonky thanks to some little 4-year-old-monkey-who-will-remain-nameless using it as a leaning apparatus. He likes to hang out in his tent, so we figured, why not. Since taking his pic, I’ve added a blanket “tent floor” that ties into the rest of the room for a bit of color and Lucas seems to love it. I also cleaned up the hap-hazardly “styled” shelves by using similarly toned baskets that I already had on hand.
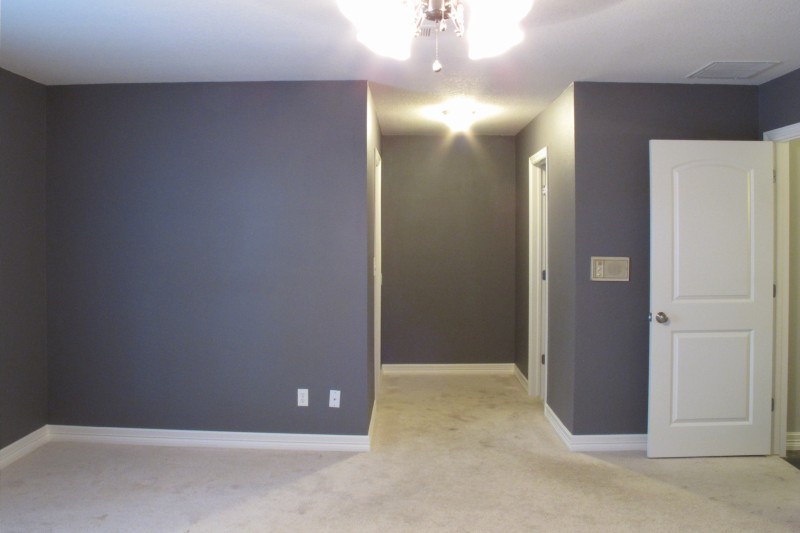
And just for fun, here’s a before shot when we first got the keys (before we installed new windows, changed out the stained carpet, and painted the room)…

His ceiling fan light recently went kaput, so that’s next on the agenda. No overhead lighting = total bummer. I’m also still tweaking and trying to work out some of the decor/wall art, so I’d say that his room is about 85% done at this point. Not too shabby. We’ll definitely get there. And I’m definitely having fun on the journey…. This is why I love to blog… looking back at previous pics is so rewarding. Even simple and free tweaking can make such a difference.
***For updated pics of Lucas’s room as it is now, check out this post.***
So, what do y’all think? Any ideas for my license plate statement wall that you’d like to share??