Yes.
Yes, that was a modified Dumb and Dumber quote.
Those who know me well, accept the fact that in the warm-weather months I speak fluent Dumb and Dumber (which seasonally transitions mid-November to fluent Elf). It just is.
Anyways, The-Table-Refinishing-That-Never-Ends is finally complete!. And I’m so excited about it that I’m going to ruin the suspense and start with a little “After” glimpse…

Table. You complete me. (I know… I’m a traitor. That one was Jerry McGuire. Seriously, only about 10% of the words I speak are original.)
Anyhoo, not gonna lie… I definitely burned off all of the cookie-calories I consumed while stress-eating over this thing throughout the dual-refinishing process, and it was worth EVERY SECOND. I’ve learned so stinkin’ much throughout this process, and finally have a result I’m satisfied with.
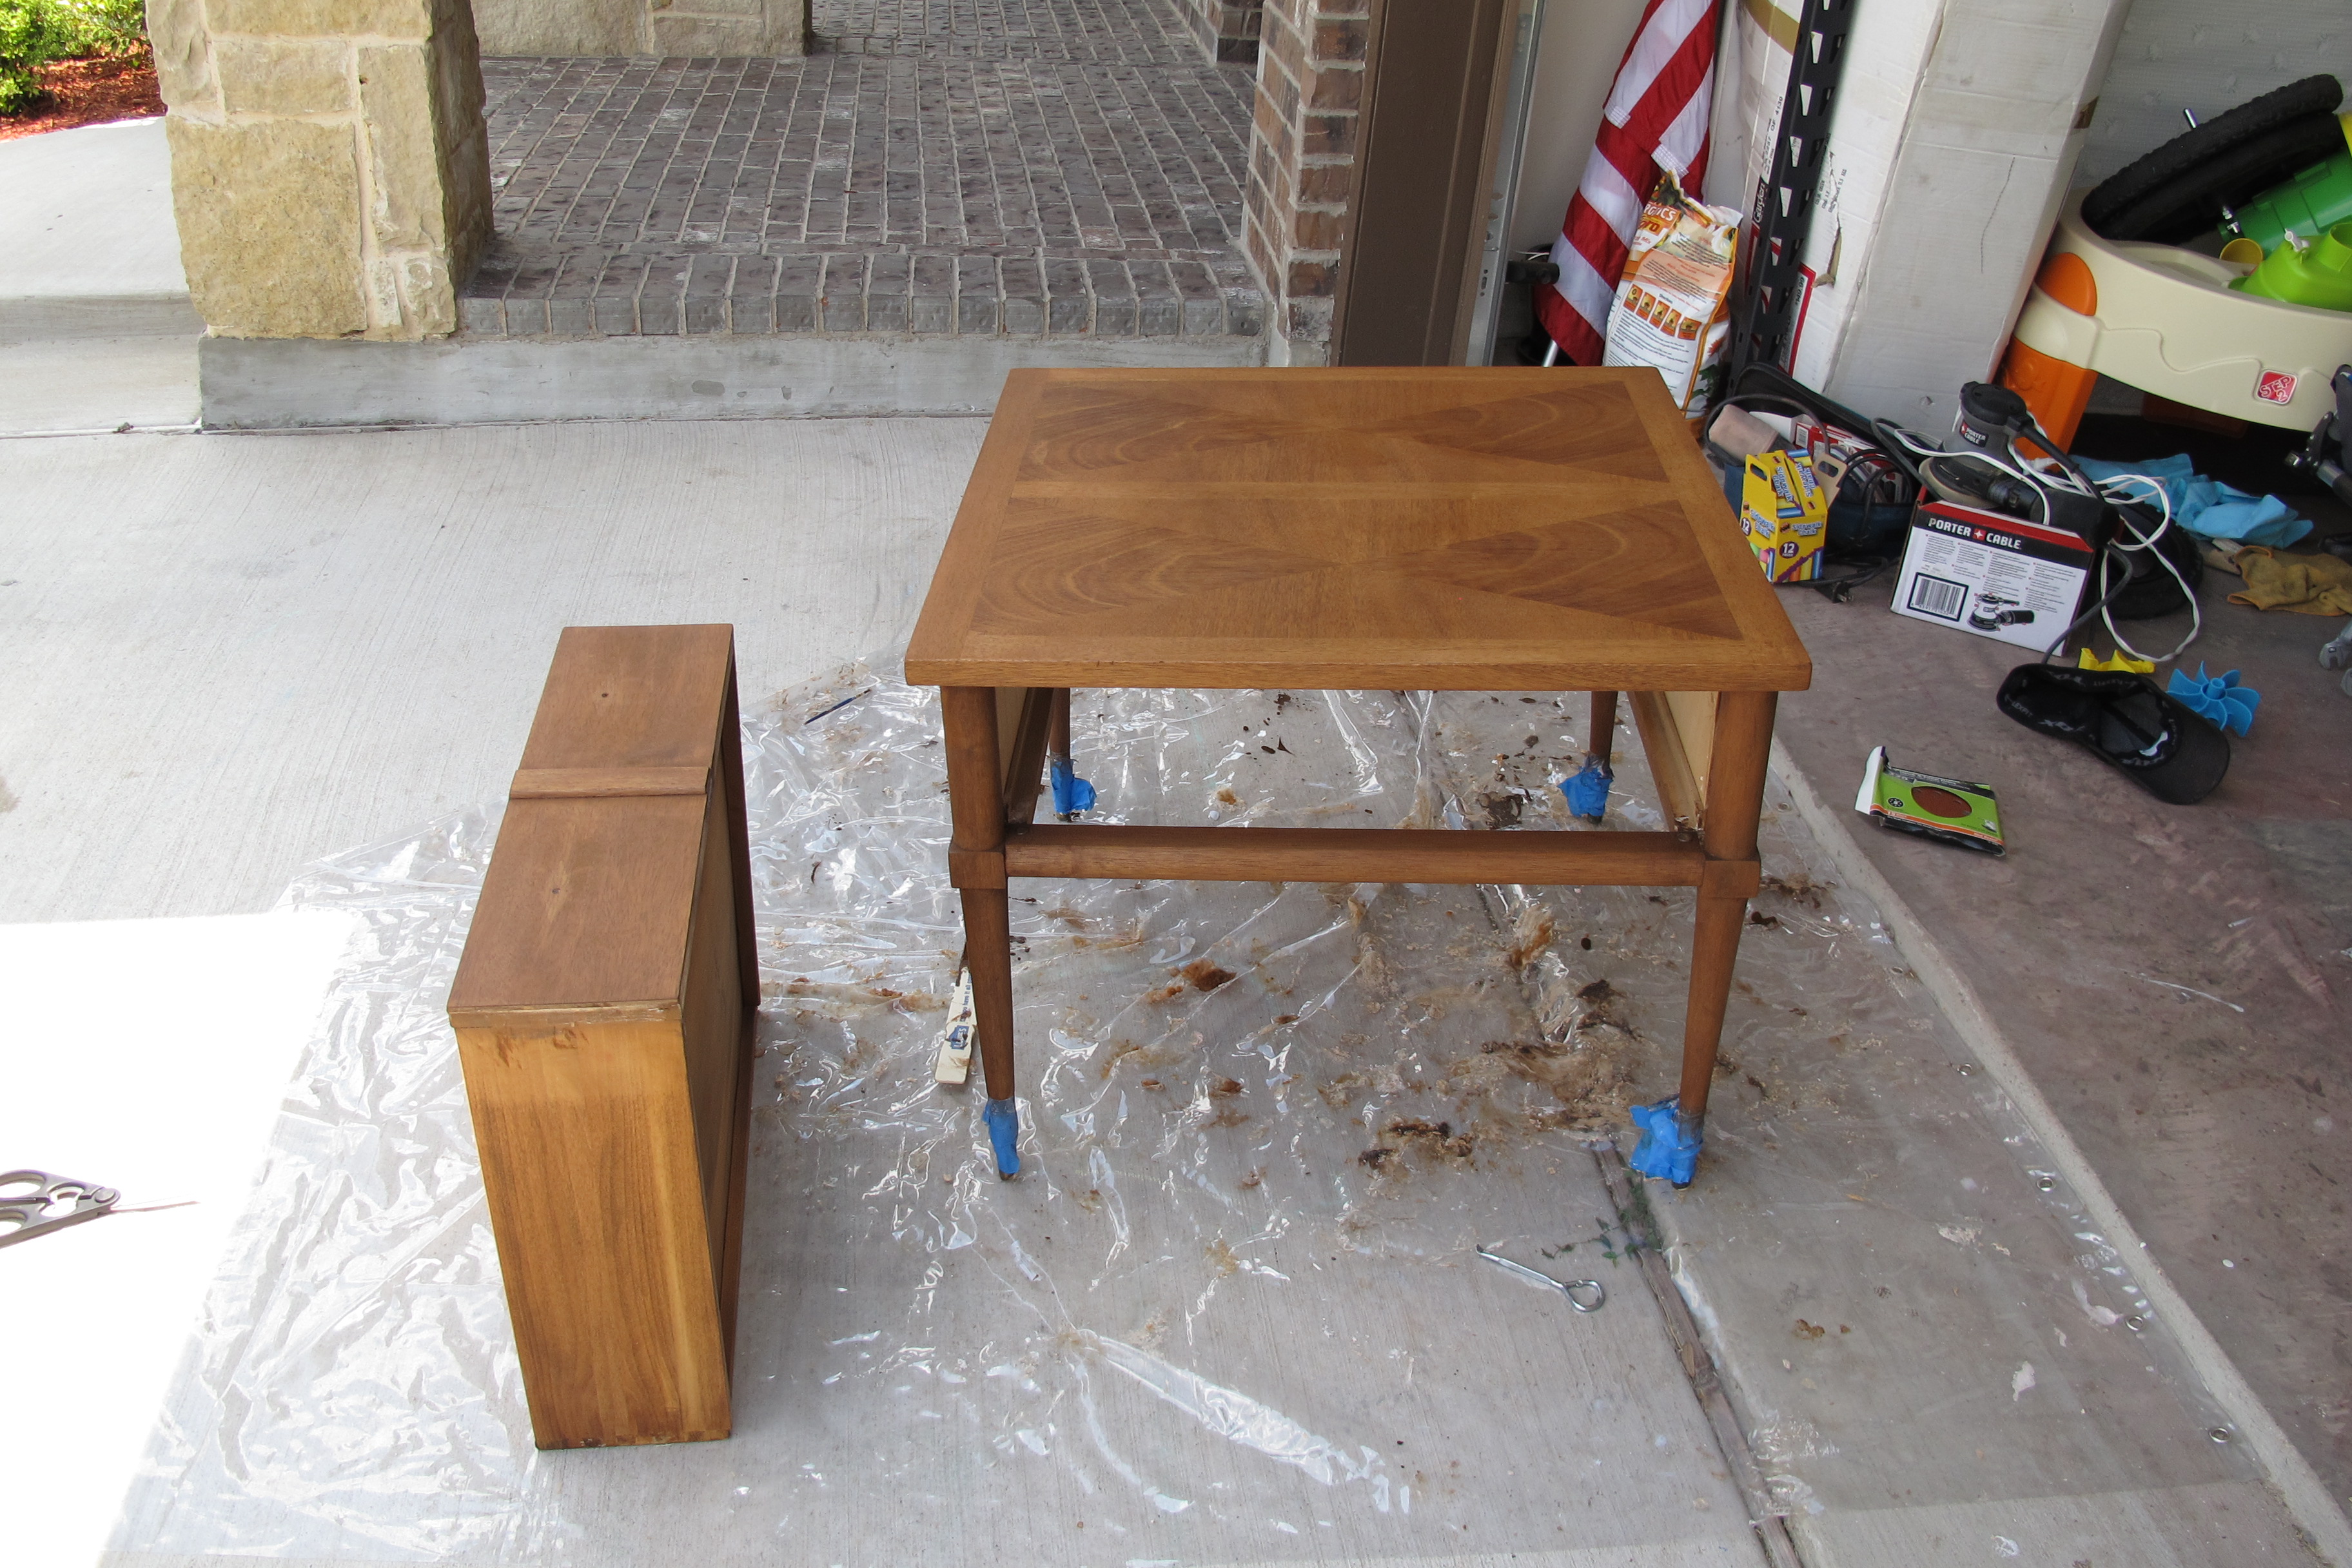
So, let’s start with a quick recap for any newbies. I purchased these drool-worthy mid-century tables for a steal at Goodwill.
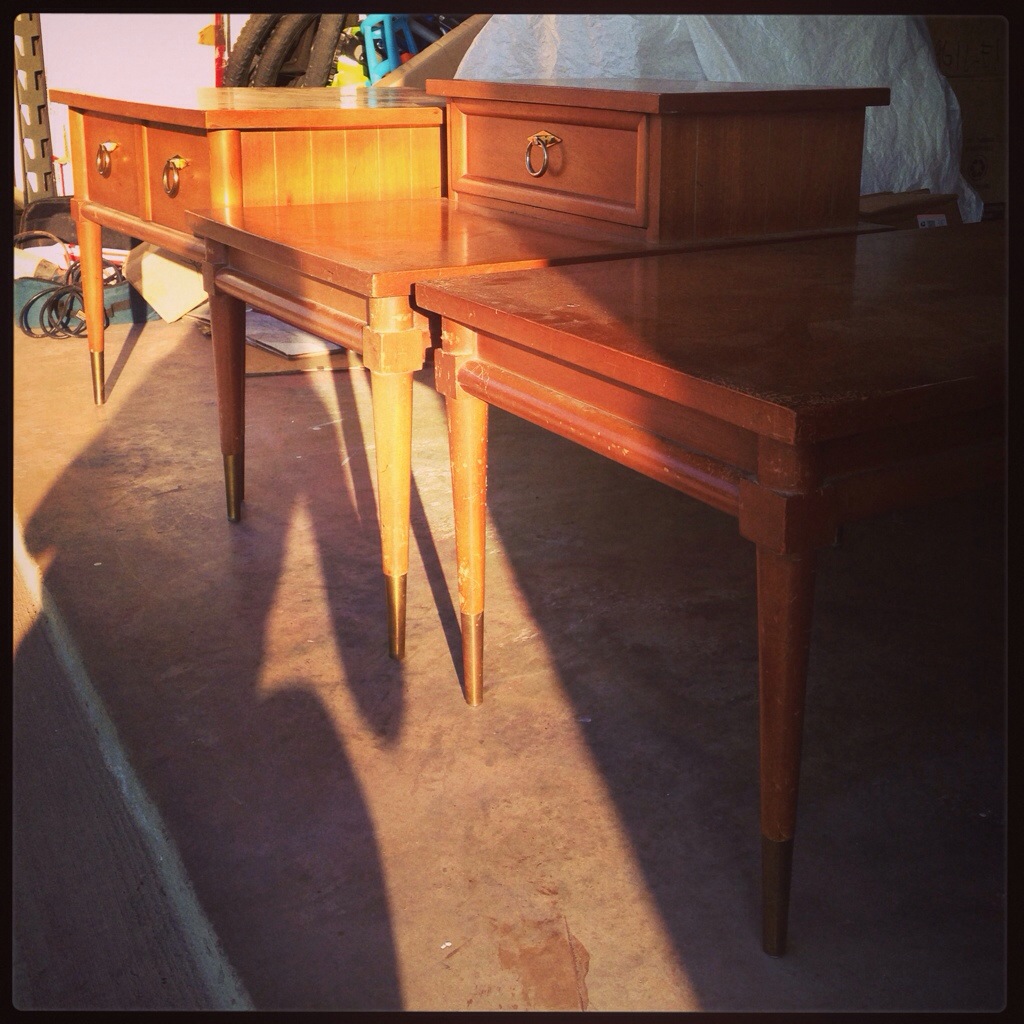
The problem was that their finishes had seen better days.
Happily, I was able to salvage the original finish on the smallest table by using mayonnaise to remove water rings. That guy now lives in our tri-functional room….

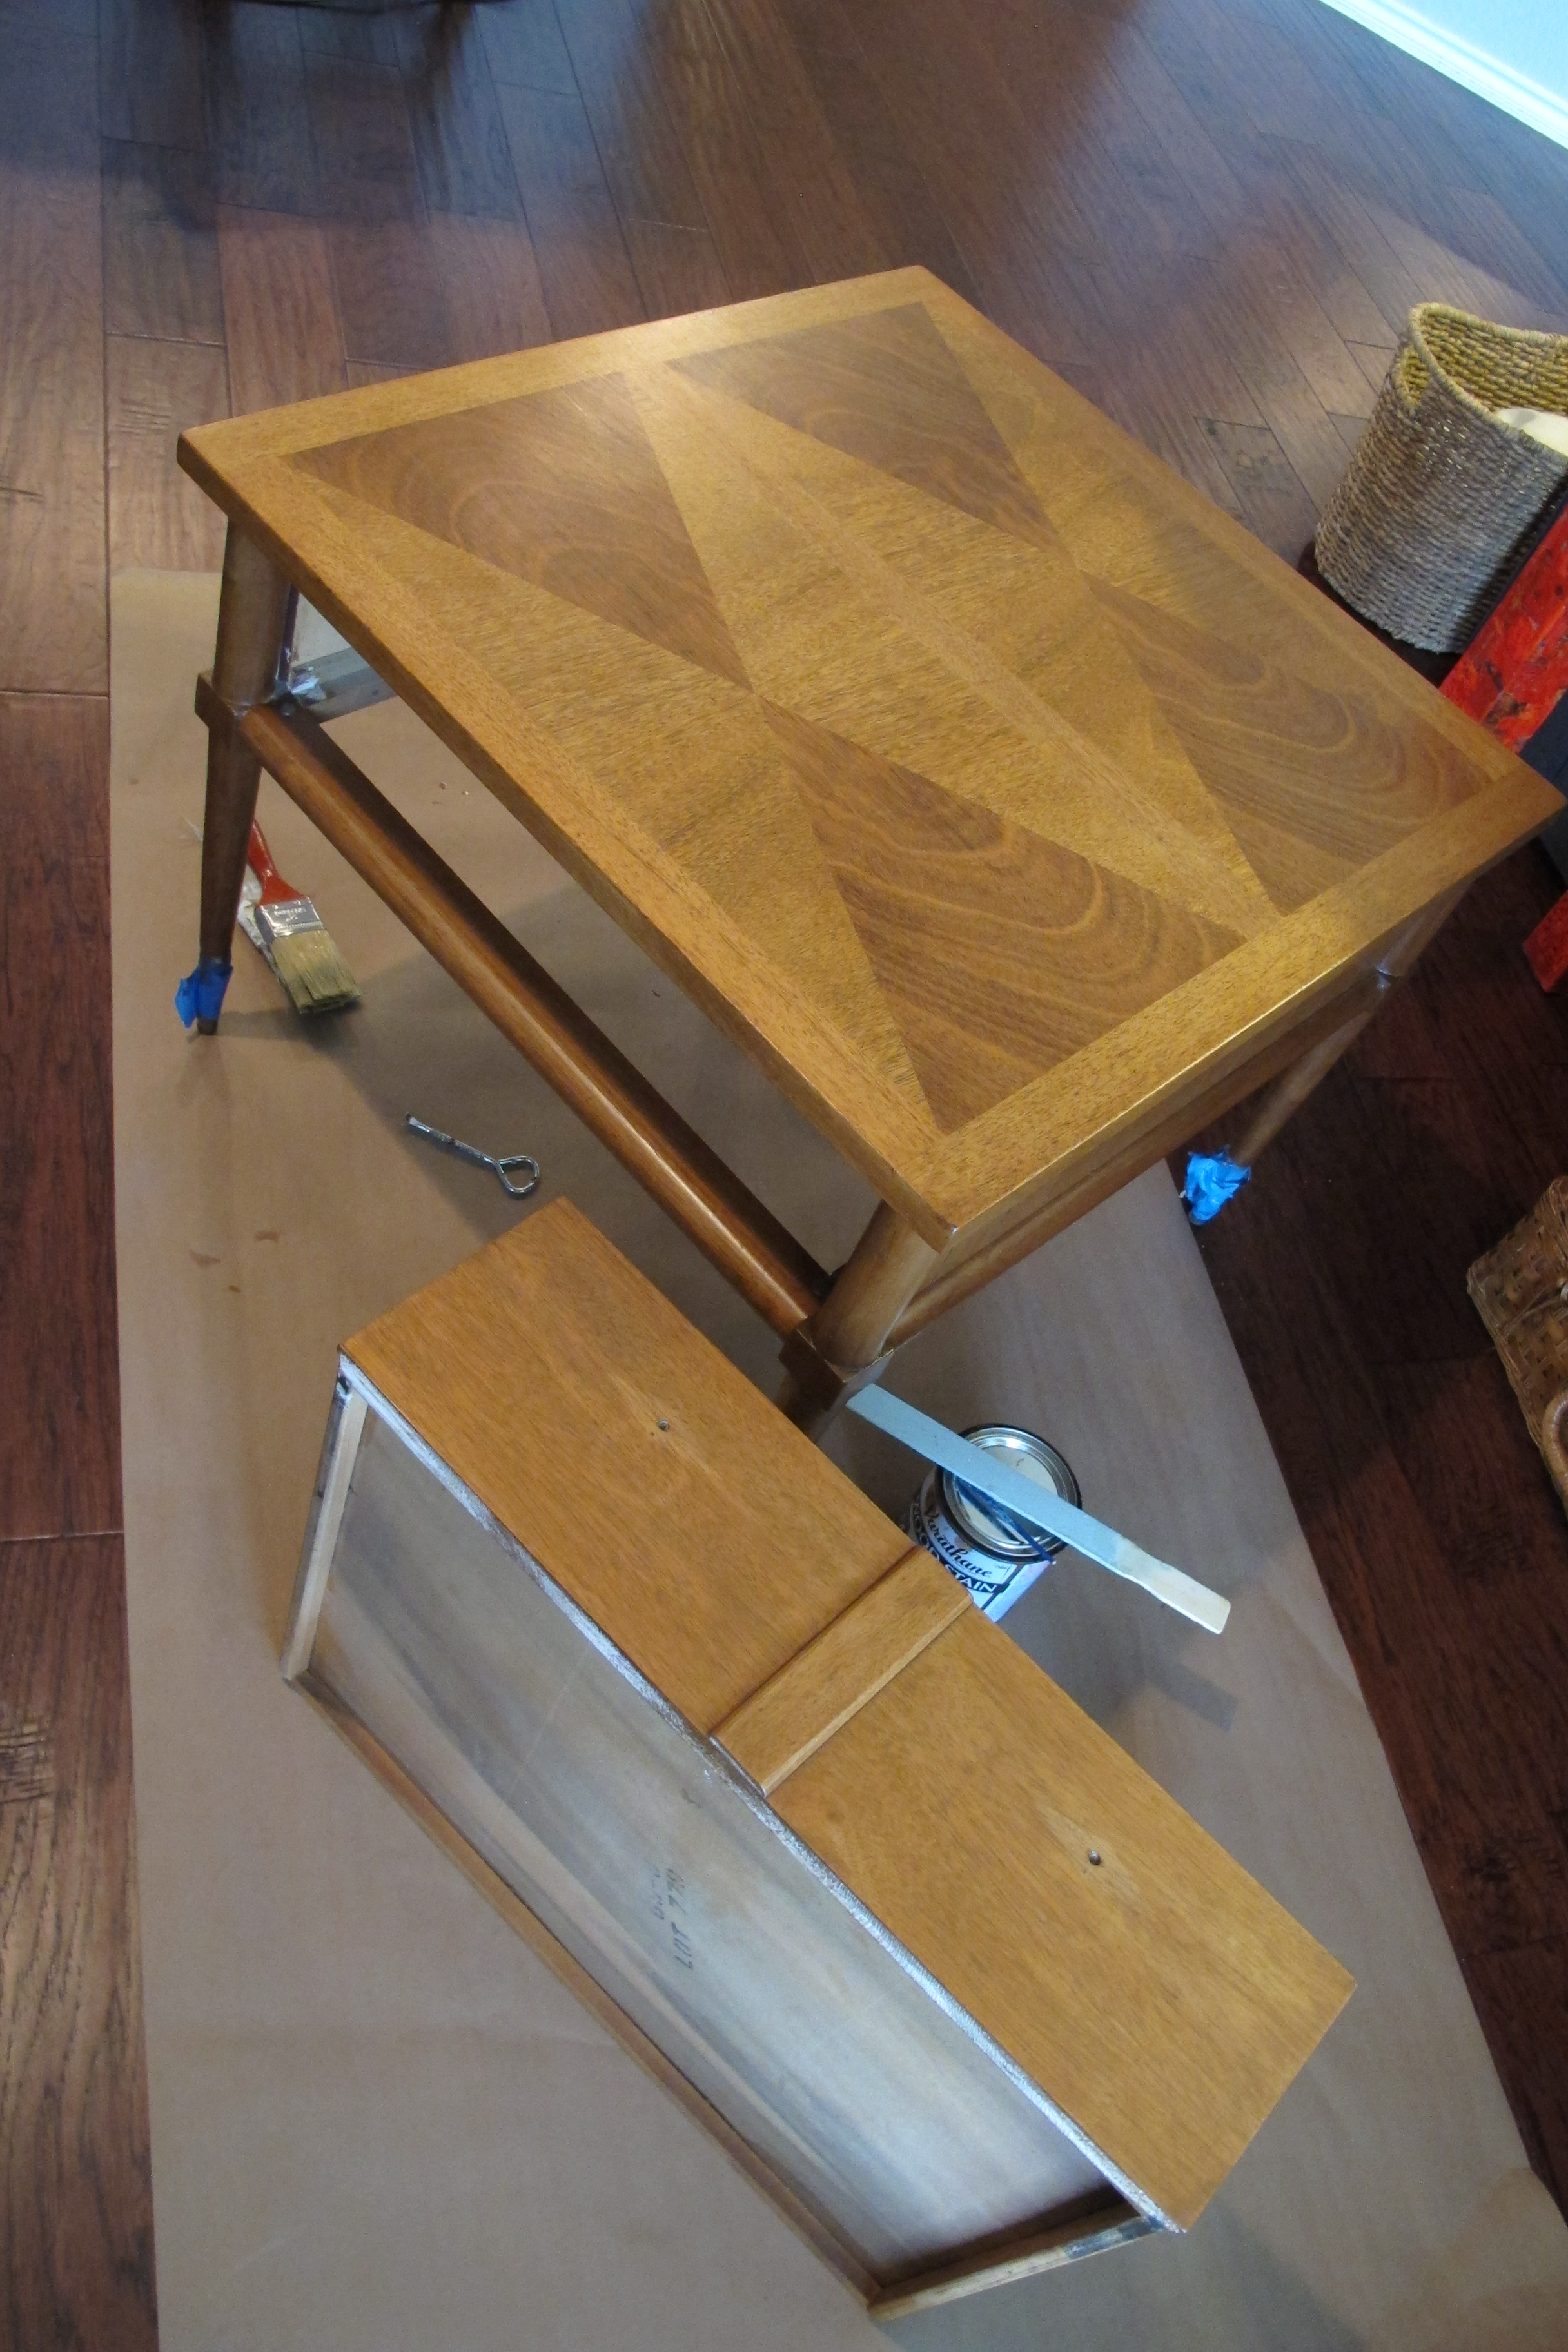
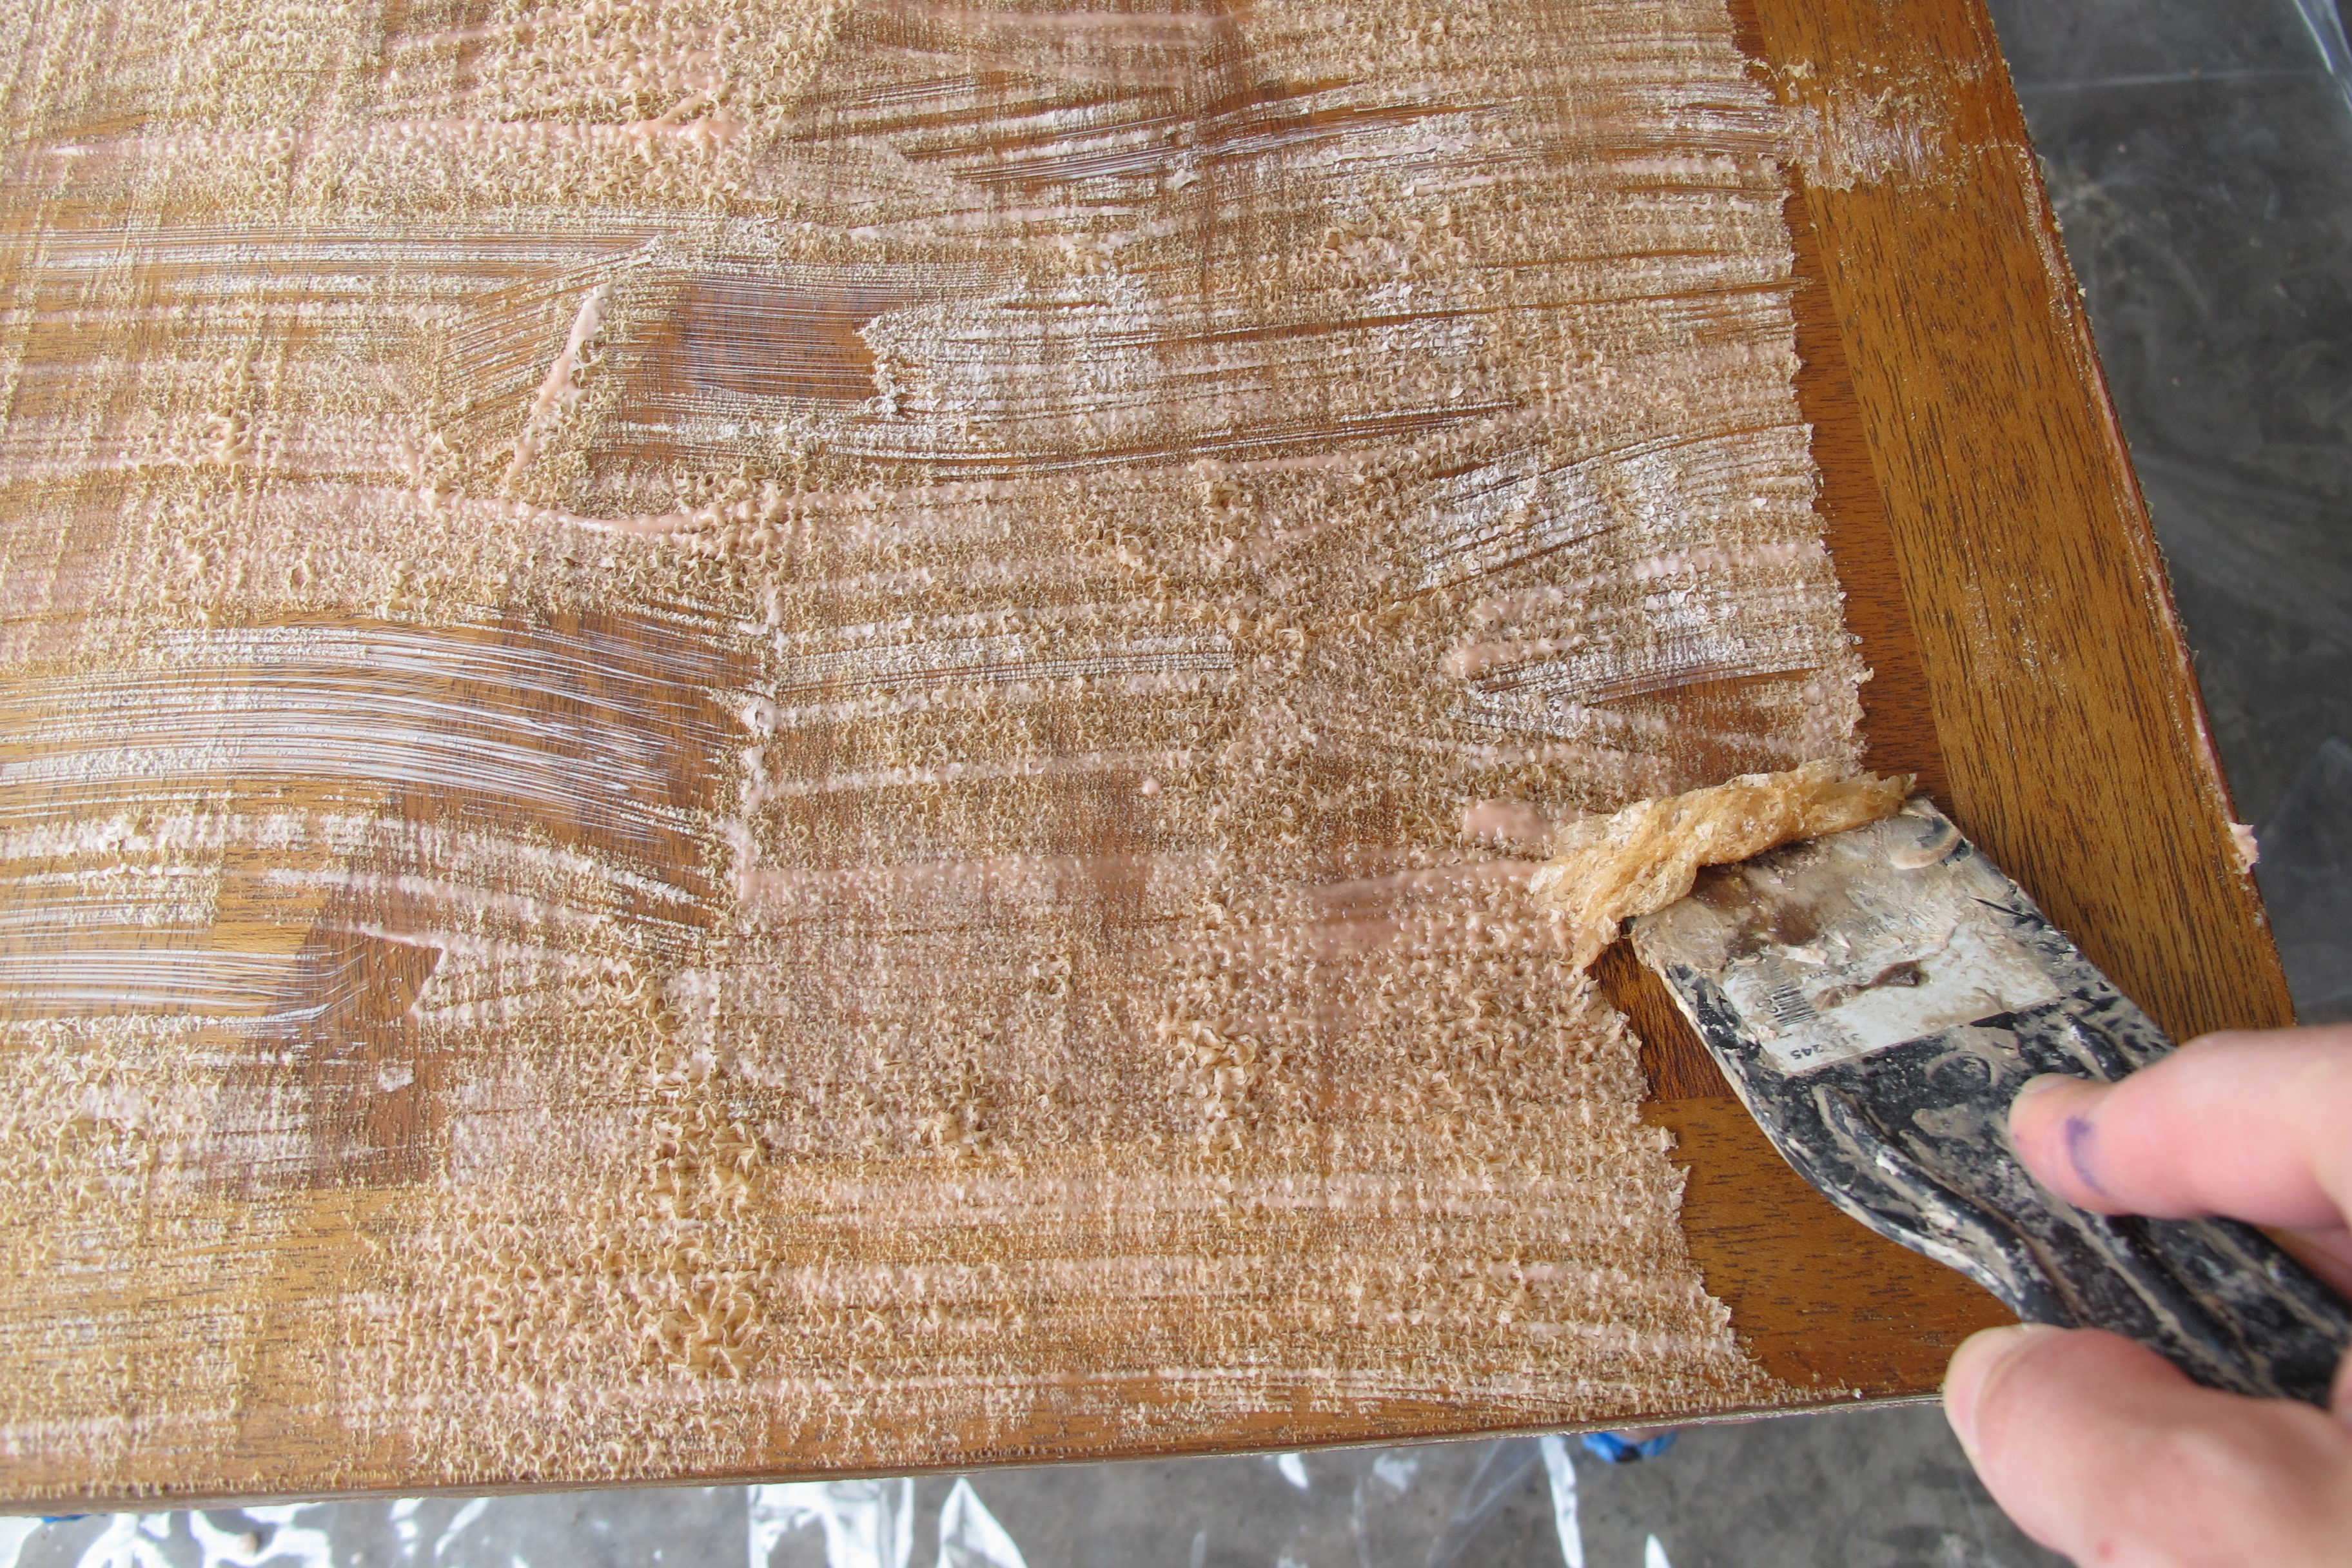
I began work on the coffee table (which is still not finished), but ended up switching gears to the larger end table. I stripped the table with chemical stripper, then stained and finished the table with a water-based poly… which ended up being a HUGE mistake resulting in bubbles and brush strokes galore (and a pathetic-ugly-crying-Christina).
So, it was onto attempt número dos. After my cries for advice were answered by several sweet folks, I came to terms with the fact that I would have to re-strip the table. Check out the comments from my previous two posts for the specific advice given.
I will say that stripping the table went SO much quicker the second time around. My guess is that this is due to a combination of knowing what to expect and using a toothbrush to get the gunk out of all the smaller spaces and crevices (this was a fantastic tip (among many others) given by Beck with Beckwith’s Treasures and was a total time-saver compared with the techniques I used the first time). It worked fabulously well. I also noted that the water-based poly came off in much more solid pieces which made the job slightly less messy…
Once the table was fully stripped, I decided to use Formby’s Tung Oil.

This was a product recommended by several awesome folks (including Beck), so I figured I’d give it a go. After a short deliberation, I decided to apply the Tung Oil sans stain to bring out the natural tones of the wood… Problem??? I don’t think I properly prepped the top of the table… My fear of over-stripping the wood (being that this was my second go-around) had prevented me from removing all the film. With the first coat of Tung oil, the top looked mottled and ashy. NOT the look I was going for. And I realized that I should’ve stained the table first. I just really liked that look so much better. I didn’t take a picture of this part as my frustration got the best of me. Thus, grabbing my camera slipped my mind. But, take my advice… Do a good job stripping the first (‘er, second) time. You won’t regret it.
At this point, I went inside, ate another cookie, repeated the mantra “At least I only have to strip the top. At least I only have to strip the top…” then decided to risk sanding the top of the table. I say “risk” because of the thin veneer that I was so scared to sand through. I didn’t want to use the stripper again because my understanding was that tung oil penetrates the wood so I figured that if I wanted an evenly stained top, I’d need to sand. I very, very carefully sanded with 220 grit sandpaper on my orbital sander. And I DID IT. I sanded just enough to allow the stain to evenly penetrate but before I went through the veneer.
Next, I applied a coat of Varathane’s Early American stain. As I’ve said in previous posts, my goal was to stay close to the original look of the table and I’ve found that this particular stain lends that perfect “mid-century” wood tone that the table had before…
The wood took the stain much more readily this go-around, which resulted in a slightly darker finish than before, but I’m okay with that. It looks rich and luscious while still boasting a mid-century flair. If the table were a person, he’d totally be swinging his flowing locks back and forth in slow motion as Hungry Eyes plays softly in the background.
That night (after about 8 hours of dry time for the stain), I took my labor of love inside. And while catching up on an episode of The Big Bang Theory, I applied the first coat of Formby’s. I simply rubbed in a thin layer with a lint-free cloth and let it dry. It looked somewhat uneven, but I’d read that this was often the case with the first few coats as the wood can sometimes absorb the oil at different rates. The next day, I gently buffed with fine grit steel wool as recommended…

…cleaned with tack cloth, and applied a second coat. I repeated this process again on the entire table, then two more times on just the top and drawer until I had an even finish all over. I still think the the base could use one last coat, just to add a tad of extra gloss, so I may still do that. But I guess that’s the beauty of this stuff. You can add layers to enhance as needed. Applying the tung oil was a process because of the long dry time (12 hours between coats per the instructions), but really it was easy and quick to apply aside from that. And totally worth it. I wish I had known about this stuff the first time around.
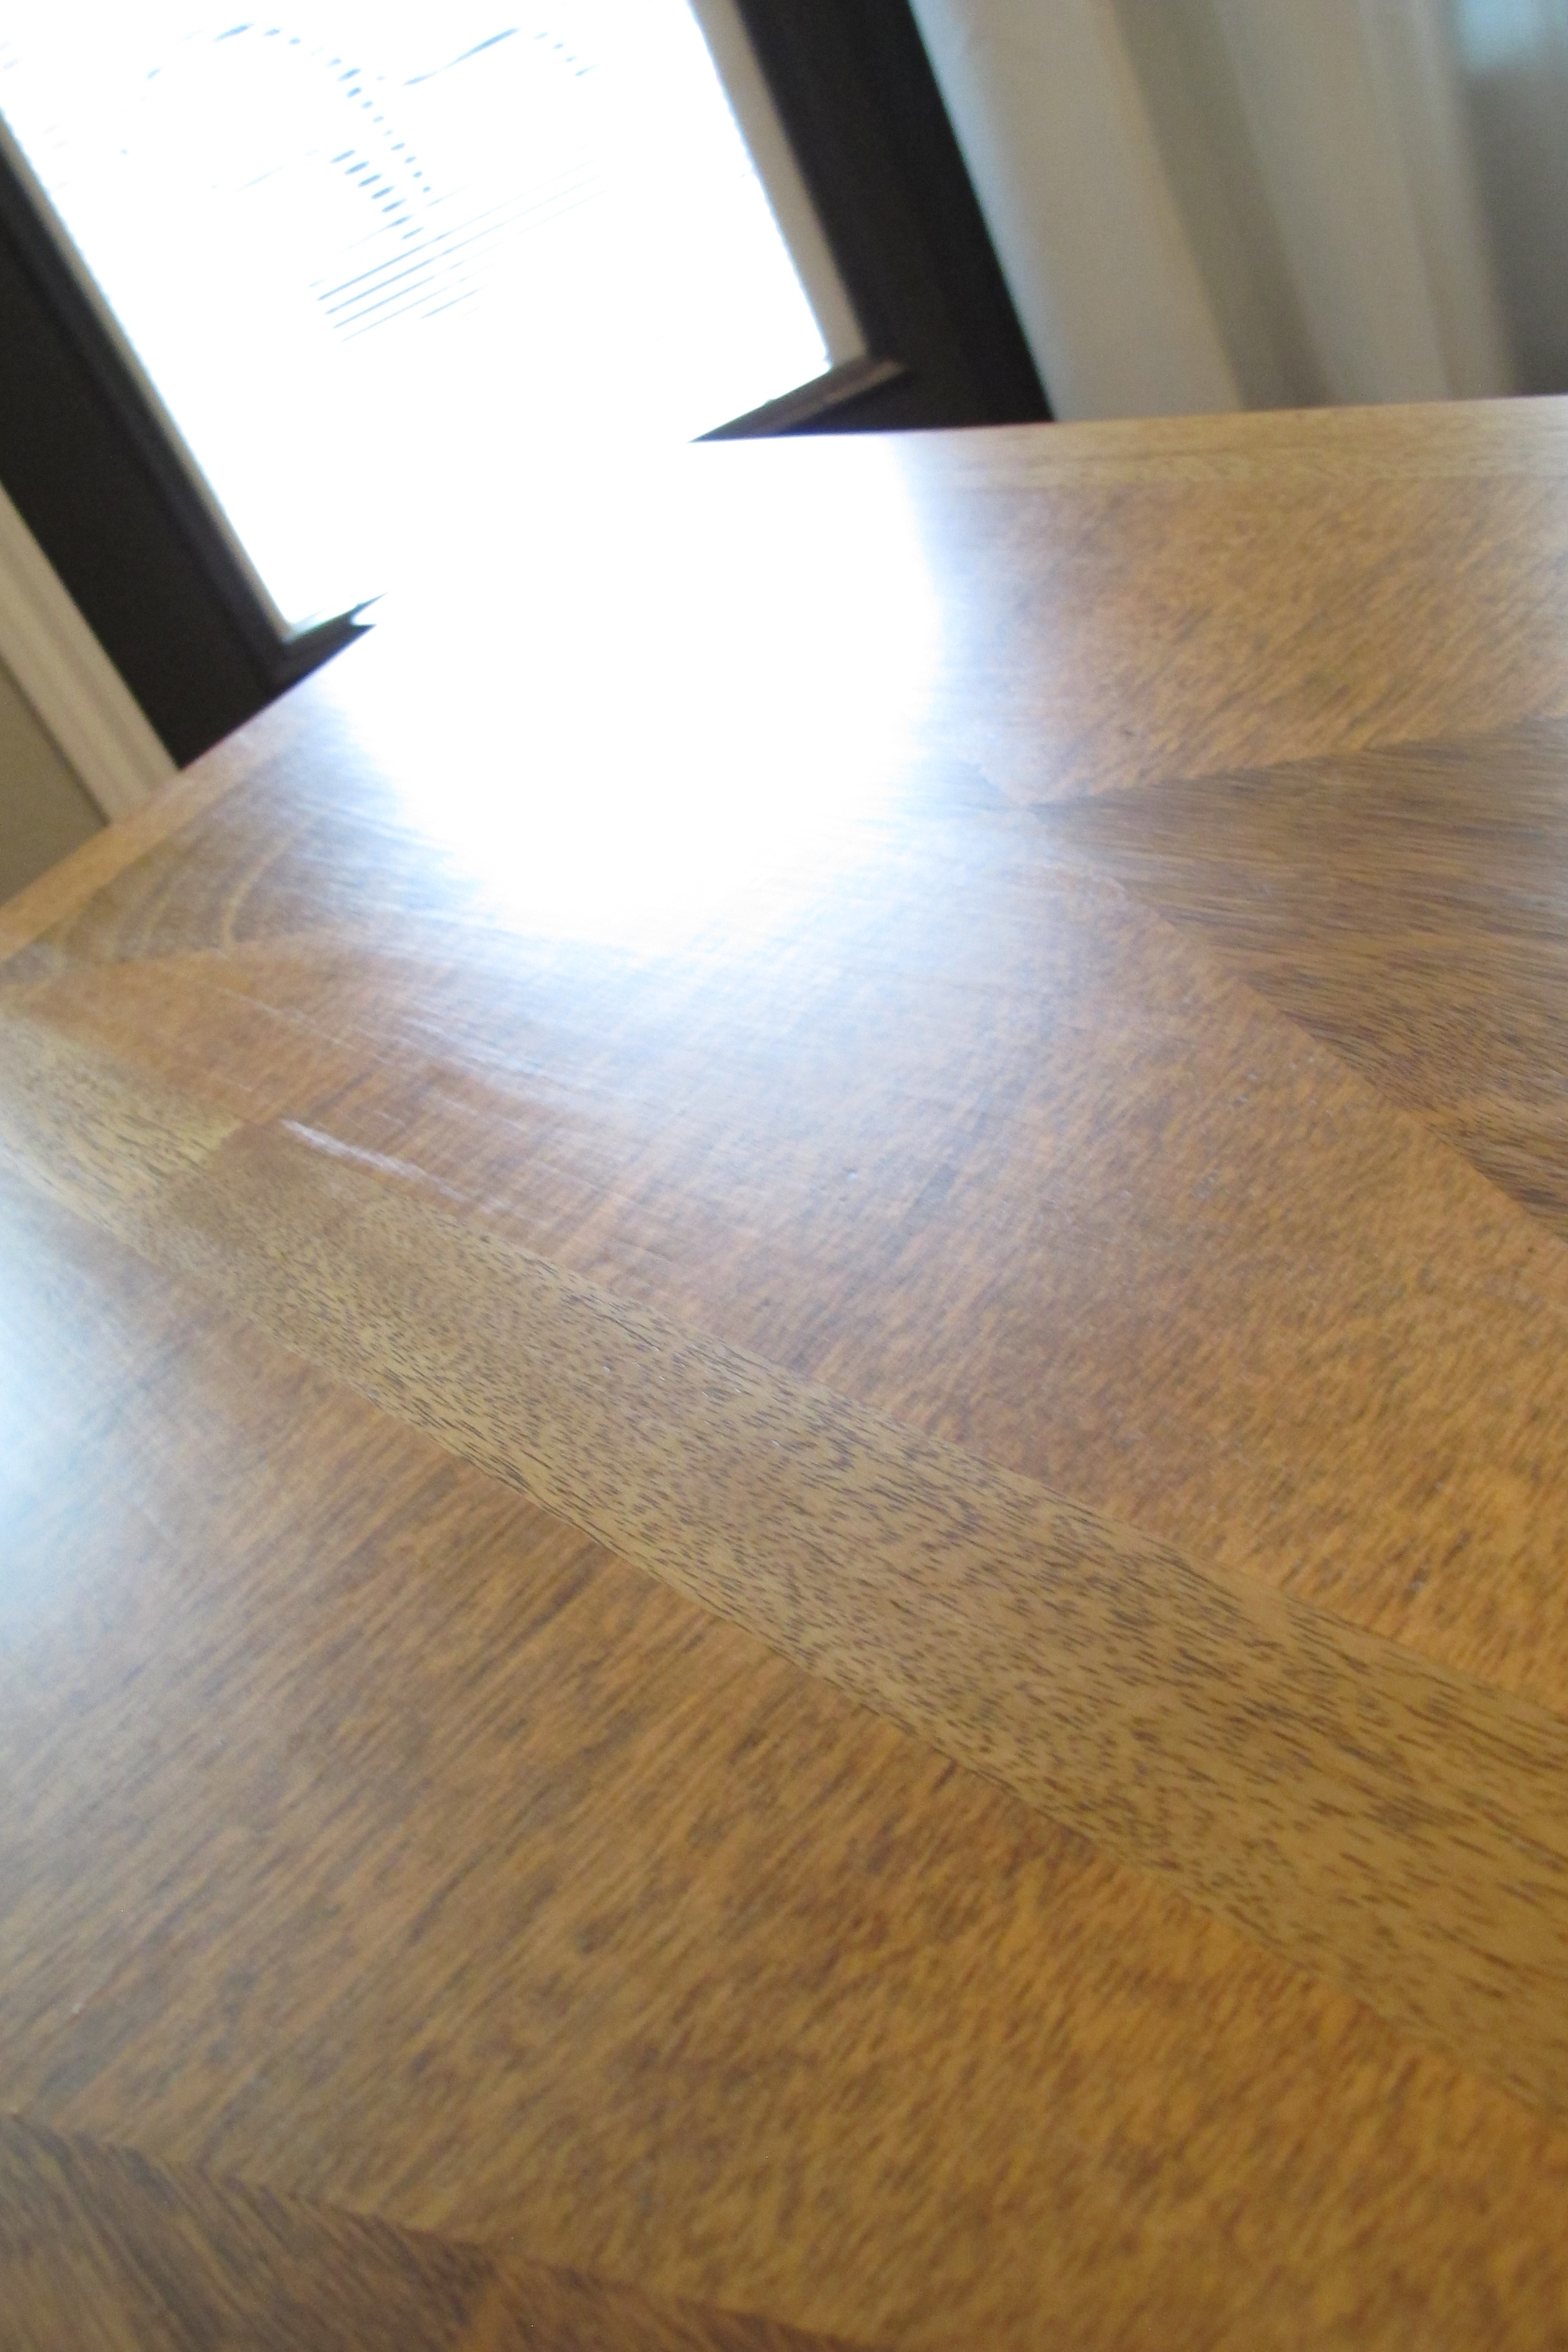
In any case, now my table is now glossy and done (please excuse the weird lighting in these pics… I think I chose an interesting time of day to shoot them)….

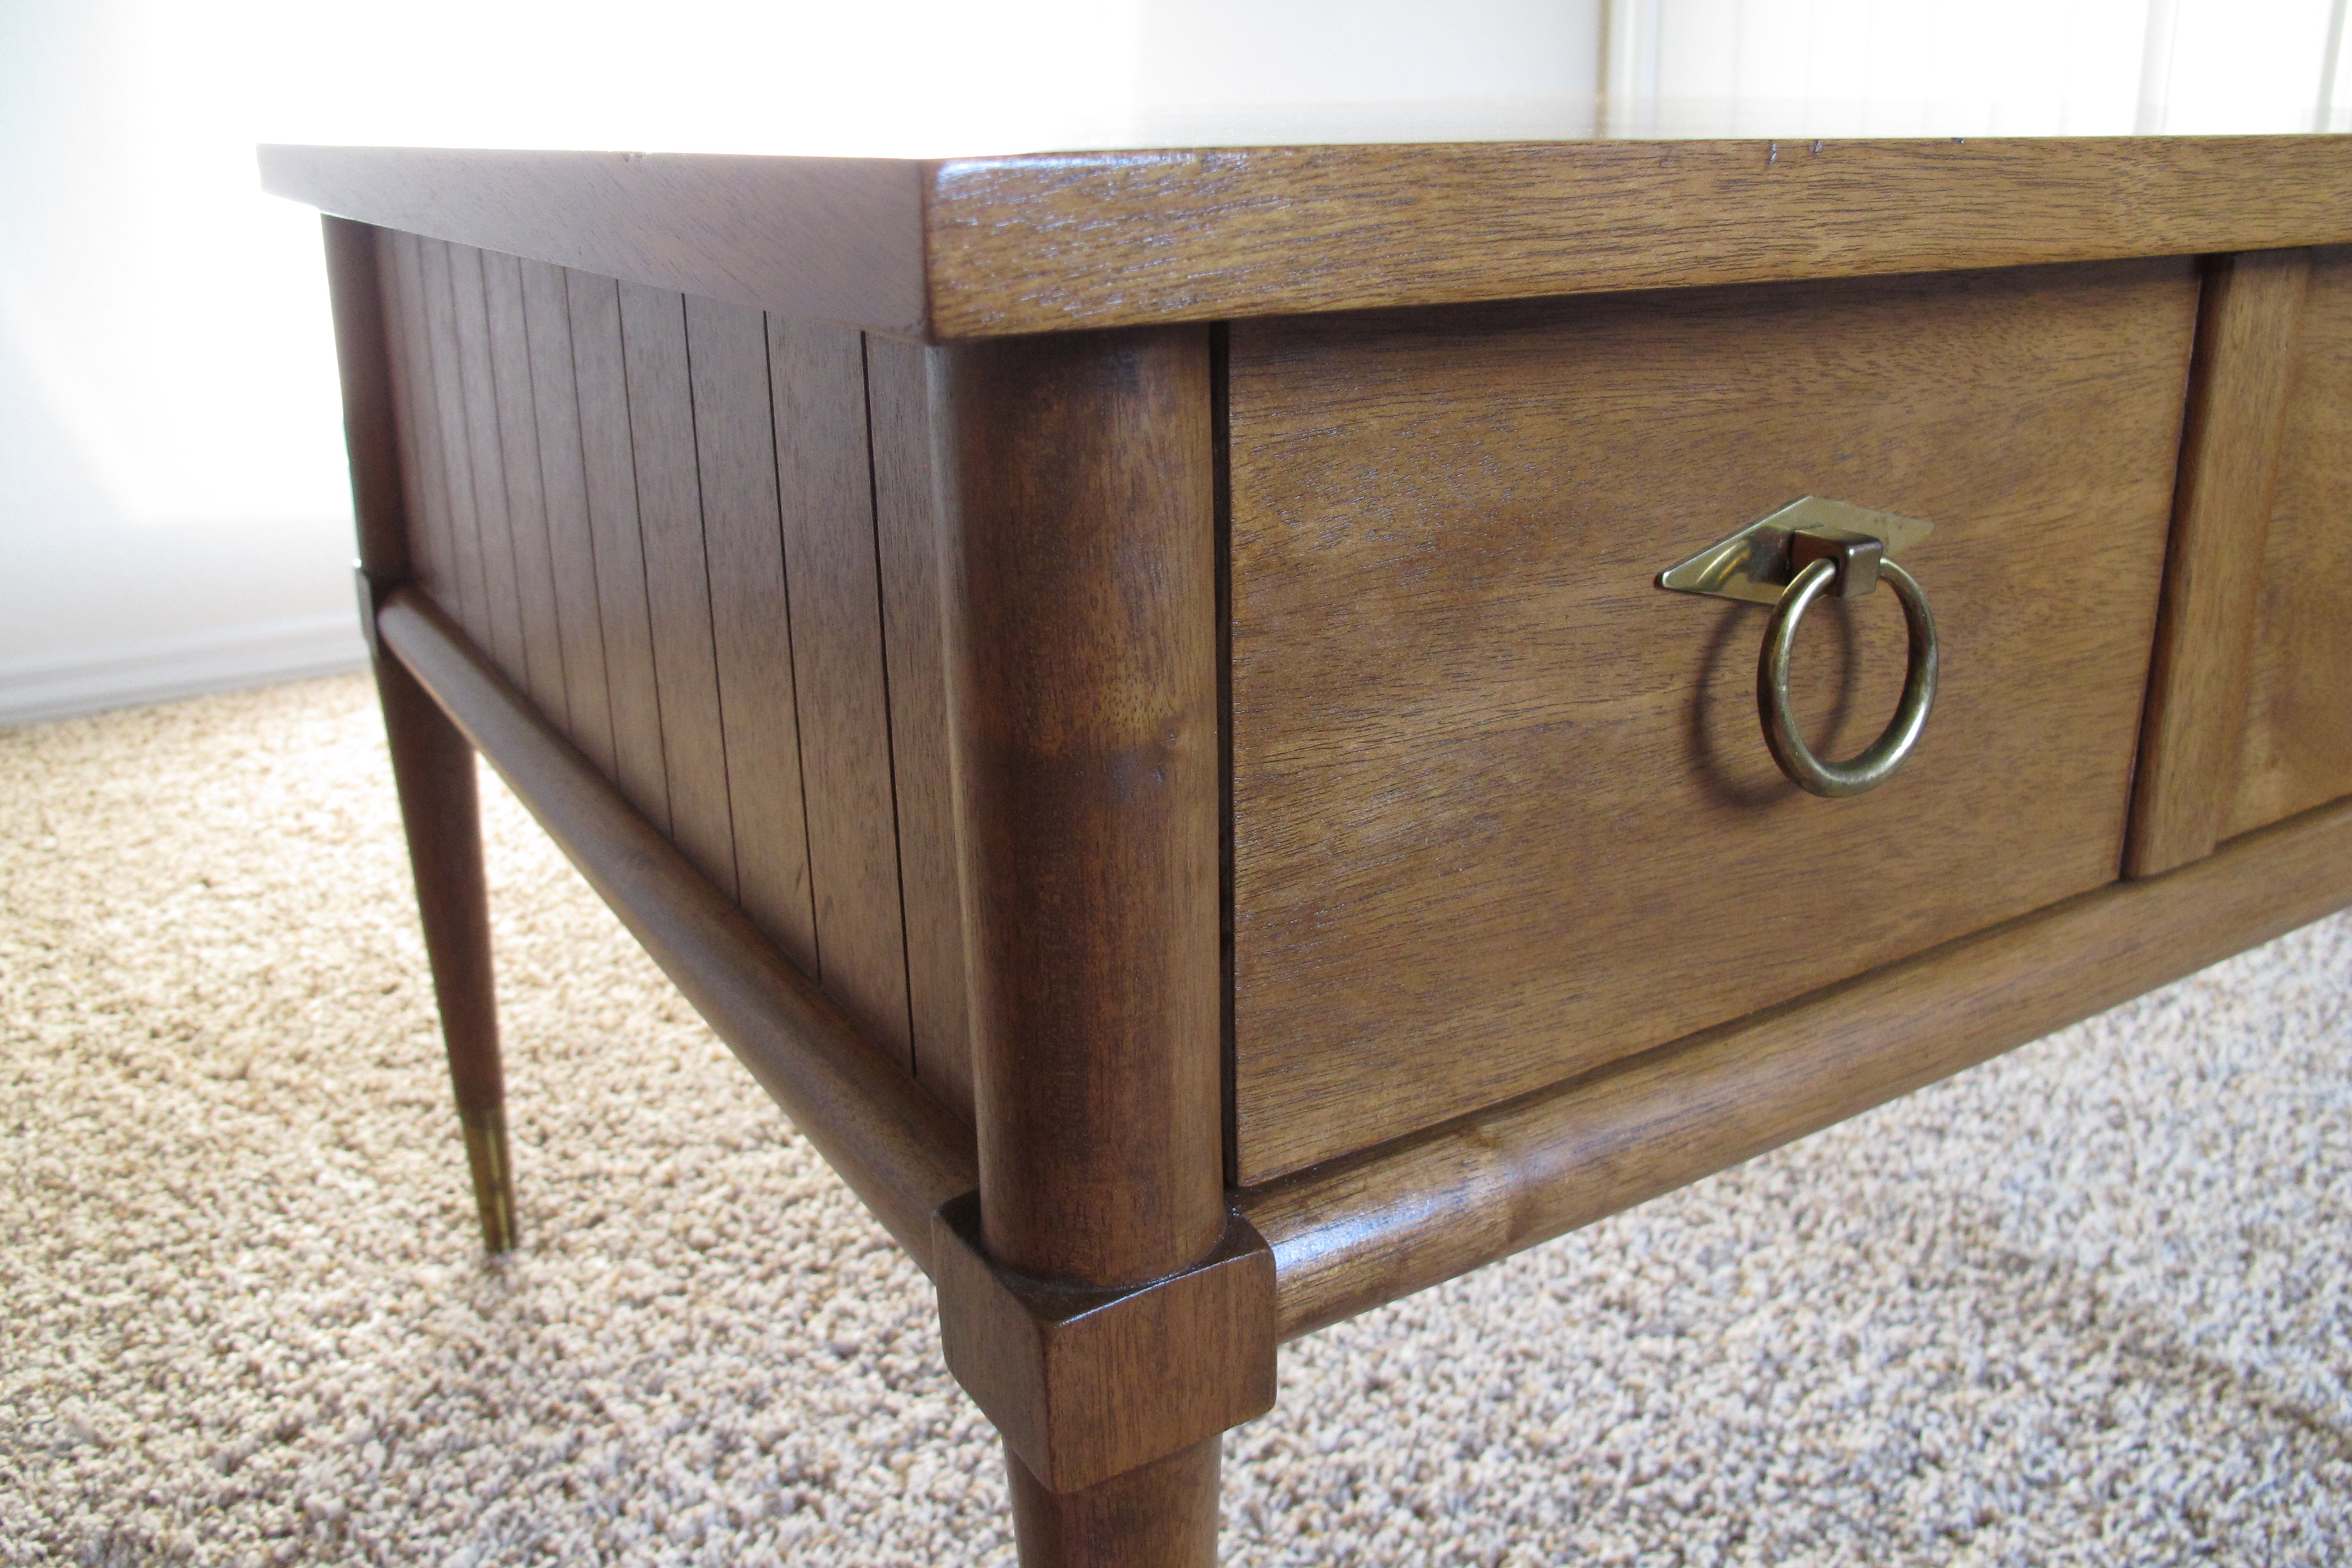

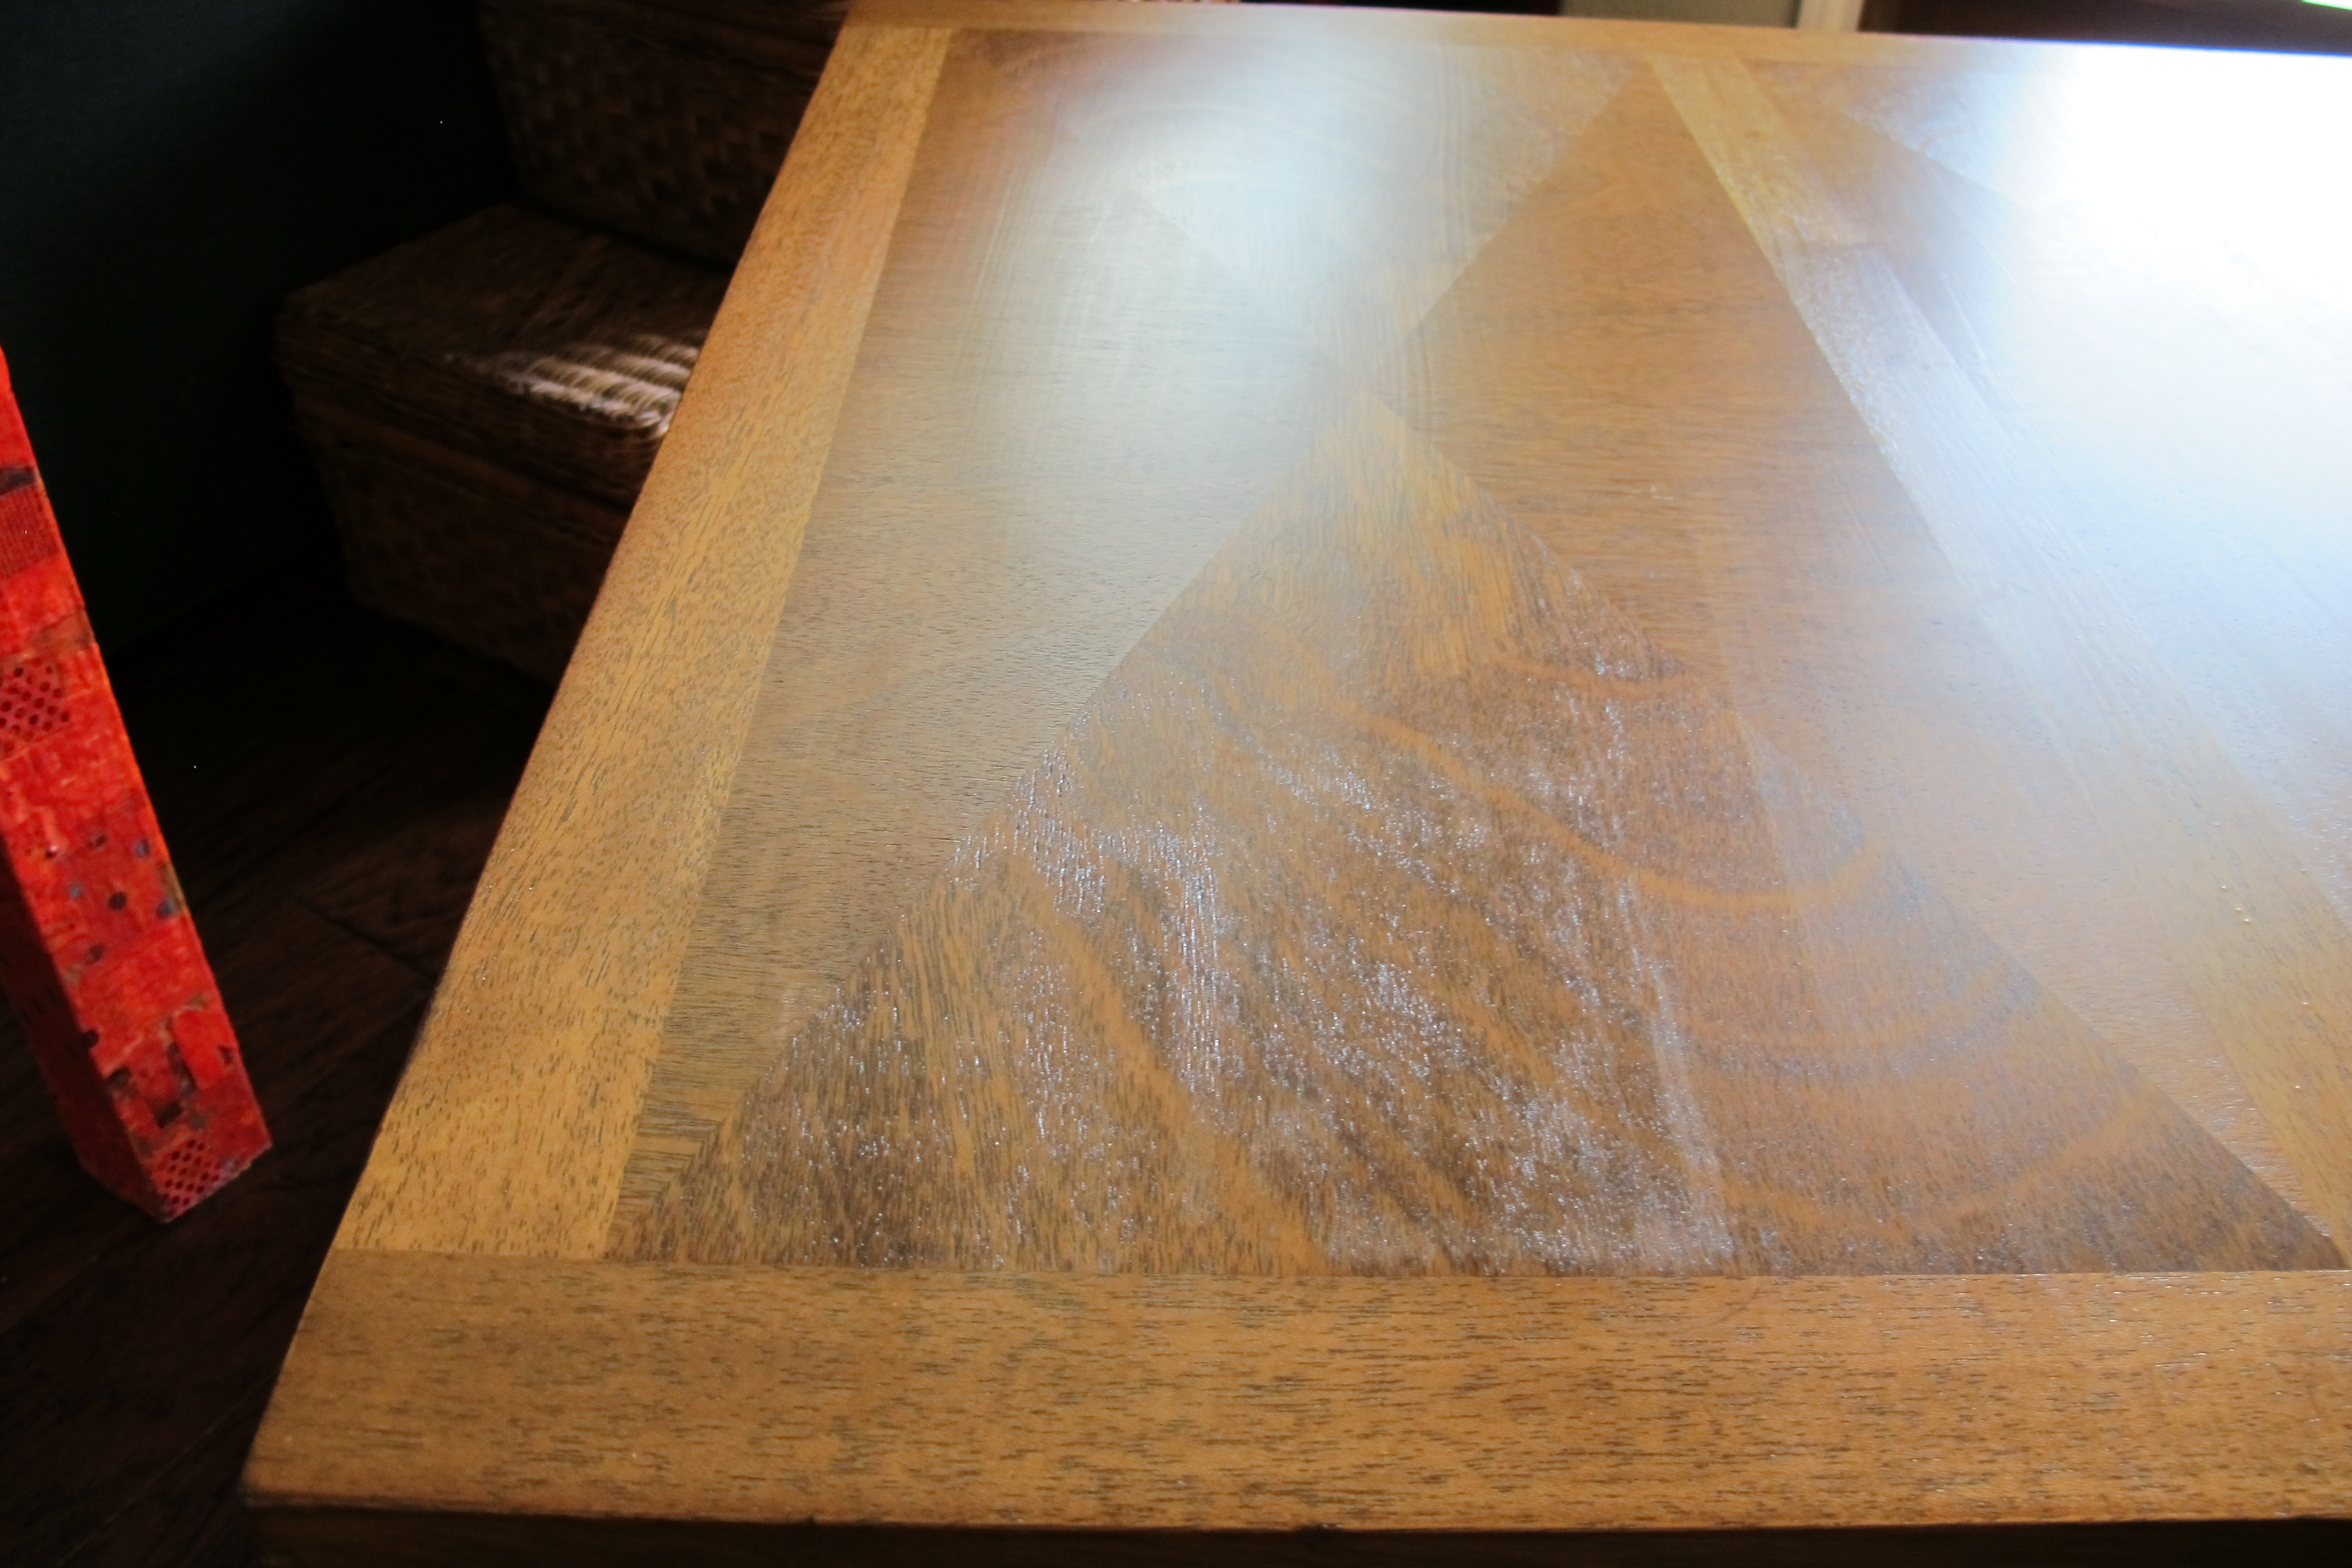
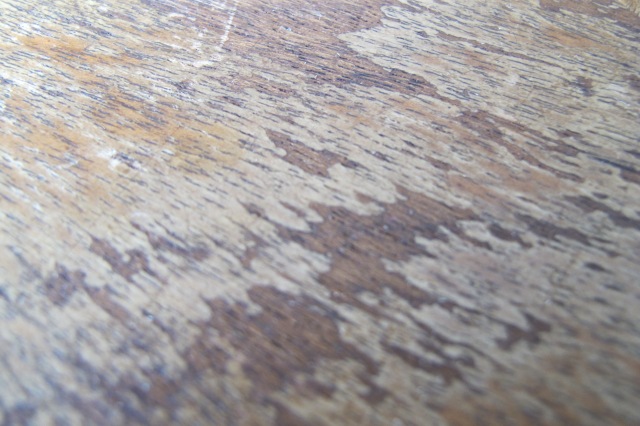
And check out the top!! The damaged spot is a smidge darker than the rest of the top, but that’s the only difference. It feels smooth as can be….
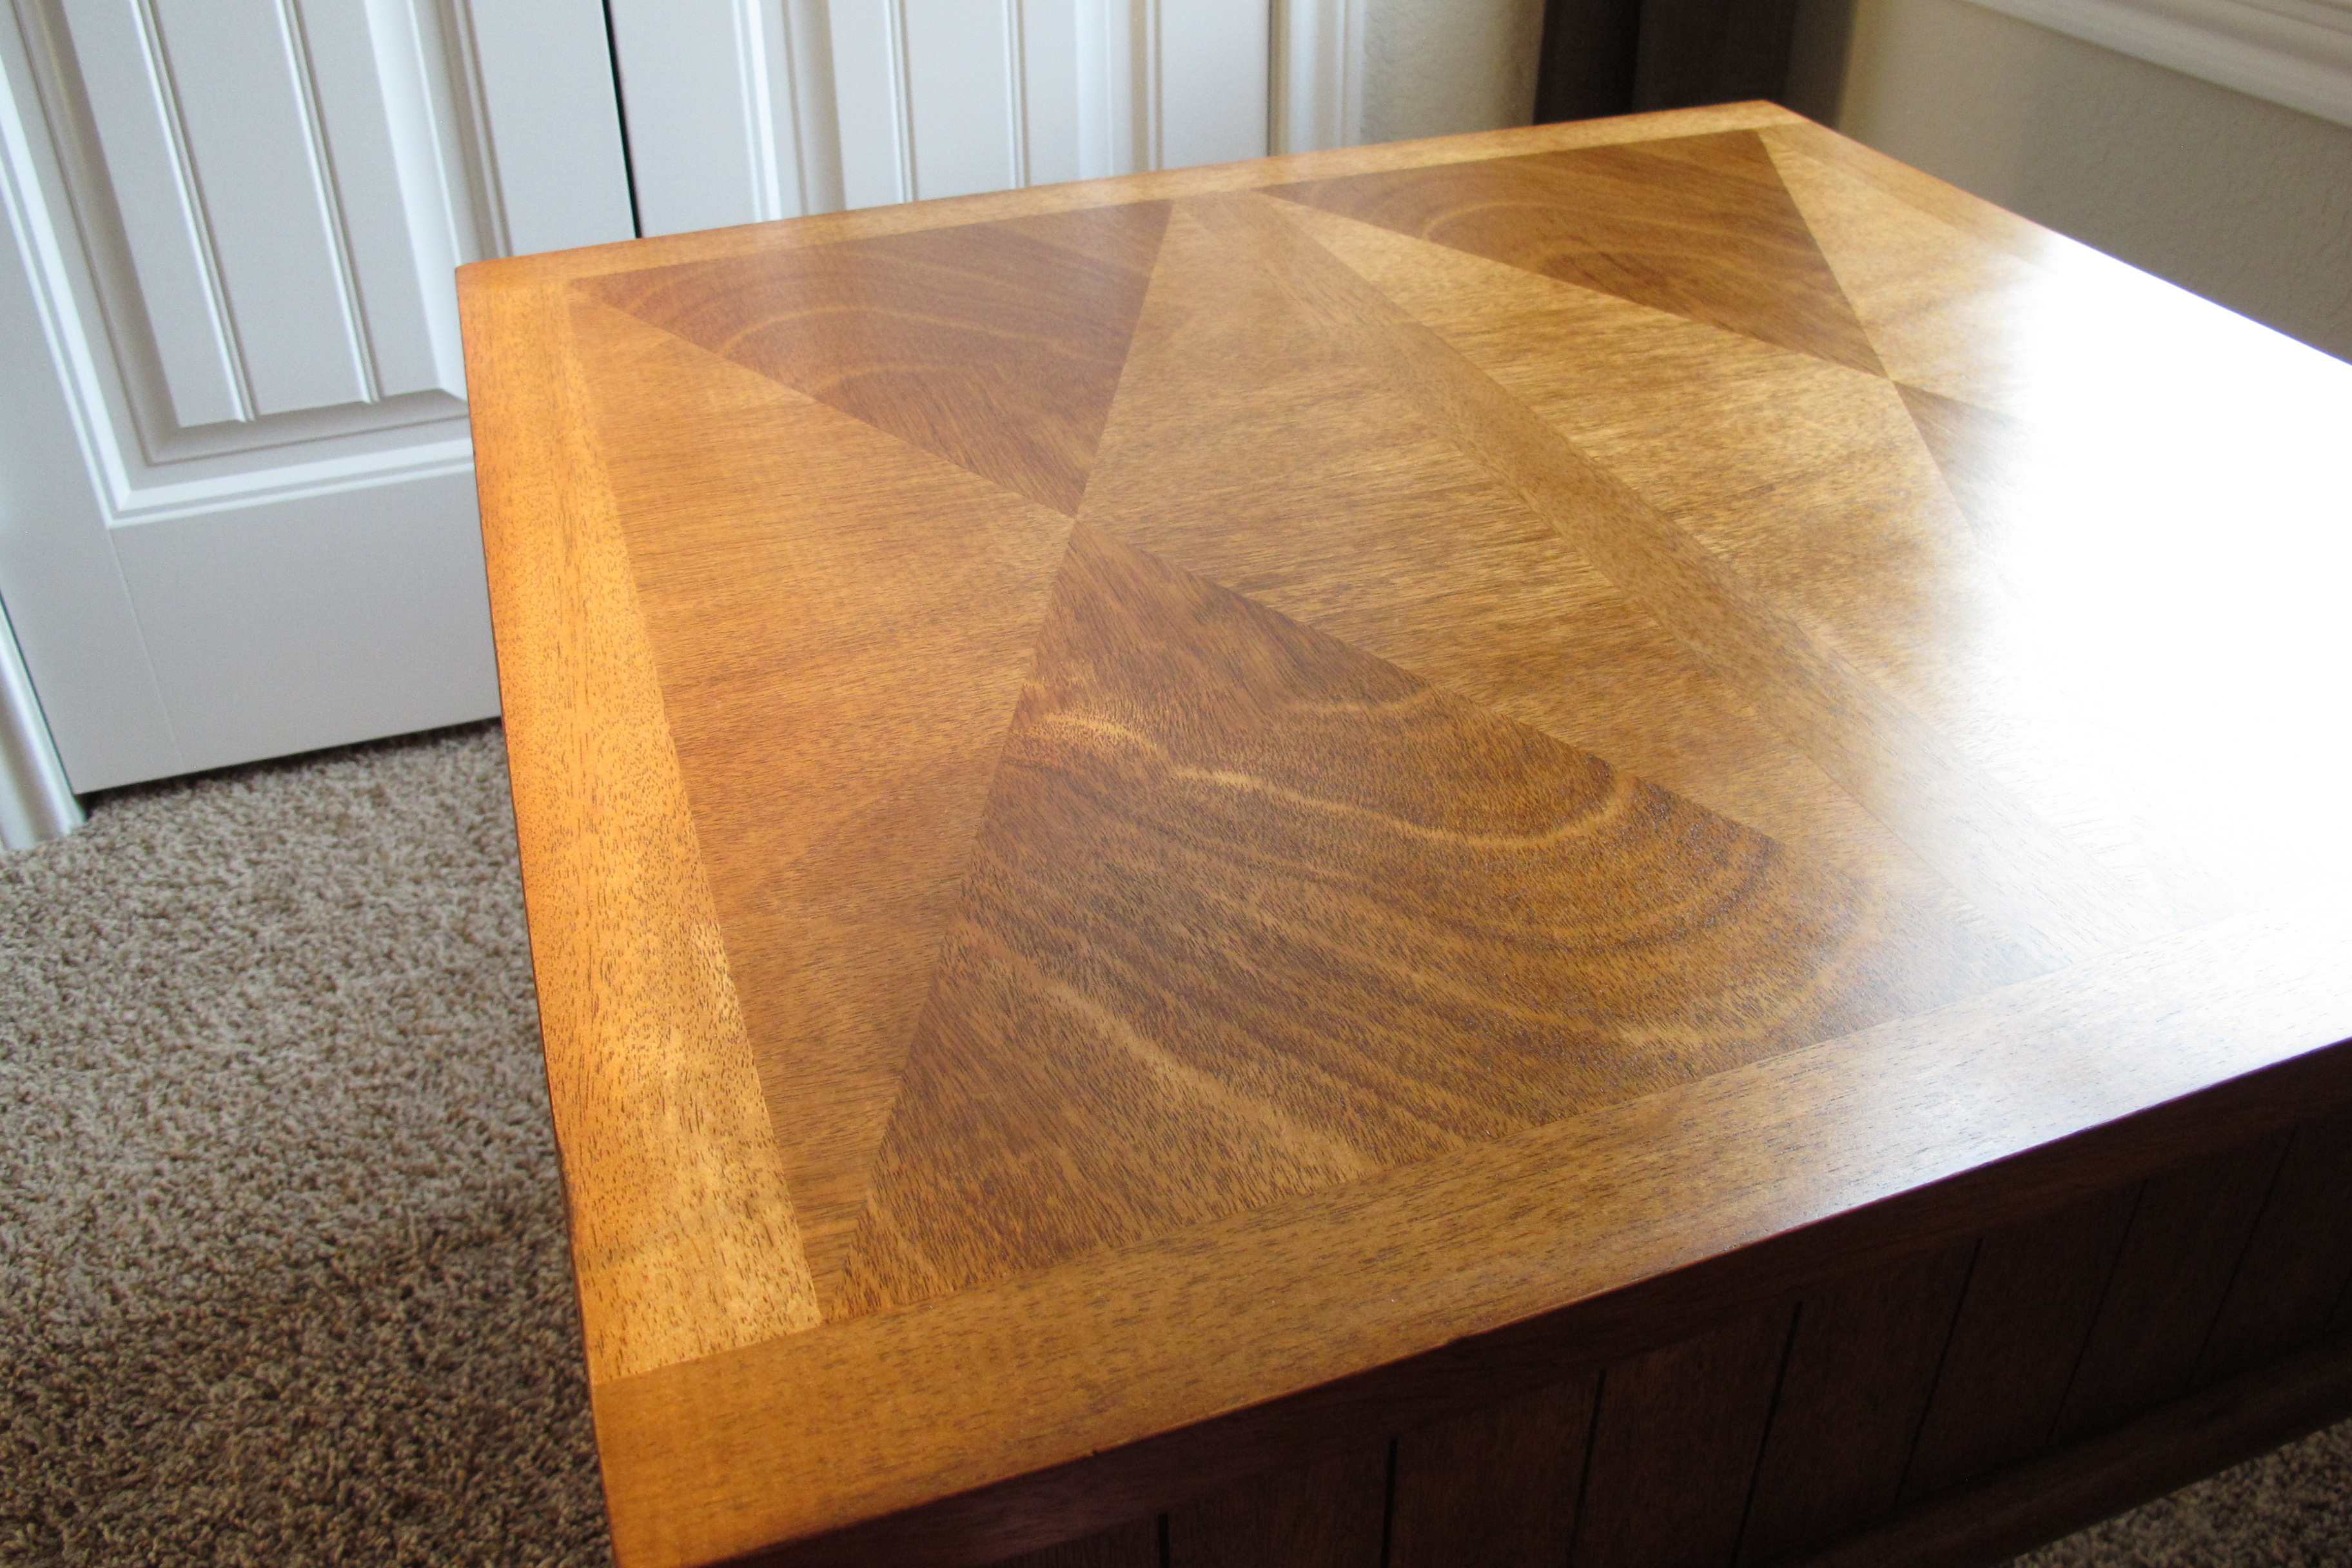
Amazing to me, especially being that the top started off here….

Remember how I questioned whether I’d even be able to stain the table because the damage went so deeply into the wood??
The fact that I was able to salvage that inlaid detailing on the top makes me absolutely over the moon.
I was thinking of selling the table once I was finished, but after all the work I put in, this little guy feels like part of the family. I’m THAT attached. So, I’m gonna hang onto him and let him live in our totally mis-matched, not nearly decorated No Man’s Land for a while until I figure out a permanent space for him.

And I must name him. For some reason he feels like an “Earl”. Maybe we’ll just go with that.
I still need to finish the coffee table. So, there’s that. But I have to say that I feel so much more equipped to do that now. As hard as it was in the “during” part, DIY is an adventure yielding many rewards if ya stick through it. I mean, just check out all this knowledge I’ve acquired…
1. How to strip wood properly (and the consequences if you don’t)
2. How much I hate water-based poly
3. How to apply tung oil and the differences in finish between the various topcoats
4. My undying love for mid-century pieces and the lengths I will go to to stay true to them (but I already knew that)
5. How many cookies it takes for me to survive refinishing a table twice within a short period of time (twelve).
Nice, right??? So, on that Hallmark note, I end this post.
What DIY adventures have y’all taken on where you nearly (but didn’t) throw in the towel?
Linked up at: Tatertots & Jello